Dreamy Blue Velvet Oreo Cheesecake Recipe for Sweet Lovers
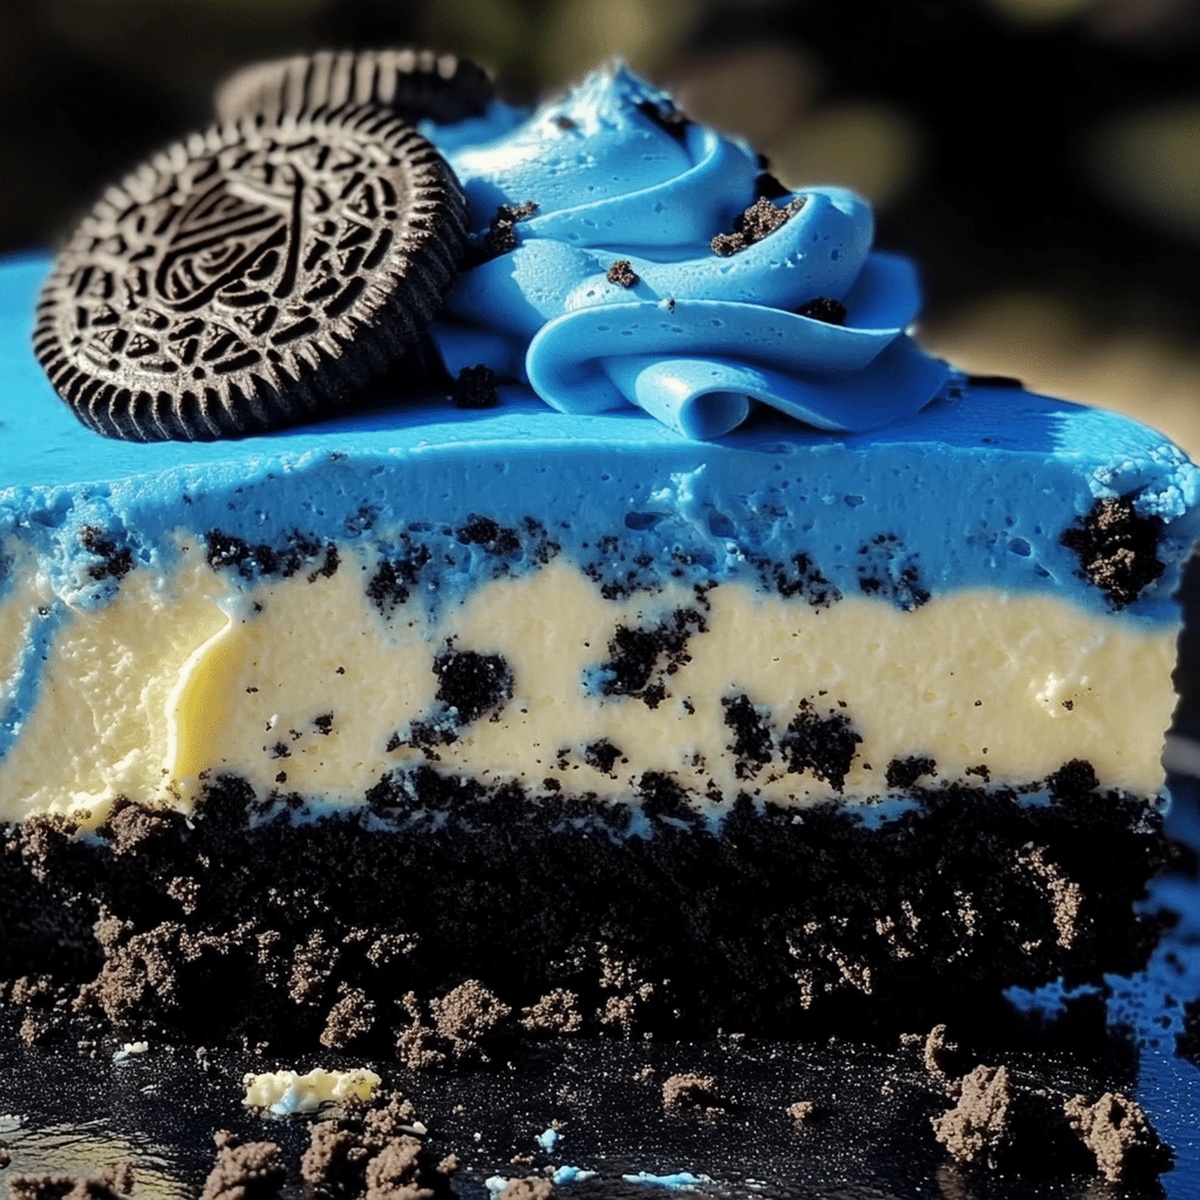
Sweet surprises sometimes arrive unexpectedly, like this blue velvet oreo cheesecake that combines creamy indulgence with playful color.
My kitchen experiments often lead to delightful discoveries that make everyone smile.
Childhood memories of cookie-dunking and dessert excitement blend perfectly in this unique treat.
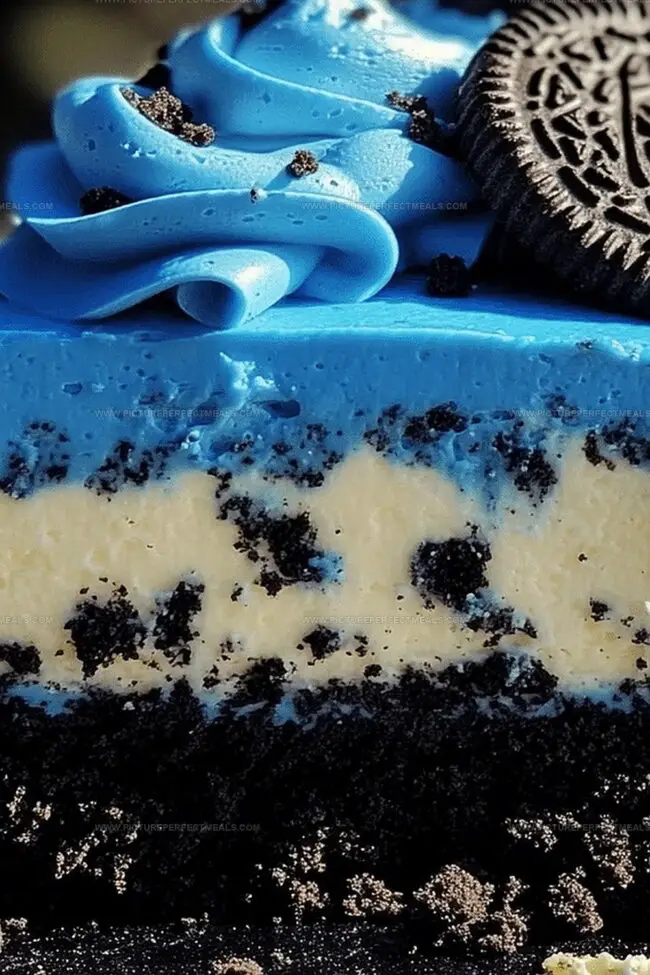
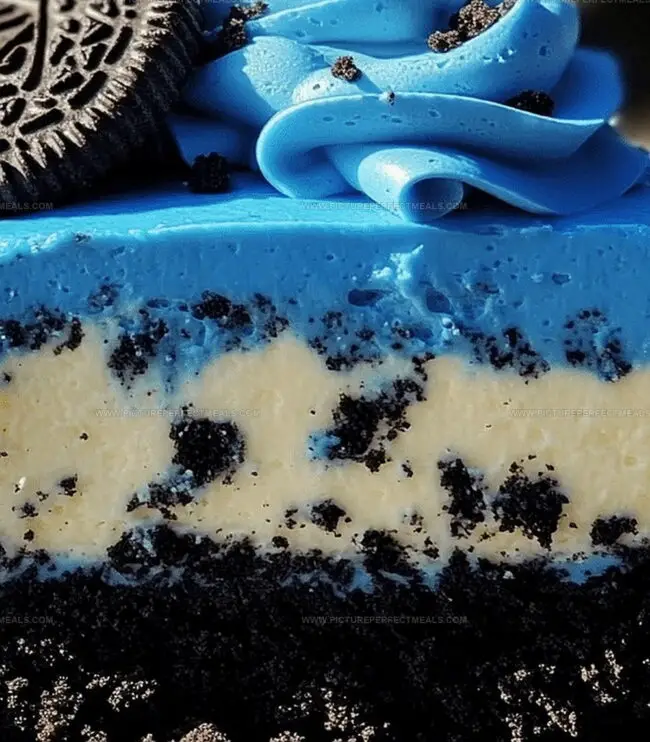
Oreo lovers will appreciate the rich chocolate cookie base nestled beneath silky blue layers.
Unexpected twists in classic recipes can spark pure culinary joy and create memorable moments.
Layers of smooth cream cheese and crushed cookies promise a decadent experience that feels both nostalgic and modern.
You’ll want to savor every single bite of this stunning dessert that’s sure to impress at any gathering.
Why Blue Velvet Oreo Cheesecake Turns Heads
Everything You’ll Need for a Bold Oreo Cheesecake
Crust Ingredients:Cheesecake Filling Ingredients:Color and Decoration Ingredients:How to Assemble Blue Velvet and Cookies in One Dessert
Step 1: Prep The Pan
Grab your 9-inch springform pan and give it a light coating of butter or cooking spray. Cut a perfect circle of parchment paper to line the bottom, ensuring a smooth release later.
Step 2: Create Oreo Crust
Crush Oreo cookies into fine crumbs using a food processor or ziplock bag and rolling pin. Mix crumbs with melted butter until well combined. Press the mixture firmly into the bottom of the prepared pan, creating an even layer.
Step 3: Whip Cheesecake Filling
In a large mixing bowl, blend cream cheese until smooth and creamy. Add:Mix ingredients until completely incorporated with no lumps.
Step 4: Add Blue Velvet Magic
Stir in blue food coloring to achieve a vibrant blue shade. Gently fold in additional crushed Oreo cookies for extra texture and flavor.
Step 5: Bake The Cheesecake
Pour the blue velvet cheesecake mixture over the Oreo crust. Smooth the top with a spatula. Place in preheated oven and bake until the center is almost set but slightly jiggly.
Step 6: Cool And Chill
Remove cheesecake from oven and let it cool at room temperature. Once cooled, refrigerate for several hours or overnight to set completely.
Step 7: Decorate And Serve
Top with whipped cream, additional Oreo cookies, or blue sprinkles. Slice and enjoy your stunning blue velvet Oreo cheesecake!
Tips for a Smooth Filling and Striking Color
Keep Cheesecake Fresh and Flavors Balanced
Pairings That Highlight This Oreo Cheesecake
Oreo Cheesecake Variants with a Colorful Twist
Print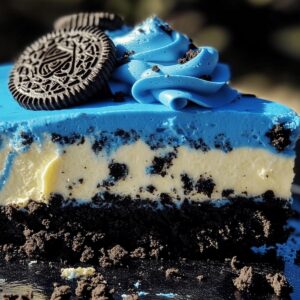
Blue Velvet Oreo Cheesecake Recipe
- Total Time: 1 hour 25 minutes
- Yield: 12 1x
Description
Blue velvet oreo cheesecake whisks dessert lovers into a dreamy world of indulgence. Creamy layers and rich chocolate crumble create a mesmerizing experience that beckons you to savor each heavenly bite.
Ingredients
Main Ingredients:
- 16 ounces (450 grams) cream cheese, softened
- 3 large eggs
- 24 Oreo cookies (with filling)
- 1 cup (200 grams) granulated sugar
Wet Ingredients:
- ½ cup (120 milliliters) sour cream
- ¼ cup (60 milliliters) heavy cream
- ¼ cup (60 grams) unsalted butter, melted
- 1 tablespoon vanilla extract
- 1 teaspoon white vinegar
- 1 cup (240 milliliters) heavy whipping cream
Dry and Coloring Ingredients:
- ¼ cup (30 grams) unsweetened cocoa powder
- 2 tablespoons powdered sugar
- Blue food coloring (gel or liquid, to desired shade)
- 68 crushed Oreo cookies
Instructions
- Prepare the oven environment by setting the temperature to 325F (160C) and readying a 9-inch springform pan with a light grease coating and parchment paper base.
- Crush the Oreo cookies into fine crumbs, blending them thoroughly with melted butter to create a cohesive crust mixture.
- Press the Oreo cookie crumb mixture firmly and evenly into the bottom of the prepared springform pan, creating a compact base for the cheesecake.
- Whip cream cheese in a large mixing bowl until smooth and creamy, ensuring no lumps remain.
- Gradually incorporate sugar, mixing continuously to maintain a silky texture.
- Add eggs one at a time, blending thoroughly after each addition to maintain a uniform consistency.
- Mix in sour cream, vanilla extract, and blue food coloring, stirring until the batter achieves a vibrant and consistent blue hue.
- Fold crushed Oreo cookies into the cheesecake batter, distributing them evenly throughout the mixture.
- Pour the blue-tinted batter over the Oreo cookie crust, smoothing the top with a spatula to ensure an even surface.
- Carefully place the springform pan in the preheated oven and bake for approximately 50-60 minutes.
- Check the cheesecake’s doneness by gently shaking the pan – the center should have a slight wobble but not be liquid.
- Remove from the oven and allow the cheesecake to cool at room temperature for one hour.
- Refrigerate the cheesecake for a minimum of 4 hours or overnight to set completely.
- Before serving, carefully release the springform pan’s sides and garnish with additional Oreo cookies if desired.
Notes
- Chill cream cheese to room temperature before mixing to ensure a smooth, lump-free batter for creamy texture.
- Crush Oreo cookies finely for the crust, pressing firmly into the pan’s base to create a solid, even foundation.
- Add food coloring gradually to achieve the perfect blue velvet shade without altering the cheesecake’s delicate flavor profile.
- Wrap the springform pan with aluminum foil when baking in a water bath to prevent moisture from seeping into the crust and ensure even, gentle cooking.
- Prep Time: 25 minutes
- Cook Time: 1 hour
- Category: Desserts
- Method: Baking
- Cuisine: American
Nutrition
- Serving Size: 12
- Calories: 392
- Sugar: 27 g
- Sodium: 230 mg
- Fat: 28 g
- Saturated Fat: 15 g
- Unsaturated Fat: 11 g
- Trans Fat: 0 g
- Carbohydrates: 31 g
- Fiber: 1 g
- Protein: 5 g
- Cholesterol: 96 mg
Daves Miller
Contributing Chef & Culinary Educator
Expertise
Education
Sullivan University, Louisville, Kentucky
White Mountains Community College, Berlin, New Hampshire
Daves is the friendly face guiding you through flavorful, fuss-free recipes at Picture Perfect Meals.
He studied culinary arts at Sullivan University and embraced Baking and Pastry Arts at White Mountains Community College. Daves specializes in comforting meals with vibrant flavors, highlighting fresh, seasonal ingredients.