Buckeye Brownies Recipe

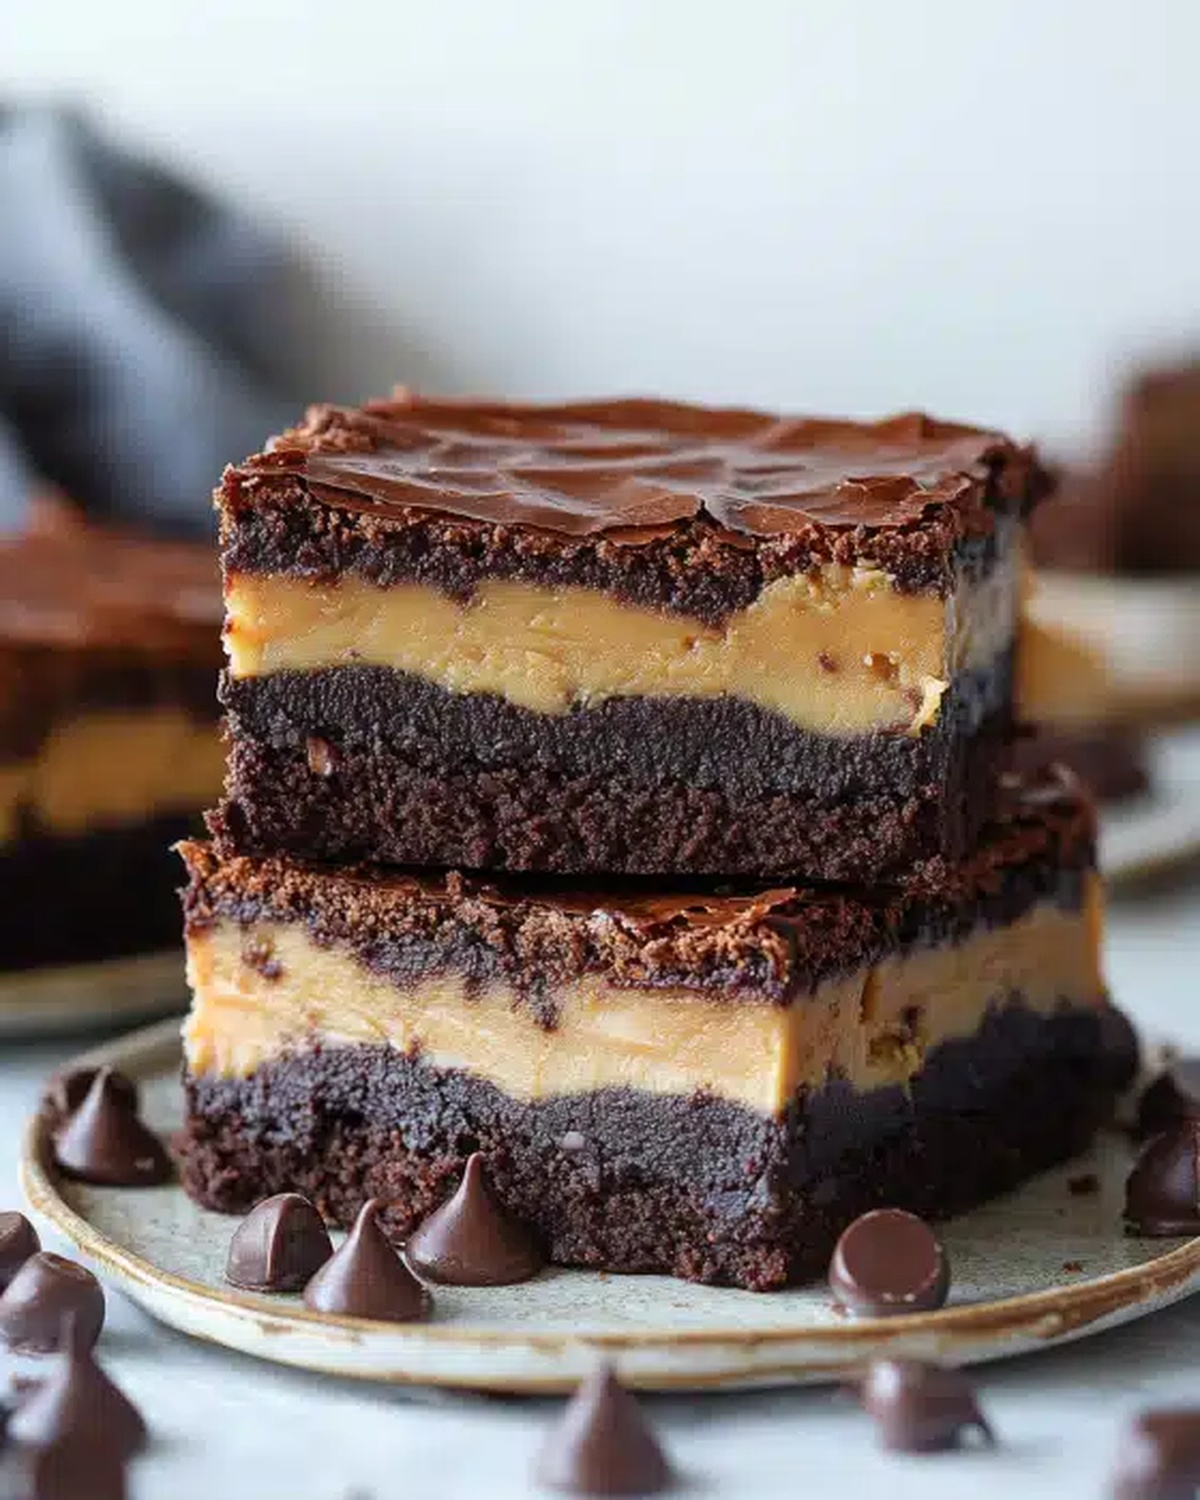
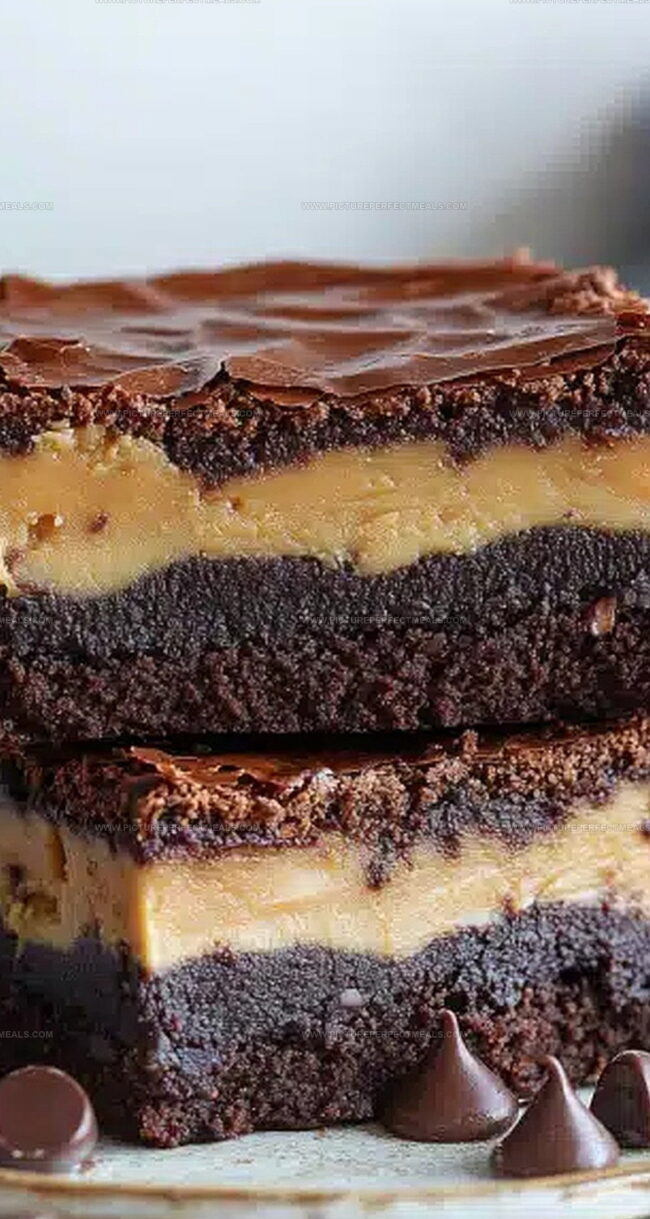
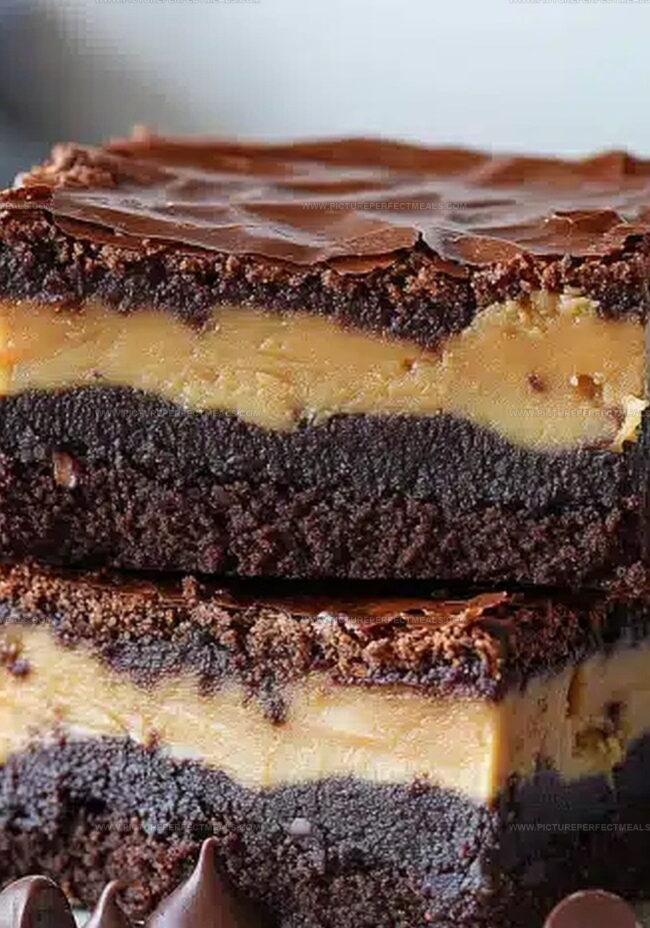
Buckeye Brownies Recipe Dreamy Peanut Butter-Chocolate Treat

Legendary ohio state fans understand the magic behind buckeye brownies as a delectable dessert that blends chocolate and peanut butter.

Sweet tooths everywhere swoon over these decadent treats that celebrate midwest culinary creativity.

Chocolate lovers recognize the powerful combination of rich cocoa and creamy peanut butter layers.

Delightful textures merge in each bite, creating a nostalgic experience that connects generations of dessert enthusiasts.

This recipe delivers a perfect balance between fudgy brownies and smooth peanut butter frosting.

Football season or game day gatherings become instantly special with these irresistible brownies.

You won’t be able to stop at just one slice of this tempting chocolate paradise.

Buckeye Brownies That Everyone Raves About

  • Elevate your baking game with these mouthwatering Buckeye Brownies.
  • Assemble this decadent treat in under an hour, perfect for spontaneous sweet cravings.
  • Combine two classic flavors that everyone loves, creating an instant favorite dessert for parties, potlucks, and family gatherings.
  • Designed for both novice and experienced bakers, this recipe requires simple ingredients and straightforward steps, ensuring delicious results every time.

What You’ll Need for Buckeye Brownies

Brownie Base:
  • All-Purpose Flour: Provides structure and texture to the brownie base.
  • Cocoa Powder: Delivers rich chocolate flavor and deep color.
  • Granulated Sugar: Adds sweetness and helps create a tender crumb.
  • Eggs: Bind ingredients and create a smooth, rich texture.
  • Butter: Adds moisture and enhances the rich flavor of brownies.
Baking Essentials:
  • Baking Powder: Helps brownies rise and become light.
  • Salt: Balances sweetness and enhances overall flavor.
Peanut Butter Layer:
  • Peanut Butter: Creamy base with nutty, rich flavor.
  • Powdered Sugar: Provides sweetness and helps create smooth consistency.
  • Butter: Softens the mixture and adds richness.
Chocolate Topping:
  • Chocolate Chips: Provides smooth, glossy chocolate coating.
  • Butter: Helps create a silky chocolate layer.
Notes for Ingredients:
  • Choose unsalted butter for better flavor control.
  • Use natural peanut butter for best texture.
  • Dutch-processed cocoa powder works best for deep chocolate flavor.
  • Select high-quality chocolate chips for superior topping.

How to Layer and Bake Buckeye Brownies

Step 1: Warm Up The Oven

Crank your oven to 350F. Grab an 8×8-inch pan and give it a quick spray of cooking oil or line with parchment paper.

Step 2: Create Brownie Magic

  • Butter
  • Granulated sugar
  • Eggs
  • Vanilla extract

Melt butter in a saucepan over low heat. Take it off the stove and whisk in sugar, eggs, and vanilla until everything looks happy together.

Step 3: Mix Dry Ingredients

  • Cocoa powder
  • Flour
  • Salt
  • Baking powder

Fold these ingredients into your wet mixture. Stir gently- don’t go crazy with mixing.

Step 4: Bake The Base

Pour brownie batter into the prepared pan. Spread it out evenly like you’re painting a delicious chocolate canvas. Slide into the oven and bake for 20-25 minutes. Check with a toothpick- it should come out mostly clean. Let the brownies chill completely.

Step 5: Peanut Butter Power

  • Peanut butter
  • Powdered sugar
  • Softened butter

Blend these ingredients until smooth as silk. Once brownies are cool, spread this creamy layer across the top.

Step 6: Chocolate Crown

  • Chocolate chips
  • Butter

Melt chocolate and butter together using a double boiler or microwave. Stir until glossy and perfect. Pour over the peanut butter layer and spread evenly.

Step 7: Chill And Slice

Pop the pan in the refrigerator for about an hour. Let the chocolate set completely. When ready, lift out the brownies and slice into squares.

Step 8: Devour And Enjoy

Grab a square and savor the layers of chocolatey, peanut buttery goodness. Share if you’re feeling generous- but no promises!

Tips for Perfect Peanut Butter and Fudge Layers

  • Boost Brownie Texture: Use room temperature eggs for smoother, more evenly mixed batter that creates a softer brownie base.
  • Prevent Peanut Butter Separation: Ensure powdered sugar is sifted to eliminate lumps and create a silky-smooth peanut butter layer that spreads easily.
  • Master Chocolate Topping: Melt chocolate slowly and gently to avoid burning, using a double boiler or microwave with short intervals for perfect glossy consistency.
  • Customize Dietary Needs: Swap regular butter with dairy-free alternatives and use gluten-free flour for a celiac-friendly version without compromising rich flavor.
  • Storage Secret: Store brownies in an airtight container in the refrigerator for up to 5 days, allowing flavors to meld and chocolate to maintain its perfect shine.

Keep Buckeye Brownies Fresh and Fudgy

  • Store leftovers in an airtight container in the refrigerator for up to 5 days. Place parchment paper between layers to prevent sticking.
  • Wrap individual brownies tightly in plastic wrap, then place in a freezer-safe container. Freeze for up to 3 months for maximum freshness.
  • Remove frozen brownies from the freezer and let them sit at room temperature for 30-45 minutes before serving. Avoid microwaving to maintain texture.
  • Warm brownies briefly in the oven at 300F for 5-7 minutes if you prefer a slightly melted chocolate and soft texture. Skip reheating if you enjoy them cold.

What to Serve with Buckeye Brownies

  • Brew a rich, dark roast coffee or a creamy cappuccino to complement the deep chocolate and nutty peanut butter flavors. The robust coffee cuts through the sweetness and enhances the brownie's decadent texture.
  • Select cold, whole milk or a chilled almond milk to balance the rich, dense brownie. The cool, smooth milk provides a refreshing contrast to the intense chocolate and peanut butter layers.
  • Uncork a sweet port wine or a full-bodied cabernet sauvignon to elevate the brownie experience. These wines bring out the chocolate's complexity and harmonize with the peanut butter's richness.
  • Mix a creamy espresso martini or a chocolate martini to match the brownie's indulgent profile. These cocktails mirror the dessert's luxurious chocolate notes while adding a sophisticated twist.

Different Flavors to Try in Buckeye Brownies

  • Gluten-Free Buckeye Brownies: Replace regular flour with almond flour or gluten-free baking mix to create a celiac-friendly version that maintains the rich chocolate and peanut butter flavors.
  • Vegan Chocolate Peanut Butter Bars: Substitute eggs with flax eggs, use dairy-free butter alternatives, and swap chocolate chips for vegan dark chocolate to make a plant-based friendly dessert.
  • Low-Sugar Buckeye Brownie Bites: Use sugar substitutes like stevia or monk fruit sweetener, and incorporate dark cocoa powder to reduce overall sugar content while keeping the intense chocolate taste.
  • Keto-Friendly Buckeye Squares: Swap traditional ingredients with almond flour, use sugar-free chocolate chips, replace powdered sugar with erythritol, and incorporate coconut oil for a low-carb ketogenic dessert option.
Print
clock clock iconcutlery cutlery iconflag flag iconfolder folder iconinstagram instagram iconpinterest pinterest iconfacebook facebook iconprint print iconsquares squares iconheart heart iconheart solid heart solid icon
Buckeye Brownies Recipe

Buckeye Brownies Recipe


5 Stars 4 Stars 3 Stars 2 Stars 1 Star

4.7 from 39 reviews

  • Total Time: 45 minutes
  • Yield: 24 1x

Description

Chocolate and peanut butter lovers rejoice with these irresistible Buckeye Brownies that meld rich fudgy layers into a classic midwestern treat. Creamy peanut butter nestled between intense chocolate creates an indulgent dessert you cannot resist sharing with friends and family.


Ingredients

Scale

Main Ingredients:

  • 1 box brownie mix (for a 9×13-inch pan) + ingredients listed on the package (usually eggs, oil, and water)(or use your favorite homemade brownie recipe)
  • 1 cup creamy peanut butter
  • 1 ½ cups semi-sweet chocolate chips

Dairy and Binding Ingredients:

  • ½ cup unsalted butter, softened
  • ¼ cup heavy cream
  • 2 tablespoons unsalted butter

Flavor and Sweetening Ingredients:

  • 2 cups powdered sugar
  • 1 teaspoon vanilla extract

Instructions

  1. Craft the foundational brownie layer by heating the oven to a precise 350°F and preparing a baking vessel with a light coating of grease or parchment protection.
  2. Create a decadent chocolate base by gently melting butter and incorporating sugar, eggs, and vanilla into a silky mixture.
  3. Integrate dry components carefully, blending cocoa powder, flour, salt, and baking powder until just combined, maintaining a smooth texture without excessive manipulation.
  4. Transfer the rich batter into the prepared pan, distributing evenly and allowing it to transform in the heated oven for approximately 20-25 minutes until a subtle firmness emerges.
  5. Allow the brownie foundation to cool completely, creating a stable platform for subsequent layers.
  6. Construct the peanut butter stratum by whisking together creamy peanut butter, powdered sugar, and softened butter until achieving a luxurious, uniform consistency.
  7. Delicately spread the peanut butter mixture across the cooled brownie surface, ensuring complete and even coverage.
  8. Fabricate the chocolate glaze by melting chocolate chips and butter using gentle heat, stirring until achieving a glossy, seamless finish.
  9. Cascade the molten chocolate over the peanut butter layer, creating a smooth, elegant topping.
  10. Refrigerate the assembled dessert until the chocolate sets firmly, typically around one hour.
  11. Slice into precise squares, revealing the tantalizing layers of chocolate, peanut butter, and decadent brownie beneath.

Notes

  • Check brownie doneness by inserting a toothpick near the center, which should come out with a few moist crumbs for ultimate fudgy texture.
  • Use room temperature eggs to ensure smooth, even mixing and prevent potential lumpy batter consistency.
  • Opt for natural peanut butter without added sugar for a less sweet, more intense nutty flavor profile.
  • Adjust chocolate topping by using dark chocolate for deeper richness or milk chocolate for sweeter variation.
  • Prep Time: 20 minutes
  • Cook Time: 25 minutes
  • Category: Desserts, Snacks
  • Method: Baking
  • Cuisine: American

Nutrition

  • Serving Size: 24
  • Calories: 300
  • Sugar: 25 g
  • Sodium: 150 mg
  • Fat: 18 g
  • Saturated Fat: 9 g
  • Unsaturated Fat: 7 g
  • Trans Fat: 0 g
  • Carbohydrates: 30 g
  • Fiber: 2 g
  • Protein: 5 g
  • Cholesterol: 20 mg
Daves Miller

Daves Miller

Contributing Chef & Culinary Educator

Expertise

  • American Southern cuisine with a modern twist.
  • Instruction in culinary fundamentals and advanced techniques.
  • Development of recipes that highlight seasonal and local produce.​
  • Mastery of artisanal bread and pastry techniques, from laminated doughs to decorative sugar artistry.

Education

Sullivan University, Louisville, Kentucky

  • Degree: Associate of Science Degree in Culinary Arts
  • Focus: Specialized in cooking techniques and culinary sciences, hands‑on externships, professional kitchen lab training, and career preparation for restaurants, entrepreneurship, and global culinary opportunities.

White Mountains Community College, Berlin, New Hampshire

  • Program: Baking and Pastry Arts degree
  • Focus: Specialized in comprehensive baking and pastry arts, including bread making, artisan breads, cake decorating and design, chocolates, confections, and decorative centerpieces; product development and baking theory; and career preparation for baker and pastry chef roles in many places.

Daves is the friendly face guiding you through flavorful, fuss-free recipes at Picture Perfect Meals. 

He studied culinary arts at Sullivan University and embraced Baking and Pastry Arts at White Mountains Community College. Daves specializes in comforting meals with vibrant flavors, highlighting fresh, seasonal ingredients.

Leave a Reply

Your email address will not be published. Required fields are marked *

Recipe rating 5 Stars 4 Stars 3 Stars 2 Stars 1 Star