Cannoli Filling Recipe Sweet Symphony of Flavors
Sweet cannoli filling whispers tales of sicilian bakeries and midnight dessert dreams.
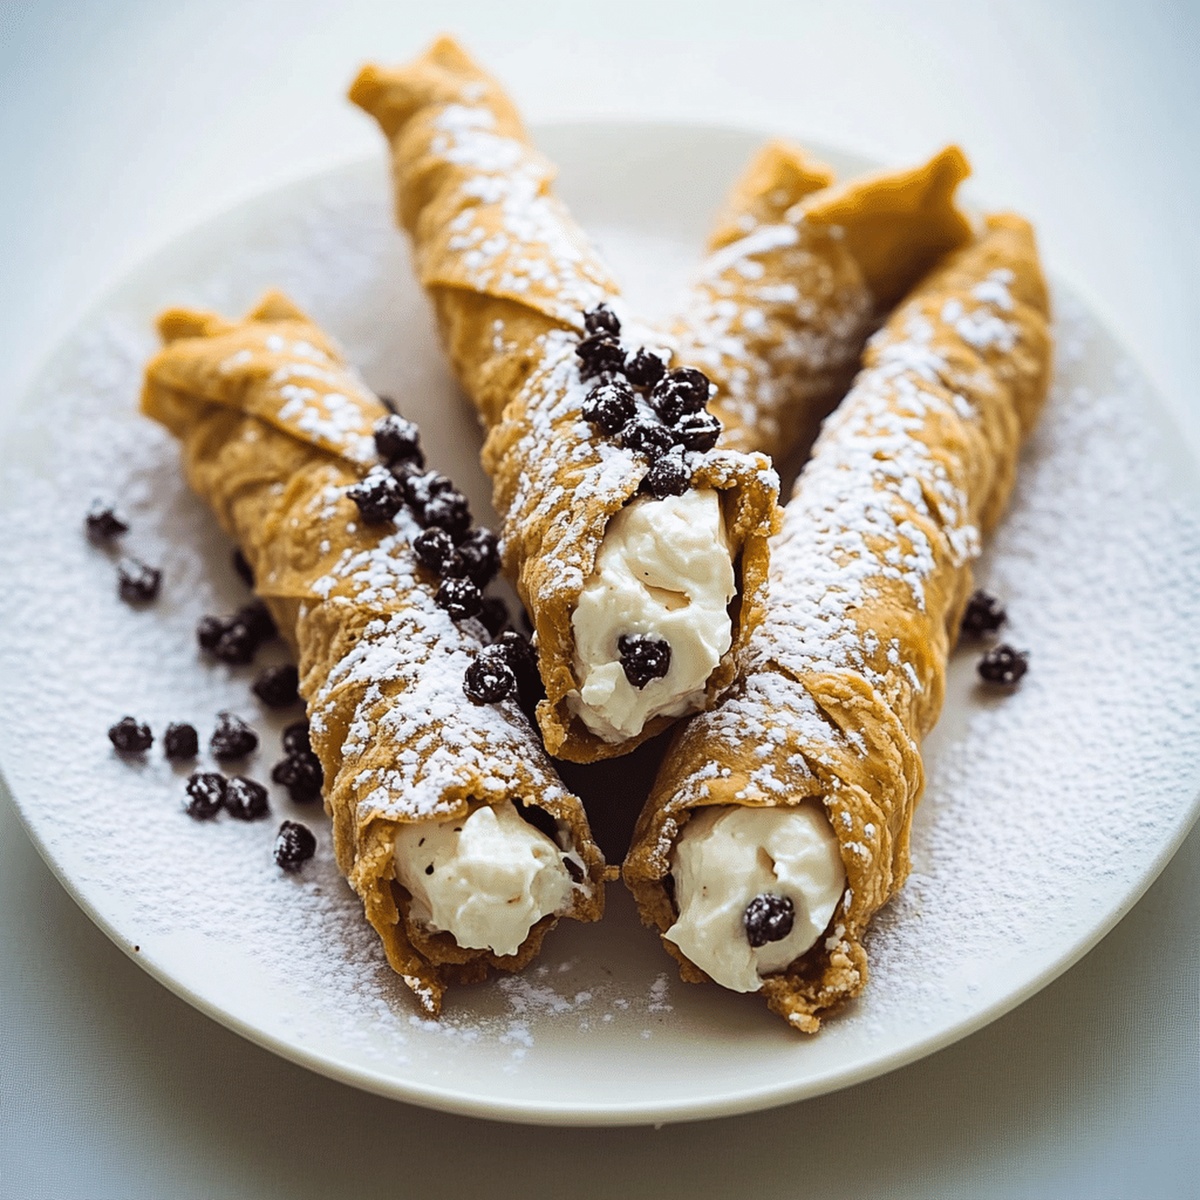
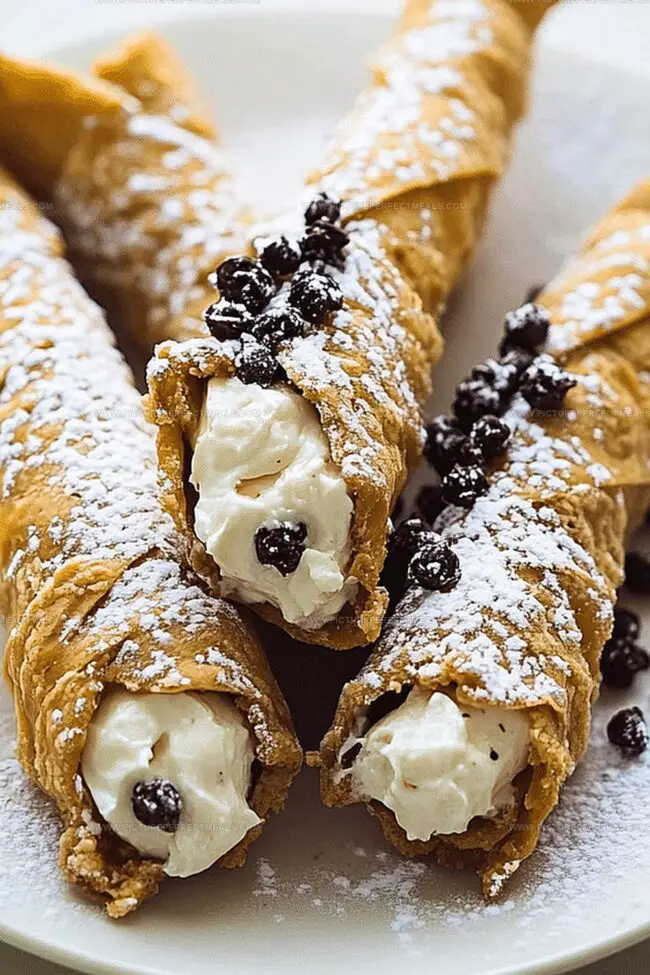
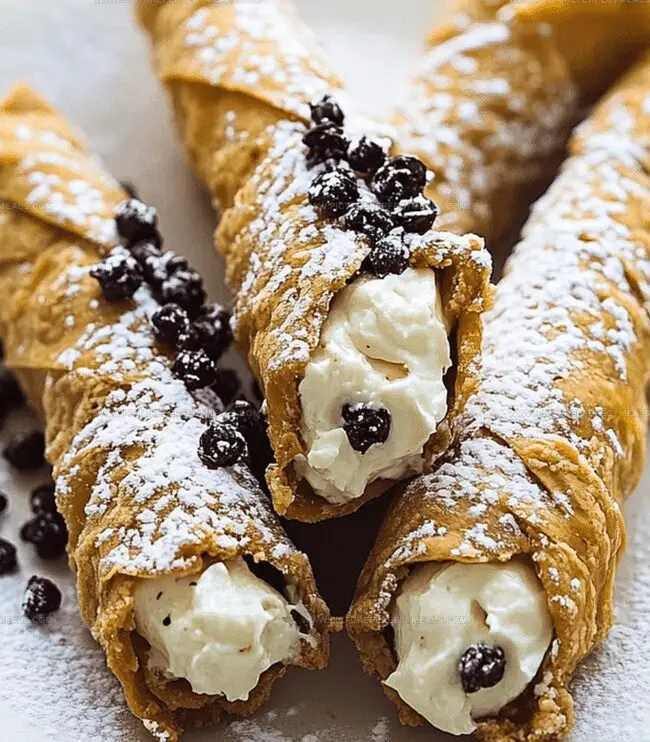
Creamy ricotta cheese mingles with powdered sugar in a dance of delectable textures.
Delicate hints of vanilla and orange zest weave through this classic italian treat.
Professional pastry chefs know the secret lies in perfectly smooth, rich ingredients.
Each spoonful promises a moment of pure indulgence that transports you to mediterranean streets.
Careful mixing and quality components turn a simple dessert into an extraordinary experience.
Why Cannoli Filling Always Impresses
Ingredients That Make Cannoli Filling Rich
Dairy Components:Sweet Enhancers:Optional Flavor Boosters:How to Whip Up a Smooth Cannoli Filling
Step 1: Prepare Ricotta Cheese
Drain ricotta cheese in a fine-mesh strainer or cheesecloth for several hours or overnight to remove excess moisture. Place in refrigerator to keep cool.
Step 2: Whip Creamy Base
In a large mixing bowl, blend drained ricotta cheese until smooth and creamy. Use an electric mixer to remove any lumps and create a silky texture.
Step 3: Add Sweetness
Gradually incorporate powdered sugar into the ricotta mixture. Mix thoroughly until sugar is completely dissolved and the filling becomes light and fluffy.
Step 4: Enhance Flavor
Stir in vanilla extract and a pinch of ground cinnamon. These ingredients will add depth and warmth to the filling.
Step 5: Mix In Extras
Fold in optional ingredients for extra texture and taste:Step 6: Chill And Set
Cover the filling and refrigerate for at least one hour. This allows flavors to meld and filling to firm up.
Step 7: Prepare For Serving
Transfer chilled filling to a piping bag with a star tip. Pipe into cannoli shells just before serving to maintain crispness.
Step 8: Garnish And Finish
Dust with additional powdered sugar. Serve immediately for best taste and texture.
Tips for Getting the Right Cannoli Texture
Storage Tips for Cannoli Cream Leftovers
Desserts That Work Great with Cannoli Filling
Fun Variations for Classic Cannoli Cream
Print
Cannoli Filling Recipe
- Total Time: 35 minutes
- Yield: 12 1x
Description
Creamy Sicilian cannoli filling combines ricotta, sugar, and vanilla for a luscious dessert delight. Rich flavors blend perfectly, offering you a classic Italian treat that whispers sweet memories of Sicily’s culinary traditions.
Ingredients
Main Dry Ingredients:
- 3 cups (375 g) all-purpose flour
- 1 cup (200 g) granulated sugar
- ⅓ cup (30 g) unsweetened cocoa powder
- 1 ½ cups (180 g) powdered sugar
Spices and Seasonings:
- 1 tablespoon baking powder
- 1 teaspoon ground cinnamon
- ½ teaspoon ground nutmeg
- ½ teaspoon ground cloves
- ½ teaspoon salt
- 1 teaspoon vanilla extract
- 1 teaspoon orange or lemon zest
Wet Ingredients and Mix-ins:
- ½ cup (115 g) unsalted butter, softened
- 2 large eggs
- ½ cup (120 ml) milk
- 23 tablespoons milk or orange juice
- ½ cup (80 g) mini chocolate chips or chopped nuts (optional)
- Colored sprinkles
- Chopped nuts
Instructions
- Whisk together flour, cocoa powder, baking powder, cinnamon, nutmeg, cloves, and salt in a medium mixing vessel to create a harmonious dry ingredient blend.
- In a spacious mixing bowl, cream butter and granulated sugar until the mixture transforms into a light, airy texture, approximately two minutes of vigorous beating.
- Incorporate eggs, vanilla extract, and citrus zest into the butter mixture, ensuring thorough integration of these aromatic components.
- Gradually fold the dry ingredient mixture into the wet ingredients, alternating with milk, and mix until just combined, maintaining a smooth, consistent batter.
- If desired, gently fold in mini chocolate chips or chopped nuts to enhance the flavor profile and add textural complexity.
- Preheat the oven to 350F (175C) and prepare baking sheets with parchment paper or silicone mats to prevent sticking.
- Portion the dough into tablespoon-sized spheres, carefully rolling each into a perfect ball with gentle hands.
- Arrange the dough balls on prepared baking sheets, spacing them approximately two inches apart to allow for proper expansion during baking.
- Transfer the baking sheets to the preheated oven and bake until the cookies achieve a delicate, golden-edged perfection.
Notes
- Customize filling thickness by adjusting ricotta draining time, allowing longer draining for a denser, less runny texture.
- Experiment with alternative sweeteners like powdered monk fruit or stevia for lower-sugar dietary needs.
- Use lactose-free ricotta or almond-based ricotta for dairy-free variations, maintaining authentic cannoli flavor profile.
- Boost flavor complexity by incorporating subtle spices like cardamom or whisking in finely grated dark chocolate for depth.
- Prep Time: 20 minutes
- Cook Time: 15 minutes
- Category: Desserts, Snacks
- Method: Baking
- Cuisine: Italian
Nutrition
- Serving Size: 12
- Calories: 275
- Sugar: 23 g
- Sodium: 110 mg
- Fat: 12 g
- Saturated Fat: 7 g
- Unsaturated Fat: 3 g
- Trans Fat: 0 g
- Carbohydrates: 36 g
- Fiber: 1 g
- Protein: 4 g
- Cholesterol: 45 mg
Daves Miller
Contributing Chef & Culinary Educator
Expertise
Education
Sullivan University, Louisville, Kentucky
White Mountains Community College, Berlin, New Hampshire
Daves is the friendly face guiding you through flavorful, fuss-free recipes at Picture Perfect Meals.
He studied culinary arts at Sullivan University and embraced Baking and Pastry Arts at White Mountains Community College. Daves specializes in comforting meals with vibrant flavors, highlighting fresh, seasonal ingredients.