Cheesy Garlic Biscuit Bombs Recipe

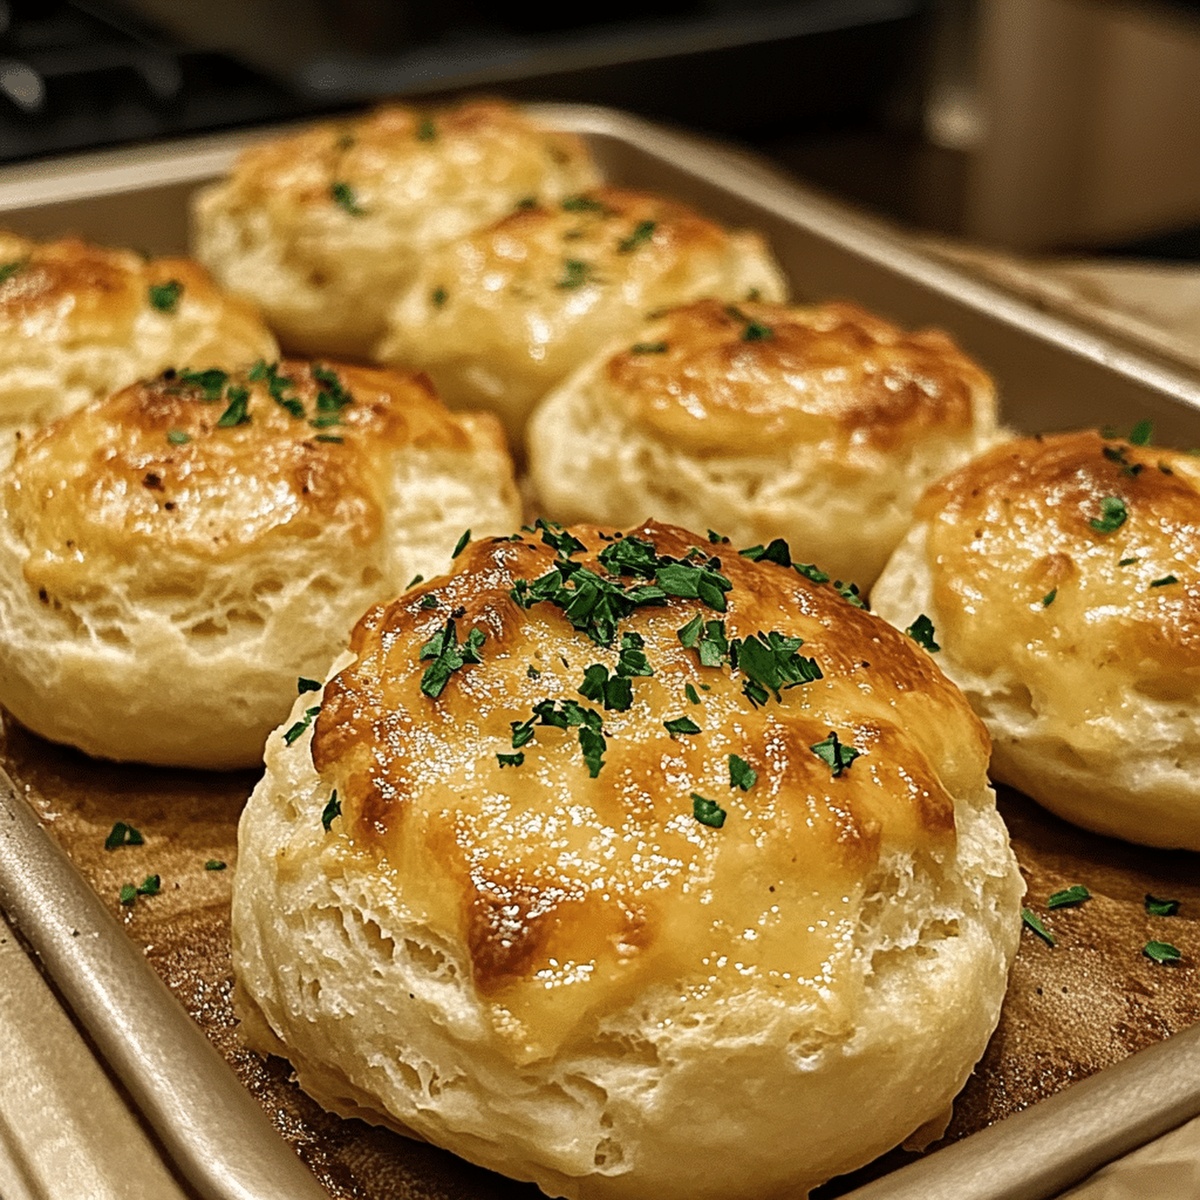
Make Irresistible Cheesy Garlic Biscuit Bombs Recipe at Home

Crispy golden biscuit bombs burst with cheesy garlic magic that’ll make your taste buds dance.

These little flavor explosions pack a serious punch of comfort and deliciousness.

Warm, pillowy dough embraces melted cheese and aromatic garlic in every single bite.

Perfectly seasoned and beautifully golden, they emerge from the oven looking like edible treasures.

My grandmother would have loved how simple yet impressive these little parcels are to create.

Each biscuit bomb delivers a delightful surprise that connects home cooking with pure joy.

She will absolutely devour these as a quick appetizer or side dish that feels like a culinary adventure.

Prepare to wow everyone at the table with this irresistible recipe that transforms ordinary ingredients into something extraordinary.

Side Ideas to Match Garlic Biscuit Bombs

  • A crisp Sauvignon Blanc cuts through the rich, cheesy biscuits with its bright acidity, balancing the garlic's intense flavor and cleansing the palate between bites.
  • Toss a light arugula salad with lemon vinaigrette to contrast the biscuits' heaviness, adding a peppery green component that refreshes the taste buds.
  • Serve alongside roasted chicken or grilled steak to transform these biscuit bombs into a complete meal, letting the garlic and cheese flavors complement the meat's robust profile.
  • Prepare a zesty marinara or herbed ranch dressing for dunking, which adds an extra layer of flavor and moisture to the crispy, golden biscuit exterior.

Biscuit Bomb Fillings You Can Switch Up

  • Gluten-Free Version: Replace all-purpose flour with a gluten-free blend, using almond flour or a commercial gluten-free mix for a celiac-friendly option.
  • Low-Carb Adaptation: Swap wheat flour for coconut flour or almond flour, reducing carbohydrate content while maintaining a similar texture.
  • Dairy-Free Alternative: Use vegan cheese substitutes or nutritional yeast for a dairy-free version, and replace butter with coconut oil or olive oil.
  • Herb-Infused Variation: Incorporate fresh herbs like rosemary, thyme, or chives into the biscuit dough for an aromatic and flavorful twist on the original recipe.

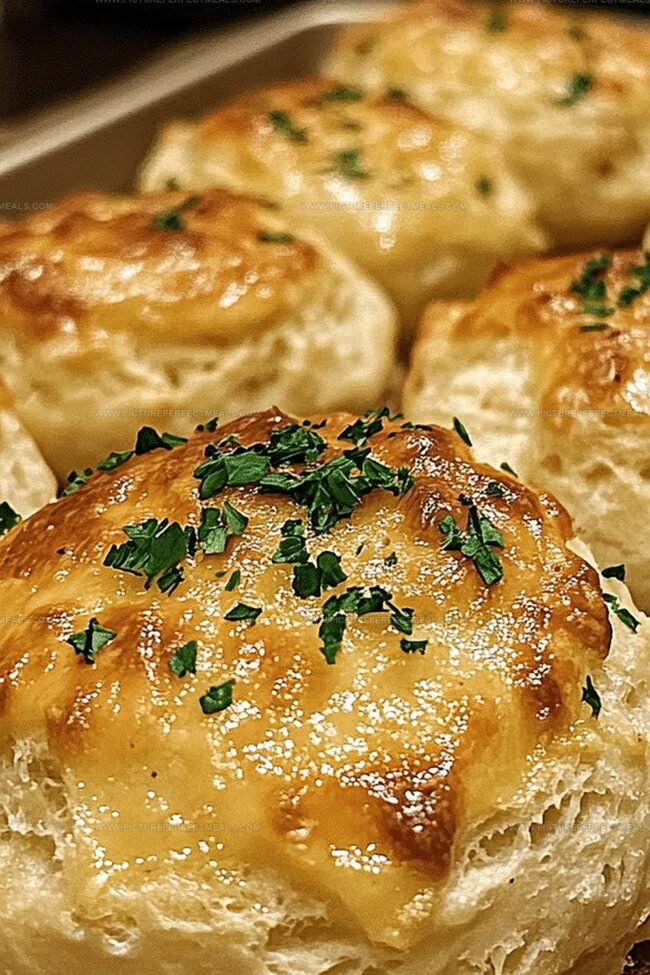
Cheesy Garlic Biscuit Bombs That Pop with Flavor

  • Perfect for busy weeknight dinners, these cheesy garlic biscuit bombs deliver restaurant-quality flavor in just 20 minutes.
  • Swap cheese types or add herbs to match your family's taste preferences, making this recipe wonderfully adaptable for picky eaters.
  • Requiring only basic ingredients and simple preparation steps, even beginner cooks can confidently create this delicious side dish without stress.

What Goes Into These Flavor-Filled Biscuits

Main Dough Ingredients:
  • All-Purpose Flour: Sturdy base for creating light and fluffy biscuit texture, choose unbleached for best results.
  • Baking Powder: Key leavening agent that helps biscuits rise and become airy.
  • Salt: Enhances overall flavor and balances the other ingredients.
Cheese and Filling Ingredients:
  • Shredded Cheddar Cheese: Sharp flavor that melts beautifully and adds rich taste, opt for medium or sharp cheddar.
  • Mozzarella Cheese: Creates delightful stretchy cheese pull, use low-moisture variety for best melting.
Wet Ingredients:
  • Butter: Provides rich flavor and helps create flaky texture, cold butter works best for biscuit preparation.
  • Milk: Helps bind ingredients and adds moisture to the dough, whole milk recommended for richness.
  • Garlic: Adds robust and aromatic flavor, fresh garlic cloves preferred over pre-minced for more intense taste.
  • Parsley: Fresh herb that brings color and subtle herbal notes to the biscuit topping.

How to Make and Bake Biscuit Bombs at Home

Step 1: Prepare the Oven

Preheat the oven to 375°F. Get a baking sheet ready by either lining it with parchment paper or giving it a light coating of cooking spray.

Step 2: Mix Biscuit Dough

In a large mixing bowl, combine:
  • Biscuit mix
  • Milk
  • Melted butter

Stir until the ingredients form a soft, slightly sticky dough.

Step 3: Prepare Cheese Filling

In a separate bowl, blend:
  • Softened cream cheese
  • Shredded cheddar cheese
  • Minced garlic
  • Chopped fresh parsley

Mix until the filling is smooth and well combined.

Step 4: Shape the Biscuit Bombs

Dust your work surface with flour. Roll out the biscuit dough and cut into small circles. Place a spoonful of cheese mixture in the center of each circle.

Step 5: Seal and Shape

Carefully fold the dough around the cheese, pinching the edges to create a sealed pocket. Roll each bomb gently to create a smooth, round shape.

Step 6: Add Garlic Topping

Brush the tops of the biscuit bombs with:
  • Melted butter
  • Minced garlic
  • Dried parsley

Step 7: Bake to Golden Perfection

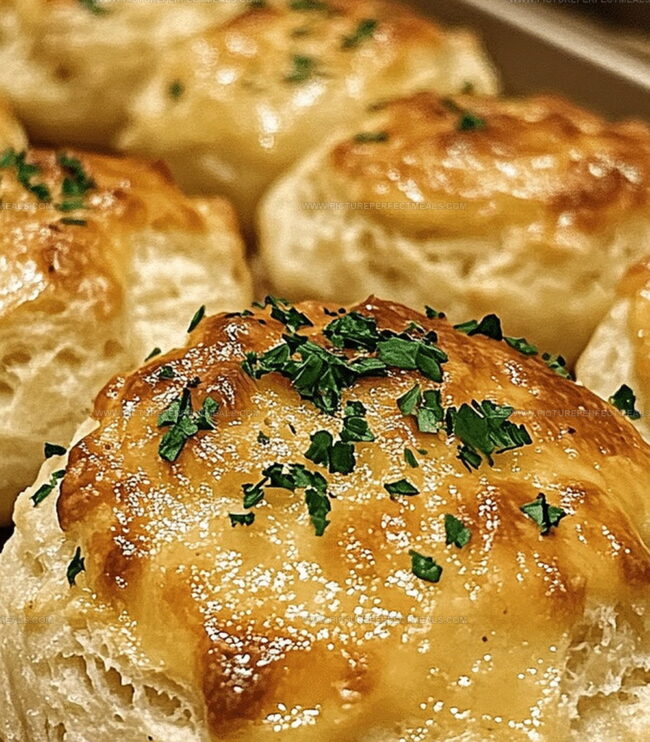
Place the biscuit bombs on the prepared baking sheet. Bake for 12-15 minutes until they turn a beautiful golden brown and look irresistibly puffy.

Step 8: Serve and Enjoy

Remove from the oven and let cool for a few minutes. Serve warm and watch them disappear quickly!

Tips for a Gooey Center and Golden Crust

  • Cheese Selection Matters: Choose a melty cheese like mozzarella or cheddar that creates gooey, stretchy centers for maximum flavor and texture.
  • Seal Edges Tightly: Pinch and roll biscuit dough completely around cheese to prevent leaking during baking, ensuring a perfect cheese-filled result.
  • Garlic Butter Boost: Brush tops with extra garlic butter just before baking to enhance golden color and add an intense aromatic flavor profile.
  • Temperature Control: Allow biscuits to rest for 2-3 minutes after baking to let cheese set and prevent burning your mouth with hot filling.
  • Customize Easily: Experiment with different cheese types or add herbs like chives or parsley to create unique variations of this crowd-pleasing appetizer.

Storing and Reheating Biscuits Without Drying

  • Store leftover biscuit bombs in an airtight container for up to 3-4 days, keeping them fresh and maintaining their delightful texture.
  • Warm biscuits at 350F for 5-7 minutes to restore their crispy exterior and gooey cheese center, ensuring they taste just as delicious as when first baked.
  • Quickly reheat individual biscuits for 15-20 seconds, but be careful not to overheat, which can make them tough and chewy.
  • Wrap cooled biscuit bombs tightly in plastic wrap and freeze for up to 1 month, providing a convenient make-ahead option for quick future meals.
Print
clock clock iconcutlery cutlery iconflag flag iconfolder folder iconinstagram instagram iconpinterest pinterest iconfacebook facebook iconprint print iconsquares squares iconheart heart iconheart solid heart solid icon
Cheesy Garlic Biscuit Bombs Recipe

Cheesy Garlic Biscuit Bombs Recipe


5 Stars 4 Stars 3 Stars 2 Stars 1 Star

4.8 from 37 reviews

  • Total Time: 25 minutes
  • Yield: 8 1x

Description

Cheesy garlic biscuit bombs deliver explosive flavor wrapped in buttery, golden pastry. Melted cheese and herb-infused garlic create an irresistible comfort snack you’ll crave with every delicious, warm bite.


Ingredients

Scale

Main Ingredients:

  • 1 can (16 ounces or 454 grams) refrigerated biscuit dough
  • 8 ounces (225 grams) mozzarella cheese

Seasoning and Flavor Enhancers:

  • 2 tablespoons butter, melted
  • 1 teaspoon garlic powder
  • 1 teaspoon dried parsley
  • ½ teaspoon Italian seasoning

Optional Toppings:

  • Grated Parmesan cheese
  • Parsley for garnish

Instructions

  1. Prepare the oven environment by heating to 375F (190C) and setting up a parchment-lined or lightly greased baking sheet.
  2. Mix cream cheese with shredded cheddar, ensuring a smooth and uniform consistency for the filling.
  3. Separate refrigerated biscuit dough into individual rounds, gently stretching each piece to create a wider surface.
  4. Place a dollop of the cheese mixture in the center of each biscuit round, carefully avoiding overfilling.
  5. Gather the edges of the dough, pinching and sealing them completely to encase the cheese filling securely.
  6. Roll each sealed biscuit into a smooth ball, ensuring no cheese is exposed.
  7. Craft a savory topping by combining minced garlic with melted butter and finely chopped parsley.
  8. Generously brush each biscuit bomb with the garlic-herb butter mixture, coating the entire surface.
  9. Arrange the prepared biscuit bombs on the prepared baking sheet, spacing them evenly to allow proper heat circulation.
  10. Bake in the preheated oven for 10-12 minutes, watching for a golden-brown exterior that indicates perfect doneness.
  11. Remove from the oven and let cool for a few minutes, allowing the molten cheese interior to set slightly before serving.

Notes

  • Grate cheese cold for easier handling and more uniform melting throughout the biscuits.
  • Brush biscuit tops with melted butter and sprinkle with fresh herbs like parsley or chives for extra flavor complexity.
  • Use room temperature ingredients to ensure smoother dough mixing and more consistent texture in the final baked biscuits.
  • Chill stuffed biscuits for 10-15 minutes before baking to help them maintain their shape and prevent cheese from leaking during cooking.
  • Prep Time: 10 minutes
  • Cook Time: 15 minutes
  • Category: Breakfast, Snacks, Appetizer
  • Method: Baking
  • Cuisine: American

Nutrition

  • Serving Size: 8
  • Calories: 210
  • Sugar: 1 g
  • Sodium: 480 mg
  • Fat: 12 g
  • Saturated Fat: 7 g
  • Unsaturated Fat: 3 g
  • Trans Fat: 0 g
  • Carbohydrates: 22 g
  • Fiber: 1 g
  • Protein: 6 g
  • Cholesterol: 30 mg
Daves Miller

Daves Miller

Contributing Chef & Culinary Educator

Expertise

  • American Southern cuisine with a modern twist.
  • Instruction in culinary fundamentals and advanced techniques.
  • Development of recipes that highlight seasonal and local produce.​
  • Mastery of artisanal bread and pastry techniques, from laminated doughs to decorative sugar artistry.

Education

Sullivan University, Louisville, Kentucky

  • Degree: Associate of Science Degree in Culinary Arts
  • Focus: Specialized in cooking techniques and culinary sciences, hands‑on externships, professional kitchen lab training, and career preparation for restaurants, entrepreneurship, and global culinary opportunities.

White Mountains Community College, Berlin, New Hampshire

  • Program: Baking and Pastry Arts degree
  • Focus: Specialized in comprehensive baking and pastry arts, including bread making, artisan breads, cake decorating and design, chocolates, confections, and decorative centerpieces; product development and baking theory; and career preparation for baker and pastry chef roles in many places.

Daves is the friendly face guiding you through flavorful, fuss-free recipes at Picture Perfect Meals. 

He studied culinary arts at Sullivan University and embraced Baking and Pastry Arts at White Mountains Community College. Daves specializes in comforting meals with vibrant flavors, highlighting fresh, seasonal ingredients.

Leave a Reply

Your email address will not be published. Required fields are marked *

Recipe rating 5 Stars 4 Stars 3 Stars 2 Stars 1 Star