
Savory Cheesy Grilled Cheese Burrito Recipe – A Flavorful Twist!
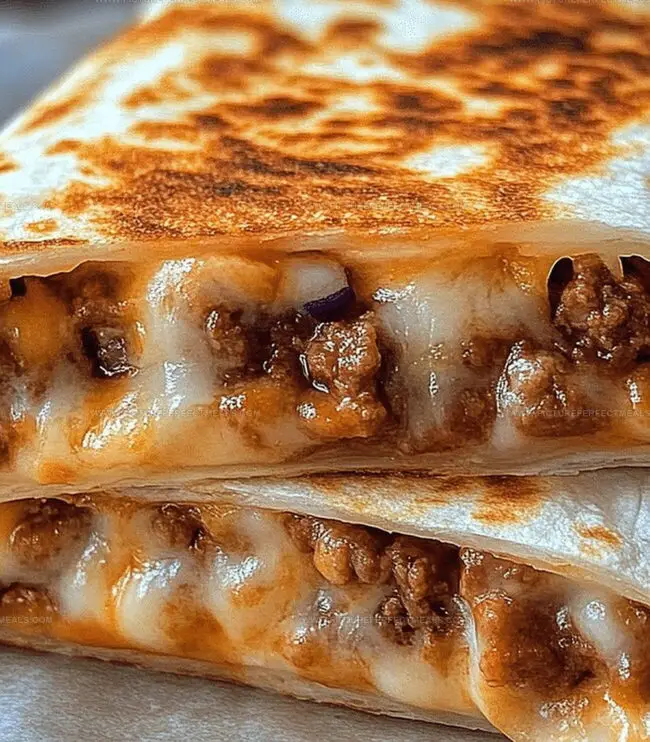
Melted cheese and crispy tortillas dance together in this mouthwatering grilled cheese burrito that promises pure comfort.
The classic burrito takes an unexpected turn with gooey, melted cheese coating every delicious bite.
Packed with savory fillings and wrapped in a golden, perfectly grilled tortilla, this recipe brings a playful twist to traditional Mexican-inspired cuisine.
Layers of flavor burst through each carefully crafted fold, creating a handheld meal that satisfies deep cravings.
Tender meats, zesty seasonings, and that irresistible cheese blend seamlessly into a culinary masterpiece.
The combination of crisp exterior and molten interior makes this burrito a true crowd-pleaser.
Grab a napkin and prepare for a flavor explosion that will have everyone asking for seconds.
Quick Recipe Overview

Grilled Cheese Burrito Ingredient Checklist
For Protein and Flavor Base:For Cooking and Preparation:For Moisture and Binding:Tools You’ll Need for Grilled Cheese Burritos
How to Fold the Perfect Grilled Cheese Burrito
Heat olive oil in a skillet over medium heat, preparing a golden cooking surface for your delicious creation.
Add ground beef to the hot skillet, breaking it into small crumbles and cooking until it transforms into a rich, caramel-colored protein.
Drain any excess grease, then sprinkle taco seasoning over the beef. Pour in water and let the mixture bubble and thicken for about 5 minutes, creating a flavor-packed filling.
Place a large tortilla in another skillet, allowing it to get slightly crisp and warm.
Spread a layer of cheese on the tortilla, then add the seasoned beef mixture across the center.
Carefully roll the tortilla into a compact burrito shape, then place it back in the skillet to grill until the outside turns golden and crispy.
Cut the grilled cheese burrito diagonally and serve immediately while the cheese is melted and the exterior is beautifully crisp.
Flavor Boosts for Grilled Cheese Burritos
Serving Ideas for Grilled Cheese Burritos
Grilled Cheese Burrito: Storing & Reheating Tips
Print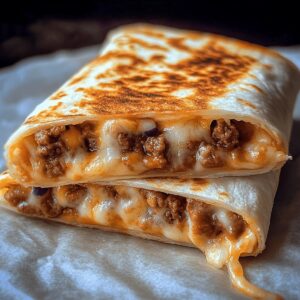
Cheesy Grilled Cheese Burrito Recipe
- Total Time: 25 minutes
- Yield: 5 1x
Description
Classic Mexican-American fusion grilled cheese burrito blends crispy tortilla layers with melted cheese and savory fillings. Southwestern comfort satisfies hunger while celebrating cross-cultural culinary creativity.
Ingredients
- 1 lb ground beef
- ½ cup nacho cheese sauce (store-bought or homemade)
- ½ cup shredded cheddar cheese
- ½ cup shredded monterey jack cheese
- 1 cup shredded cheddar cheese (for the outside)
- ½ cup sour cream
- 4 large flour tortillas
- 1 packet (or 2 tbsps) taco seasoning
- ½ cup water
- 1 cup cooked rice (optional, for extra filling)
- ½ cup tortilla strips (or crushed tortilla chips)
- 1 tbsp olive oil
- 1 tbsp mayonnaise
- 1 tbsp butter (for grilling)
- 1 tsp lime juice
- 1 tsp chipotle powder (or adobo sauce from canned chipotles)
- ½ tsp garlic powder
- ½ tsp smoked paprika
- Pinch of salt
Instructions
- Meat Preparation: Heat skillet over medium flame, drizzle olive oil, and brown ground beef thoroughly, crumbling while stirring to ensure even cooking.
- Seasoning Integration: Drain excess grease, sprinkle taco seasoning over beef, add water, and allow mixture to simmer, stirring occasionally until liquid reduces to create a thick, glossy sauce.
- Flavor Development: Cook beef for 5 minutes, allowing taco seasoning to fully infuse the meat, creating a rich, concentrated flavor profile.
- Tortilla Assembly: Lay out large flour tortilla, spread sour cream across the center, creating a creamy base for the filling.
- Beef Placement: Carefully distribute the seasoned beef down the middle of the tortilla, ensuring even coverage.
- Cheese Layering: Generously sprinkle shredded cheese over the warm beef, allowing residual heat to begin melting the cheese.
- Additional Filling: Strategically add rice, beans, and pico de gallo across the beef, creating a multi-dimensional flavor landscape.
- Burrito Wrapping: Fold bottom of tortilla up, then tightly roll from one side, sealing in all ingredients securely.
- Final Grilling: Place burrito seam-side down in a preheated skillet, grilling until exterior becomes golden and crispy, creating a delightful crunch.
- Serving Preparation: Remove from heat, slice diagonally, and serve immediately with optional side of salsa or guacamole for enhanced enjoyment.
Notes
- Select Lean Beef: Choose ground beef with lower fat content (90/10 or 93/7) to minimize excessive grease and create a cleaner, more concentrated flavor profile.
- Drain Thoroughly: Use a colander or paper towels to remove maximum grease, preventing soggy and heavy meat texture in your burrito.
- Season Strategically: Add taco seasoning after browning beef to enhance spice absorption and develop deeper, more complex flavor layers without burning spices.
- Control Moisture Carefully: Simmer beef mixture until liquid reduces completely, creating a thick, clingy sauce that won’t make your burrito soggy or difficult to wrap.
- Prep Time: 10 minutes
- Cook Time: 15 minutes
- Category: Lunch, Snacks
- Method: Sautéing
- Cuisine: Mexican
Nutrition
- Serving Size: 5
- Calories: 640
- Sugar: 2 g
- Sodium: 1200 mg
- Fat: 38 g
- Saturated Fat: 16 g
- Unsaturated Fat: 20 g
- Trans Fat: 1 g
- Carbohydrates: 52 g
- Fiber: 3 g
- Protein: 30 g
- Cholesterol: 90 mg
Jenna Hartley
Founder & Recipe Creator
Expertise
Education
Box Hill Institute, Melbourne
William Angliss Institute, Melbourne
Jenna is the heart of Picture Perfect Meals, turning simple ingredients into beautiful, easy‑to‑make dishes.
Growing up around family meals in Melbourne, she trained at Box Hill Institute and then perfected her pastry skills at William Angliss Institute. She loves mixing classic Australian flavors with fresh ideas to keep cooking fun and stress‑free.