Sweet Chocolate Thumbprint Cookies Recipe: Bite-Sized Joy
Sweet memories of childhood baking always swirl around these delightful chocolate thumbprint cookies.
Tiny kitchen adventures begin with soft, buttery dough pressed carefully by small fingers.
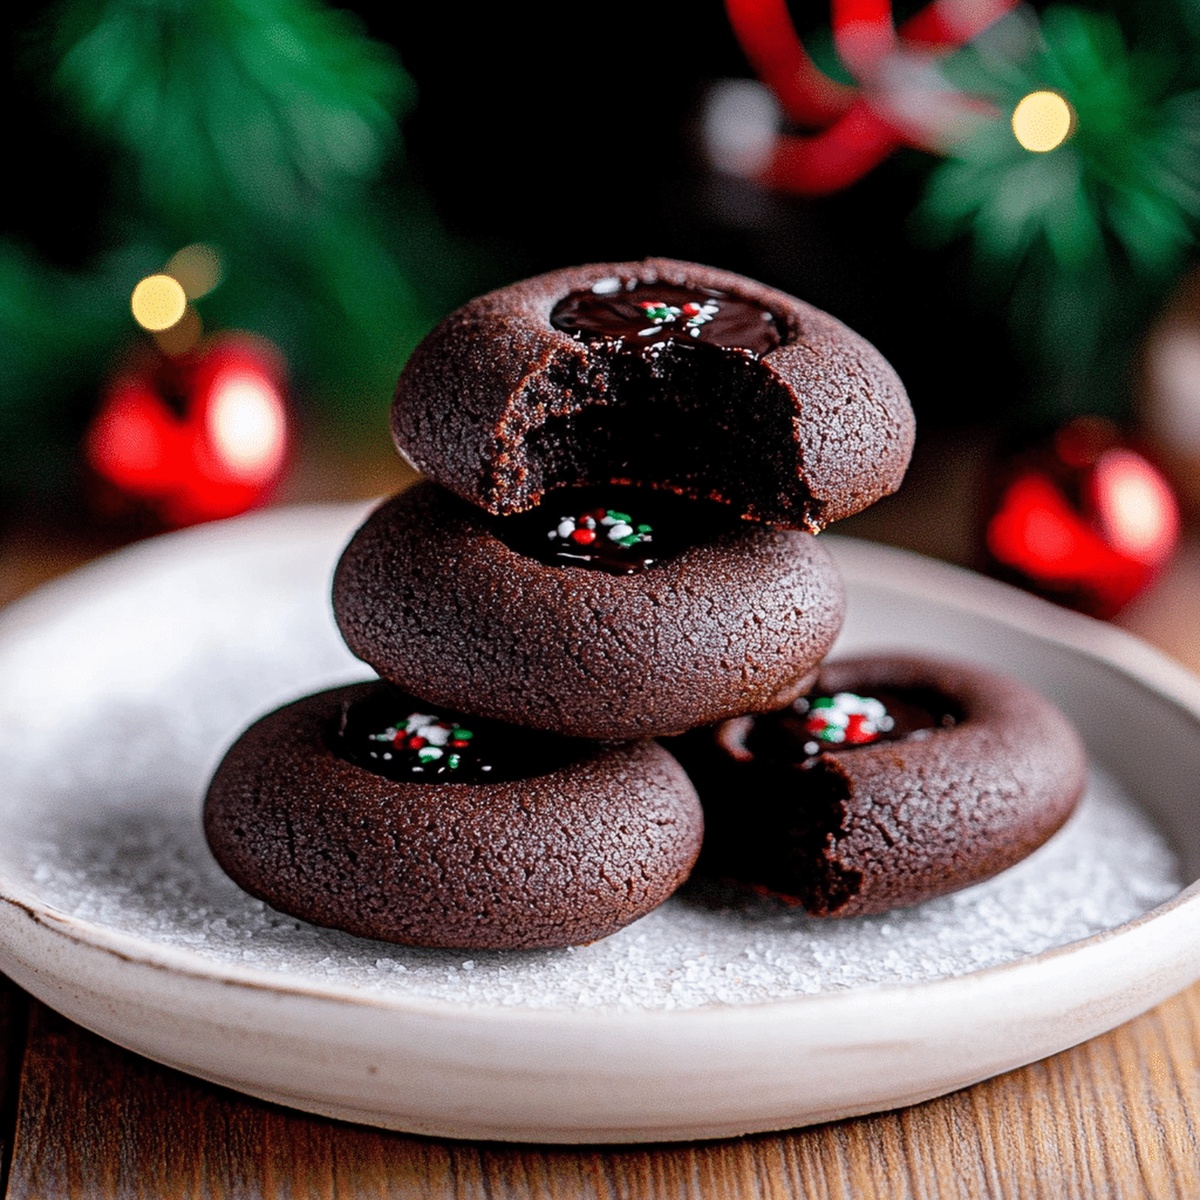
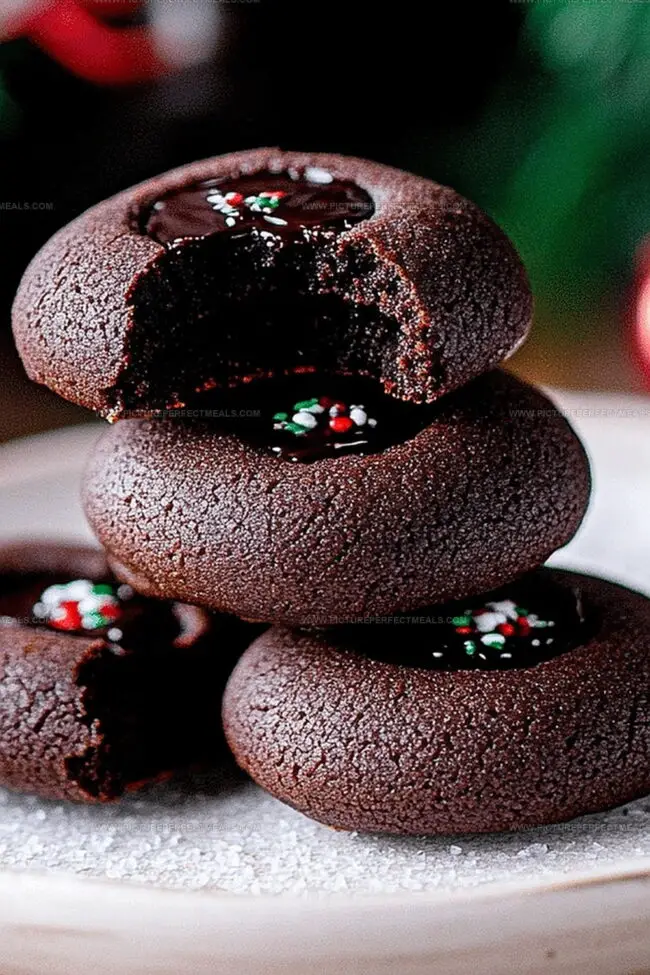
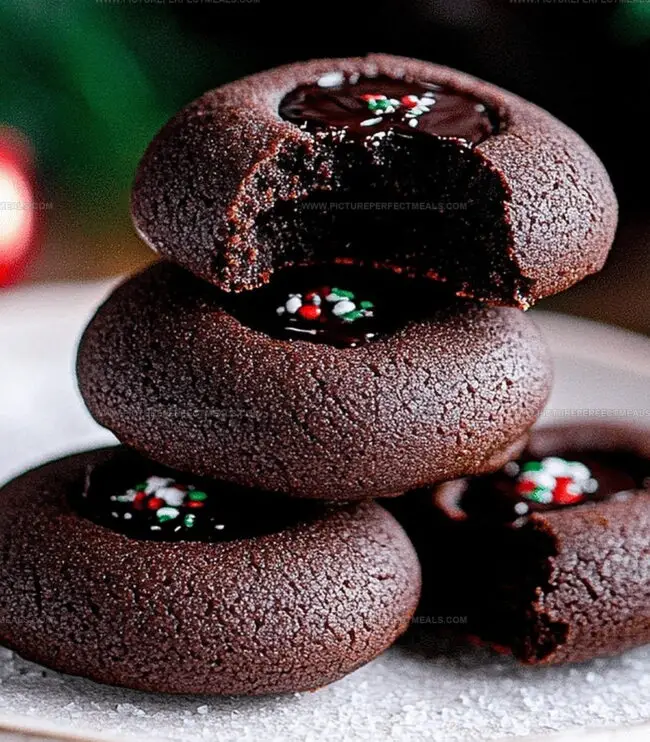
Chocolate centers glisten like precious gems nestled in golden cookie landscapes.
Rich cocoa aromas promise delectable moments of pure comfort and joy.
Playful indentations make each cookie uniquely charming and irresistibly cute.
Baking together creates magical connections that warm hearts faster than any oven.
Let’s craft these delicious treats and sprinkle some happiness into your day.
Chocolate Thumbprint Cookies That Hit the Spot
Ingredients to Create Thumbprint Cookie Goodness
Base Ingredients:Flavor Enhancers:Filling and Coating Ingredients:Bake Thumbprint Cookies with Chocolate Centers
Step 1: Whip Up the Dough
In a spacious mixing bowl, cream butter and sugar until they transform into a light, airy mixture. Incorporate egg yolks and vanilla extract, blending until smooth. Gradually fold in flour and salt, mixing until a soft dough emerges. Wrap the dough and refrigerate for half an hour to firm up.
Step 2: Shape Your Sweet Treats
Heat the oven to 350F (175C) and line a baking sheet with parchment paper. Scoop out small dough balls and roll them between your palms. For extra crunch, roll each ball in finely chopped nuts if desired. Arrange the dough balls on the baking sheet, spacing them about 2 inches apart.
Step 3: Create Signature Indentations
Gently press your thumb or the back of a spoon into the center of each cookie, forming a deep well that will hold the delicious chocolate filling.
Step 4: Bake to Golden Perfection
Slide the cookies into the oven and bake for 10-12 minutes until the edges turn a light golden brown. After removing from the oven, let the cookies rest on the baking sheet for 2 minutes. If the indentations have puffed up, softly press them down while still warm. Transfer to a wire rack for complete cooling.
Step 5: Craft Decadent Chocolate Filling
In a microwave-safe bowl, combine:Heat in 20-second intervals, stirring between each, until the mixture becomes smooth and glossy.
Step 6: Fill and Finish
Carefully spoon the melted chocolate into the center of each cookie. Allow the chocolate to set at room temperature or accelerate the process by placing the cookies in the refrigerator.
Tricks to Keep Thumbprints Perfect Every Time
Store Thumbprint Cookies Without Losing Softness
What to Serve with Chocolate Thumbprint Cookies
New Fillings for Thumbprint Cookie
Print
Chocolate Thumbprint Cookies Recipe
- Total Time: 32 minutes
- Yield: 12 1x
Description
Sweet chocolate thumbprint cookies deliver melt-in-your-mouth comfort with rich cocoa and creamy ganache centers. Indulgent treats from European baking traditions promise delightful moments of pure chocolate bliss you’ll savor with each delicate bite.
Ingredients
Chocolate Thumbprint Cookies
Main Ingredients:
- 1 ¼ cups all-purpose flour
- ½ cup unsweetened cocoa powder
- ½ teaspoon salt
- ½ cup unsalted butter
- ⅔ cup granulated sugar
- 1 large egg
- 1 teaspoon vanilla extract
Filling Ingredients:
- 4 ounces (113 grams) semisweet chocolate
- ¼ cup heavy cream
- 2 tablespoons unsalted butter
Garnish Ingredients:
- Powdered sugar (optional)
Instructions
- Craft a luxurious butter and sugar mixture by whipping them together until they transform into a light, airy texture. Incorporate egg yolks and vanilla, blending until thoroughly combined.
- Gradually fold in flour and salt, gently forming a soft, cohesive dough. Wrap the mixture and refrigerate for half an hour to enhance flavor development and improve texture.
- Heat the oven to 350F (175C) and prepare a parchment-lined baking sheet. Extract small portions of chilled dough and roll into precise spheres.
- Optional: Enhance cookie exteriors by rolling each sphere through finely chopped nuts, creating a delightful crunchy exterior.
- Arrange cookie spheres on the baking sheet, maintaining approximately two inches of separation between each cookie.
- Using your thumb or a rounded utensil, create a deep, centered indentation in each cookie, ensuring sufficient space for chocolate filling.
- Bake cookies for 10-12 minutes until edges develop a delicate golden hue. Allow minimal resting time on the baking sheet to prevent over-browning.
- While cookies are still warm, gently reinforce the indentations if they have slightly collapsed during baking. Transfer to a cooling rack.
- Prepare a decadent chocolate filling by melting chocolate chips with heavy cream and butter. Use microwave technique, stirring between brief heating intervals until achieving a smooth, glossy consistency.
- Carefully spoon the molten chocolate mixture into each cookie’s central indentation. Allow chocolate to set naturally at room temperature or expedite the process using refrigeration.
Notes
- Ensure butter is softened at room temperature for easy mixing and smoother dough consistency.
- Chilling the dough helps prevent spreading and maintains the cookie’s shape during baking.
- Rolling cookies in finely chopped nuts adds extra texture and a delightful crunch to the classic recipe.
- For a gluten-free version, substitute all-purpose flour with almond flour or a gluten-free baking blend.
- Prep Time: 20 minutes
- Cook Time: 12 minutes
- Category: Desserts, Snacks
- Method: Baking
- Cuisine: American
Nutrition
- Serving Size: 12
- Calories: 150
- Sugar: 10 g
- Sodium: 50 mg
- Fat: 7 g
- Saturated Fat: 4 g
- Unsaturated Fat: 3 g
- Trans Fat: 0 g
- Carbohydrates: 20 g
- Fiber: 1 g
- Protein: 2 g
- Cholesterol: 15 mg
Daves Miller
Contributing Chef & Culinary Educator
Expertise
Education
Sullivan University, Louisville, Kentucky
White Mountains Community College, Berlin, New Hampshire
Daves is the friendly face guiding you through flavorful, fuss-free recipes at Picture Perfect Meals.
He studied culinary arts at Sullivan University and embraced Baking and Pastry Arts at White Mountains Community College. Daves specializes in comforting meals with vibrant flavors, highlighting fresh, seasonal ingredients.