Classic Beef Rissoles Recipe: Juicy Homemade Comfort on a Plate
My mom’s legendary beef rissoles sparked countless memories around our dinner table.
These savory patties blend rich ground beef with unexpected herbs and spices.
Her secret ingredient always made neighbors lean over the fence, curious about what deliciousness was cooking.
Australian kitchens know rissoles as comfort food that brings people together with minimal fuss.
Each bite carries a delicate balance of tender meat and subtle seasonings.
Home cooks appreciate how quickly these delectable morsels come together during busy weeknights.
I challenge you to make these rissoles and create your own delicious tradition.
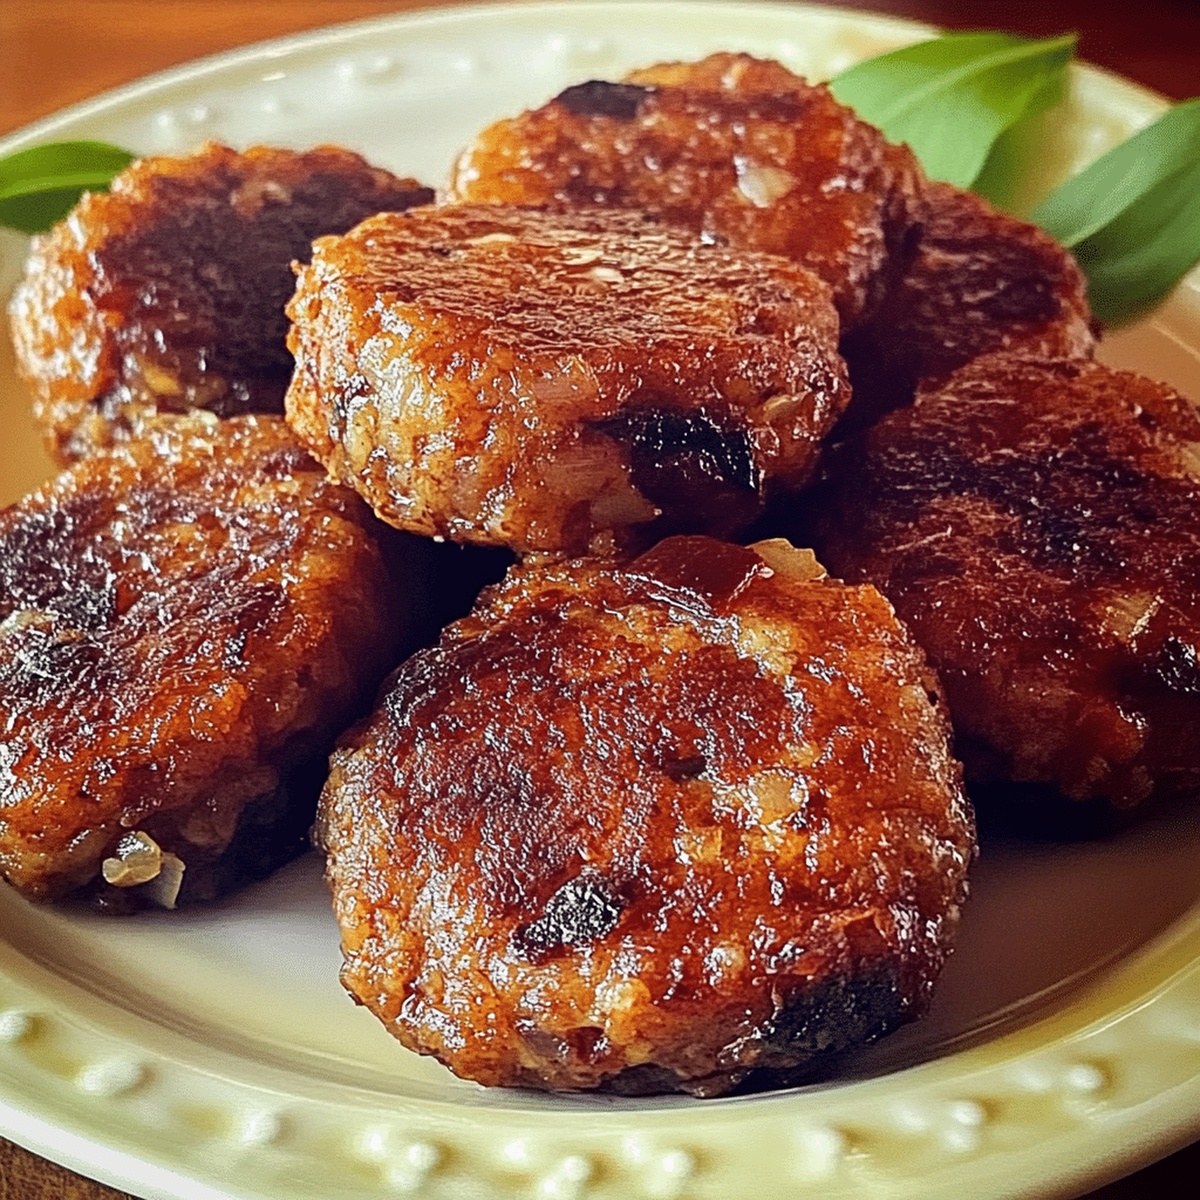
Classic Beef Rissoles Ready for Any Dinner Table
Ingredients to Shape Perfect Beef Rissoles
Meat Base:Aromatics and Seasonings:Binding and Moisture:Cooking Element:How to Cook Beef Rissoles with Juicy Centers
Step 1: Chop and Gather Ingredients
Finely dice the onion and mince the garlic. Grab these ingredients:Step 2: Blend the Mixture
Toss all ingredients into a large mixing bowl. Use your hands or a sturdy spoon to blend everything thoroughly. Make sure breadcrumbs and seasonings are completely integrated with the beef.
Step 3: Create Rissole Shapes
Scoop small portions of the meat mixture and roll into round balls. Gently press each ball into a flat patty shape. Continue until all mixture is transformed into rissole shapes.
Step 4: Cook the Rissoles
Warm a skillet with oil over medium heat. Carefully place rissoles into the pan, avoiding overcrowding. Sizzle each side for 3-4 minutes until a beautiful golden-brown color develops. Check that internal temperature reaches 160°F for safe eating.
Step 5: Plate and Serve
Transfer cooked rissoles onto a paper towel to drain excess oil. Arrange on a serving plate alongside your favorite accompaniments like crispy roasted potatoes, fresh garden salad, or vibrant steamed vegetables.
Smart Cooking Tips for Evenly Cooked Rissoles
How to Reheat Beef Rissoles Without Drying Them Out
Dishes to Round Out a Meal with Beef Rissoles
Ingredient Variations to Suit Your Rissoles Taste
Lean Protein Boost: Swap ground beef with turkey or chicken mince for a lower-fat alternative that maintains great flavor and texture.
Gluten-Free Champion: Replace breadcrumbs with crushed gluten-free crackers or almond meal to create a celiac-friendly version without compromising taste.
Vegetarian Transformation: Substitute ground meat with lentils, black beans, or plant-based mince to craft a hearty vegetarian rissole packed with protein and rich Mediterranean-inspired seasonings.
Keto-Friendly Option: Remove breadcrumbs entirely and use ground pork rinds or finely grated cauliflower as a binding agent, keeping the recipe low-carb and perfectly aligned with ketogenic dietary requirements.
Print
Classic Beef Rissoles Recipe
- Total Time: 25 minutes
- Yield: 4 1x
Description
Succulent classic beef rissoles bring hearty Australian comfort straight to dinner tables with simple, rustic charm. Savory herbs and juicy meat create an irresistible meal that connects family through delicious home-style cooking you’ll crave.
Ingredients
Main Protein:
- 1 lb (450 g) ground beef
Binding and Flavor Enhancers:
- 1 egg, lightly beaten
- ⅓ cup breadcrumbs (or panko)
- 2 tablespoons ketchup or tomato sauce
- 1 teaspoon Worcestershire sauce
Aromatics and Seasonings:
- 1 small onion, finely chopped
- 2 cloves garlic, minced
- 1 teaspoon dried parsley (or 2 tablespoons fresh parsley, finely chopped)
- ½ teaspoon smoked paprika
- ¼ teaspoon salt
- ¼ teaspoon black pepper
- 1 tablespoon olive oil or vegetable oil (for frying)
Instructions
- Finely dice the onion and mince the garlic, creating a foundation of aromatic flavors for the rissoles.
- In a spacious mixing bowl, combine ground beef, breadcrumbs, chopped onion, minced garlic, egg, Worcestershire sauce, dried oregano, paprika, salt, and pepper, creating a harmonious blend of ingredients.
- Gently fold and knead the mixture using hands or a utensil, ensuring even distribution of breadcrumbs and spices throughout the meat.
- Portion the mixture and form uniform patties by rolling small amounts into balls and then gently flattening them into disk-like shapes.
- Warm a skillet with a thin layer of oil over medium heat, allowing the surface to become evenly heated.
- Carefully place the rissoles in the pan, maintaining sufficient space between each patty to promote even cooking and proper browning.
- Cook each side for approximately 3-4 minutes, rotating when a golden-brown crust develops and ensuring the internal temperature reaches a safe 70C (160F).
- Transfer the cooked rissoles onto a paper towel-lined plate to absorb excess oil and allow slight cooling.
- Plate the rissoles alongside complementary accompaniments like creamy mashed potatoes, crisp garden salad, or steamed seasonal vegetables for a complete meal.
Notes
- Customize the meat mixture by blending different ground meats like beef, pork, or lamb for enhanced flavor complexity.
- Prevent dry rissoles by avoiding overworking the meat mixture and adding a splash of milk or extra egg for moisture retention.
- Experiment with alternative breadcrumbs like gluten-free options or almond meal to accommodate dietary restrictions.
- Boost nutritional value by incorporating finely grated vegetables like zucchini or carrots into the meat mixture for added nutrients and moisture.
- Prep Time: 10 minutes
- Cook Time: 15 minutes
- Category: Lunch, Dinner, Snacks
- Method: Frying
- Cuisine: Australian
Nutrition
- Serving Size: 4
- Calories: 347
- Sugar: 2 g
- Sodium: 200 mg
- Fat: 22 g
- Saturated Fat: 8 g
- Unsaturated Fat: 12 g
- Trans Fat: 0 g
- Carbohydrates: 18 g
- Fiber: 1 g
- Protein: 20 g
- Cholesterol: 75 mg
Daves Miller
Contributing Chef & Culinary Educator
Expertise
Education
Sullivan University, Louisville, Kentucky
White Mountains Community College, Berlin, New Hampshire
Daves is the friendly face guiding you through flavorful, fuss-free recipes at Picture Perfect Meals.
He studied culinary arts at Sullivan University and embraced Baking and Pastry Arts at White Mountains Community College. Daves specializes in comforting meals with vibrant flavors, highlighting fresh, seasonal ingredients.