Coconut Cream Pie Recipe

Coconut Cream Pie Recipe for Sweet Bliss

Creamy coconut cream pie sits at the heart of tropical dessert dreams.

Sweet memories of island vacations dance through each silky slice.

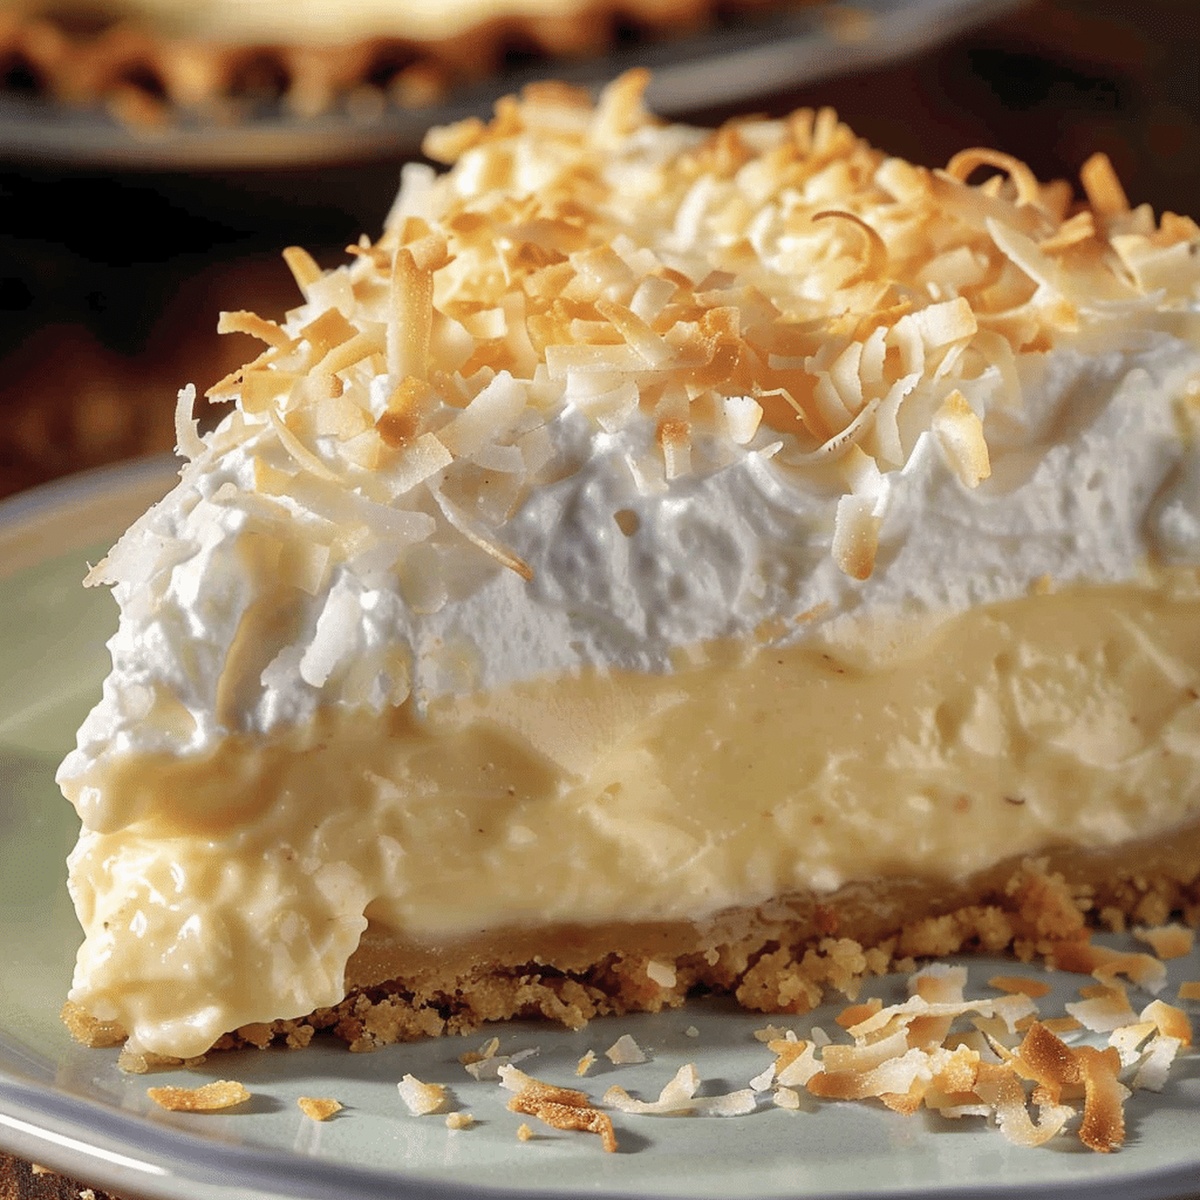
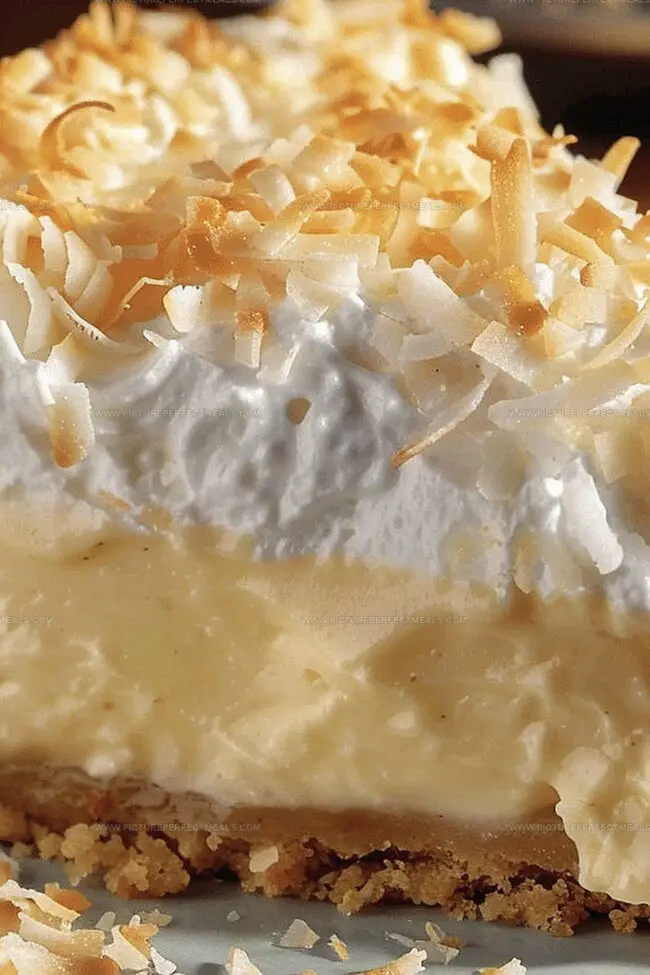
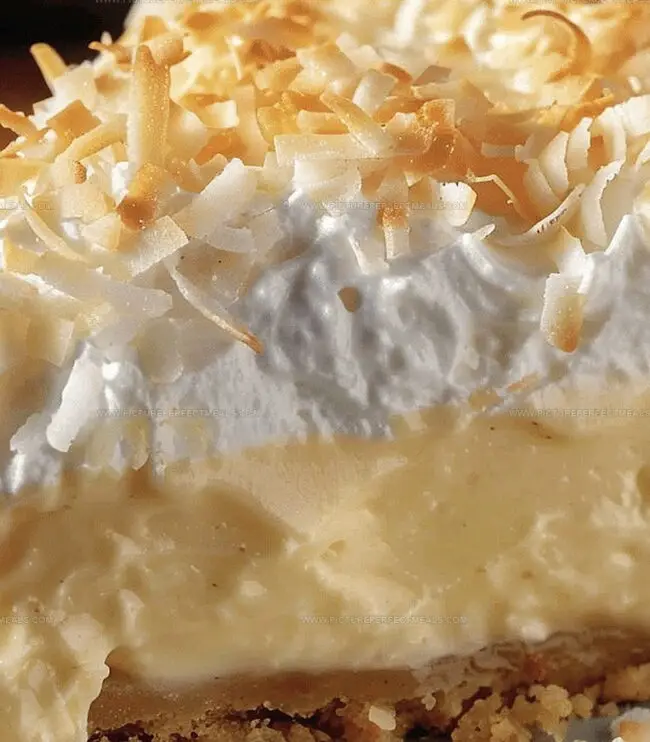
Buttery graham cracker crusts cradle a luscious filling that whispers pure indulgence.

Delicate coconut flakes sprinkled across smooth peaks create textural magic for your taste buds.

Every forkful promises a delightful escape from ordinary desserts.

Chilled and dreamy, this pie delivers comfort in the most delectable way.

You can’t resist diving into this classic treat that feels like a warm culinary hug.

What Makes Coconut Cream Pie a Crowd Favorite

  • Coconut Cream Pie's Irresistible Charm
  • Perfect for home cooks with minimal baking experience, this recipe walks you through simple steps that guarantee a delicious dessert without complex techniques.
  • Crafted in under an hour, this pie delivers maximum flavor with minimal time investment, making it ideal for spontaneous sweet cravings or last-minute gatherings.
  • The combination of creamy coconut custard and a flaky crust creates a universally appealing dessert that satisfies both kids and adults, ensuring happy faces around the table.
  • Equally stunning as a casual family dinner finale or an elegant potluck contribution, this coconut cream pie adapts to any social setting with its classic, comforting appeal.

Ingredients That Bring Coconut Cream Pie to Life

Base Ingredients:
  • Coconut Milk, Whole Milk: Creamy liquid base that creates the rich, smooth texture of the pie filling.
  • Sugar: Adds sweetness and helps thicken the custard.
  • Egg Yolks: Provide richness and help set the custard's consistency.
  • Cornstarch: Essential thickening agent for creating a smooth, stable pie filling.
  • Salt: Enhances overall flavor and balances sweetness.
Flavoring Ingredients:
  • Vanilla Extract: Adds warm, classic flavor to complement the coconut.
  • Shredded Coconut: Provides texture and intense coconut flavor throughout the filling.
Crust Ingredient:
  • Pie Crust: Pre-baked base that holds the creamy coconut filling.

How to Make a Smooth and Rich Coconut Cream Pie

Step 1: Cook Custard Base

Place the saucepan over medium heat and start whisking continuously. Keep stirring to prevent any burning or sticking at the bottom of the pan. Watch the mixture carefully as it transforms from liquid to a thick, bubbling custard. This process takes around 7-8 minutes, so stay patient and keep whisking.

Step 2: Enhance Custard Flavor

Remove the pan from heat and introduce two exciting ingredients:
  • Vanilla extract
  • Shredded coconut

Stir these through the hot custard, allowing the flavors to meld beautifully.

Step 3: Fill Pie Crust

Pour the luscious coconut custard into your pre-baked pie crust. Use a spatula to spread the filling evenly, creating a smooth, inviting surface that promises deliciousness in every slice.

Tips to Nail the Coconut Cream Filling

  • Select Full-Fat Coconut Milk: Choose high-quality, full-fat coconut milk for a richer, more intense coconut flavor and creamier texture in your pie filling.
  • Whisk Constantly: Continuously whisk the custard mixture while cooking to prevent lumps and ensure a smooth, silky consistency throughout the filling.
  • Toast Coconut Topping: Lightly toast shredded coconut before sprinkling on top for an enhanced nutty flavor and beautiful golden-brown color that adds extra crunch.
  • Chill Thoroughly: Refrigerate the pie for at least 4 hours or overnight to allow the custard to set completely and develop deeper flavors.
  • Prevent Weepy Filling: Avoid overheating the custard and allow it to cool slightly before adding to the pie crust to prevent a watery or separated filling.

How to Store Coconut Cream Pie Properly

  • Store the coconut cream pie in an airtight container or cover tightly with plastic wrap. Keep chilled for up to 3-4 days to maintain its creamy texture and fresh flavor.
  • Wrap the entire pie or individual slices in plastic wrap and aluminum foil. Freeze for up to 2 months. Thaw overnight in the refrigerator before serving.
  • Gently warm individual slices in the microwave for 10-15 seconds. For best results, let the pie sit at room temperature for 15 minutes before serving to soften the custard.
  • Place a paper towel loosely over the pie when storing to absorb excess moisture and keep the crust crisp.

Drinks and Sweets That Go Great with This Pie

  • Pair this creamy coconut pie with a chilled coconut mojito, blending white rum, fresh mint, and a splash of coconut water for a refreshing tropical twist.
  • Serve alongside a bold, dark espresso or cappuccino, where the rich coffee notes beautifully cut through the pie's sweet, creamy texture.
  • Select a glass of slightly sweet Moscato d'Asti or a crisp Riesling, whose light, fruity undertones complement the coconut's delicate flavor profile.
  • Drizzle some warm salted caramel sauce over a slice, creating a decadent layer of complexity that enhances the pie's creamy coconut base.

Unique Flavor Ideas for Coconut Cream Pie

  • Tropical Fruit Fusion: Replace shredded coconut with diced mango, pineapple, and passion fruit for a vibrant island-inspired filling.
  • Dairy-Free Delight: Swap whole milk with almond milk and use coconut cream instead of regular coconut milk for a lactose-free version.
  • Gluten-Free Comfort: Substitute traditional pie crust with a gluten-free graham cracker crust made from certified gluten-free graham crackers and melted butter.
  • Vegan Coconut Dream: Use silken tofu instead of egg yolks, coconut cream for richness, and plant-based milk to create a completely vegan coconut cream pie that's creamy and indulgent.
Print
clock clock iconcutlery cutlery iconflag flag iconfolder folder iconinstagram instagram iconpinterest pinterest iconfacebook facebook iconprint print iconsquares squares iconheart heart iconheart solid heart solid icon
Coconut Cream Pie Recipe

Coconut Cream Pie Recipe


5 Stars 4 Stars 3 Stars 2 Stars 1 Star

4.8 from 24 reviews

  • Total Time: 4 hours 20 minutes
  • Yield: 8 1x

Description

Heavenly Coconut Cream Pie transports sweet dreams from tropical kitchens straight to dessert plates. Luxurious layers of silky coconut custard, flaky pastry, and billowing whipped cream promise pure indulgence with each creamy, dreamy bite you’ll savor.


Ingredients

Scale

Main Ingredients:

  • 4 large egg yolks
  • 400 ml (13.5 ounces) coconut milk
  • 300 ml whole milk
  • 1 pre-baked 9-inch pie crust

Sweeteners and Thickeners:

  • 150 g (¾ cup) granulated sugar
  • 60 g (¼ cup) cornstarch
  • 2 tablespoons powdered sugar
  • 50 g (½ cup) sweetened shredded coconut

Flavor Enhancers and Garnish:

  • ¼ teaspoon salt
  • 1 teaspoon vanilla extract
  • ½ teaspoon vanilla extract
  • 240 ml (1 cup) heavy whipping cream
  • 30 g (¼ cup) toasted coconut flakes

Instructions

  1. Combine coconut milk, whole milk, sugar, egg yolks, cornstarch, and salt in a saucepan, creating a smooth, creamy base for the pie filling.
  2. Place the saucepan over medium heat, continuously whisking the mixture to prevent scorching and ensure a silky texture.
  3. Monitor the mixture closely as it gradually thickens and begins to bubble, stirring consistently to maintain an even consistency.
  4. Once the custard reaches a pudding-like thickness and coats the back of a spoon, remove the saucepan from the heat.
  5. Gently fold in vanilla extract and shredded coconut, distributing the flavors evenly throughout the creamy custard.
  6. Carefully transfer the luscious filling into the pre-baked pie crust, using a spatula to spread it evenly and create a smooth, tempting surface.
  7. Allow the pie to cool completely at room temperature, then refrigerate for at least 2-3 hours to set the custard and enhance the flavor profile.

Notes

  • Swap whole milk with coconut milk for an intensely rich, dairy-free version that maintains the creamy texture and enhances coconut flavor.
  • Prevent lumpy custard by continuously whisking and ensuring low, steady heat during cooking to help cornstarch activate smoothly.
  • Toast shredded coconut beforehand to deepen its nutty flavor and add delightful crunch throughout the pie’s filling.
  • Use a digital thermometer to check custard temperature around 175-180°F for perfect thickening without risk of scrambling egg yolks.
  • Prep Time: 20 minutes
  • Cook Time: 4 hours
  • Category: Desserts
  • Method: Simmering
  • Cuisine: American

Nutrition

  • Serving Size: 8
  • Calories: 360
  • Sugar: 23 g
  • Sodium: 150 mg
  • Fat: 26 g
  • Saturated Fat: 16 g
  • Unsaturated Fat: 8 g
  • Trans Fat: 0 g
  • Carbohydrates: 32 g
  • Fiber: 1 g
  • Protein: 4 g
  • Cholesterol: 130 mg
Daves Miller

Daves Miller

Contributing Chef & Culinary Educator

Expertise

  • American Southern cuisine with a modern twist.
  • Instruction in culinary fundamentals and advanced techniques.
  • Development of recipes that highlight seasonal and local produce.​
  • Mastery of artisanal bread and pastry techniques, from laminated doughs to decorative sugar artistry.

Education

Sullivan University, Louisville, Kentucky

  • Degree: Associate of Science Degree in Culinary Arts
  • Focus: Specialized in cooking techniques and culinary sciences, hands‑on externships, professional kitchen lab training, and career preparation for restaurants, entrepreneurship, and global culinary opportunities.

White Mountains Community College, Berlin, New Hampshire

  • Program: Baking and Pastry Arts degree
  • Focus: Specialized in comprehensive baking and pastry arts, including bread making, artisan breads, cake decorating and design, chocolates, confections, and decorative centerpieces; product development and baking theory; and career preparation for baker and pastry chef roles in many places.

Daves is the friendly face guiding you through flavorful, fuss-free recipes at Picture Perfect Meals. 

He studied culinary arts at Sullivan University and embraced Baking and Pastry Arts at White Mountains Community College. Daves specializes in comforting meals with vibrant flavors, highlighting fresh, seasonal ingredients.

Leave a Reply

Your email address will not be published. Required fields are marked *

Recipe rating 5 Stars 4 Stars 3 Stars 2 Stars 1 Star