Cream Cheese Squares Recipe

Cream Cheese Squares Recipe Fluffiest Sweet Dream

Crafting delectable cream cheese squares feels like unwrapping a sweet surprise in your kitchen.

These delightful treats combine smooth textures with irresistible flavors that dance across your palate.

Rich cream cheese blends perfectly with buttery layers, creating a mouthwatering experience.

Soft and creamy, each bite promises a moment of pure indulgence.

Simple ingredients transform into an elegant dessert that impresses without complicated techniques.

Home bakers can effortlessly master this recipe with minimal kitchen skills.

Nothing compares to the joy of sharing these delectable squares with people you love.

Come savor every delicious moment and let your taste buds celebrate!

Cream Cheese Squares That Disappear Fast at Any Party

  • Perfect for busy home bakers wanting a delightful dessert without complex techniques.
  • Requires just a few pantry staples like cream cheese, flour, and sugar, making preparation super straightforward and budget-friendly.
  • Delivers creamy, sweet squares that appeal to all ages, from kids to grandparents, ensuring everyone gets a tasty treat they'll love.
  • Easily adaptable for different occasions like potlucks, family gatherings, or casual weekend snacking, making these squares a reliable go-to dessert.

What You’ll Need for Cream Cheese Squares

Crust Ingredients:
  • All-Purpose Flour: Provides the base structure for the buttery foundation of the dessert. Best when using fresh, sifted flour.
  • Powdered Sugar: Adds sweetness and helps create a delicate crust texture. Light and fine varieties work best.
Filling Ingredients:
  • Cream Cheese: Creates the rich, creamy center of the dessert. Full-fat cream cheese recommended for best flavor and texture.
  • Granulated Sugar: Sweetens the cream cheese filling. Standard white sugar provides ideal consistency.
  • Large Egg: Binds the filling and helps create a smooth, stable texture. Room temperature egg integrates more easily.
Flavor Enhancers:
  • Vanilla Extract: Adds depth and warmth to the overall flavor profile. Pure vanilla extract preferred over imitation varieties.
  • Unsalted Butter: Helps bind the crust and provides rich flavor. Softened butter mixes more smoothly into the dough.

Bake Cream Cheese Squares with Clean Layers

Step 1: Craft the Delicious Base

  • Warm up the oven to 350F (175C)
  • Grab an 8×8-inch baking pan
  • Grease the pan or line with parchment paper
  • Mix flour and powdered sugar in a bowl
  • Add softened butter and blend until dough forms
  • Press dough evenly into pan bottom
  • Bake crust for 12-15 minutes until golden
  • Pull out and let cool briefly

Step 2: Whip Up Creamy Filling

  • Grab a fresh mixing bowl
  • Blend cream cheese and granulated sugar
  • Beat until super smooth and silky
  • Drop in egg and vanilla extract
  • Mix until completely combined
  • Pour filling over baked crust
  • Spread evenly with spatula

Step 3: Bake to Perfection

  • Return pan to oven
  • Bake 20-25 minutes
  • Look for set filling with golden edges
  • Remove from oven
  • Let squares cool completely in pan

Step 4: Slice and Savor

  • Cut into 16 squares or larger pieces
  • Chill before serving
  • Enjoy your dreamy dessert!

Tips for Getting the Right Balance in Cream Cheese Squares

  • Chill Before Cutting: Refrigerate the cream cheese squares for at least an hour to ensure clean, precise cuts and enhance the flavor's richness.
  • Soften Ingredients Properly: Let cream cheese and butter sit at room temperature for 30-45 minutes to achieve a smooth, lump-free mixture that blends easily.
  • Prevent Cracking: Avoid overbaking by removing the dessert from the oven when the center is still slightly jiggly, as it will continue setting while cooling.
  • Customize Flavor Variations: Experiment with different extracts like almond or lemon, or add a swirl of fruit preserves on top for a personalized twist.
  • Line Pan Perfectly: Use parchment paper with overhanging edges for easy removal and clean slicing of the cream cheese squares.

Store and Reheat Cream Cheese Squares Without Drying Out

  • Store leftovers in an airtight container for up to 5 days, keeping them in the refrigerator to maintain freshness and prevent spoilage.
  • Wrap the cream cheese squares tightly with plastic wrap or aluminum foil to protect them from absorbing other food odors and maintain their delicate texture.
  • Warm individual squares briefly in the microwave for 10-15 seconds at 50% power, checking to avoid overheating and preventing the cream cheese from becoming rubbery.
  • For the best taste and texture, enjoy these squares cold directly from the refrigerator, as they tend to lose their creamy consistency when completely at room temperature.

Treats That Work with Cream Cheese Squares

  • Brew a smooth medium roast or vanilla-infused latte that balances the richness of the cream cheese squares with its subtle, warm undertones.
  • Serve alongside raspberry or strawberry compote to add a bright, tangy contrast that cuts through the creamy dessert's sweetness.
  • Select a chilled Moscato or sweet Riesling that matches the dessert's delicate texture and provides a light, crisp finish to each bite.
  • Dust squares with powdered sugar or sprinkle toasted almond slivers to add a delicate crunch and enhanced visual appeal to the dessert.

Flavor Ideas for Changing Up Cream Cheese Squares

  • Gluten-Free Version: Replace wheat flour with almond flour or gluten-free flour blend for a celiac-friendly dessert that maintains the same creamy texture and rich flavor.
  • Vegan Cream Cheese Option: Substitute dairy cream cheese with plant-based cream cheese and use coconut oil instead of butter, and replace the egg with a flax egg or applesauce to create a dairy-free alternative.
  • Lemon Cheesecake Squares: Add fresh lemon zest and lemon juice to the cream cheese filling for a bright, tangy version that enhances the classic dessert with a refreshing citrus note.
  • Low-Sugar Alternative: Use monk fruit sweetener or stevia in place of granulated sugar and reduce the overall sweetness while maintaining the dessert's creamy consistency and delectable profile.
Print
clock clock iconcutlery cutlery iconflag flag iconfolder folder iconinstagram instagram iconpinterest pinterest iconfacebook facebook iconprint print iconsquares squares iconheart heart iconheart solid heart solid icon
Cream Cheese Squares Recipe

Cream Cheese Squares Recipe


5 Stars 4 Stars 3 Stars 2 Stars 1 Star

4.8 from 34 reviews

  • Total Time: 45 minutes
  • Yield: 12 1x

Description

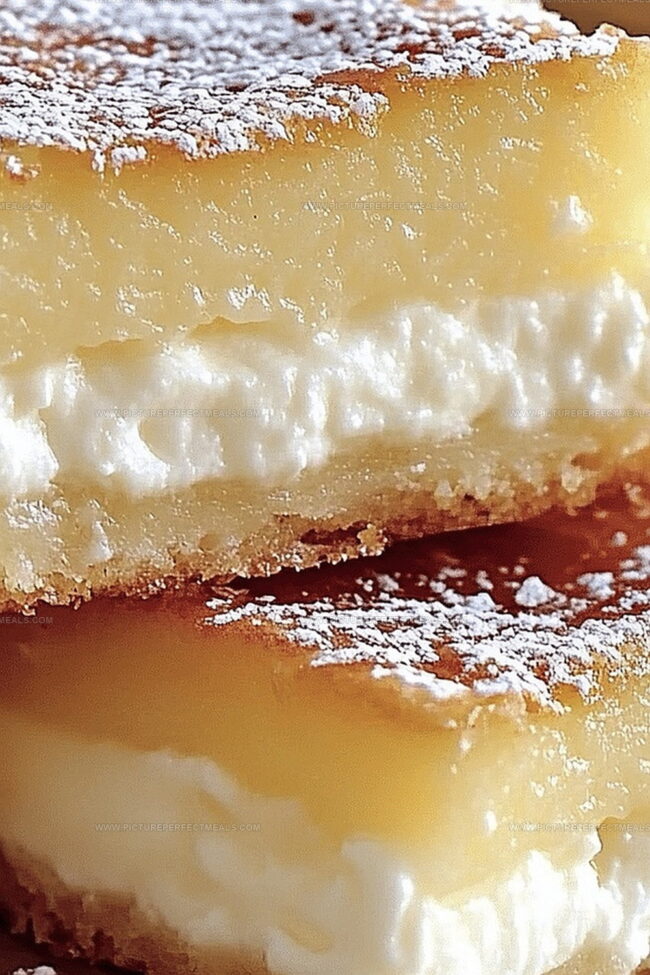
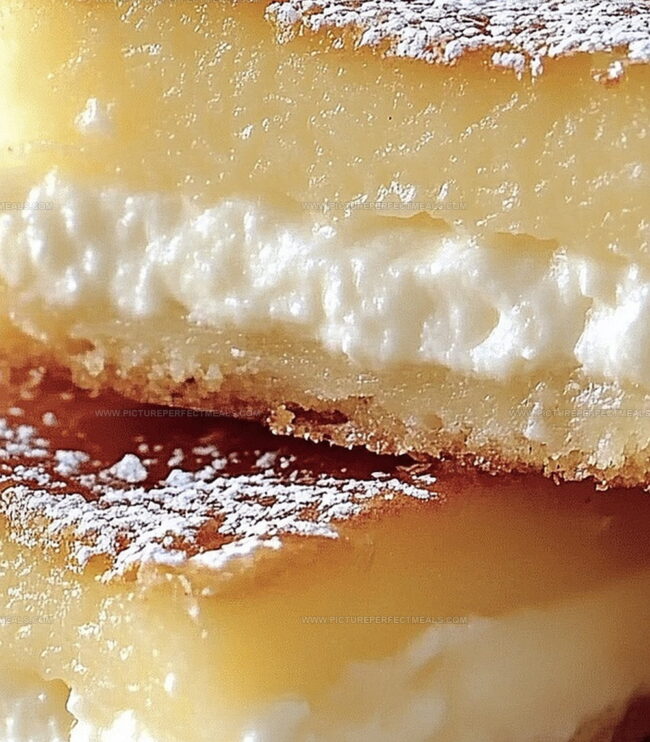
Classic cream cheese squares bring together creamy richness and buttery graham cracker crust in a delightful dessert. Smooth, tangy layers meld perfectly, offering you a simple yet irresistible treat that satisfies sweet cravings with minimal effort.


Ingredients

Scale

Main Ingredients:

  • 2 cans (8 ounces each) refrigerated crescent roll dough
  • 16 ounces (453 grams) cream cheese, softened
  • ½ cup (1 stick) (113 grams) unsalted butter, melted

Sweeteners and Flavoring:

  • 1 cup (200 grams) granulated sugar
  • ¼ cup (50 grams) granulated sugar (for topping)
  • 1 teaspoon vanilla extract

Spice:

  • 1 teaspoon ground cinnamon

Instructions

  1. Craft a buttery foundation by blending flour and powdered sugar with softened butter, creating a cohesive dough that will serve as the delectable base for these cream cheese squares.
  2. Transfer the prepared dough into a meticulously greased 8×8-inch baking vessel, pressing firmly and evenly to establish a uniform crust layer that promises a delightful crumbly texture.
  3. Gently toast the crust in a preheated 350F (175C) oven until it develops a light golden hue, approximately 12-15 minutes, which will provide a sturdy platform for the luscious cream cheese topping.
  4. While the crust rests and cools, whip the cream cheese and granulated sugar into a silky, smooth consistency that promises a luxurious mouthfeel.
  5. Incorporate the egg and vanilla extract into the cream cheese mixture, blending until a uniform, velvety batter emerges that will transform into a decadent filling.
  6. Cascade the cream cheese mixture over the slightly cooled crust, utilizing a spatula to distribute the filling evenly and create a pristine, unblemished surface.
  7. Return the pan to the oven, allowing the filling to bake and set, developing a delicate golden perimeter and a firm, creamy center within 20-25 minutes.
  8. Permit the baked delicacy to cool completely within the pan, which will help the filling stabilize and ensure clean, precise cutting lines.
  9. Once thoroughly cooled, slice into 16 elegant squares or adjust the size to suit personal preference, revealing the harmonious layers of buttery crust and creamy filling.
  10. For optimal enjoyment, refrigerate the squares before serving, enhancing their flavor and providing a refreshingly smooth dessert experience.

Notes

  • Ensure butter and cream cheese are at room temperature for smooth, lump-free mixing and better incorporation of ingredients.
  • For a cleaner cut, refrigerate the squares for at least an hour before slicing, which helps the filling set and creates neat, sharp edges.
  • Experiment with flavor variations by adding lemon zest, cinnamon, or a swirl of fruit preserves on top of the cream cheese filling for a personalized touch.
  • Use a gluten-free flour blend to make this recipe suitable for those with gluten sensitivities, maintaining the same delicious texture and taste.
  • Prep Time: 15 minutes
  • Cook Time: 30 minutes
  • Category: Snacks, Desserts
  • Method: Baking
  • Cuisine: American

Nutrition

  • Serving Size: 12
  • Calories: 246
  • Sugar: 20 g
  • Sodium: 250 mg
  • Fat: 14 g
  • Saturated Fat: 8 g
  • Unsaturated Fat: 4 g
  • Trans Fat: 0 g
  • Carbohydrates: 29 g
  • Fiber: 0 g
  • Protein: 3 g
  • Cholesterol: 38 mg
Daves Miller

Daves Miller

Contributing Chef & Culinary Educator

Expertise

  • American Southern cuisine with a modern twist.
  • Instruction in culinary fundamentals and advanced techniques.
  • Development of recipes that highlight seasonal and local produce.​
  • Mastery of artisanal bread and pastry techniques, from laminated doughs to decorative sugar artistry.

Education

Sullivan University, Louisville, Kentucky

  • Degree: Associate of Science Degree in Culinary Arts
  • Focus: Specialized in cooking techniques and culinary sciences, hands‑on externships, professional kitchen lab training, and career preparation for restaurants, entrepreneurship, and global culinary opportunities.

White Mountains Community College, Berlin, New Hampshire

  • Program: Baking and Pastry Arts degree
  • Focus: Specialized in comprehensive baking and pastry arts, including bread making, artisan breads, cake decorating and design, chocolates, confections, and decorative centerpieces; product development and baking theory; and career preparation for baker and pastry chef roles in many places.

Daves is the friendly face guiding you through flavorful, fuss-free recipes at Picture Perfect Meals. 

He studied culinary arts at Sullivan University and embraced Baking and Pastry Arts at White Mountains Community College. Daves specializes in comforting meals with vibrant flavors, highlighting fresh, seasonal ingredients.

Leave a Reply

Your email address will not be published. Required fields are marked *

Recipe rating 5 Stars 4 Stars 3 Stars 2 Stars 1 Star