Crispy Air Fryer Chicken Rissoles Recipe: Golden Bites of Joy!
Weeknight dinners demand quick, delicious solutions that pack serious flavor into air fryer chicken rissoles.
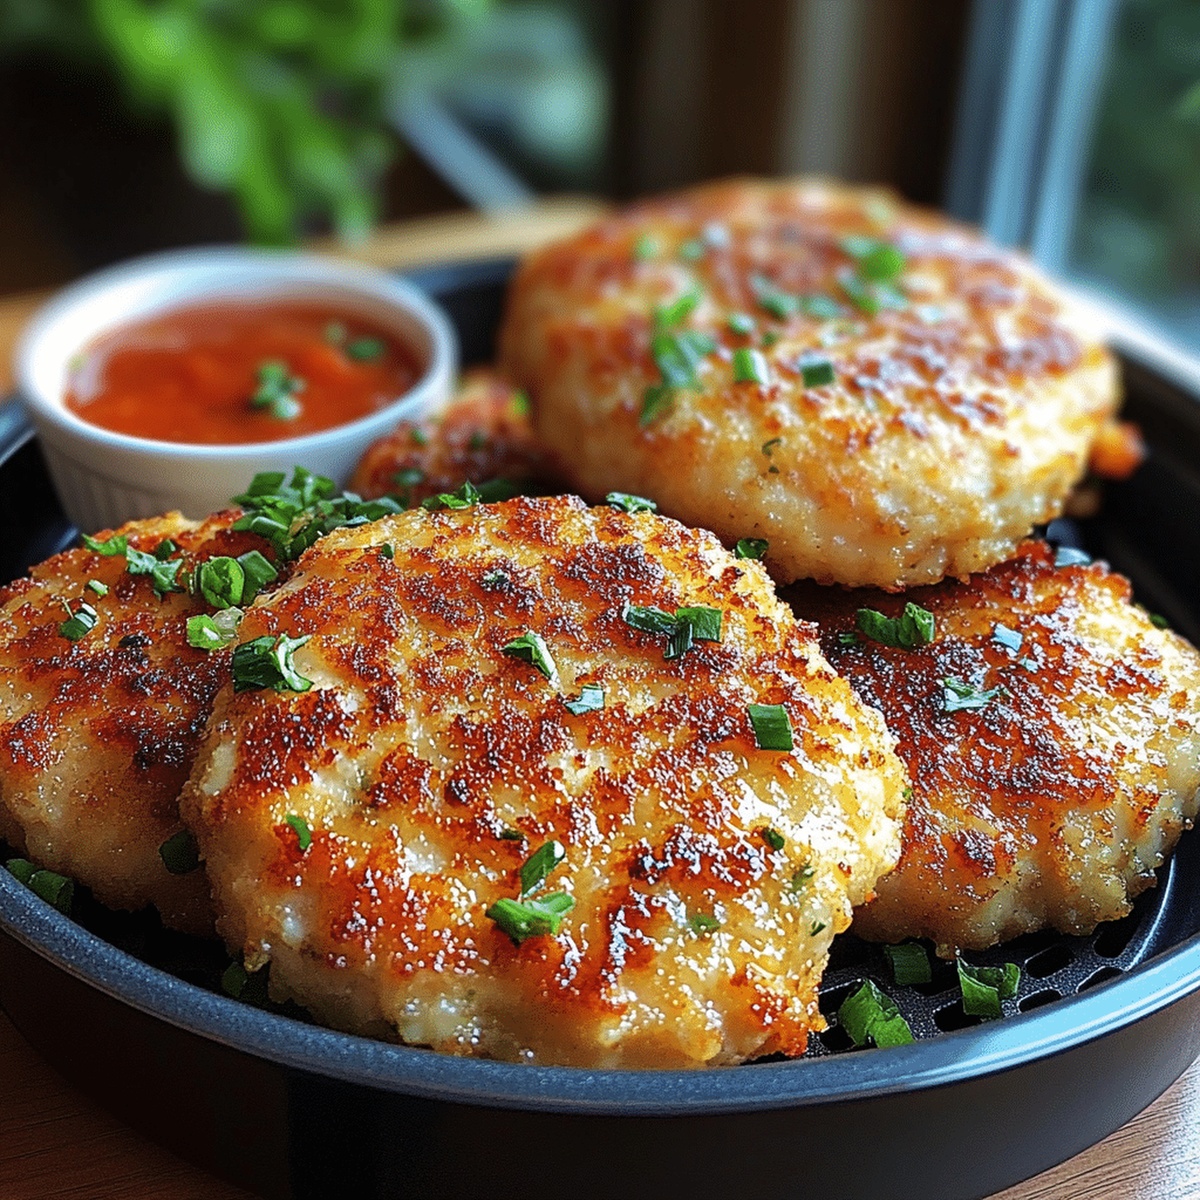
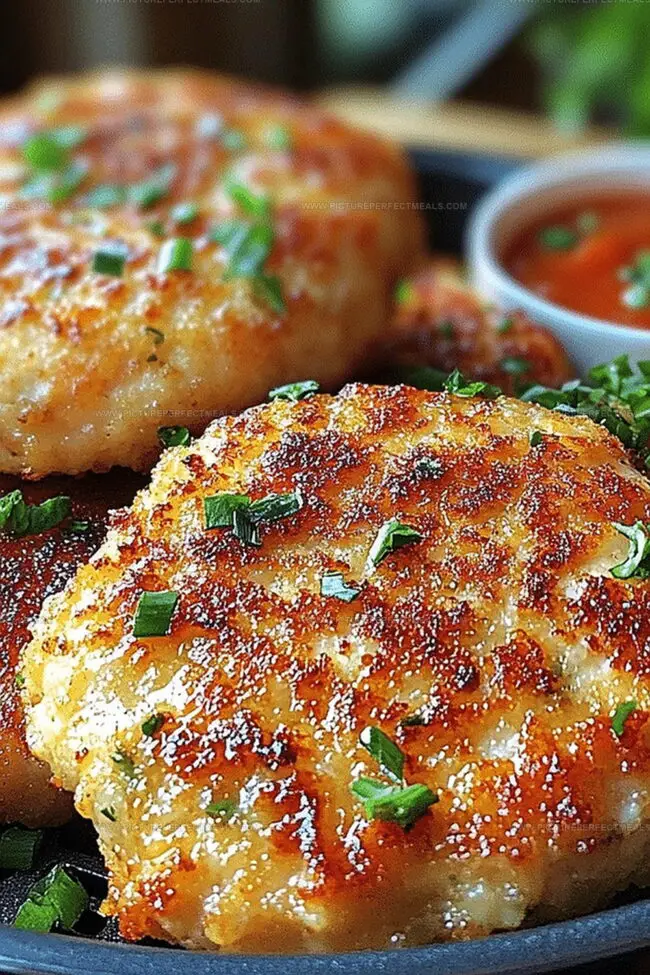
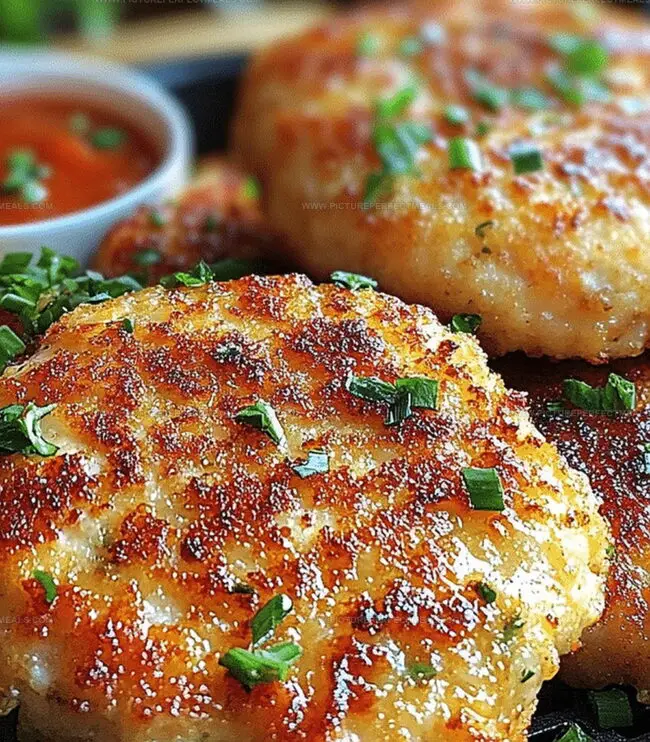
These golden-brown parcels of seasoned meat deliver a satisfying crunch without excess oil.
Each bite promises a perfect blend of tender chicken and crispy exterior.
The air fryer works magic, transforming simple ingredients into a meal that sparks excitement at the dinner table.
Herbs and spices mingle with ground chicken, creating a mouthwatering experience that feels both comforting and gourmet.
Minimal effort yields maximum taste, making these rissoles a weeknight champion.
Jump into this simple recipe and surprise your taste buds with a delightful culinary adventure.
Quick Recipe Overview
Air Fryer Chicken Rissoles Ingredient List
For Protein Base:For Flavor Enhancers:For Binding and Texture:Tools That Make Chicken Rissoles in the Air Fryer
How to Cook Chicken Rissoles That Stay Juicy
Mix ground chicken with aromatic herbs, crispy breadcrumbs, and zesty seasonings in a large bowl. Blend ingredients thoroughly until perfectly combined.
Gently form mixture into compact rounds using clean hands. Make sure each patty is uniform in size for even cooking.
Crank air fryer to 375°F and let it warm up quickly. Ensure basket is ready for delicious cooking.
Spritz basket with olive oil spray. Place chicken rounds in single layer without crowding. Give a light spray on top of rounds. Cook 10-12 minutes, turning midway. Watch for beautiful golden-brown exterior and ensure internal temperature hits 165°F.
Transfer crispy rounds to serving plate. Pair with tangy dipping sauce, fresh salad, or creamy mashed potatoes. Enjoy your homemade culinary creation!
Ideas to Season or Customize Chicken Rissoles
Serve Rissoles with Salad, Sauce, or Veggies
Tips for Storing Air-Fried Rissoles Just Right
Print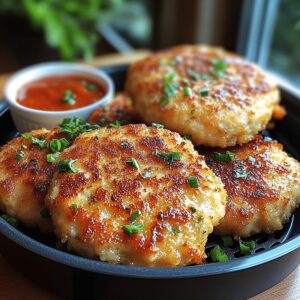
Crispy Air Fryer Chicken Rissoles Recipe
- Total Time: 22 minutes
- Yield: 5 1x
Description
Brazilian chicken rissoles sizzle with zesty flavors in this quick air fryer recipe. Home cooks can enjoy crispy, golden appetizers packed with herbs and spices in minutes.
Ingredients
- 1 lb (500 g) ground chicken
- 1 egg
- ½ cup breadcrumbs (gluten-free option available)
- 2 tbsps fresh parsley, chopped (or 1 tsp dried parsley)
- 1 small onion, finely grated or minced
- 1 small carrot, finely grated
- 2 garlic cloves, minced
- 1 tsp Worcestershire sauce
- ½ tsp smoked paprika
- ½ tsp salt
- ¼ tsp black pepper
- Olive oil spray
Instructions
- Preparation: Combine ground chicken, breadcrumbs, onion, carrot, egg, garlic, parsley, Worcestershire sauce, paprika, salt, and pepper in a large mixing bowl. Mix thoroughly until ingredients are uniformly distributed and form a cohesive mixture.
- Forming: Craft uniform oval-shaped patties or compact spheres, approximately two inches in diameter. Ensure consistent sizing to promote even cooking and optimal texture.
- Air Fryer Setup: Preheat air fryer to 375°F (190°C), allowing the appliance to reach full temperature potential for ideal cooking performance.
- Cooking Preparation: Lightly spray air fryer basket with olive oil. Arrange rissoles in a single layer with minimal spacing between them. Gently mist rissole surfaces with additional olive oil to enhance exterior crispness.
- Cooking Process: Insert basket into preheated air fryer. Cook for 10-12 minutes, rotating midway to ensure comprehensive browning and thorough internal cooking. Verify doneness by confirming internal temperature reaches 165°F (74°C) using a meat thermometer.
- Serving: Immediately transfer golden-brown rissoles to serving plate. Complement with preferred condiment, fresh side salad, or creamy mashed potatoes for a complete and satisfying meal experience.
Notes
- Prevent Sticking Technique: Lightly coat the air fryer basket with olive oil spray to ensure easy rissole removal and create a crispy exterior without excessive oil.
- Consistent Size Matters: Shape rissoles uniformly to guarantee even cooking and prevent undercooked or overcooked sections during air frying.
- Moisture Balance Critical: Mix ingredients gently to maintain chicken’s moisture while avoiding over-mixing, which can lead to dense, tough rissoles.
- Temperature Precision: Use a meat thermometer to confirm internal temperature reaches 165°F, ensuring chicken is safely cooked without becoming dry or rubbery.
- Prep Time: 10 minutes
- Cook Time: 12 minutes
- Category: Dinner, Snacks
- Method: Frying
- Cuisine: Australian
Nutrition
- Serving Size: 5
- Calories: 290
- Sugar: 2 g
- Sodium: 350 mg
- Fat: 9 g
- Saturated Fat: 2 g
- Unsaturated Fat: 7 g
- Trans Fat: 0 g
- Carbohydrates: 20 g
- Fiber: 1 g
- Protein: 30 g
- Cholesterol: 90 mg
Jenna Hartley
Founder & Recipe Creator
Expertise
Education
Box Hill Institute, Melbourne
William Angliss Institute, Melbourne
Jenna is the heart of Picture Perfect Meals, turning simple ingredients into beautiful, easy‑to‑make dishes.
Growing up around family meals in Melbourne, she trained at Box Hill Institute and then perfected her pastry skills at William Angliss Institute. She loves mixing classic Australian flavors with fresh ideas to keep cooking fun and stress‑free.