Crunchy Coated Ice-Cream Spheres: Air Fryer Magic Recipe
Dessert magic happens when crispy air fryer ice cream balls meet a perfect golden crunch.
These delightful treats blend creamy smoothness with an irresistible exterior that cracks beautifully.
Cold meets hot in an unexpected dance of temperatures and textures.
Chocolate lovers and sweet tooth enthusiasts will adore this simple yet impressive dessert.
The coating creates a stunning contrast with the chilled center, making each bite a delightful surprise.
Comfort and indulgence come together in these delectable spheres of pure happiness.
Prepare to elevate your dessert game with this mouthwatering recipe that promises pure bliss in every single bite.
Quick Recipe Overview
Easy Air Fryer Ice-Cream Balls Ingredient Roundup
For Frozen Base:For Crispy Coating:For Binding and Preparation:Tools for Making Ice-Cream Balls in the Air Fryer
How to Cook-Coated Ice-Cream Balls at Home
Grab your favorite ice cream and form perfectly round balls using a scoop. Place these frosty orbs on a lined tray and stash them in the freezer overnight until they’re rock solid.
Crush cornflakes into fine crumbs and mix with sweet spices. Whip eggs into a smooth liquid for dunking. These will create a delightful crispy shell.
Pull frozen spheres from the freezer. Quickly dunk each ball into egg wash, then roll thoroughly in cornflake mixture. Add a double coating for extra crunch. Return to freezer for a quick chill.
Set air fryer to blazing hot temperature around 400F. Let it heat up completely before cooking.
Spritz air fryer basket with non-stick spray. Carefully place ice cream balls without crowding. Give a light spray on top. Cook until exterior turns golden and crispy, about 12 minutes.
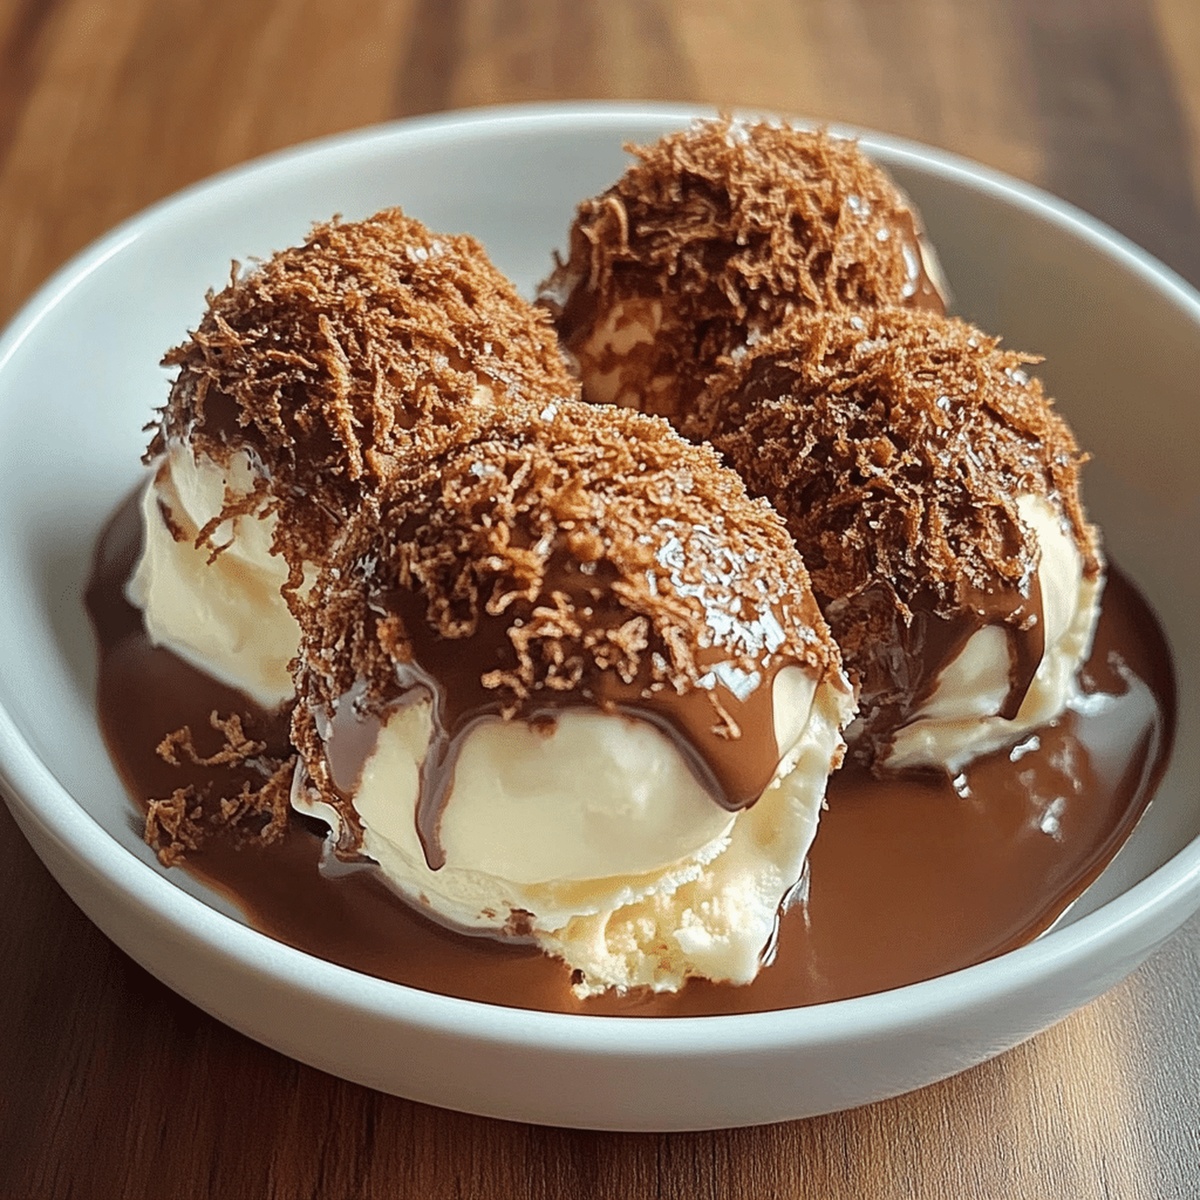
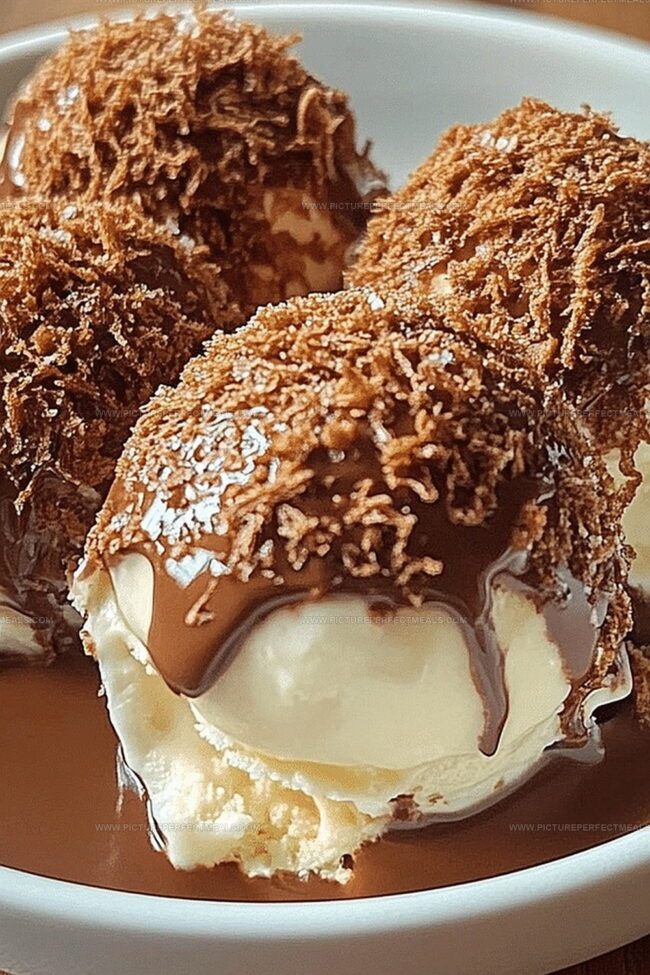
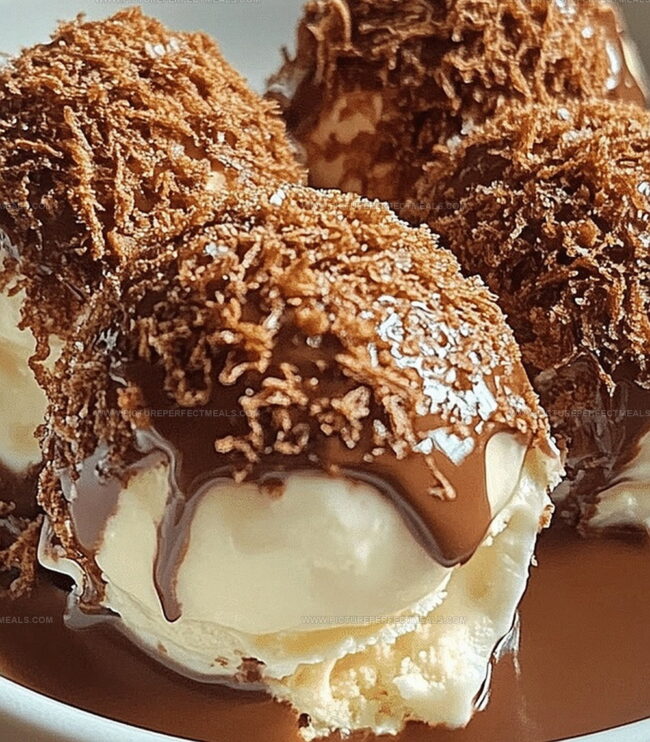
Gently remove golden-brown treats. Top with decadent sauces like chocolate or caramel. Enjoy immediately while crispy and cold.
Flavor Additions for More Ice Cream Fun
Serve Ice-Cream Balls as a Showstopper Dessert
Keep Ice-Cream Balls Frozen Yet Crunchy
Print
Crispy Air Fryer Ice-Cream Balls Recipe
- Total Time: 22 minutes
- Yield: 5 1x
Description
Crispy homemade ice-cream balls emerge as a delightful dessert that blends creamy vanilla with a golden crunchy exterior. Chilled treats surprise palates with minimal effort and maximum satisfaction for home cooks seeking quick indulgence.
Ingredients
- 2 large eggs
- 1 pint (500 ml) ice cream of choice
- 2 cups crushed cornflakes or panko breadcrumbs
- ½ cup granulated sugar
- 1 tsp ground cinnamon
- Non-stick cooking spray
Instructions
- Preparation: Form precise ice cream spheres using a scoop, place on a parchment-lined tray, and freeze solidly for 12 hours to achieve maximum firmness.
- Coating Creation: Combine crushed cornflakes with sugar and cinnamon in one bowl, whisk eggs in another, creating complementary textures for an irresistible exterior.
- Initial Dipping: Remove frozen spheres quickly, dunk thoroughly in whisked eggs, then roll comprehensively in cornflake mixture, ensuring complete and even coverage with gentle, consistent pressure.
- Double Coating: Repeat coating process for enhanced crunchiness, then return spheres to freezer for an additional 30-minute hardening period.
- Air Fryer Setup: Preheat air fryer to 400F for 35 minutes, ensuring optimal cooking environment.
- Positioning: Lightly spray air fryer basket with non-stick spray, arrange coated spheres without touching, and mist surfaces with cooking spray for extra crispness.
- Cooking Process: Air fry for approximately 12 minutes, watching carefully until exterior transforms into a golden, crisp shell while preserving the ice cream’s frozen core.
- Serving: Carefully remove transformed treats and plate immediately, garnishing with decadent accompaniments like chocolate drizzle, caramel sauce, or whipped cream for a luxurious presentation.
Notes
- Freeze Thoroughly: Ensure ice cream balls are frozen solid for 12 hours to prevent melting during coating and air frying, maintaining structural integrity.
- Coating Technique: Apply cornflake mixture twice for extra crunchiness, pressing gently to create a uniform, adherent exterior that’ll crisp beautifully.
- Temperature Precision: Preheat air fryer exactly at 400F and monitor closely to achieve golden-brown crust without compromising the ice cream’s frozen core.
- Quick Handling: Work swiftly during coating and air frying stages to prevent ice cream from softening, which could compromise the crispy shell and overall texture.
- Prep Time: 2 minutes
- Cook Time: 20 minutes
- Category: Desserts, Snacks
- Method: Frying
- Cuisine: American
Nutrition
- Serving Size: 5
- Calories: 410
- Sugar: 20 g
- Sodium: 150 mg
- Fat: 15 g
- Saturated Fat: 7 g
- Unsaturated Fat: 8 g
- Trans Fat: 0 g
- Carbohydrates: 63 g
- Fiber: 2 g
- Protein: 6 g
- Cholesterol: 120 mg
Jenna Hartley
Founder & Recipe Creator
Expertise
Education
Box Hill Institute, Melbourne
William Angliss Institute, Melbourne
Jenna is the heart of Picture Perfect Meals, turning simple ingredients into beautiful, easy‑to‑make dishes.
Growing up around family meals in Melbourne, she trained at Box Hill Institute and then perfected her pastry skills at William Angliss Institute. She loves mixing classic Australian flavors with fresh ideas to keep cooking fun and stress‑free.