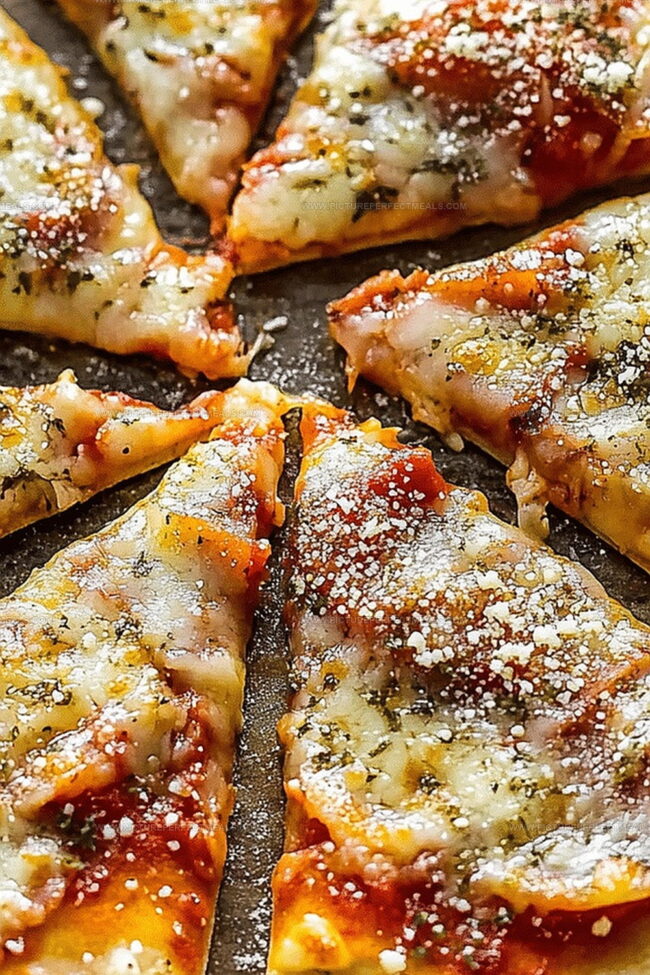
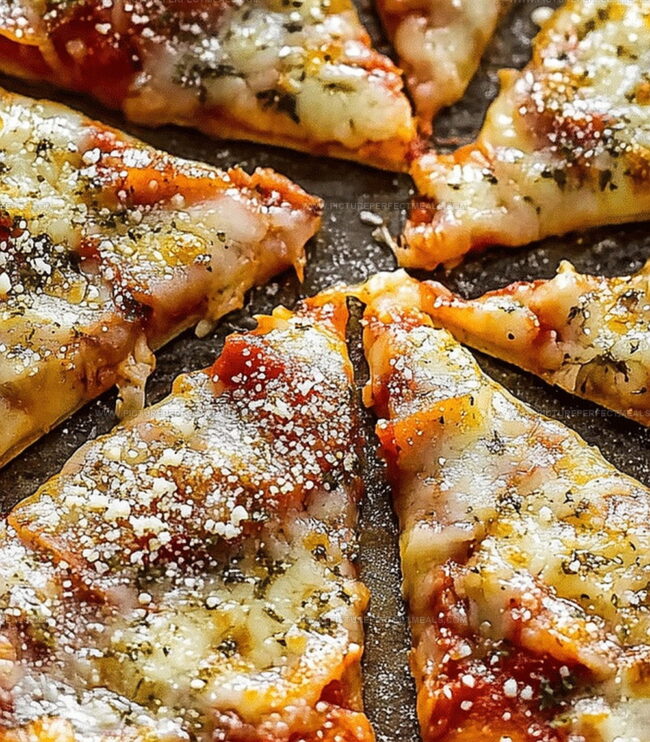
Weeknight dinners take a delightful turn with this air fryer tortilla pizza that combines simplicity and flavor in one quick meal.
The crispy tortilla base creates a perfect canvas for melted cheese and your favorite toppings.
Transforming a humble tortilla into a mouthwatering pizza happens in minutes with minimal effort.
You can customize each pizza to suit different taste preferences effortlessly.
The air fryer ensures a crunchy texture that traditional ovens struggle to achieve.
Layers of cheese, sauce, and toppings meld together into a delectable treat that satisfies pizza cravings without the hassle of making dough from scratch.
Prepare to savor every crispy, cheesy bite of this game-changing meal.
Quick Recipe Overview
Prep Time: 3 minutes
Cook Time: 5-7 minutes
Total Time: 10 minutes
Calories: 570 kcal
Servings: 1
Build Your Air Fryer Tortilla Pizza Base
For Base:
Tortilla: Crispy, thin base that turns golden and crunchy when air fried, choose soft flour tortillas for best results.
For Sauce:
Pizza Sauce: Vibrant, tangy base layer that adds rich tomato flavor, select a smooth jarred sauce or homemade marinara.
For Toppings:
Shredded Mozzarella Cheese: Melts beautifully and creates that classic stretchy pizza texture, opt for fresh, high-moisture cheese.
Pepperoni: Classic pizza topping that crisps up wonderfully in the air fryer, look for thin-cut slices for even cooking.
Grated Parmesan Cheese: Adds nutty, salty finish that enhances overall pizza flavor, choose freshly grated for best taste.
For Optional Garnish:
Fresh Basil Leaves: Bright, aromatic herb that adds fresh pop of color and flavor, select bright green leaves without wilting.
Must-Have Tools for Tortilla Pizza Nights
Air Fryer: Essential for quick, crispy pizza cooking.
Cutting Board: Perfect for slicing toppings and prepping ingredients.
Sharp Knife: Needed to chop vegetables and slice ingredients.
Spatula or Tongs: Helps safely place and remove tortilla pizza from air fryer.
Measuring Spoons: Great for precise seasoning and sauce portioning.
Crispy Air Fryer Tortilla Pizza Instructions
Fire Up Your Air Fryer Preheat the air fryer to a toasty 375°F (190°C) for a few minutes, creating the perfect hot environment for your crispy pizza creation.
Layer Your Tortilla Base Grab a tortilla and spread a thin layer of pizza sauce across its surface, ensuring even coverage that will make every bite delicious.
Sprinkle Cheese and Toppings Generously add shredded cheese and your favorite pizza toppings, making sure to distribute them evenly for maximum flavor explosion.
Slide Into the Air Fryer Carefully place the loaded tortilla into the air fryer basket, positioning it so it cooks evenly without touching the sides.
Crisp to Perfection Cook for 4-5 minutes, watching closely to prevent burning. The edges should turn golden brown and the cheese should melt into bubbly goodness.
Plate and Serve Remove your tortilla pizza from the air fryer, let it cool for a moment, then slice and enjoy your quick and crispy meal that’s ready in minutes.
Pizza Hacks, Toppings & Twists
Easy Crust Swap: Use whole wheat or gluten-free tortillas for a healthier or dietary-friendly base that’s just as crispy and delicious.
Topping Creativity: Mix up your pizza with unique combinations like BBQ chicken, Mediterranean veggie, or breakfast-style with scrambled eggs and bacon.
Cheese Lover’s Tip: Layer different cheeses like mozzarella, parmesan, and feta for a more complex and rich flavor profile that melts perfectly in the air fryer.
Veggie Boost: Add extra nutrition by sprinkling fresh herbs like basil or oregano, or toss on some spinach, arugula, or roasted vegetables after cooking for a fresh crunch and added nutrients.
Quick Meal Prep: Make multiple tortilla pizzas at once by preparing several in advance and storing them in the refrigerator, ready to pop into the air fryer for a lightning-fast meal.
Tortilla Pizza Pairing & Presentation Tips
Pizza Party Platter: Create a vibrant spread by arranging these mini tortilla pizzas on a large wooden board with small bowls of extra marinara, fresh herbs, and grated parmesan for guests to customize their slices.
Dipping Delights: Serve alongside cool ranch dressing, marinara sauce, or garlic aioli to enhance the flavor profile and provide an interactive dining experience for everyone.
Salad Companion: Pair these crispy tortilla pizzas with a light mixed green salad dressed in a zesty vinaigrette to balance the richness and add a fresh, nutritious element to the meal.
Movie Night Magic: Transform these quick pizzas into perfect finger food for casual gatherings, game nights, or family movie evenings where easy, shareable bites are always a hit.
Save & Reheat Your Pizza Like a Pro
Smart Portioning: Prepare individual tortilla pizzas for easy meal customization, perfect for family members with different taste preferences or dietary needs.
Refrigerator Storage: Keep assembled uncooked pizzas wrapped in plastic wrap for up to 24 hours before air frying, allowing convenient advance preparation for busy weeknights.
Quick Leftover Revival: Reheat remaining tortilla pizzas in the air fryer at 350F for 2-3 minutes to restore crispy texture, avoiding soggy microwave reheating.
Batch Cooking Strategy: Create multiple tortilla pizzas simultaneously by working in small batches, ensuring each pizza receives consistent heat and maintains crisp edges.
Crispy tortilla pizza brings Italian-inspired flavors to your kitchen with minimal effort. Quick preparation and simple ingredients make this recipe a delightful meal for casual dining or quick snacks.
Recipe development with a focus on single-dish meals.
Fusion of traditional and modern Australian cuisines.
Food styling and photography for digital platforms.
Education
Box Hill Institute, Melbourne
Degree: Advanced Diploma of Hospitality Management
Focus: Specialized in practical food and beverage service, responsible alcohol and hygiene compliance, legal risk management, and hands‑on experience in a simulated restaurant environment.
William Angliss Institute, Melbourne
Program: Certificate IV in Patisserie
Focus: Specialized in pastry and bakery techniques, cookery and specialty food preparation, recipe planning and costing, commercial kitchen operations, sustainable and inclusive work practices, food safety and hygiene compliance, and workplace health and safety.
Jenna is the heart of Picture Perfect Meals, turning simple ingredients into beautiful, easy‑to‑make dishes.
Growing up around family meals in Melbourne, she trained at Box Hill Institute and then perfected her pastry skills at William Angliss Institute. She loves mixing classic Australian flavors with fresh ideas to keep cooking fun and stress‑free.


Jenna Hartley
Founder & Recipe Creator
Expertise
Education
Box Hill Institute, Melbourne
William Angliss Institute, Melbourne
Jenna is the heart of Picture Perfect Meals, turning simple ingredients into beautiful, easy‑to‑make dishes.
Growing up around family meals in Melbourne, she trained at Box Hill Institute and then perfected her pastry skills at William Angliss Institute. She loves mixing classic Australian flavors with fresh ideas to keep cooking fun and stress‑free.