Crispy Almond Crescent Cookies Recipe

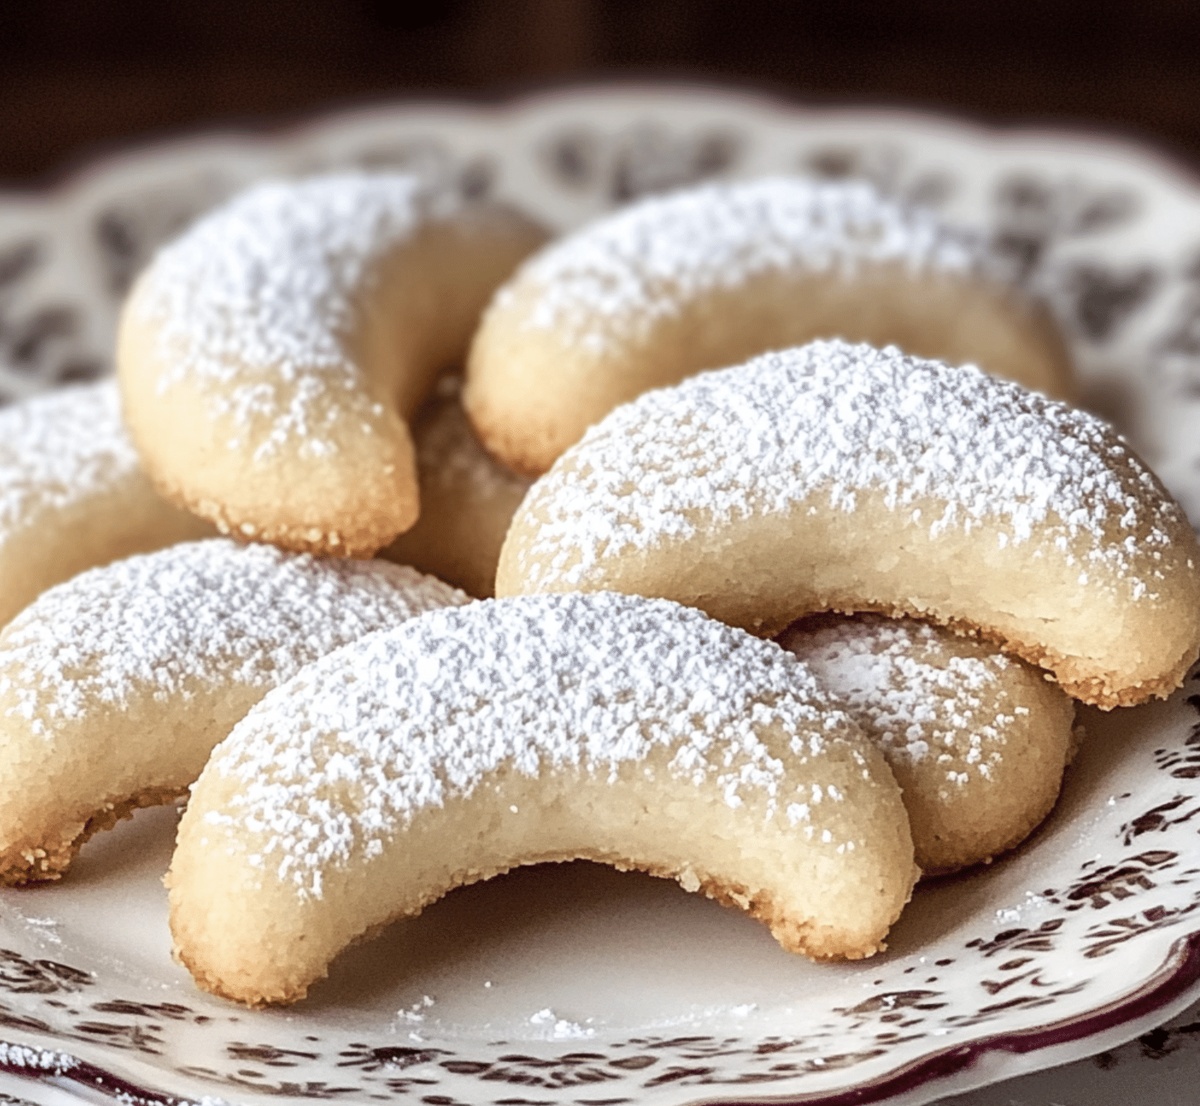
Golden Almond Crescents: A Crunchy Cookie Recipe to Cherish

Delicate and buttery almond crescent cookies dance with a delightful crispy texture that melts in your mouth.

These elegant European-style treats showcase a classic almond crescent cookie recipe that promises pure bakery-quality deliciousness.

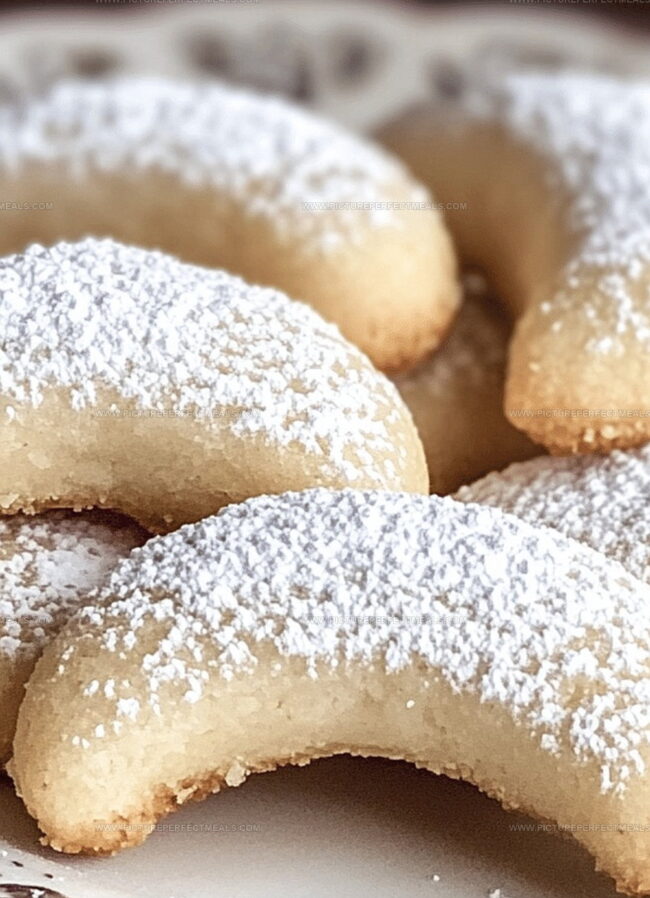
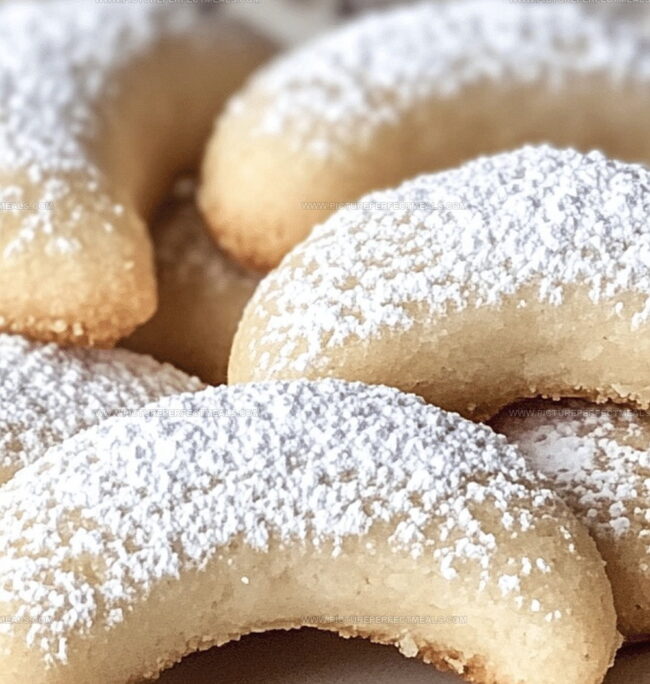
Powdered sugar transforms these golden delights into a visual masterpiece, coating each curve with a soft, sweet embrace.

Light and airy, these cookies crumble gently with each bite, releasing rich almond notes that transport you to a cozy café.

The simple yet sophisticated recipe requires minimal ingredients but delivers maximum flavor.

Prepare to impress your loved ones with these irresistible, melt-in-your-mouth cookies that are sure to become a treasured family favorite.

Quick Recipe Overview

Prep Time: 15 minutes

Cook Time: 20 minutes

Total Time: 35 minutes

Calories: 158 kcal

Servings: 24

Almond Crescent Cookies Ingredient List

For Base Ingredients:
  • Unsalted Butter: Provides rich, creamy texture and helps bind the cookie dough together; choose high-quality butter for best flavor.
  • Granulated Sugar: Sweetens the cookies and helps create a delicate, crisp texture; opt for fine-grain sugar for smooth mixing.
  • Vanilla Extract: Adds deep, aromatic flavor; use pure vanilla extract for the most authentic taste.
For Dry Ingredients:
  • All-Purpose Flour: Creates structure and stability in the cookies; sift to remove any lumps for a smoother dough.
  • Ground Almonds: Adds nutty flavor and tender texture; ensure finely ground for even distribution.
  • Salt: Enhances overall flavor and balances sweetness; use fine sea salt for even seasoning.
For Finishing Ingredients:
  • Powdered Sugar: Provides a delicate, sweet coating and beautiful snow-like appearance; sift for even dusting and smooth coverage.

Tools to Shape Almond Crescent Cookies Flawlessly

  • Electric mixer (hand or stand): Essential for creaming butter and sugar, creating light and fluffy texture.
  • Large mixing bowl: Perfect for combining wet ingredients and creating cookie dough.
  • Separate mixing bowl: Used for whisking dry ingredients before combining with wet mixture.
  • Measuring cups and spoons: Crucial for accurate ingredient measurements.
  • Baking sheets: Needed for baking cookies and creating even spacing.
  • Parchment paper or silicone baking mats: Prevents cookies from sticking and ensures easy removal.
  • Fine-mesh sieve: Ideal for dusting powdered sugar evenly over cookies.
  • Wire cooling rack: Allows cookies to cool completely and prevents soggy bottoms.
  • Whisk: Great for combining dry ingredients smoothly.

Bake Almond Crescent Cookies with a Soft Finish

  • Prep Your Workspace

Grab your baking gear and line two cookie sheets with parchment paper, making sure everything is clean and ready to roll.

  • Whip Up the Base

Soften your butter and blend it with sugar until it looks super fluffy and light, creating a dreamy mixture that’ll make your cookies melt-in-your-mouth delicious.

  • Build Your Dough

Gently fold in flour, ground almonds, and a pinch of salt, mixing carefully until everything comes together into a smooth, soft dough that’s begging to be shaped.

  • Create Crescent Magic

Roll small portions of dough into little logs, curving them slightly to form elegant crescent shapes. Place these beauties on your prepared baking sheets, giving them just enough breathing room.

  • Bake to Golden Perfection

Slide your cookie sheets into a warm oven and bake until the edges turn a delicate golden color. Watch them closely to avoid any burnt edges.

  • Sugar Shower

While the cookies are still warm, dust them generously with powdered sugar, creating a magical snow-like coating that’ll make everyone’s eyes light up.

  • Cool and Enjoy

Let your cookies rest on a wire rack, allowing them to cool completely and develop that perfect, melt-in-your-mouth texture that’ll have everyone asking for more.

Add a Twist to Classic Almond Crescent Cookies

  • Baking Brilliance: Tips for Perfect Almond Crescents
  • Butter Temperature Matters: Let butter soften at room temperature for 30-45 minutes before starting. Perfectly softened butter ensures smooth, even mixing and creates a tender cookie texture.
  • Almond Flour Power: Toast ground almonds lightly in a dry skillet before adding to enhance their nutty flavor and bring out deeper, richer almond notes in the cookies.
  • Shaping Secrets: Use lightly floured hands when forming crescents to prevent sticky dough from clinging to your fingers. Aim for uniform size to ensure even baking.
  • Gluten-Free Transformation: Swap regular flour with a gluten-free all-purpose blend for those with wheat sensitivities. Add a pinch of xanthan gum to help bind the ingredients.
  • Flavor Adventure: Experiment with adding orange zest or almond extract for a delightful twist on the classic recipe. A light sprinkle of cinnamon can also create an unexpected warm flavor dimension.

Serving Crescent Cookies Dusted in Sugar or Plain

  • Elegant Holiday Gift Packaging: Wrap these delicate crescent cookies in clear cellophane bags tied with festive ribbons for a charming homemade present that sparkles with love.
  • Tea Time Companion: Serve alongside Earl Grey or chamomile tea for a delightful afternoon treat that melts perfectly with each sip and complements the subtle almond flavor.
  • Dessert Platter Stunner: Arrange these powdery white crescents on a rustic wooden board with fresh berries and dark chocolate pieces to create a visually stunning dessert display that tempts every guest.
  • Festive Winter Celebration: Dust extra powdered sugar on top to mimic a light snowfall, making these cookies an ideal sweet addition to holiday gatherings and winter parties.

Storage Tips for Crescent Cookies That Keep Their Shape

  • Smart Storage Solutions: Keep cookies in an airtight container at room temperature for up to 5 days, separating layers with parchment paper to maintain their delicate shape.
  • Freezing Friendly: Wrap unbaked cookie dough logs tightly in plastic wrap, then store in freezer bags for 2-3 months. Thaw in refrigerator overnight before shaping and baking.
  • Make-Ahead Magic: Prepare cookie dough up to 3 days in advance and refrigerate. Remove from fridge 30 minutes before shaping to soften slightly for easier handling.
  • Powdered Sugar Trick: Store powdered sugar dusting separately in a small container. Sprinkle fresh sugar just before serving to keep the cookies looking pristine and prevent moisture absorption.
Print
clock clock iconcutlery cutlery iconflag flag iconfolder folder iconinstagram instagram iconpinterest pinterest iconfacebook facebook iconprint print iconsquares squares iconheart heart iconheart solid heart solid icon
Crispy Almond Crescent Cookies Recipe

Crispy Almond Crescent Cookies Recipe


5 Stars 4 Stars 3 Stars 2 Stars 1 Star

4.7 from 12 reviews

  • Total Time: 35 minutes
  • Yield: 25 1x

Description

Delightful almond crescent cookies from Austria blend nutty richness with delicate sweetness. Melt-in-mouth pastries provide a glimpse of European baking tradition that you will savor with each tender bite.


Ingredients

Scale
  • 1 cup (230 g) unsalted butter, softened
  • ½ cup (100 g) granulated sugar
  • 2 cups (250 g) all-purpose flour
  • 1 cup (120 g) finely ground almonds (almond meal)
  • 1 cup (120 g) powdered sugar
  • 1 tsp vanilla extract
  • 1 tsp vanilla sugar (optional)
  • ¼ tsp salt

Instructions

  1. Preparation: Preheat the oven to 350F (175C) and line two baking sheets with parchment paper or silicone mats.
  2. Creaming: Blend softened butter and granulated sugar in a mixer until light and fluffy, then mix in vanilla extract until fully incorporated.
  3. Dry Ingredients: Whisk flour, ground almonds, and salt together, then gradually fold into the butter mixture to create a smooth, cohesive dough.
  4. Shaping: Roll tablespoon-sized portions of dough into elongated logs, carefully curving each into a crescent shape and placing them slightly apart on prepared baking sheets.
  5. Baking: Bake for 12-15 minutes until edges turn a delicate golden brown, watching carefully to prevent over-browning.
  6. Finishing: Allow cookies to rest on baking sheets for 5 minutes, then generously dust with powdered sugar using a fine-mesh sieve while still warm.
  7. Cooling: Transfer cookies to a wire rack, letting them cool completely. Optionally, add an additional light dusting of powdered sugar before serving.

Notes

  • Control Butter Temperature: Ensure butter is softened but not melted for perfect cookie texture and smooth mixing.
  • Prevent Crumbling: Chill dough for 30 minutes before shaping to help cookies maintain structural integrity and prevent breaking during handling.
  • Master Shaping Technique: Roll dough gently and curve into crescent shape with light, consistent pressure to achieve uniform cookie size and elegant presentation.
  • Watch Baking Time Carefully: Check cookies at 12 minutes to avoid over-browning; golden edges indicate perfect doneness for delicate, crisp texture.
  • Prep Time: 15 minutes
  • Cook Time: 20 minutes
  • Category: Desserts, Snacks
  • Method: Baking
  • Cuisine: American

Nutrition

  • Serving Size: 25
  • Calories: 206
  • Sugar: 8 g
  • Sodium: 0.1 g
  • Fat: 14 g
  • Saturated Fat: 9 g
  • Unsaturated Fat: 5 g
  • Trans Fat: 0 g
  • Carbohydrates: 19 g
  • Fiber: 1 g
  • Protein: 2 g
  • Cholesterol: 31 mg
Jenna Hartley

Jenna Hartley

Founder & Recipe Creator

Expertise

  • Recipe development with a focus on single-dish meals.
  • Fusion of traditional and modern Australian cuisines.
  • Food styling and photography for digital platforms.​

Education

Box Hill Institute, Melbourne

  • Degree: Advanced Diploma of Hospitality Management
  • Focus: Specialized in practical food and beverage service, responsible alcohol and hygiene compliance, legal risk management, and hands‑on experience in a simulated restaurant environment.

William Angliss Institute, Melbourne

  • Program: Certificate IV in Patisserie
  • Focus: Specialized in pastry and bakery techniques, cookery and specialty food preparation, recipe planning and costing, commercial kitchen operations, sustainable and inclusive work practices, food safety and hygiene compliance, and workplace health and safety.

Jenna is the heart of Picture Perfect Meals, turning simple ingredients into beautiful, easy‑to‑make dishes. 

Growing up around family meals in Melbourne, she trained at Box Hill Institute and then perfected her pastry skills at William Angliss Institute. She loves mixing classic Australian flavors with fresh ideas to keep cooking fun and stress‑free.

Leave a Reply

Your email address will not be published. Required fields are marked *

Recipe rating 5 Stars 4 Stars 3 Stars 2 Stars 1 Star