Crispy Cheesy Beef Filled Bites Recipe

Crunchy Cheesy Beef Filled Bites Recipe: Irresistible Snack Magic

Weeknight dinners demand something special, and these crispy cheesy beef filled bites will revolutionize your meal routine.

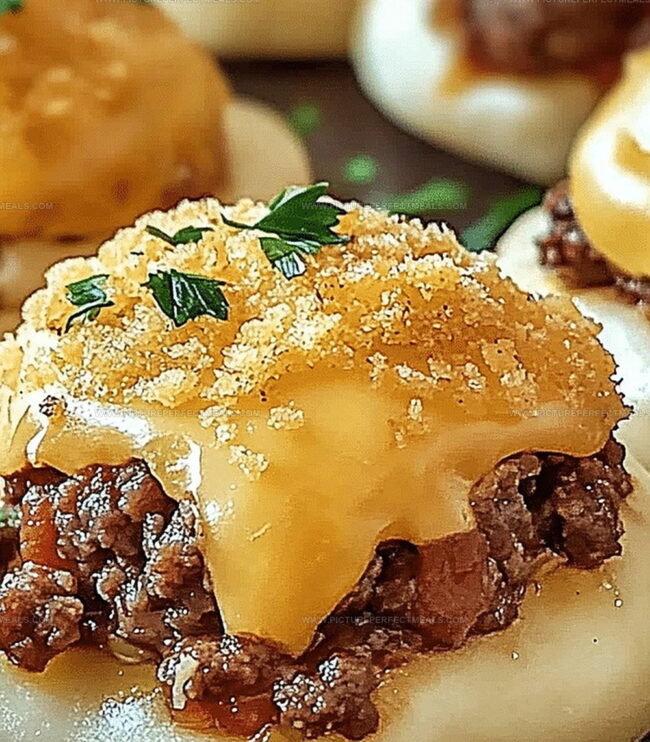
Packed with savory ground beef and melted cheese, these bite-sized delights promise a flavor explosion in every crunch.

The golden-brown exterior gives way to a molten center that keeps everyone coming back for more.

Each bite delivers a perfect balance of crispy texture and rich, meaty goodness.

The simple ingredients transform an ordinary evening into a memorable feast.

Quick to prepare and impossible to resist, these beef bites are sure to become a family favorite.

Serve them as an appetizer or main course, and watch them disappear in minutes.

Quick Recipe Overview

Prep Time: 15 minutes

Cook Time: 20 minutes

Total Time: 35 minutes

Calories: 350 kcal

Servings: 8

Ingredients for Cheesy Beef Filled Bites

For Meat and Seasonings:
  • Ground Beef: Delivers hearty protein base, choose lean cuts for less grease and richer flavor.
  • Onion: Adds subtle sweetness and depth, select fresh crisp onions for best aromatic profile.
  • Garlic: Provides robust savory notes, fresh garlic cloves offer more intense flavor than pre-minced.
  • Garlic Powder: Enhances overall seasoning complexity with concentrated garlic essence.
  • Onion Powder: Contributes smooth, balanced aromatic undertones to meat mixture.
  • Salt: Elevates and balances all other flavor dimensions in the recipe.
  • Black Pepper: Introduces gentle warmth and slight spiciness to the filling.
For Binding Ingredients:
  • Breadcrumbs: Creates texture and helps hold meat mixture together, panko works excellently.
  • Milk: Softens mixture and helps bind ingredients smoothly.
  • Egg: Acts as natural binding agent to prevent filling from falling apart.
For Dough and Topping:
  • Crescent Roll Dough: Provides quick, flaky exterior for convenient preparation.
  • Cheddar Cheese: Delivers rich, melty center with sharp tangy undertones.
  • Butter: Adds golden shine and enhances exterior browning.
  • Dried Parsley: Offers light herbal garnish and visual appeal.

Tools to Prepare Cheesy Beef Filled Bites

  • Large Skillet: Essential for browning beef and sautéing onions and garlic.
  • Mixing Bowl: Perfect for combining beef mixture with other ingredients.
  • Baking Sheet: Needed to bake and arrange the cheesy beef bites.
  • Parchment Paper: Helps prevent sticking and makes cleanup easier.
  • Measuring Cups and Spoons: Crucial for accurate ingredient measurements.
  • Spatula or Wooden Spoon: Great for mixing and stirring ingredients.
  • Sharp Knife: Useful for cutting crescent roll dough and chopping ingredients.

Instructions for Cheesy Beef Filled Bites

  • Fire Up the Oven

Crank your oven to a toasty 375F. Grab a baking sheet and give it a quick spray of cooking oil or line it with parchment paper.

  • Brown the Beef

Toss ground beef into a sizzling skillet. Break it into bite-sized crumbles while cooking. Splash in chopped onions and garlic, letting them dance around until the onions turn soft and transparent.

  • Mix the Magic

Dump the beef mixture into a bowl. Stir in breadcrumbs, milk, and an egg. Sprinkle in some garlic and onion powder, plus a dash of salt and pepper. Mix until everything hugs together.

  • Shape the Bites

Unroll those crescent roll triangles and slice each into smaller pieces. Drop a dollop of beef mixture onto each triangle and nestle a cheese cube right in the center.

  • Wrap and Seal

Fold the dough over the filling, pinching the edges to create adorable little pouches. Make sure no cheesy goodness can escape.

  • Bake to Golden Perfection

Place your stuffed bites on the baking sheet. Brush the tops with melted butter and dust with dried parsley if you’re feeling fancy. Pop them in the oven for 12-15 minutes until they turn a gorgeous golden brown.

  • Serve and Devour

Pull them out, let them cool just a moment, then dig in while they’re warm and irresistible.

Tips and Variations for Cheesy Beef Filled Bites

  • Beef Bite Mastery: Quick tips to elevate your recipe game!
  • Meat Moisture Magic: Pat ground beef dry before cooking to ensure crispy, caramelized edges and prevent soggy bites. Less liquid means more flavor concentration.
  • Cheese Selection Secrets: Experiment with different cheese varieties like pepper jack, swiss, or gouda for unique flavor profiles that complement the beef perfectly.
  • Make-Ahead Meal Prep: Assemble these bites ahead of time and refrigerate for up to 24 hours before baking. They're perfect for unexpected guests or quick weeknight dinners.
  • Gluten-Free Transformation: Swap crescent roll dough with gluten-free puff pastry or almond flour-based dough to make this recipe celiac-friendly without sacrificing taste.
  • Veggie Boost Option: Finely dice bell peppers or mushrooms and mix into the beef filling for added nutrition and a flavor-packed punch that kids and adults will love.

Serving Suggestions for Cheesy Beef Filled Bites

  • Party Platter Perfection: Arrange these cheesy beef bites on a wooden board with colorful toothpicks, creating an eye-catching appetizer spread that guests will devour.
  • Dipping Delights: Serve alongside zesty marinara sauce, creamy ranch dressing, or tangy honey mustard for an extra flavor burst that complements the beef and cheese.
  • Game Day Favorite: Pack these bites in a portable container for tailgating, picnics, or sports watch parties as a handheld, crowd-pleasing snack that's easy to munch.
  • Kid-Friendly Meal Companion: Pair with a simple green salad or crisp vegetable sticks to balance the rich, cheesy bites and create a complete meal kids and adults will love.

How to Store Cheesy Beef Filled Bites

  • Refrigeration Tactics: Store leftover beef bites in an airtight container inside the refrigerator for up to 3-4 days. Cool completely before sealing to prevent moisture buildup and maintain crispness.
  • Freezing Strategy: Freeze unbaked or baked bites flat on a baking sheet, then transfer to freezer-safe bags. Frozen bites stay delicious for 2-3 months. Thaw overnight in the refrigerator before reheating.
  • Reheating Magic: Crisp up cold bites in a preheated oven at 350F for 8-10 minutes. Avoid microwave reheating to keep the dough crispy and prevent soggy texture. Air fryers work wonderfully for restoring original crunchiness.
  • Portion Control Plan: Prepare smaller batches or divide the recipe into meal-prep containers. Individual portions make quick grab-and-go lunches or snacks. Label containers with date and contents for easy tracking.
Print
clock clock iconcutlery cutlery iconflag flag iconfolder folder iconinstagram instagram iconpinterest pinterest iconfacebook facebook iconprint print iconsquares squares iconheart heart iconheart solid heart solid icon
Crispy Cheesy Beef Filled Bites Recipe

Crispy Cheesy Beef Filled Bites Recipe


5 Stars 4 Stars 3 Stars 2 Stars 1 Star

4.8 from 33 reviews

  • Total Time: 35 minutes
  • Yield: 9 1x

Description

Quick and irresistible easy cheesy beef filled bites deliver a flavor explosion of savory ground beef and melted cheese. Crispy pastry shells cradle rich meaty filling, perfect for game day or casual entertaining with friends.


Ingredients

Scale
  • 1 pound (450 grams) ground beef
  • 4 oz (113 grams) cheddar cheese, cut into small cubes
  • 1 tube (8 oz/226 grams) refrigerated crescent roll dough
  • 1 large egg
  • ½ cup (60 grams) breadcrumbs
  • ¼ cup (60 ml) milk
  • 2 tbsps butter, melted
  • 1 small onion, finely chopped
  • 2 cloves garlic, minced
  • ½ tsp garlic powder
  • ½ tsp onion powder
  • ½ tsp salt
  • ¼ tsp black pepper
  • 1 tsp dried parsley (optional)

Instructions

  1. Preheat Preparation: Activate oven to 375F (190C), lining a baking sheet with parchment paper or applying a light grease coating.
  2. Meat Transformation: In a skillet over medium heat, brown ground beef into crumbly pieces. Drain excess fat, then introduce onions and garlic, sautéing until aromatics become translucent and fragrant.
  3. Filling Fusion: Combine beef mixture with breadcrumbs, milk, egg, and seasonings in a mixing bowl. Blend thoroughly to create a harmonious filling, ensuring even distribution of ingredients.
  4. Dough Manipulation: Unroll crescent roll dough and segment into compact triangular shapes. These will serve as delicate vessels for the savory filling.
  5. Assembly Artistry: Position beef mixture and cheese cube onto each dough triangle. Carefully envelop the filling, meticulously sealing edges to form compact pouches that prevent leakage during baking.
  6. Final Transformation: Arrange bites on prepared baking sheet, embellishing with melted butter and dried parsley. Bake for 12-15 minutes until achieving a rich, golden-brown exterior that promises crisp texture and enticing flavor.
  7. Serving Suggestion: Remove from oven and allow brief cooling. Serve warm to maximize gustatory pleasure and ensure optimal texture of these delectable morsels.

Notes

  • Meat Moisture Control: Drain ground beef thoroughly to prevent soggy bites and ensure crispy exterior texture.
  • Dough Handling Technique: Keep crescent roll dough chilled until ready to use, preventing stickiness and making folding easier.
  • Cheese Melting Strategy: Use firm cheese cubes that melt smoothly without leaking, like cheddar or mozzarella, for best results.
  • Sealing Precision: Pinch dough edges tightly to prevent filling from escaping during baking, creating neat, compact appetizers.
  • Prep Time: 15 minutes
  • Cook Time: 20 minutes
  • Category: Appetizer, Snacks
  • Method: Baking
  • Cuisine: American

Nutrition

  • Serving Size: 9
  • Calories: 305
  • Sugar: 1 g
  • Sodium: 400 mg
  • Fat: 19 g
  • Saturated Fat: 10 g
  • Unsaturated Fat: 9 g
  • Trans Fat: 0 g
  • Carbohydrates: 17 g
  • Fiber: 1 g
  • Protein: 18 g
  • Cholesterol: 70 mg
Jenna Hartley

Jenna Hartley

Founder & Recipe Creator

Expertise

  • Recipe development with a focus on single-dish meals.
  • Fusion of traditional and modern Australian cuisines.
  • Food styling and photography for digital platforms.​

Education

Box Hill Institute, Melbourne

  • Degree: Advanced Diploma of Hospitality Management
  • Focus: Specialized in practical food and beverage service, responsible alcohol and hygiene compliance, legal risk management, and hands‑on experience in a simulated restaurant environment.

William Angliss Institute, Melbourne

  • Program: Certificate IV in Patisserie
  • Focus: Specialized in pastry and bakery techniques, cookery and specialty food preparation, recipe planning and costing, commercial kitchen operations, sustainable and inclusive work practices, food safety and hygiene compliance, and workplace health and safety.

Jenna is the heart of Picture Perfect Meals, turning simple ingredients into beautiful, easy‑to‑make dishes. 

Growing up around family meals in Melbourne, she trained at Box Hill Institute and then perfected her pastry skills at William Angliss Institute. She loves mixing classic Australian flavors with fresh ideas to keep cooking fun and stress‑free.

Leave a Reply

Your email address will not be published. Required fields are marked *

Recipe rating 5 Stars 4 Stars 3 Stars 2 Stars 1 Star