
Crunchy Dill Pickle Cheese Balls Recipe: Zesty Party Winners!
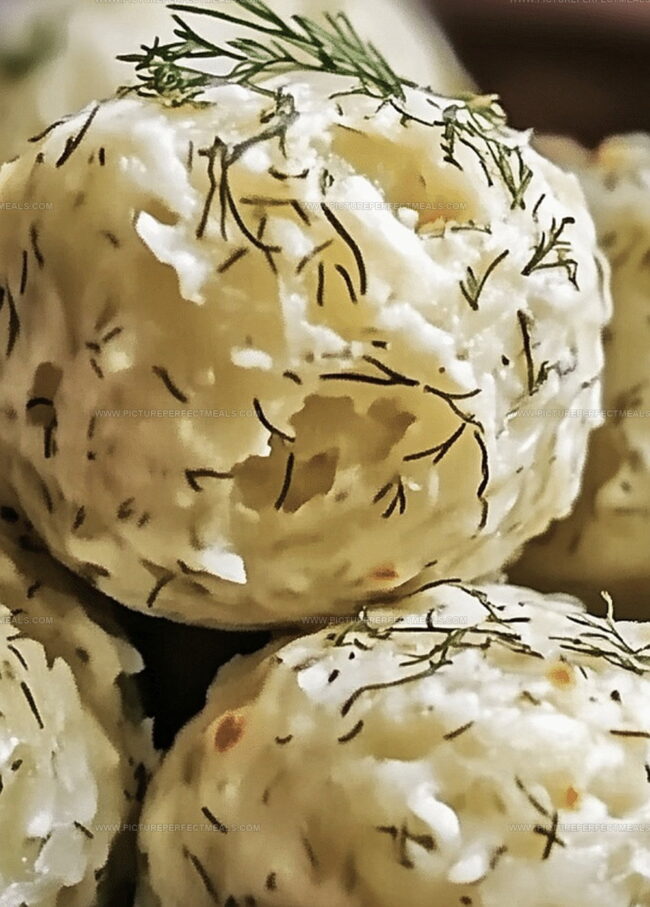
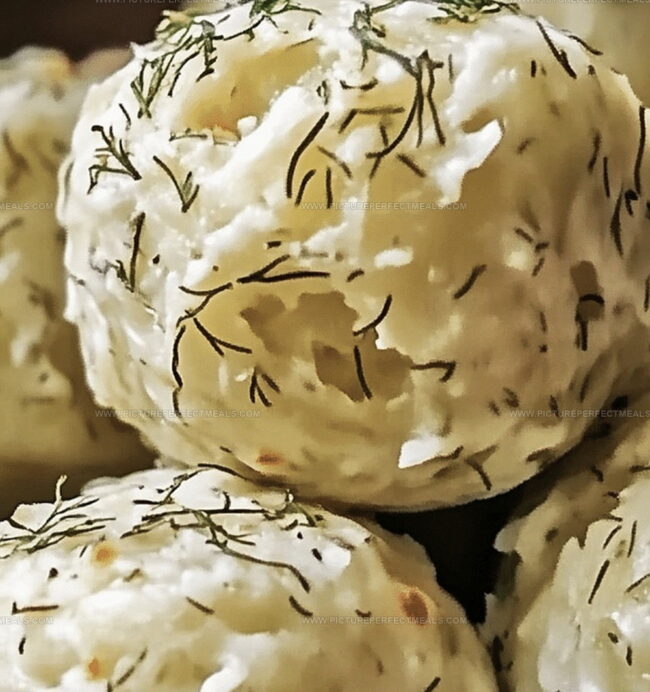
Parties light up when these dill pickle cheese balls enter the room, combining creamy cheese with tangy pickle flavors that dance on your palate.
Crafted with simple ingredients, this appetizer packs a punch of zesty excitement.
The blend of cream cheese, sharp cheddar, and chopped dill pickles creates an irresistible snack that keeps guests coming back for more.
Crispy breadcrumb coating adds a delightful crunch to each bite-sized morsel.
Prepare these crowd-pleasing cheese balls in just minutes and watch as they become the star of any gathering.
Serve them warm and watch smiles spread across every face.
You won’t be able to resist these addictive little flavor bombs.
Quick Recipe Overview
Gather These for Dill Pickle Cheese Balls
For Creamy Base:For Seasoning Enhancers:For Coating and Garnish:Tools for the Cheese Ball Mission
Let’s Whip Up Dill Pickle Cheese Balls
Grab a big mixing bowl and toss in softened cream cheese, sharp cheddar, zesty chopped pickles, and a splash of tangy pickle juice. Sprinkle in garlic and onion powder for an extra flavor kick. Blend everything until it’s smooth and irresistible.
Pop the bowl in the fridge for about 30 minutes. This magical waiting time helps the mixture set and makes rolling super easy.
Using a spoon, scoop out small portions and roll them into bite-sized spheres of cheesy goodness. Keep them uniform for a pro look.
Give each ball a tasty makeover by rolling it in fresh dill or crushed pretzels. This step adds texture and makes them look gorgeous.
Arrange your pickle cheese balls on a gorgeous platter. Set out some crackers or veggie sticks, and watch them disappear in minutes. Perfect for game day, parties, or a quick snack!
Cheese Ball Add-Ins & Flavor Notes
Serve Those Cheese Balls Right
Store Them Like a Snack Pro
Print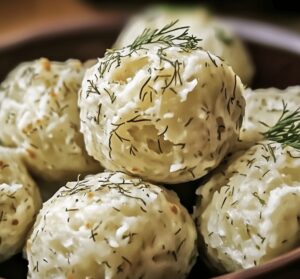
Crispy Dill Pickle Cheese Balls Recipe
- Total Time: 1 hour 15 minutes
- Yield: 21 1x
Description
Dill pickle cheese balls combine tangy pickles with creamy cheese for an irresistible appetizer. Crispy exterior and zesty center make these bite-sized snacks perfect for parties and gatherings you’ll devour in moments.
Ingredients
- 8 oz (225 g) cream cheese, softened
- 1 cup (100 g) shredded sharp cheddar cheese
- ½ cup (75 g) finely chopped dill pickles
- ½ cup (75 g) chopped dill pickles
- 12 tbsps pickle juice (adjust to taste)
- ¼ cup (15 g) chopped fresh dill or parsley
- 1 tbsp fresh dill, finely chopped (or 1 tsp dried dill)
- 1 tsp garlic powder
- 1 tsp onion powder
- ¼ tsp black pepper
Instructions
- Flavor Development: Whip softened cream cheese and sharp cheddar until creamy, folding in minced dill pickles and pickle juice to amplify the tangy essence, creating a robust flavor foundation.
- Seasoning Fusion: Integrate garlic and onion powder, then precisely season with salt and pepper, ensuring a harmonious balance that elevates the pickle’s sharp undertones.
- Chilling and Shaping: Refrigerate the cheese mixture for 30 minutes to solidify, then utilize a scoop to form consistent spheres, delicately rolling between palms to craft smooth, compact orbs.
- Textural Transformation: Generously coat each cheese ball in a crunchy exterior of fresh dill, crushed pretzels, or finely chopped nuts, adding a delightful textural contrast and visual appeal.
- Elegant Presentation: Artfully arrange the prepared cheese balls on a serving platter, accompanied by an assortment of crisp crackers, raw vegetable sticks, or crunchy pretzel sticks to create an inviting appetizer spread.
Notes
- Chill for Precision: Refrigerate the cheese mixture for at least 30 minutes to help it firm up, making it easier to shape and preventing sticky hands during rolling.
- Balance Pickle Intensity: Adjust pickle juice and diced pickle quantities to control the tanginess, ensuring the flavor doesn’t overpower the creamy cheese base.
- Texture Matters: Experiment with different coatings like crushed pretzels, chopped nuts, or fresh herbs to add crunch and visual appeal while complementing the pickle flavor.
- Room Temperature Tip: Let cream cheese soften naturally at room temperature for smoother blending and easier mixing, avoiding microwave heating that can compromise texture.
- Prep Time: 15 minutes
- Cook Time: 1 hour
- Category: Appetizer, Snacks
- Method: None
- Cuisine: American
Nutrition
- Serving Size: 21
- Calories: 121
- Sugar: 1 g
- Sodium: 236 mg
- Fat: 10 g
- Saturated Fat: 5 g
- Unsaturated Fat: 4 g
- Trans Fat: 0 g
- Carbohydrates: 3 g
- Fiber: 0 g
- Protein: 6 g
- Cholesterol: 30 mg
Jenna Hartley
Founder & Recipe Creator
Expertise
Education
Box Hill Institute, Melbourne
William Angliss Institute, Melbourne
Jenna is the heart of Picture Perfect Meals, turning simple ingredients into beautiful, easy‑to‑make dishes.
Growing up around family meals in Melbourne, she trained at Box Hill Institute and then perfected her pastry skills at William Angliss Institute. She loves mixing classic Australian flavors with fresh ideas to keep cooking fun and stress‑free.