
Heavenly Chocolate Coconut Balls Recipe: Sweet Bliss in Each Bite
Sweet treats that melt chocolate coconut balls in your mouth always spark joy during gatherings.
These bite-sized delights pack incredible flavor in every single morsel.
No baking required means minimal effort with maximum satisfaction.
Creamy coconut blends perfectly with rich chocolate, creating an irresistible combination.
Each ball offers a smooth texture that crumbles delicately on your tongue.
The simple ingredients list ensures anyone can whip up this delightful dessert.
Prepare to indulge in a quick, decadent snack that promises pure bliss with every bite.
Quick Recipe Overview
Chocolate Coconut Balls Ingredient List
For Coconut Ball Base:For Chocolate Coating:For Optional Garnish:Tools You’ll Use for Coconut Ball Perfection
Rolling Chocolate Coconut Balls at Home
Combine shredded coconut, powdered sugar, sweetened condensed milk, and vanilla extract in a large bowl. Mix thoroughly until the ingredients transform into a deliciously sticky dough that holds together perfectly.
Scoop small portions of the mixture and gently roll into round balls. Place these delectable spheres on a parchment-lined baking sheet. Chill in the refrigerator for about 30 minutes to help them firm up and maintain their shape.
Carefully melt chocolate chips in a microwave-safe bowl, stirring every 30 seconds until silky smooth. Add a touch of coconut oil for an extra glossy finish that will make your treats shine.
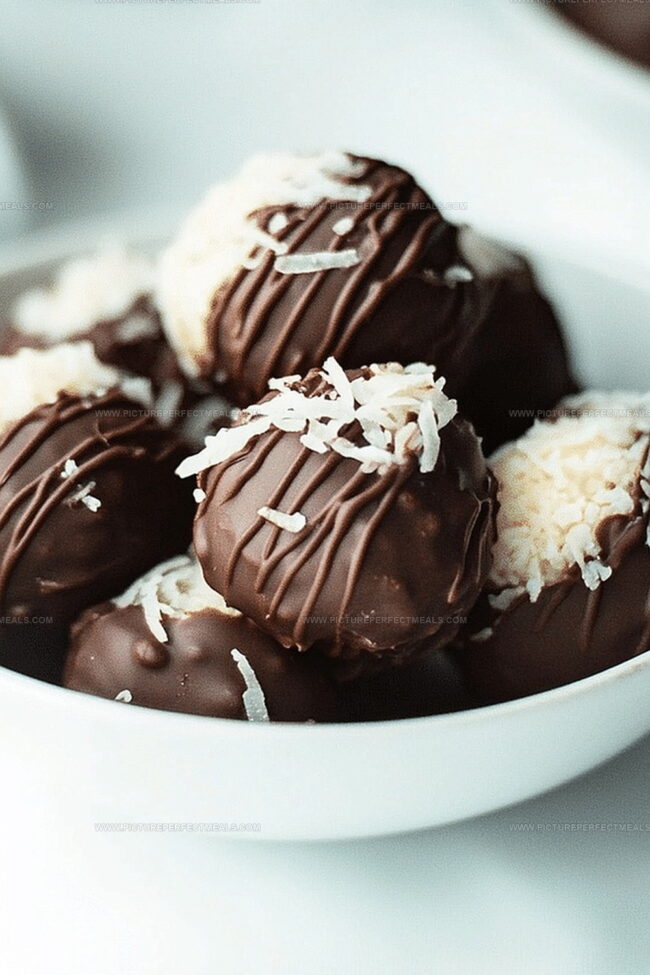
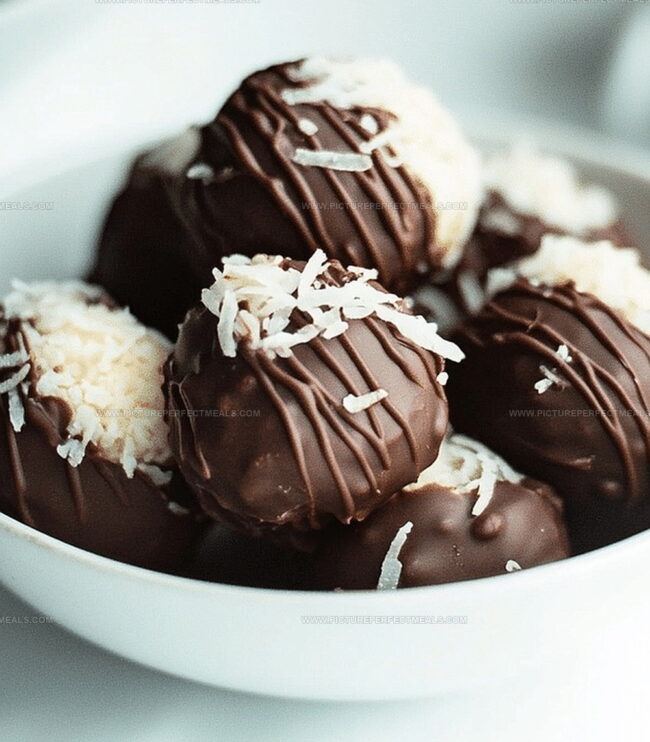
Dip each chilled coconut ball into the melted chocolate, ensuring complete coverage. Use a fork to lift and allow excess chocolate to drip off before placing back on the parchment paper.
Let the chocolate-covered balls rest at room temperature until the chocolate hardens completely. For a quicker setup, pop the baking sheet in the refrigerator for 15-20 minutes.
Transfer your chocolate coconut balls to an airtight container. These irresistible treats are ready to delight friends, family, or simply satisfy your sweet tooth whenever the craving strikes.
Flavor Add-Ons for Coconut Ball Recipes
When to Serve Chocolate Coconut Balls
Store Coconut Balls
Print
Delectable Chocolate Coconut Balls Recipe
- Total Time: 50 minutes
- Yield: 16 1x
Description
Homemade chocolate coconut balls combine rich cocoa with sweet shredded coconut for an irresistible treat. Brazilian dessert lovers will savor these simple, no-bake delights that melt in your mouth and satisfy chocolate cravings completely.
Ingredients
- 1 cup (240 ml) powdered sugar
- 2 cups (473 ml) sweetened shredded coconut
- ½ cup (120 ml) sweetened condensed milk
- 1 cup (170 g) semi-sweet chocolate chips or melting chocolate
- 1 tsp (5 ml) vanilla extract
- 1 tsp (5 ml) coconut oil or vegetable oil
Instructions
- Mixing: Combine shredded coconut, powdered sugar, sweetened condensed milk, and vanilla extract in a large bowl, kneading until the mixture forms a cohesive, malleable texture that holds its shape.
- Forming: Craft uniform spherical confections by rolling small portions between your palms, creating smooth, consistent balls. Arrange these delicate orbs on a parchment-lined tray with ample spacing.
- Chilling: Refrigerate the coconut formations for 30 minutes, allowing them to firm up and maintain structural integrity for chocolate coating. Meanwhile, prepare the chocolate glaze by melting chocolate chips with coconut oil in short microwave intervals, stirring between each to achieve a glossy, smooth consistency.
- Coating: Submerge each chilled coconut sphere into the molten chocolate, using a dipping fork to ensure complete coverage. Gently tap to remove excess chocolate, creating an elegant, even finish.
- Setting: Place chocolate-enrobed balls on the parchment-lined tray, allowing them to set at room temperature or expedite the process with a brief refrigeration. Once the chocolate shell has completely hardened, transfer these decadent treats to an airtight container for storage and preservation.
Notes
- Maintain Consistent Size: Roll coconut balls precisely to ensure uniform cooking and even chocolate coating, using a small scoop or tablespoon for consistent measurements.
- Control Chocolate Melting: Heat chocolate slowly and stir frequently to prevent burning, keeping temperatures low and steady for smooth, glossy chocolate coverage.
- Chill for Structural Stability: Refrigerate coconut balls before dipping to help them hold shape during chocolate coating and prevent crumbling or falling apart.
- Dietary Adaptations: Swap ingredients for alternative diets – use dairy-free chocolate for vegan version, coconut sugar for lower glycemic index, or sugar-free chocolate for diabetic-friendly treat.
- Prep Time: 20 minutes
- Cook Time: 30 minutes
- Category: Snacks, Desserts
- Method: Blending
- Cuisine: American
Nutrition
- Serving Size: 16
- Calories: 161
- Sugar: 16 g
- Sodium: 10 mg
- Fat: 8 g
- Saturated Fat: 6 g
- Unsaturated Fat: 2 g
- Trans Fat: 0 g
- Carbohydrates: 21 g
- Fiber: 1 g
- Protein: 1 g
- Cholesterol: 1 mg
Jenna Hartley
Founder & Recipe Creator
Expertise
Education
Box Hill Institute, Melbourne
William Angliss Institute, Melbourne
Jenna is the heart of Picture Perfect Meals, turning simple ingredients into beautiful, easy‑to‑make dishes.
Growing up around family meals in Melbourne, she trained at Box Hill Institute and then perfected her pastry skills at William Angliss Institute. She loves mixing classic Australian flavors with fresh ideas to keep cooking fun and stress‑free.