Delectable Sour Cherry Hand Pies Recipe

Rustic Sour Cherry Hand Pies Recipe: Bite-Sized Bliss!

Baking these warm sour cherry hand pies brings pure comfort to any kitchen.

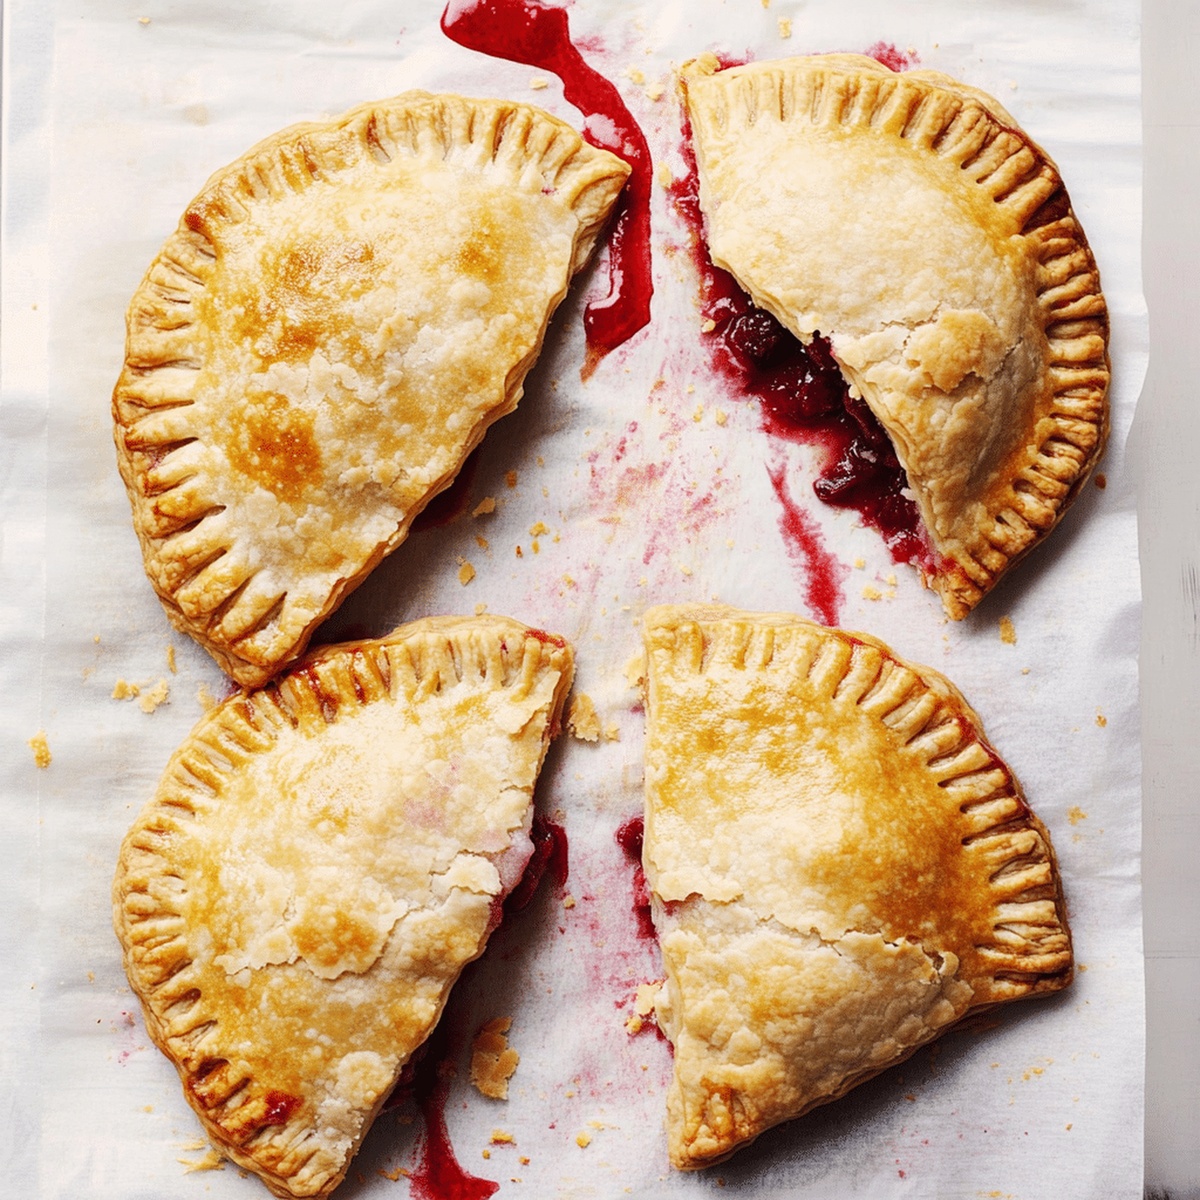
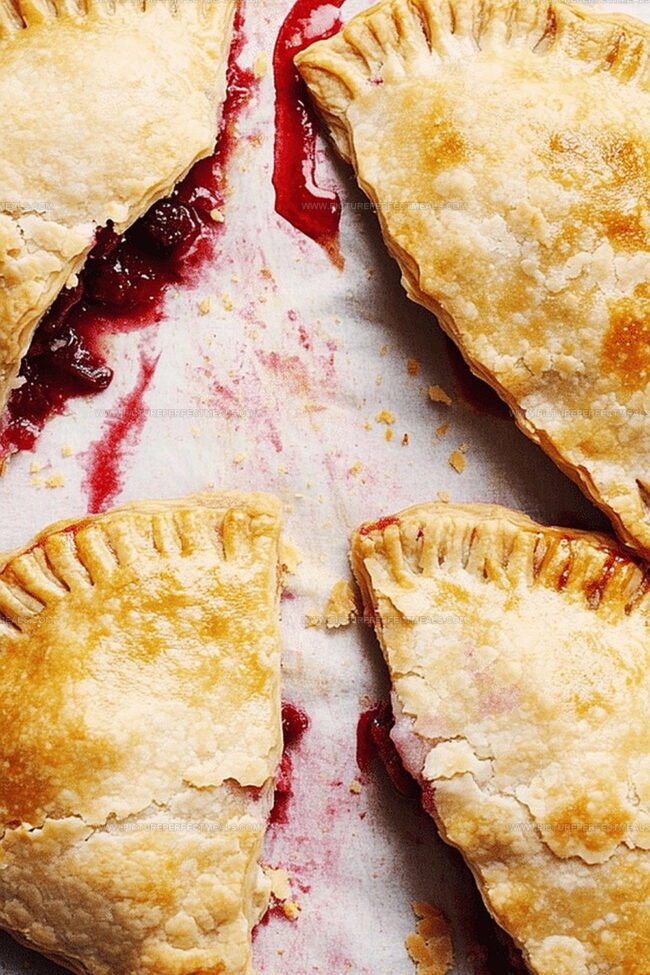
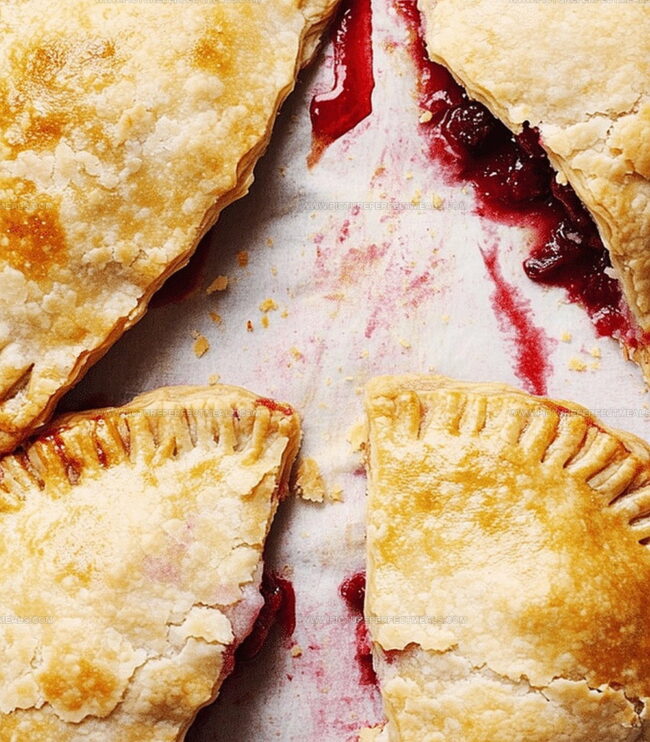
Sweet summer cherries nestled in a flaky, golden crust create an irresistible treat.

The homemade sour cherry hand pies burst with tangy fruity flavors that dance across your palate.

Each bite delivers a perfect balance of buttery pastry and vibrant fruit filling.

We combine simple ingredients to craft these adorable handheld desserts that everyone will adore.

The compact size makes them ideal for picnics, potlucks, or a delightful afternoon snack.

Prepare to fall in love with these charming little pies that promise to delight your taste buds.

Quick Recipe Overview

Prep Time: 20 minutes

Cook Time: 30 minutes

Total Time: 50 minutes

Calories: 450 kcal

Servings: 8

Ingredients for Sour Cherry Hand Pies

For Pastry Dough:
  • All-Purpose Flour: Provides structure and tender texture for the hand pie crust.
  • Granulated Sugar: Adds subtle sweetness and helps with browning.
  • Salt: Enhances overall flavor and balances the sweetness.
  • Cold Butter: Creates flaky layers by preventing gluten development.
  • Ice Water: Binds the dough together without developing too much gluten.
For Filling:
  • Sour Cherries: Delivers tangy, bright flavor and juicy texture.
  • Granulated Sugar: Balances the cherries' tartness and helps create syrupy consistency.
  • Lemon Juice: Brightens the filling and adds subtle acidity.
  • Cornstarch: Thickens the cherry mixture and prevents runny filling.
  • Vanilla Extract: Adds depth and warmth to the cherry flavor.
For Finishing and Frying:
  • Egg: Creates golden, shiny crust when used as wash.
  • Milk: Helps egg wash create beautiful browning.
  • Coarse Sugar: Provides delightful crunch and sparkly appearance.
  • Vegetable Oil: Enables crispy, golden exterior when frying.
  • Powdered Sugar: Optional sweet drizzle for extra indulgence.

Tools for Golden, Juicy Hand Pies

  • Pastry Cutter or Fingers: Perfect for cutting cold butter into flour mixture.
  • Large Mixing Bowl: Essential for combining dough ingredients.
  • Rolling Pin: Needed to roll out pie dough to even thickness.
  • Round Cutter or Knife: Used for cutting dough circles or rectangles.
  • Baking Sheet: Lined with parchment paper to hold pie cutouts.
  • Saucepan: For cooking cherry filling over medium heat.
  • Small Mixing Bowl: To mix cornstarch and water.
  • Fork: Great for sealing pie edges and creating decorative crimps.
  • Pastry Brush: Helps apply egg wash to pie crusts.
  • Deep Pan or Fryer: Required for frying pies in oil.
  • Paper Towels: Used for draining fried pies.
  • Measuring Spoons and Cups: For accurate ingredient amounts.

How to Bake Tart Cherry Hand Pies Like a Pro

  • Prep the Pastry Dough

Whisk flour, sugar, and salt, then crumble cold butter into the mixture until it looks like rough sand. Gradually add icy water, mixing until the dough just holds together.

  • Chill and Shape Dough

Split dough into two portions, form into flat discs, wrap in plastic, and refrigerate for half an hour to firm up.

  • Create Cherry Filling

Simmer cherries with sugar and lemon juice, stirring occasionally. Mix cornstarch with water, then blend into the cherry mixture. Cook until thickened, remove from heat, stir in vanilla, and let cool.

  • Form Hand Pies

Roll out chilled dough super thin. Cut into circular or rectangular shapes. Chill cutouts briefly to keep them firm.

  • Assemble and Seal

Spoon cherry filling onto half the dough pieces. Cover with remaining dough, press edges with a fork, and cut small vents on top.

  • Bake or Fry

Choose your adventure: Bake at 375F until golden brown, or deep fry in hot oil until crispy and delicious.

  • Final Touch

Let pies cool slightly. Optional: Dust with powdered sugar glaze for extra yumminess.

Tips for Filling, Crimping, and Flavoring

  • Crispy Crust Secrets: Freeze butter for 15 minutes before cutting into flour for extra flaky pastry that crumbles perfectly.
  • Make-Ahead Magic: Prepare filling and dough up to 3 days in advance, storing separately in refrigerator to save time during baking.
  • Dietary Flexibility: Swap wheat flour with gluten-free blend for celiac-friendly version, ensuring everyone can enjoy these delightful hand pies.
  • Fruit Flavor Twists: Replace sour cherries with raspberries, blueberries, or mixed berries for exciting seasonal variations that keep the recipe interesting and adaptable.
  • Smart Storage Solution: Store cooled hand pies in airtight container at room temperature for 2-3 days, or freeze for up to one month for convenient snacking anytime.

Ways to Serve These Sweet-Tart Treats

  • Sweet Picnic Companion: Pack these hand pies in cute wax paper or small containers for outdoor summer gatherings, perfect for beach trips or park adventures.
  • Dessert Pairing Paradise: Serve alongside vanilla bean ice cream or a dollop of fresh whipped cream to elevate the tart cherry flavor and create a luxurious dessert experience.
  • Breakfast Twist: Transform these hand pies into a morning treat by warming them slightly and enjoying with a strong espresso or cappuccino, creating a delightful start to your day.
  • Gifting Delight: Wrap individual hand pies in parchment paper with a cute twine bow, making them a charming homemade gift for friends, neighbors, or as a sweet hostess present.

How to Store Your Hand Pies Without Losing Crunch

  • Quick Chilling Strategy: Store unbaked hand pies on parchment-lined baking sheets in the refrigerator for up to 2 hours before baking to maintain their shape and ensure crisp edges.
  • Smart Freezing Technique: Wrap individual unbaked hand pies tightly in plastic wrap, then place in freezer bags. Freeze for up to 3 months and bake directly from frozen, adding 5-7 minutes to the baking time.
  • Freshness Retention Method: Keep baked hand pies in an airtight container at room temperature for 2-3 days. For maximum taste, warm briefly in the oven before serving to restore their crispy texture.
  • Filling Preparation Tip: Prepare cherry filling up to 3 days in advance and store in a sealed container in the refrigerator. This helps develop deeper flavors and saves time during pie assembly.
Print
clock clock iconcutlery cutlery iconflag flag iconfolder folder iconinstagram instagram iconpinterest pinterest iconfacebook facebook iconprint print iconsquares squares iconheart heart iconheart solid heart solid icon
Delectable Sour Cherry Hand Pies Recipe

Delectable Sour Cherry Hand Pies Recipe


5 Stars 4 Stars 3 Stars 2 Stars 1 Star

4.6 from 8 reviews

  • Total Time: 50 minutes
  • Yield: 9 1x

Description

Delightful sour cherry hand pies deliver a tantalizing blend of tart cherries nestled in buttery, flaky pastry. Sweet-tart filling and crisp crust create a perfect handheld dessert you’ll savor with pure culinary joy.


Ingredients

Scale
  • 2 cups pitted sour cherries (fresh or frozen)
  • 1 ½ cups (226 g) unsalted butter, cold and cubed
  • 2 ½ cups (300 g) all-purpose flour
  • 1 large egg
  • ½ cup granulated sugar
  • 1 tbsp cornstarch
  • 1 tbsp lemon juice
  • ½ tsp vanilla extract
  • 1 tsp salt
  • 6 tbsps (90 ml) ice water
  • 1 tbsp milk
  • 1 tbsp granulated sugar
  • 2 tbsps coarse sugar (for sprinkling)

Instructions

  1. Dough Preparation: Whisk flour, sugar, and salt in a mixing bowl. Integrate cold butter using a pastry cutter until mixture resembles sandy crumbs. Introduce ice water gradually, blending until dough forms a cohesive mass.
  2. Dough Chilling: Divide dough into two flat discs, wrap in plastic, and refrigerate for 30 minutes to firm up the texture.
  3. Cherry Filling Creation: Combine cherries, sugar, and lemon juice in a saucepan over medium heat. Simmer, stirring occasionally, allowing cherries to release juices for 5 minutes. Mix cornstarch with water, then fold into the mixture to enhance thickness.
  4. Filling Finalization: Cook for an additional 2-3 minutes until reaching a jam-like consistency. Remove from heat, stir in vanilla extract, and cool completely.
  5. Dough Rolling and Cutting: Roll chilled dough on a flour-dusted surface to a thin layer. Cut precise dough portions using a circular or rectangular cutter, placing them on a parchment-lined baking sheet.
  6. Pie Assembly: Spoon cherry filling onto half of each dough round, leaving a small border. Brush edges with egg wash. Overlay a second dough round, pressing edges with a fork to seal. Create small ventilation slits on top.
  7. Finishing Touches: Brush pies with egg wash and sprinkle with coarse sugar. Preheat oven to 375F (190C).
  8. Baking Process: Bake hand pies for 18-22 minutes until golden and crisp. Alternatively, for a different texture, deep-fry at 350F (175C) until exterior becomes crispy.
  9. Serving Preparation: Allow pies to cool slightly. Optional: Drizzle with powdered sugar glaze for added sweetness and presentation.

Notes

  • Chill Dough Thoroughly: Refrigerate pastry dough for at least 30 minutes to prevent shrinking and ensure flaky, tender texture during baking.
  • Manage Moisture Carefully: Control cherry filling’s consistency by gradually adding cornstarch, preventing runny or overly thick filling that could compromise pie structure.
  • Create Clean Seals: Press fork edges firmly and brush with egg wash to guarantee tight hand pie seals, preventing filling leakage during cooking.
  • Adjust for Dietary Needs: Substitute all-purpose flour with gluten-free blend and use cold vegan butter for dairy-free version, maintaining similar pastry texture and richness.
  • Prep Time: 20 minutes
  • Cook Time: 30 minutes
  • Category: Desserts, Snacks
  • Method: Frying
  • Cuisine: American

Nutrition

  • Serving Size: 9
  • Calories: 348
  • Sugar: 17 g
  • Sodium: 165 mg
  • Fat: 20 g
  • Saturated Fat: 12 g
  • Unsaturated Fat: 8 g
  • Trans Fat: 0 g
  • Carbohydrates: 36 g
  • Fiber: 1 g
  • Protein: 3 g
  • Cholesterol: 33 mg
Jenna Hartley

Jenna Hartley

Founder & Recipe Creator

Expertise

  • Recipe development with a focus on single-dish meals.
  • Fusion of traditional and modern Australian cuisines.
  • Food styling and photography for digital platforms.​

Education

Box Hill Institute, Melbourne

  • Degree: Advanced Diploma of Hospitality Management
  • Focus: Specialized in practical food and beverage service, responsible alcohol and hygiene compliance, legal risk management, and hands‑on experience in a simulated restaurant environment.

William Angliss Institute, Melbourne

  • Program: Certificate IV in Patisserie
  • Focus: Specialized in pastry and bakery techniques, cookery and specialty food preparation, recipe planning and costing, commercial kitchen operations, sustainable and inclusive work practices, food safety and hygiene compliance, and workplace health and safety.

Jenna is the heart of Picture Perfect Meals, turning simple ingredients into beautiful, easy‑to‑make dishes. 

Growing up around family meals in Melbourne, she trained at Box Hill Institute and then perfected her pastry skills at William Angliss Institute. She loves mixing classic Australian flavors with fresh ideas to keep cooking fun and stress‑free.

Leave a Reply

Your email address will not be published. Required fields are marked *

Recipe rating 5 Stars 4 Stars 3 Stars 2 Stars 1 Star