Whip Up Magical Chocolate Coconut Truffles Recipe Today
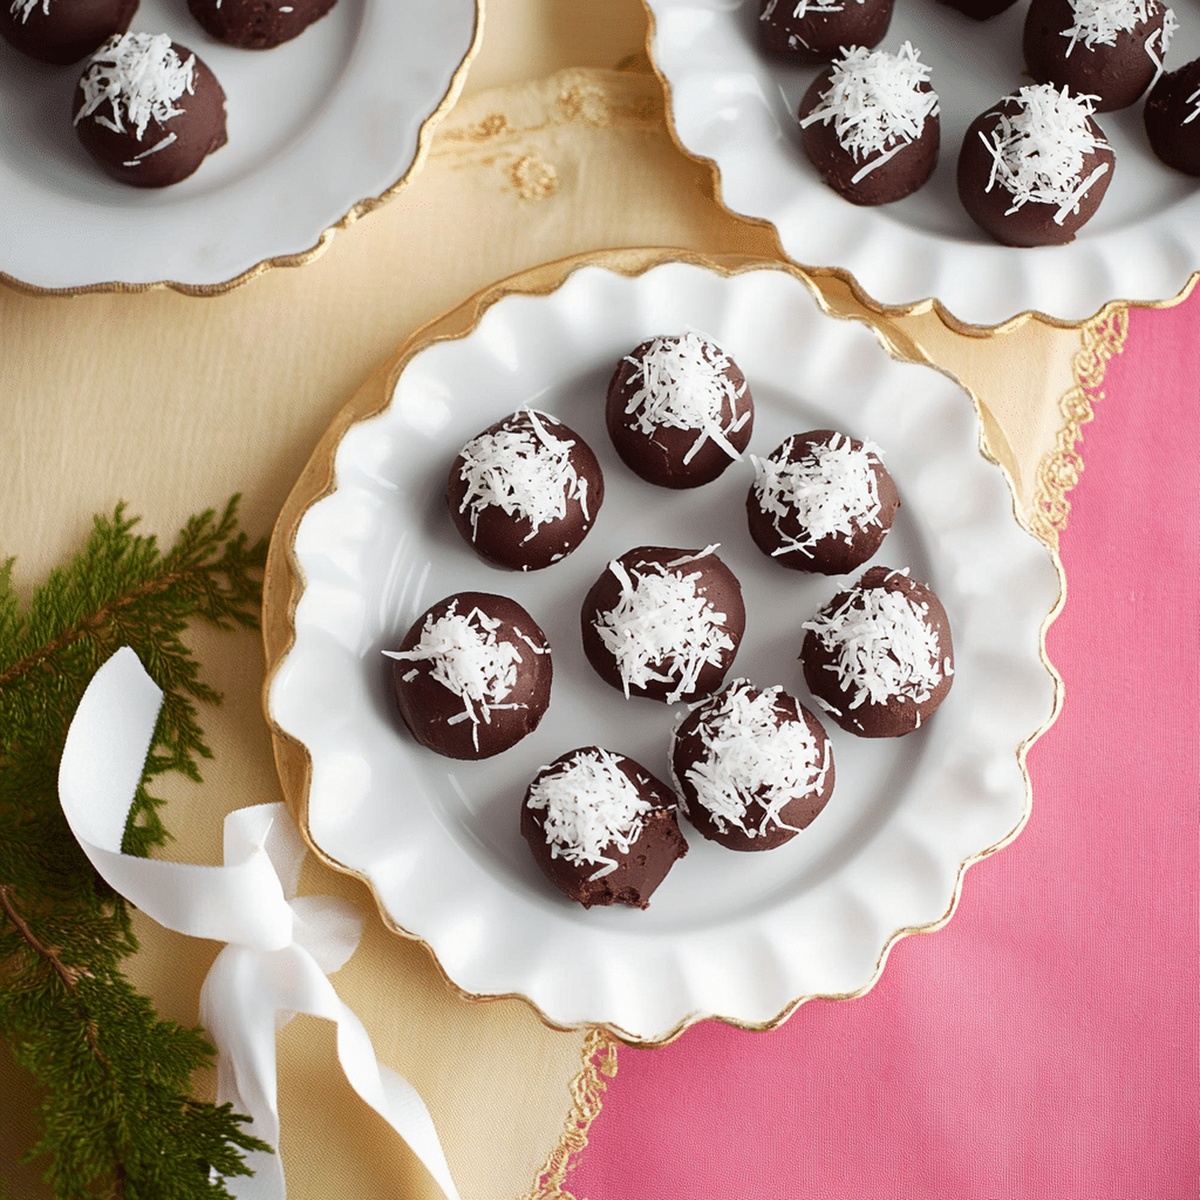
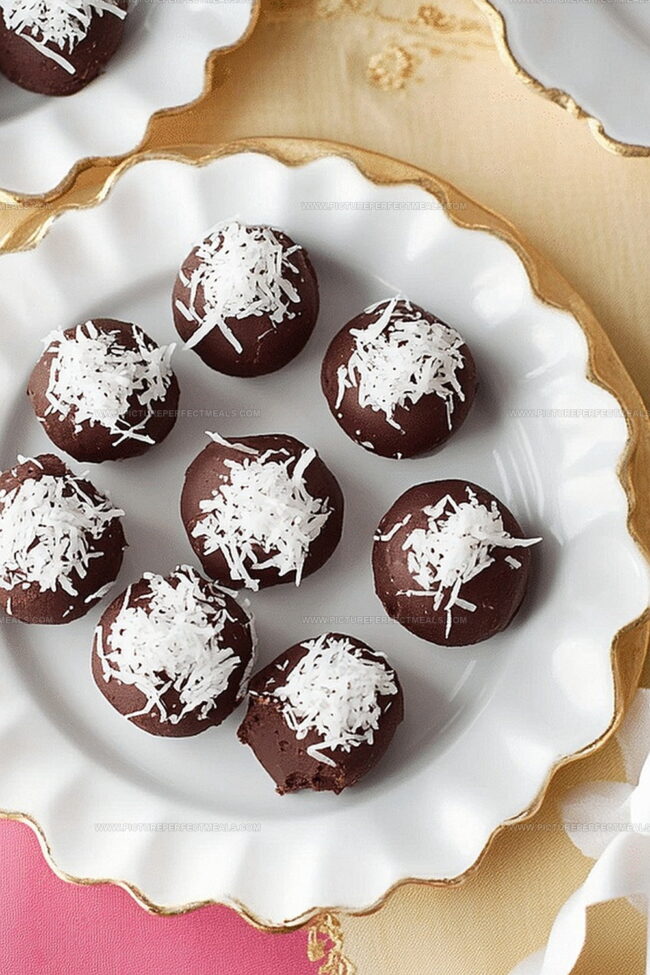
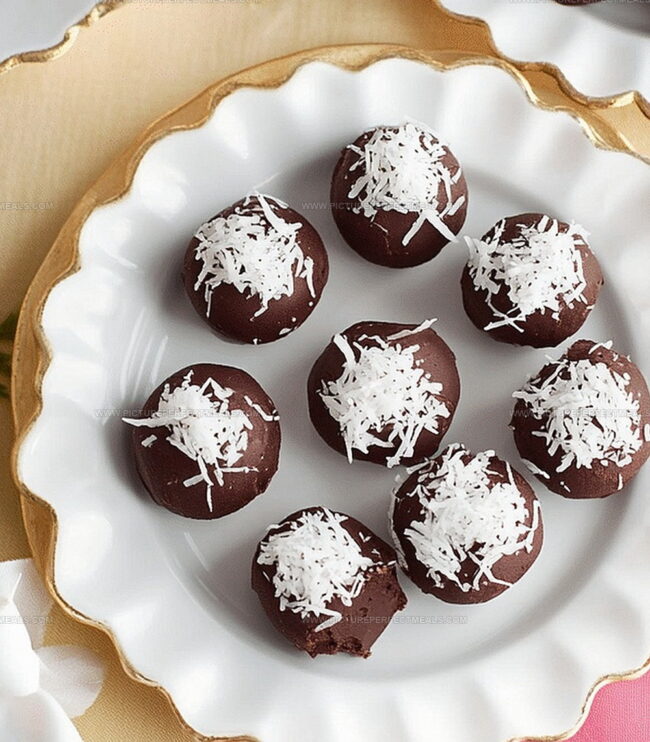
Indulgent chocolate coconut truffles dance between decadence and simplicity, offering a melt-in-your-mouth experience that captures pure dessert magic.
Sweet cocoa and rich coconut create an irresistible flavor combination that tempts every palate.
These delightful treats require minimal ingredients and even less effort to prepare.
No baking skills needed – just pure culinary enthusiasm.
The smooth chocolate melts seamlessly with shredded coconut, creating bite-sized delights that sparkle with elegance.
Each truffle promises a luxurious moment of blissful escape from everyday stress.
You’ll want to savor every single delectable morsel of these heavenly confections.
Quick Recipe Overview
Chocolate Coconut Truffle Ingredient List
For Base Mixture:For Shaping:For Chilling:Tools That Help You Nail That Coconut Texture
Instructions for Rolling and Coating with Ease
Blend coconut and sweetened condensed milk together in a mixing bowl, combining until the mixture becomes smooth and holds together perfectly.
Grab small portions of the coconut mixture and gently roll them between your palms, forming cute round truffles that are compact and uniform in size.
Transfer the freshly shaped coconut balls onto a parchment-lined tray and slide them into the freezer, allowing them to firm up and become deliciously chilled for about 25 minutes.
Carefully melt chocolate in a double boiler or microwave, stirring until it becomes silky and completely liquid.
Using a fork, dip each frozen coconut ball into the melted chocolate, ensuring full coverage, then place back on the parchment paper to let the chocolate set.
Return the chocolate-covered truffles to the refrigerator for a final cooling period, allowing the chocolate to harden and create a beautiful, glossy finish.
Flavor Upgrades to Try Inside Each Truffle
How to Serve These Sweet Bites
Tips for Long-Lasting Coconut Chocolate Treats
Print
Dreamy Chocolate Coconut Truffles Recipe
- Total Time: 45 minutes
- Yield: 21 1x
Description
Sinful chocolate coconut truffles combine rich dark chocolate with sweet shredded coconut for an indulgent treat. Delicate spheres melt smoothly, offering a perfect balance of intense cocoa and tropical coconut flavors that you’ll savor.
Ingredients
- 10 oz (280 g) semi-sweet or dark chocolate, chopped
- 2 ½ cups shredded coconut (sweetened or unsweetened)
- ½ cup sweetened condensed milk
- 2 tbsps unsalted butter, melted
- 1 tsp vanilla extract
- 1 tsp coconut oil (optional, for a smooth coating)
- Extra shredded coconut (for garnish)
- Drizzle of melted white chocolate
- Chopped nuts
Instructions
- Mixture Preparation: Blend shredded coconut, sweetened condensed milk, vanilla extract, and melted butter in a mixing bowl, whisking until the ingredients meld into a smooth, consistent texture.
- Truffle Shaping: Craft uniform spheres by scooping the coconut mixture with a spoon or cookie scoop, then rolling gently between palms to create perfectly rounded truffles.
- Chilling Process: Arrange the delicate coconut orbs on a parchment-lined baking sheet, spacing them apart, and freeze for 25 minutes until they become solidly structured and maintain their precise shape.
- Finishing Touch: Extract the chilled truffles, ready for final coating or immediate serving, preserving their elegant, compact form.
Notes
- Chill Thoroughly: Freeze truffles completely to help them maintain shape and prevent crumbling during handling or coating.
- Consistent Size Matters: Use a small cookie scoop or tablespoon to create uniform truffles, ensuring even texture and cooking time.
- Gentle Rolling Technique: Roll the mixture between cool, slightly damp palms to prevent sticking and create smooth, perfect spheres.
- Customize Coating Options: Experiment with dark, milk, or white chocolate coatings, or roll in cocoa powder, crushed nuts, or toasted coconut for added texture and flavor variety.
- Prep Time: 15 minutes
- Cook Time: 30 minutes
- Category: Desserts, Snacks
- Method: Baking
- Cuisine: American
Nutrition
- Serving Size: 21
- Calories: 130
- Sugar: 10 g
- Sodium: 30 mg
- Fat: 8 g
- Saturated Fat: 5 g
- Unsaturated Fat: 3 g
- Trans Fat: 0 g
- Carbohydrates: 14 g
- Fiber: 2 g
- Protein: 2 g
- Cholesterol: 5 mg
Jenna Hartley
Founder & Recipe Creator
Expertise
Education
Box Hill Institute, Melbourne
William Angliss Institute, Melbourne
Jenna is the heart of Picture Perfect Meals, turning simple ingredients into beautiful, easy‑to‑make dishes.
Growing up around family meals in Melbourne, she trained at Box Hill Institute and then perfected her pastry skills at William Angliss Institute. She loves mixing classic Australian flavors with fresh ideas to keep cooking fun and stress‑free.