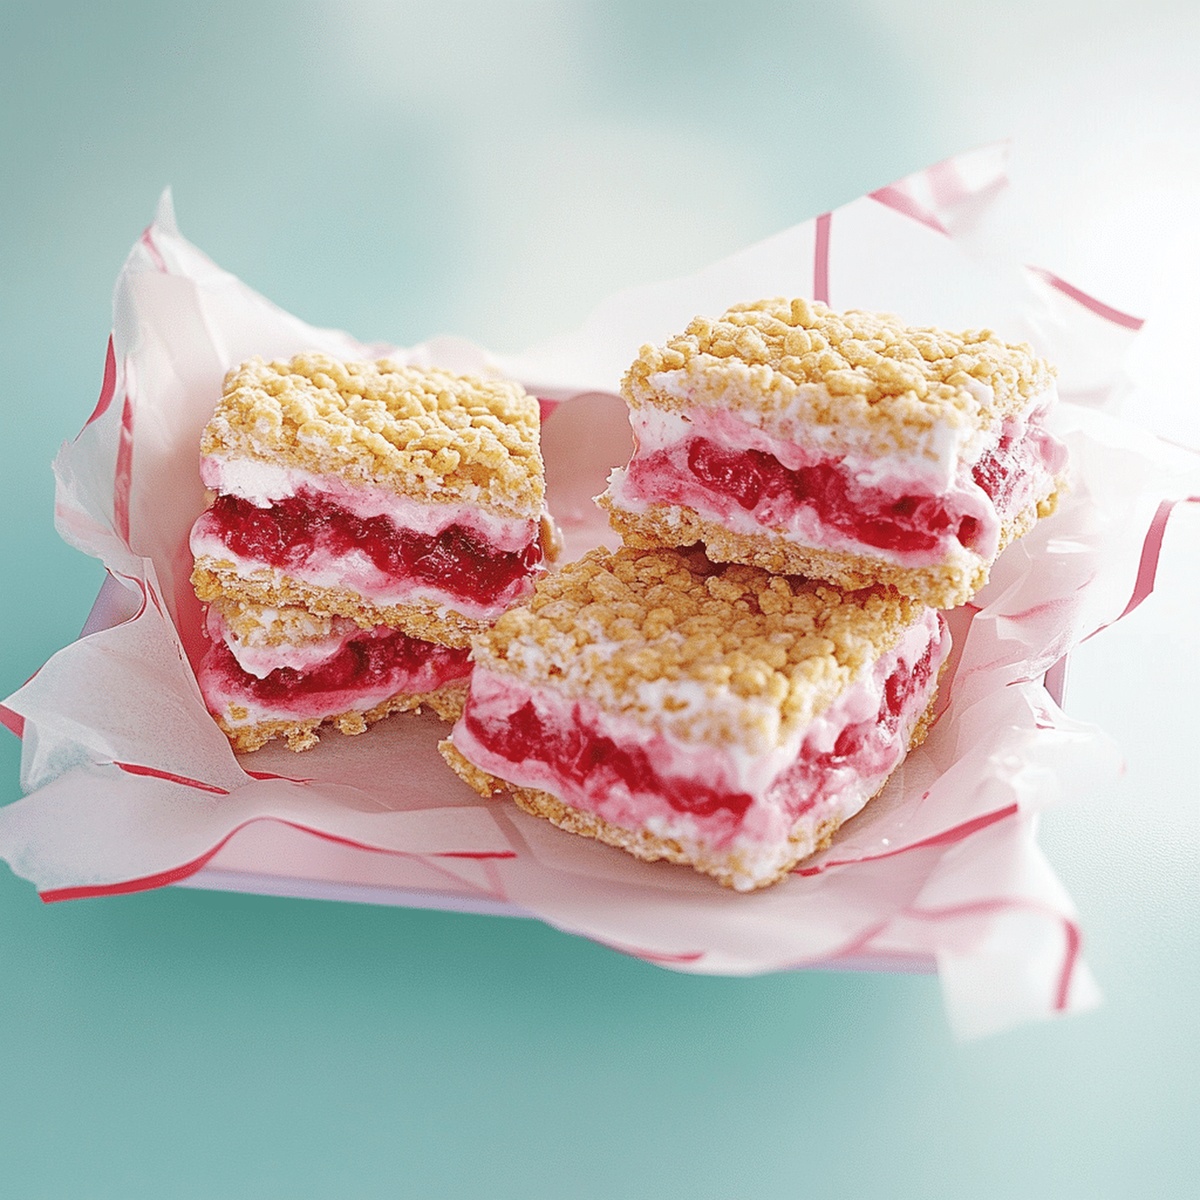
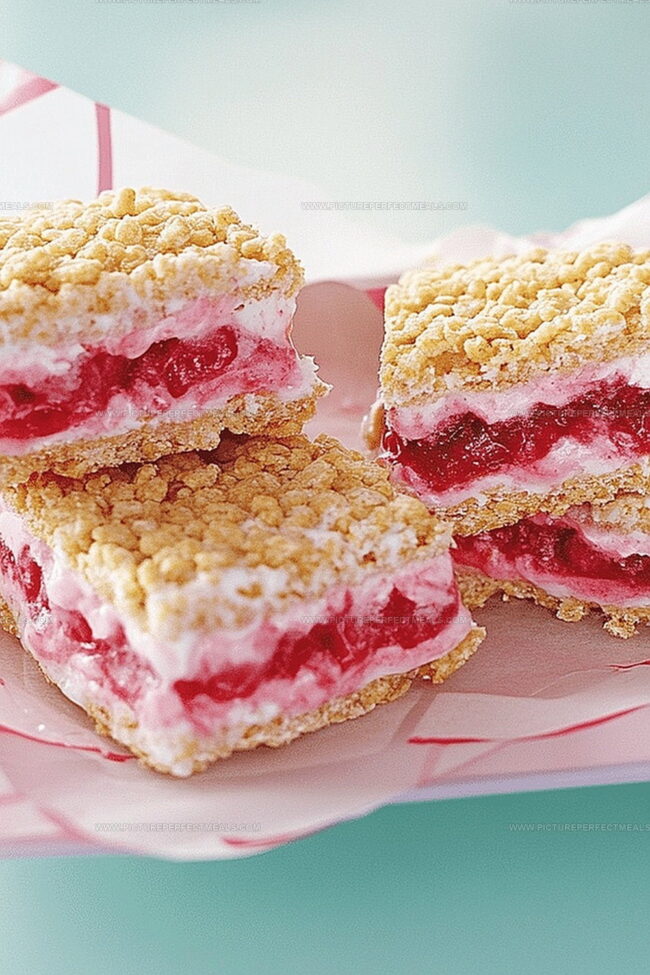
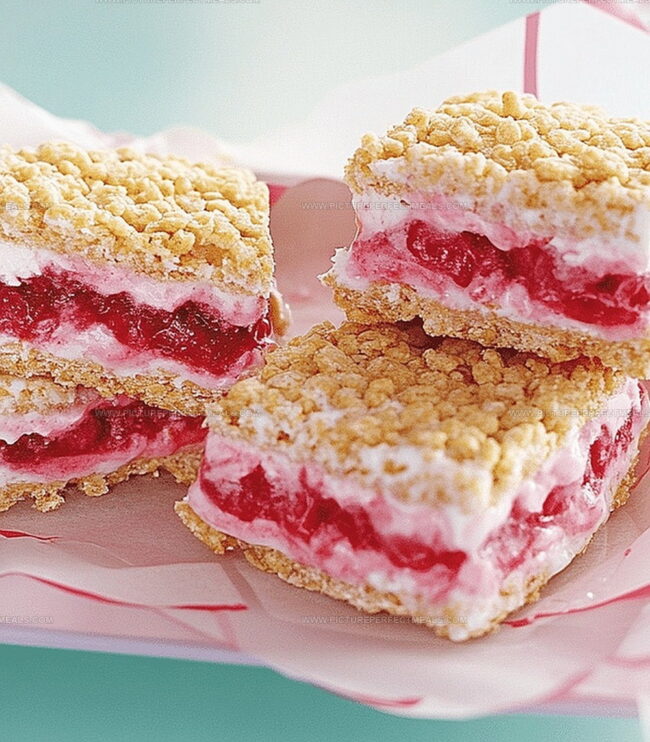
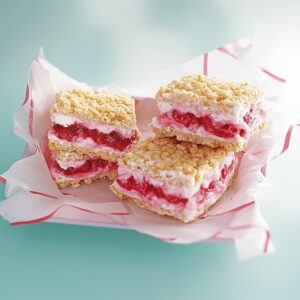
Nostalgic childhood flavors collide with creamy decadence in these irresistible pb&j puffed cereal ice cream sandwiches that promise pure bliss.
Sweet memories dance across your palate with every delightful bite.
Crispy cereal edges provide a satisfying crunch against smooth, velvety ice cream layers.
Peanut butter’s rich complexity weaves perfectly with sweet berry jam undertones.
The contrast of temperatures and textures creates an extraordinary dessert experience.
Soft, cool, and utterly indulgent, these frozen treats transform a classic sandwich into an elegant summer delight.
Come savor a cool twist on a beloved comfort combination.
Quick Recipe Overview
Prep Time: 20 minutes
Cook Time: 4 hours
Total Time: 4 hours 20 minutes
Calories: 200 kcal
Servings: 12
PB&J Ice Cream Sandwich Ingredient List
For Base Layer:
Puffed Rice Cereal: Crispy foundation that provides delightful crunch and texture to the sandwich base.
Butter: Helps bind ingredients and adds rich, smooth flavor for enhanced taste and consistency.
Honey or Corn Syrup: Natural sweetener that creates sticky binding agent for cereal mixture.
For Flavor Enhancement:
Peanut Butter: Creamy protein-packed spread delivering deep nutty richness and signature taste profile.
For Assembly Support:
Parchment Paper: Non-stick surface enabler that ensures easy removal and clean cutting of ice cream sandwich layers.
Tools to Build PB&J Cereal Sandwiches
Large saucepan: Essential for melting and mixing peanut butter, honey, and butter.
Wooden spoon or spatula: Perfect for stirring ingredients smoothly and folding cereal.
9×9-inch baking pan: Crucial for creating uniform sandwich base and top layers.
Parchment paper: Helps with easy removal and prevents sticking.
Measuring cups: Ensures accurate ingredient proportions.
Refrigerator: Helps set the cereal mixture quickly and firmly.
Make PB&J Puffed Cereal Sandwiches at Home
Melt Flavor Base Combine peanut butter, honey, and butter in a large saucepan over medium heat. Stir until the mixture transforms into a smooth, glossy liquid.
Coat Cereal Gently fold puffed rice cereal into the melted mixture, ensuring every crispy piece gets a delicious, even coating.
Create First Layer Line a square baking pan with parchment paper. Press half the cereal mixture firmly into the pan, creating a solid, compact base that will hold the sandwich together.
Chill Foundation Slide the pan into the refrigerator for 15-20 minutes, allowing the layer to set and become sturdy. Keep the remaining cereal mixture ready for the top layer.
Tweak Your PB&J Ice Cream Sandwich Game
Creamy Customization: Swap traditional peanut butter with almond or sunflower seed butter for nut-free options or different flavor profiles.
Sweetness Control: Use sugar-free honey or reduce honey amount for a less sweet treat, perfect for those watching sugar intake.
Freezing Pro Tip: Wrap individual ice cream sandwiches in plastic wrap before storing to prevent freezer burn and maintain optimal texture.
Dietary Adaptations: Create gluten-free versions by ensuring puffed rice cereal is certified gluten-free and using dairy-free ice cream alternatives like coconut or oat milk-based options.
Berry Blast Variation: Add dried strawberry pieces or raspberry jam swirls into the cereal mixture for an extra fruity PB&J-inspired twist.
Fun Ways to Serve PB&J Ice Cream Sandwiches
Nostalgic Dessert Platter: Create a fun ice cream sandwich spread with different flavors like chocolate, vanilla, and strawberry nestled between the peanut butter cereal layers.
Sweet Breakfast Remix: Transform leftovers into a quick morning treat by cutting sandwiches into smaller bite-sized pieces and serving with fresh berries or sliced bananas.
Party-Ready Presentation: Wrap individual ice cream sandwiches in colorful wax paper and arrange on a cool slate or wooden board for a gorgeous dessert table centerpiece that guests will love.
Chilled Summer Crowd-Pleaser: Prepare sandwiches ahead of time and store in the freezer, allowing easy grab-and-go snacks during backyard barbecues or poolside gatherings.
Save and Chill Your PB&J Sandwiches
Meal Planning & Storage Advice
Chill Before Serving: Refrigerate ice cream sandwiches for 30 minutes before enjoying to help them hold their shape and enhance flavor melding.
Quick Batch Preparation: Make multiple sandwiches in advance and store in a sealed container, layering with parchment paper between each sandwich to prevent sticking.
Freezer-Friendly Delight: Wrap individual sandwiches tightly in plastic wrap or aluminum foil, then place in a freezer-safe container. They’ll stay fresh for up to 2 weeks.
Temperature Control: Store in the coldest part of your freezer, maintaining a consistent temperature to prevent ice crystal formation and preserve the creamy texture.
Preparation: Line a 9-inch square baking pan completely with parchment paper, creating an overhang for easy extraction.
Base Mixture: Melt peanut butter, honey, and butter in a saucepan over medium heat, stirring until smooth and integrated. Remove from heat and fold puffed rice cereal into the liquid, ensuring thorough coating.
First Layer Formation: Press half of the cereal mixture into the prepared pan, creating a compact, even base. Refrigerate for 15-20 minutes to stabilize the foundation.
Ice Cream Layering: Spread softened ice cream evenly across the chilled cereal base, guaranteeing full coverage and a smooth surface.
Final Assembly: Top the ice cream with remaining cereal mixture, gently pressing to create a uniform seal. Freeze the entire dessert for 2-3 hours until completely set and firm.
Serving: Remove from freezer, lift from pan using parchment edges, and slice into individual sandwiches for a delightful frozen treat.
Notes
Cereal Coating Technique: Work quickly when mixing cereal with peanut butter mixture to prevent clumping and ensure each piece gets evenly coated.
Temperature Control: Allow ice cream to soften just enough to spread smoothly without becoming too liquid, which can compromise the sandwich’s structure.
Pressing Pressure: Use gentle but firm pressure when layering to create compact, stable layers without crushing the delicate puffed cereal.
Storage Strategy: Wrap individual sandwiches in plastic wrap or parchment paper after cutting to prevent freezer burn and maintain optimal texture.
Recipe development with a focus on single-dish meals.
Fusion of traditional and modern Australian cuisines.
Food styling and photography for digital platforms.
Education
Box Hill Institute, Melbourne
Degree: Advanced Diploma of Hospitality Management
Focus: Specialized in practical food and beverage service, responsible alcohol and hygiene compliance, legal risk management, and hands‑on experience in a simulated restaurant environment.
William Angliss Institute, Melbourne
Program: Certificate IV in Patisserie
Focus: Specialized in pastry and bakery techniques, cookery and specialty food preparation, recipe planning and costing, commercial kitchen operations, sustainable and inclusive work practices, food safety and hygiene compliance, and workplace health and safety.
Jenna is the heart of Picture Perfect Meals, turning simple ingredients into beautiful, easy‑to‑make dishes.
Growing up around family meals in Melbourne, she trained at Box Hill Institute and then perfected her pastry skills at William Angliss Institute. She loves mixing classic Australian flavors with fresh ideas to keep cooking fun and stress‑free.
Jenna Hartley
Founder & Recipe Creator
Expertise
Education
Box Hill Institute, Melbourne
William Angliss Institute, Melbourne
Jenna is the heart of Picture Perfect Meals, turning simple ingredients into beautiful, easy‑to‑make dishes.
Growing up around family meals in Melbourne, she trained at Box Hill Institute and then perfected her pastry skills at William Angliss Institute. She loves mixing classic Australian flavors with fresh ideas to keep cooking fun and stress‑free.