Dreamy Peanut Butter Chocolate Cream Pie Recipe

Heavenly Dreamy Peanut Butter Chocolate Cream Pie Recipe

Decadent desserts often surprise us with their unexpected peanut butter chocolate cream pie magic.

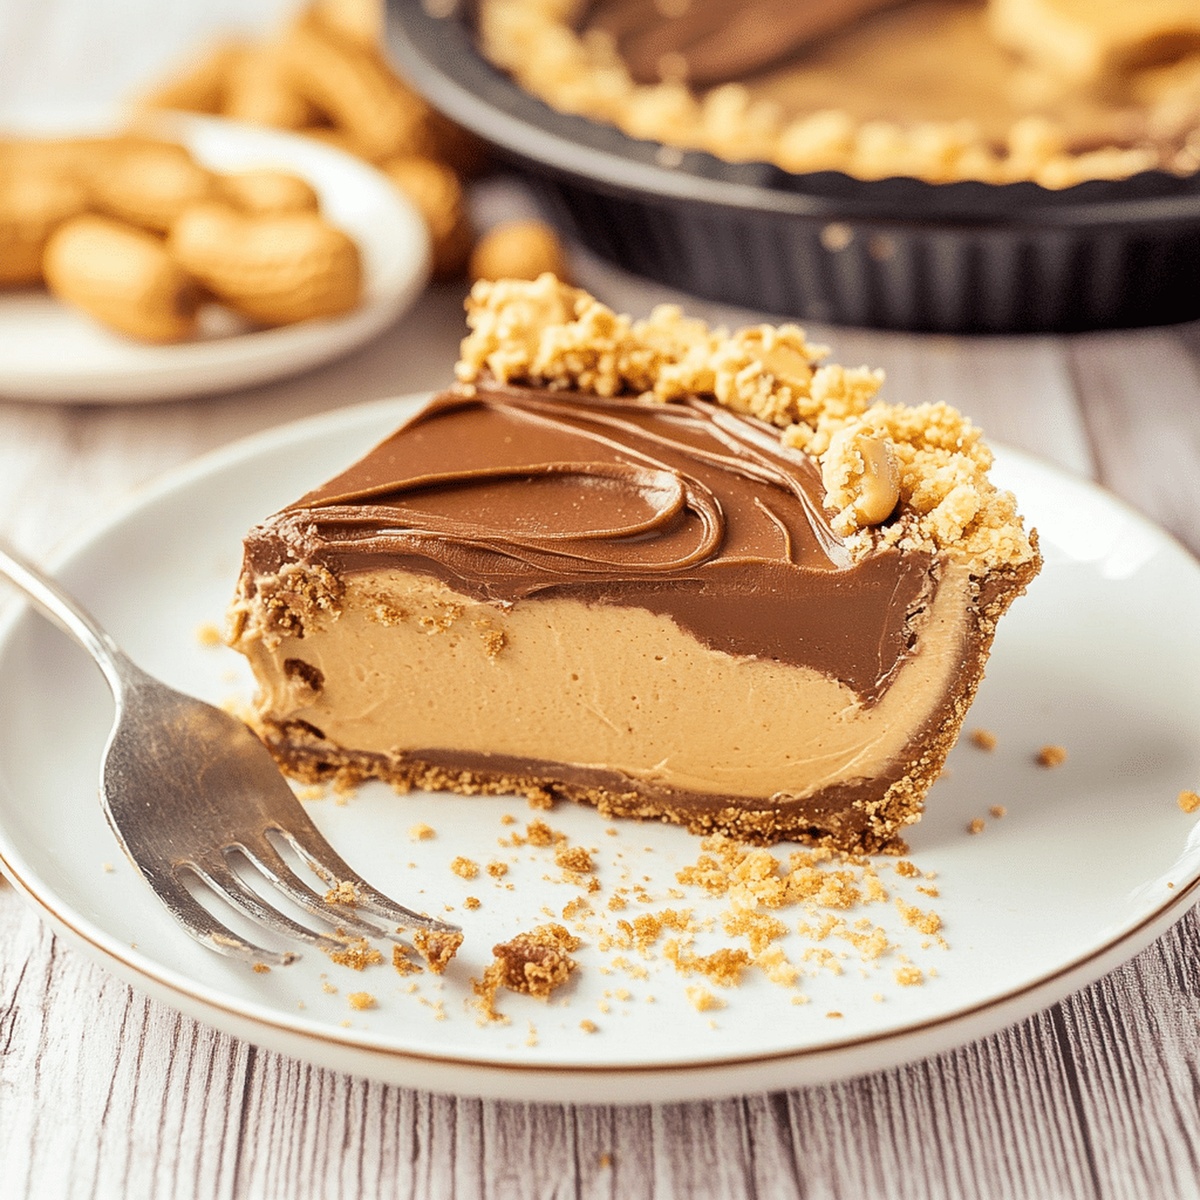
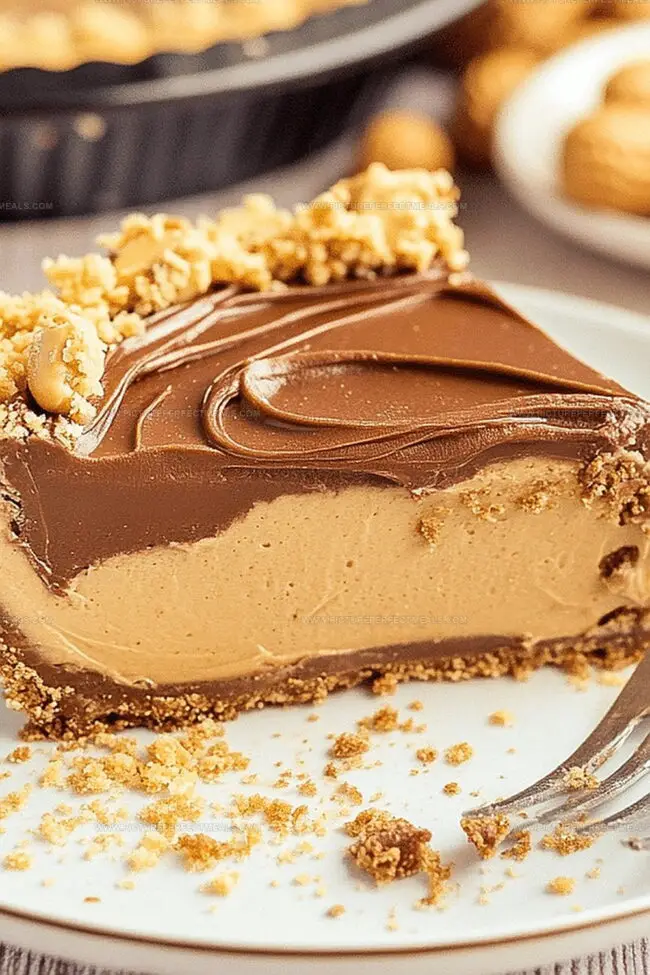
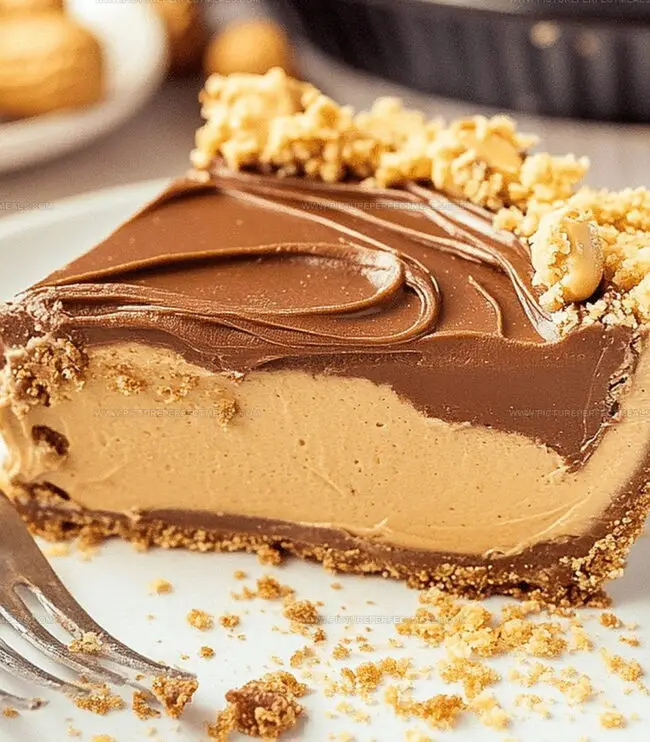
Rich chocolate and creamy peanut butter create an irresistible dance of flavors in this heavenly treat.

Every slice promises pure indulgence with its silky smooth texture and deep, luxurious taste.

The combination melts together like a sweet symphony of pure comfort.

Each bite delivers a perfect balance between intense chocolate and nutty peanut butter notes.

The pie’s luscious filling nestles perfectly in a crisp, buttery crust that adds delightful crunch.

Chocolate and peanut butter lovers will swoon over this simple yet extraordinary dessert that transforms ordinary moments into delectable memories.

What Goes Into Peanut Butter Chocolate Cream Pie

For Crust Base:
  • Oreo Cookies: Provides sweet, rich foundation with chocolate undertones that elevates the entire pie experience.
  • Unsalted Butter: Binds cookie crumbs together, creating a sturdy and deliciously crisp base that holds the filling perfectly.
For Creamy Filling:
  • Cream Cheese: Delivers tangy richness and smooth texture, ensuring a luxurious and stable peanut butter base.
  • Peanut Butter: Brings intense nutty flavor and creamy consistency, creating the signature taste of the pie.
  • Powdered Sugar: Adds sweetness and helps stabilize the filling, balancing the savory peanut butter notes.
  • Vanilla Extract: Introduces warm, aromatic depth that enhances the overall flavor profile of the filling.
  • Heavy Whipping Cream: Creates light, airy texture that makes the filling incredibly soft and decadent.
For Chocolate Topping and Garnish:
  • Semi-Sweet Chocolate: Provides deep, sophisticated chocolate layer with balanced sweetness that complements the peanut butter.
  • Heavy Whipping Cream: Helps create smooth, glossy ganache with perfect pouring consistency.
  • Salted Peanuts: Adds delightful crunch and salty contrast, elevating the pie's textural complexity.

Tools for Peanut Butter Pie Prep

  • Food processor: Perfect for crushing Oreo cookies into fine crumbs.
  • 9-inch pie dish: Essential for creating and holding the delicious pie crust.
  • Large mixing bowl: Needed for blending peanut butter filling ingredients smoothly.
  • Medium bowl: Used for mixing cookie crumbs and melted butter.
  • Spatula: Great for spreading and smoothing filling and ganache evenly.
  • Whisk or electric mixer: Helps beat cream cheese and whip heavy cream effortlessly.
  • Small saucepan: Necessary for heating cream for chocolate ganache.
  • Heatproof bowl: Ideal for melting chocolate and creating ganache.
  • Knife: Helpful for chopping chocolate and peanuts.
  • Measuring cups and spoons: Ensures accurate ingredient measurements.

Making a Peanut Butter Chocolate Pie

  • Crush Cookie Base

Blast Oreo cookies in a food processor until they turn into fine dust. Mix with melted butter and press firmly into a pie dish, creating a solid foundation. Pop the crust in the refrigerator while you prepare the filling.

  • Whip Creamy Peanut Butter Layer

Blend cream cheese and peanut butter until silky smooth. Incorporate powdered sugar and vanilla. Separately, whip cream into fluffy peaks. Gently fold whipped cream into the peanut butter mixture, creating a luxurious filling. Spread evenly across the chilled crust and return to the refrigerator.

  • Create Chocolate Glaze

Chop chocolate into small pieces. Heat cream until it’s steaming hot. Pour cream over chocolate and let it sit briefly. Stir until the mixture transforms into a glossy, rich ganache. Allow to cool slightly.

  • Final Assembly

Drizzle the warm chocolate ganache over the chilled peanut butter layer. Sprinkle chopped salted peanuts on top for a crunchy finish. Refrigerate for a couple of hours until the pie sets completely. Slice and serve this decadent dessert that combines creamy, crunchy, and chocolatey goodness.

Tweaking Chocolate Cream Pie Flavors

  • Chill for Perfection: Refrigerate the pie for at least 2 hours to ensure the filling sets properly and develops a rich, creamy texture that will melt in your mouth.
  • No-Bake Magic: This pie is a no-bake wonder, making it ideal for hot summer days or when you want a delicious dessert without turning on the oven.
  • Gluten-Free Hack: Swap regular Oreo cookies with gluten-free chocolate sandwich cookies to make the crust suitable for those with gluten sensitivities.
  • Nut-Free Option: Replace peanut butter with sunflower seed butter or cookie butter for those with nut allergies, maintaining the creamy texture and delicious flavor profile.
  • Make-Ahead Marvel: Prepare the entire pie up to 3 days in advance and store covered in the refrigerator, making it perfect for parties or special occasions that require advance planning.

Ways to Serve Chocolate Cream Pie

  • Dessert Party Pleaser: Slice this pie at gatherings to watch guests' eyes light up with excitement. Perfect for potlucks, birthday celebrations, and family dinners where everyone craves a decadent treat.
  • Gourmet Presentation: Drizzle extra melted chocolate in elegant zigzag patterns across each slice. Add a dollop of whipped cream and sprinkle additional crushed peanuts for a restaurant-quality finishing touch.
  • Indulgent Pairing: Serve chilled alongside a scoop of vanilla bean ice cream or a warm cup of coffee. The contrast between cold pie and hot beverage creates a delightful sensory experience that elevates the entire dessert.
  • Make-Ahead Magic: Prepare the pie a day in advance and store covered in the refrigerator. This strategy allows flavors to meld and makes hosting stress-free, giving you more time to enjoy your guests' company.

Storing Chocolate Cream Pie the Right Way

  • Smart Refrigeration Strategy: Store the pie covered in plastic wrap or aluminum foil in the refrigerator for up to 5 days. Keep it away from strong-smelling foods to maintain its delicate flavor profile.
  • Freezing Magic: Wrap the entire pie tightly in plastic wrap and aluminum foil, then freeze for maximum 1 month. Thaw overnight in the refrigerator before serving to maintain texture and taste.
  • Slice Separation Technique: Insert parchment paper between individual slices when storing in containers to prevent sticking and make grabbing a quick dessert easier.
  • Temperature Control Tip: Always serve chilled directly from the refrigerator. Remove the pie 5-10 minutes before serving to allow the ganache and filling to soften slightly for optimal enjoyment.

Quick Recipe Overview

Prep Time: 30 minutes

Cook Time: 2 hours 30 minutes

Total Time: 3 hours

Calories: 507 kcal

Servings: 8

Print
clock clock iconcutlery cutlery iconflag flag iconfolder folder iconinstagram instagram iconpinterest pinterest iconfacebook facebook iconprint print iconsquares squares iconheart heart iconheart solid heart solid icon
Dreamy Peanut Butter Chocolate Cream Pie Recipe

Dreamy Peanut Butter Chocolate Cream Pie Recipe


5 Stars 4 Stars 3 Stars 2 Stars 1 Star

4.8 from 33 reviews

  • Total Time: 30 minutes
  • Yield: 9 1x

Description

Creamy peanut butter chocolate cream pie delights dessert enthusiasts with its rich, indulgent layers. Chocolate graham cracker crust and silky filling create a luxurious experience you’ll crave again and again.


Ingredients

Scale
  • 8 oz (226 g) cream cheese, softened
  • 1 cup creamy peanut butter
  • 1 ½ cups (360 ml) heavy whipping cream
  • 1 cup powdered sugar
  • 1 tsp vanilla extract
  • 25 Oreo cookies
  • 6 tbsps (90 ml) unsalted butter, melted
  • 6 oz (170 g) semi-sweet chocolate, chopped
  • ¾ cup (180 ml) heavy whipping cream
  • ¼ cup chopped salted peanuts

Instructions

  1. Crust Preparation: Pulverize Oreo cookies into fine crumbs using a food processor. Mix thoroughly with melted butter to create a cohesive mixture.
  2. Crust Forming: Press the cookie mixture firmly into a 9-inch pie dish, ensuring an even layer that climbs the sides. Refrigerate to set the foundation.
  3. Filling Creation: Whip cream cheese and peanut butter until smooth and creamy. Blend in powdered sugar and vanilla extract until fully incorporated.
  4. Cream Integration: Whip heavy cream to stiff peaks, then gently fold into the peanut butter mixture, maintaining a light and airy texture.
  5. Filling Application: Spread the peanut butter mixture evenly across the chilled crust, creating a smooth surface. Return to refrigerator for initial firming.
  6. Ganache Preparation: Place chopped semi-sweet chocolate in a heat-resistant bowl. Heat heavy whipping cream until it reaches a gentle simmer.
  7. Ganache Completion: Pour hot cream over chocolate, allowing a brief rest. Stir until the mixture transforms into a glossy, seamless ganache.
  8. Final Assembly: Once cooled slightly, pour the chocolate ganache over the peanut butter filling, ensuring complete and elegant coverage.
  9. Garnish and Chill: Sprinkle chopped salted peanuts across the top for added texture and visual interest. Refrigerate for at least two hours to allow complete setting and flavor melding.

Notes

  • Crust Consistency Check: Ensure Oreo crumbs are finely ground for a smooth, compact base that holds together perfectly when sliced.
  • Chilling Strategy: Refrigerate the crust and pie between layers to maintain structural integrity and enhance flavor melding.
  • Whipping Technique: Whip cream cheese and peanut butter at room temperature for smoother blending, preventing lumpy texture.
  • Ganache Precision: Let chocolate ganache cool slightly before pouring to prevent melting the peanut butter filling and achieve clean layer separation.
  • Prep Time: 30 minutes
  • Cook Time: 0 minutes
  • Category: Desserts
  • Method: None
  • Cuisine: American

Nutrition

  • Serving Size: 9
  • Calories: 406
  • Sugar: 22 g
  • Sodium: 330 mg
  • Fat: 29 g
  • Saturated Fat: 14 g
  • Unsaturated Fat: 12 g
  • Trans Fat: 0 g
  • Carbohydrates: 32 g
  • Fiber: 1 g
  • Protein: 7 g
  • Cholesterol: 39 mg
Jenna Hartley

Jenna Hartley

Founder & Recipe Creator

Expertise

  • Recipe development with a focus on single-dish meals.
  • Fusion of traditional and modern Australian cuisines.
  • Food styling and photography for digital platforms.​

Education

Box Hill Institute, Melbourne

  • Degree: Advanced Diploma of Hospitality Management
  • Focus: Specialized in practical food and beverage service, responsible alcohol and hygiene compliance, legal risk management, and hands‑on experience in a simulated restaurant environment.

William Angliss Institute, Melbourne

  • Program: Certificate IV in Patisserie
  • Focus: Specialized in pastry and bakery techniques, cookery and specialty food preparation, recipe planning and costing, commercial kitchen operations, sustainable and inclusive work practices, food safety and hygiene compliance, and workplace health and safety.

Jenna is the heart of Picture Perfect Meals, turning simple ingredients into beautiful, easy‑to‑make dishes. 

Growing up around family meals in Melbourne, she trained at Box Hill Institute and then perfected her pastry skills at William Angliss Institute. She loves mixing classic Australian flavors with fresh ideas to keep cooking fun and stress‑free.

Leave a Reply

Your email address will not be published. Required fields are marked *

Recipe rating 5 Stars 4 Stars 3 Stars 2 Stars 1 Star