Powdered Sugar: Optional topping that adds delicate sweetness and elegant finish.
Tools to Bake Pistachio Sugar Cookie Bars Fast
9×13-inch baking dish: Perfect size for making bar cookies.
Parchment paper: Ensures easy removal and prevents sticking.
Electric mixer or whisk: Helps blend ingredients smoothly.
Mixing bowls: One for dry ingredients, one for wet ingredients.
Measuring cups and spoons: Precise measurements are key for baking success.
Spatula: Helps fold ingredients and spread batter evenly.
Cooling rack: Allows bars to cool without getting soggy.
How to Make Soft and Colorful Pistachio Cookie Bars
Warm Up the Oven Set your oven to a cozy 350°F and grab a 9×13-inch baking pan. Line it with parchment paper, letting the edges hang over like a little paper cape to help you lift out your delicious creation later.
Create the Cookie Base Mix together your dry ingredients in a large bowl until they’re perfectly blended. In another bowl, cream together butter and sugar until they become light and fluffy, almost like a cloud of sweetness.
Combine the Magic Gently fold the dry ingredients into the creamy butter mixture. Don’t go crazy with mixing – just blend until everything comes together in a soft, dreamy dough.
Spread the Love Pour the cookie dough into your prepared pan. Use a spatula or your hands to spread it evenly, creating a smooth canvas for your pistachio paradise.
Add the Pistachio Punch Sprinkle the dry pudding mix over the cookie base, making sure it’s distributed evenly. This is where the magic happens and the unique flavor comes to life.
Bake to Perfection Slide the pan into the preheated oven and bake for about 20-25 minutes. You’re looking for golden edges and a set center that’s still slightly soft.
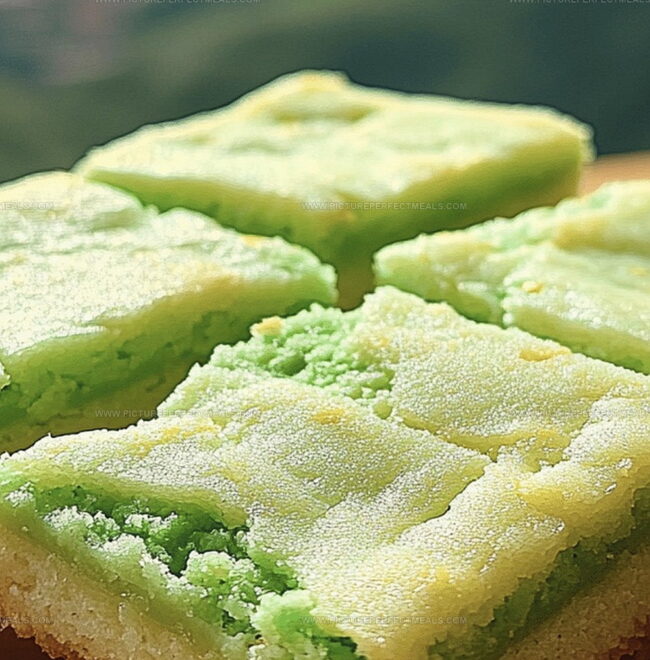
Cool and Slice Once baked, let the bars cool completely in the pan. Use those handy parchment paper edges to lift the entire batch out, then slice into beautiful squares of pistachio-infused happiness.
Add-In Ideas for Pistachio Pudding Cookie Bars
Baking Success Secrets: Ensure your butter and eggs are at room temperature for smoother mixing and better texture.
Make-Ahead Magic: These bars can be prepared up to 3 days in advance and stored in an airtight container at room temperature.
Gluten-Free Option: Swap regular flour with a gluten-free all-purpose flour blend to make these bars accessible for those with gluten sensitivities.
Nutty Alternatives: If pistachios aren’t your favorite, try substituting with chopped almonds or walnuts for a different flavor profile.
Festive Decorating Hack: Drizzle melted white chocolate or sprinkle crushed pistachios on top for an extra special touch that makes the bars look bakery-worthy.
Presenting Pistachio Bars for Holidays or Potlucks
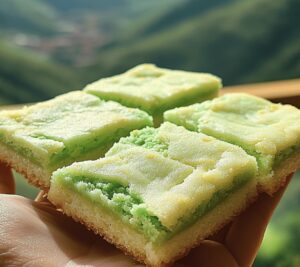
Festive Holiday Dessert Platter: Arrange these pudding bars on a elegant white ceramic platter, garnished with fresh mint leaves and a light dusting of powdered sugar for a beautiful holiday presentation.
Afternoon Tea Companion: Slice bars into smaller bite-sized squares and serve alongside hot Earl Grey tea, creating a delightful sweet treat perfect for leisurely afternoon gatherings.
Ice Cream Pairing Delight: Top warm pudding bars with a scoop of vanilla bean ice cream, allowing the creamy cold dessert to contrast beautifully with the soft, sweet cookie base.
Brunch Centerpiece Option: Create a dessert buffet featuring these bars as a centerpiece, complemented by fresh berries and whipped cream for an elegant weekend brunch spread.
Store Pistachio Bars and Keep Them Chewy
Quick Refrigeration: Store cooled bars in an airtight container inside the refrigerator for up to 5 days, maintaining their soft texture and delicious flavor.
Freezing Magic: Wrap individual bars in plastic wrap, then place in a freezer-safe container to freeze for 2-3 months, perfect for make-ahead treats or unexpected sweet cravings.
Room Temperature Tips: Keep bars covered at room temperature for 1-2 days, ensuring they stay moist and delectable when served at gatherings or casual snack times.
Slice Smart: Cut bars only when completely cooled to prevent crumbling and maintain clean, precise edges that look professional and appetizing.
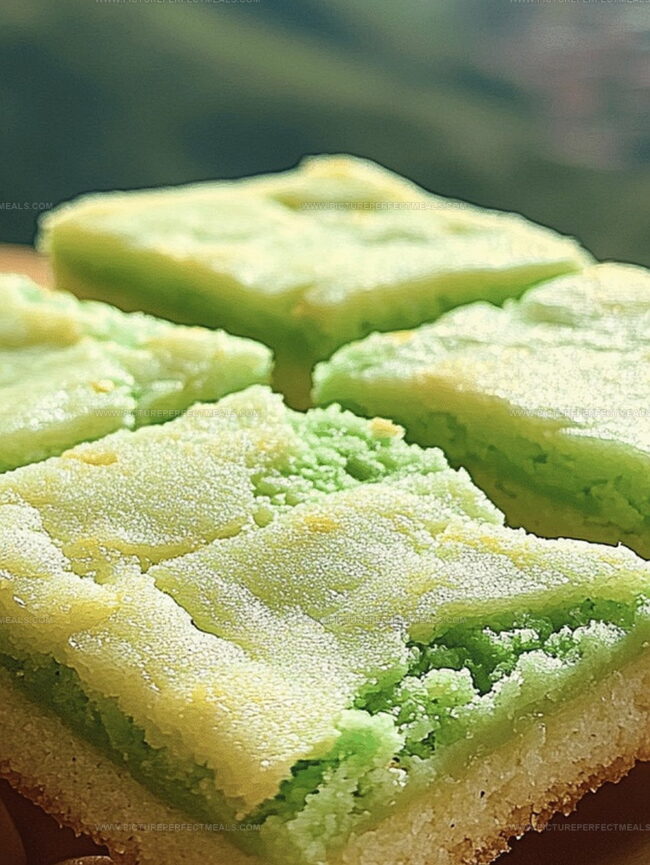
Homemade pistachio pudding sugar cookie bars blend nostalgic comfort with modern dessert creativity. Rich pistachio flavors and buttery cookie textures create an irresistible treat you will crave again and again.
Ingredients
Scale
2 ½ cups (310 g, 11 oz) all-purpose flour
1 cup (200 g, 7 oz) granulated sugar
½ cup (100 g, 3.5 oz) light brown sugar, packed
1 cup (225 g, 8 oz) unsalted butter, softened
2 large eggs
2 (3.4 oz or 96 g) boxes instant pistachio pudding mix
1 tsp vanilla extract
1 tsp baking powder
½ tsp baking soda
½ tsp salt
½ cup (60 g, 2 oz) chopped pistachios (optional)
½ cup (115 g, 4 oz) unsalted butter, softened
2 cups (250 g, 9 oz) powdered sugar
3–4 tbsps (45–60 ml) milk or heavy cream
Green food coloring (optional, for a brighter hue)
Chopped pistachios for garnish (optional)
Instructions
Preparation: Preheat the oven to 350°F with the rack positioned centrally for consistent heat circulation.
Pan Setup: Grease the baking pan and line with parchment paper, creating overhanging edges for easy removal of the baked bars.
Dry Ingredient Blend: Whisk together flour, pistachio pudding mix, and other dry ingredients until completely smooth and well-integrated.
Butter Mixture: Cream butter and sugars in a spacious mixing bowl until the mixture becomes light, airy, and pale, developing a silky foundation for the cookie bars.
Wet Ingredient Fusion: Blend eggs and vanilla extract into the butter mixture, ensuring a complete and uniform emulsification.
Batter Assembly: Gently fold dry ingredients into the wet mixture, mixing minimally to maintain a tender texture and prevent tough cookies.
Pan Distribution: Spread the dough evenly across the prepared pan, using a spatula to create a level surface and consistent thickness.
Baking Process: Bake in the preheated oven for 20-25 minutes, watching for golden-brown edges and a set but slightly soft center.
Cooling and Serving: Allow bars to cool completely in the pan, then lift out using parchment paper edges and slice into precise, uniform squares.
Notes
Prevent Tough Texture: Mix dry and wet ingredients minimally to avoid developing gluten, which can make cookies dense and chewy instead of soft and tender.
Butter Temperature Matters: Ensure butter is softened, not melted, to create the perfect creamy base that helps cookies maintain a light, fluffy consistency.
Even Baking Technique: Spread dough uniformly in the pan and use a center oven rack to guarantee consistent golden-brown edges and perfectly cooked centers.
Cooling Is Crucial: Allow bars to cool completely in the pan to help them set properly, preventing crumbling and maintaining a clean, professional cut when slicing.
Recipe development with a focus on single-dish meals.
Fusion of traditional and modern Australian cuisines.
Food styling and photography for digital platforms.
Education
Box Hill Institute, Melbourne
Degree: Advanced Diploma of Hospitality Management
Focus: Specialized in practical food and beverage service, responsible alcohol and hygiene compliance, legal risk management, and hands‑on experience in a simulated restaurant environment.
William Angliss Institute, Melbourne
Program: Certificate IV in Patisserie
Focus: Specialized in pastry and bakery techniques, cookery and specialty food preparation, recipe planning and costing, commercial kitchen operations, sustainable and inclusive work practices, food safety and hygiene compliance, and workplace health and safety.
Jenna is the heart of Picture Perfect Meals, turning simple ingredients into beautiful, easy‑to‑make dishes.
Growing up around family meals in Melbourne, she trained at Box Hill Institute and then perfected her pastry skills at William Angliss Institute. She loves mixing classic Australian flavors with fresh ideas to keep cooking fun and stress‑free.

Jenna Hartley
Founder & Recipe Creator
Expertise
Education
Box Hill Institute, Melbourne
William Angliss Institute, Melbourne
Jenna is the heart of Picture Perfect Meals, turning simple ingredients into beautiful, easy‑to‑make dishes.
Growing up around family meals in Melbourne, she trained at Box Hill Institute and then perfected her pastry skills at William Angliss Institute. She loves mixing classic Australian flavors with fresh ideas to keep cooking fun and stress‑free.