Dreamy Strawberry Cream Puffs Recipe

Enchanting Dreamy Strawberry Cream Puffs Recipe for Sweet Smiles

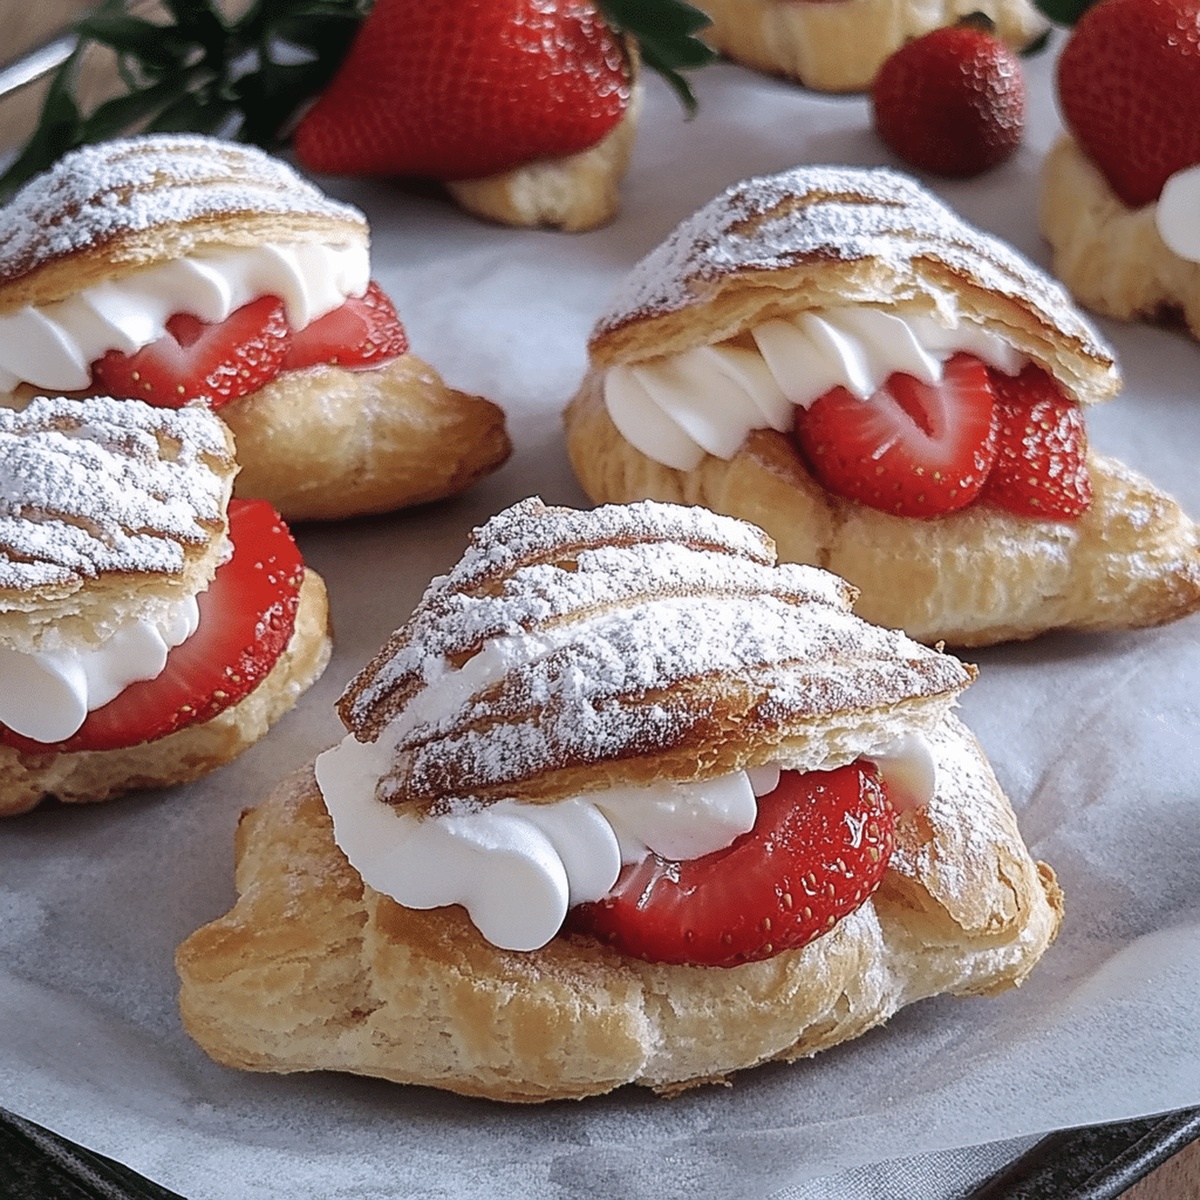
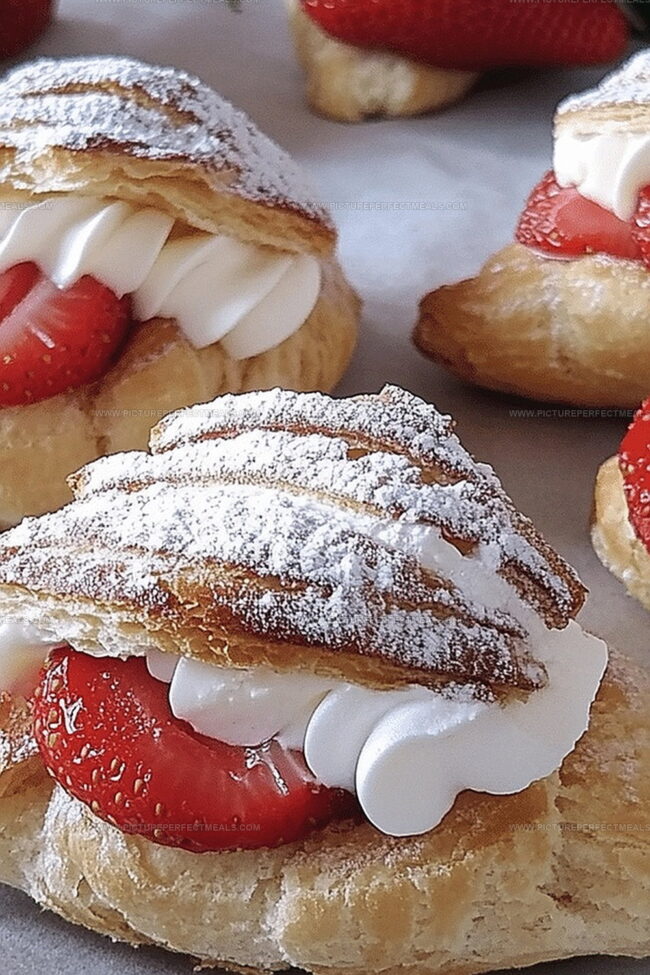
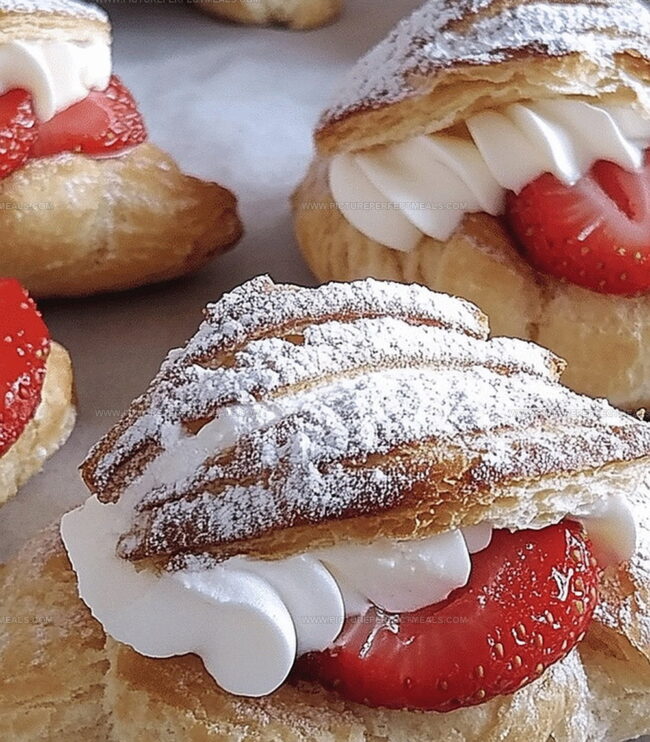
Delicate pastry shells filled with luscious strawberry cream puffs make any dessert lover swoon with delight.

These elegant treats combine the softest choux pastry with a silky, berry-infused filling that melts in your mouth.

Bakers of all skill levels can master this classic French-inspired delicacy with surprising ease.

The light, airy shells provide the perfect canvas for the vibrant strawberry cream.

Each bite delivers a harmonious blend of crisp pastry and smooth, fruity filling that dances across your palate.

Prepare to impress your guests with this stunning dessert that looks more complicated than it truly is.

You’ll find these cream puffs are the ultimate sweet sensation that elevates any gathering from ordinary to extraordinary.

Quick Recipe Overview

Prep Time: 20 minutes

Cook Time: 30 minutes

Total Time: 50 minutes

Calories: 221 kcal

Servings: 12

Strawberry Cream Puffs Ingredient Roundup

For Choux Pastry Base:
  • Water, Milk: Provide crucial moisture for creating light, airy pastry texture.
  • Butter: Adds rich flavor and helps create golden, crispy exterior.
  • Salt: Enhances overall flavor profile and balances sweetness.
  • Flour: Provides structure and creates the signature puffy texture.
For Binding and Structure:
  • Eggs: Act as binding agent, giving pastry elasticity and helping it rise beautifully.
  • Vanilla Extract (Optional): Introduces warm, aromatic undertone to pastry.
For Filling and Topping:
  • Heavy Cream: Creates luxurious, silky smooth filling with indulgent texture.
  • Strawberries: Brings vibrant color, fresh sweetness, and natural fruity brightness.
  • Powdered Sugar: Provides delicate sweetness and elegant finishing touch.
  • Cream Cheese (Optional): Adds tangy richness and helps stabilize whipped cream filling.

Tools to Whip Up Strawberry Cream Puffs

  • Medium saucepan: Essential for boiling water, milk, butter, and creating the choux pastry base.
  • Mixing bowl: Needed to cool and mix the dough after cooking.
  • Baking sheet: Crucial for shaping and baking cream puff shells.
  • Parchment paper: Prevents sticking and ensures easy removal of pastries.
  • Wooden spoon or spatula: Perfect for stirring dough and mixing ingredients.
  • Piping bag or spoon: Helps create uniform cream puff shapes.
  • Wire cooling rack: Allows cream puffs to cool evenly and prevent soggy bottoms.
  • Measuring cups and spoons: Precise measurements for ingredients.

How to Fill and Bake Strawberry Cream Puffs

  • Fire Up the Oven

Crank the oven to a toasty 400F and line a baking sheet with parchment paper for smooth sailing.

  • Create Liquid Magic

Toss water, milk, butter, and salt into a saucepan and bring them to a rolling boil over medium heat.

  • Transform Mixture into Dough

Pull the pan off the heat and dump flour into the liquid. Whisk like crazy until the mixture becomes a unified dough ball that separates from the pan’s sides.

  • Dry Out the Dough

Return the pan to low heat and stir the dough continuously for 12 minutes, evaporating excess moisture.

  • Cool and Prepare

Move the dough to a mixing bowl and let it chill for 5 minutes to calm down.

  • Egg Integration

Crack eggs into the dough one by one, mixing thoroughly after each addition until the mixture looks glossy and smooth.

  • Shape and Spread

Pipe or spoon the dough onto the baking sheet in cute little mounds, keeping them a couple inches apart.

  • Bake to Perfection

Slide the tray into the oven and bake for 25-30 minutes. Keep that oven door closed! Wait until the puffs turn golden and puffy. Cool completely on a wire rack.

Tips for Fresh Cream and Crisp Shells

  • Cream Puff Success Secrets: Tips for perfectly airy, delicate pastries that will wow everyone.
  • Dough Consistency Matters: Mix the flour vigorously until the dough forms a smooth, glossy ball that pulls cleanly from the pan's sides.
  • Egg Technique: Add eggs one at a time, ensuring each is fully incorporated before adding the next to create a silky, stable choux pastry base.
  • Piping Pro Tips: Use a pastry bag with a large round tip for uniform cream puffs, or spoon carefully for a more rustic look.
  • Moisture Control: Cook the dough on low heat to remove excess moisture, which helps create crisp, hollow shells that are perfect for filling.
  • Strawberry Flavor Boosters: Fold fresh chopped strawberries into whipped cream filling or add a strawberry jam center for extra fruity punch.
  • Gluten-Free Option: Substitute regular flour with a gluten-free blend to make these cream puffs accessible for those with wheat sensitivities.
  • Make-Ahead Magic: Bake shells in advance and store in an airtight container, filling just before serving to maintain maximum crispness.
  • Dairy-Free Twist: Replace milk and butter with non-dairy alternatives like almond milk and coconut oil.

Serve Cream Puffs Like a French Bakery

  • Berry Bliss Plate: Arrange cream puffs on a beautiful white serving platter, dusted with powdered sugar and garnished with fresh strawberry slices around the edges.
  • Dessert Party Star: Create a stunning cream puff tower by stacking puffs in a pyramid shape, drizzling chocolate sauce, and sprinkling chopped pistachios for elegant texture and color contrast.
  • Sweet Brunch Centerpiece: Serve alongside fresh whipped cream, a small bowl of extra strawberry sauce, and mint leaves for guests to customize their cream puffs, making the dessert interactive and fun.
  • Afternoon Tea Companion: Pair cream puffs with a light strawberry-infused iced tea or champagne, creating a sophisticated and refreshing dessert experience that elevates the delicate pastry.

Best Way to Store Strawberry Cream Puffs

  • Quick Cooling Technique: Allow cream puffs to cool entirely at room temperature for optimal texture and structure, preventing potential sogginess or collapse.
  • Refrigeration Strategy: Store unfilled cream puff shells in an airtight container at room temperature for up to 2 days, maintaining crisp exterior and delicate structure.
  • Cream Filling Management: Keep strawberry cream filling sealed in a refrigerated container, consuming within 2-3 days to ensure maximum freshness and prevent bacterial growth.
  • Smart Assembly Approach: Assemble strawberry cream puffs just before serving to maintain crispy pastry shell and prevent filling from making the dough soft or soggy.
Print
clock clock iconcutlery cutlery iconflag flag iconfolder folder iconinstagram instagram iconpinterest pinterest iconfacebook facebook iconprint print iconsquares squares iconheart heart iconheart solid heart solid icon
Dreamy Strawberry Cream Puffs Recipe

Dreamy Strawberry Cream Puffs Recipe


5 Stars 4 Stars 3 Stars 2 Stars 1 Star

4.7 from 8 reviews

  • Total Time: 50 minutes
  • Yield: 13 1x

Description

Parisian pastry chefs elevate classic strawberry cream puffs with delicate choux pastry and luscious strawberry-infused cream. Fresh berries and light pastry create an irresistible French dessert you’ll cherish with every elegant bite.


Ingredients

Scale
  • ½ cup (120 ml) water
  • ½ cup (120 ml) whole milk
  • ½ cup (115 g) unsalted butter
  • 1 cup (125 g) all-purpose flour
  • 4 large eggs
  • 1 cup (240 ml) heavy whipping cream
  • ¼ cup (30 g) powdered sugar
  • ½ cup (75 g) fresh strawberries (finely diced)
  • ¼ tsp salt
  • ½ tsp vanilla extract
  • Powdered sugar (for dusting)
  • Melted chocolate (for drizzling)

Instructions

  1. Preparation: Preheat oven to 400F (200C) and line a baking sheet with parchment paper, creating an ideal environment for crafting delicate cream puffs.
  2. Liquid Base Creation: Combine water, milk, butter, and salt in a saucepan, bringing the mixture to a vigorous boil over medium heat, establishing the foundation for the pastry dough.
  3. Dough Formation: Swiftly remove from heat and aggressively incorporate flour, stirring until the mixture transforms into a compact, cohesive dough ball that cleanly separates from the pan’s sides.
  4. Moisture Elimination: Return the pan to low heat, continuously manipulating the dough for 12 minutes to expel excess moisture and develop an impeccable texture.
  5. Cooling and Egg Integration: Transfer the warm dough to a mixing bowl, allowing a brief 5-minute cooling period before introducing eggs one at a time, blending thoroughly until the mixture becomes glossy and uniform.
  6. Shaping and Baking: Utilize a piping bag or spoon to distribute 2-inch circular dough mounds onto the prepared baking sheet, ensuring strategic spacing. Bake in the preheated oven for 25-30 minutes until the cream puffs achieve a resplendent golden hue and puffy consistency.
  7. Cooling Process: Extract from the oven and allow cream puffs to cool completely on a wire rack, developing a crisp exterior and tender interior that promises a delightful culinary experience.

Notes

  • Mastering Moisture Control: Thoroughly dry the dough during cooking to prevent soggy cream puffs, ensuring each egg is fully incorporated before adding the next.
  • Precision Piping Technique: Use a consistent circular motion when piping dough to create uniform cream puffs with even rising and professional appearance.
  • Temperature Timing: Watch carefully during baking – golden brown color indicates perfect doneness, while under-baking leads to deflated, soft pastries.
  • Gluten-Free Adaptation: Substitute all-purpose flour with a 1:1 gluten-free blend, adding xanthan gum for structural integrity and maintaining the classic cream puff texture.
  • Prep Time: 20 minutes
  • Cook Time: 30 minutes
  • Category: Desserts, Snacks
  • Method: Baking
  • Cuisine: French

Nutrition

  • Serving Size: 13
  • Calories: 210
  • Sugar: 5 g
  • Sodium: 95 mg
  • Fat: 15 g
  • Saturated Fat: 9 g
  • Unsaturated Fat: 4 g
  • Trans Fat: 0 g
  • Carbohydrates: 18 g
  • Fiber: 1 g
  • Protein: 3 g
  • Cholesterol: 70 mg
Jenna Hartley

Jenna Hartley

Founder & Recipe Creator

Expertise

  • Recipe development with a focus on single-dish meals.
  • Fusion of traditional and modern Australian cuisines.
  • Food styling and photography for digital platforms.​

Education

Box Hill Institute, Melbourne

  • Degree: Advanced Diploma of Hospitality Management
  • Focus: Specialized in practical food and beverage service, responsible alcohol and hygiene compliance, legal risk management, and hands‑on experience in a simulated restaurant environment.

William Angliss Institute, Melbourne

  • Program: Certificate IV in Patisserie
  • Focus: Specialized in pastry and bakery techniques, cookery and specialty food preparation, recipe planning and costing, commercial kitchen operations, sustainable and inclusive work practices, food safety and hygiene compliance, and workplace health and safety.

Jenna is the heart of Picture Perfect Meals, turning simple ingredients into beautiful, easy‑to‑make dishes. 

Growing up around family meals in Melbourne, she trained at Box Hill Institute and then perfected her pastry skills at William Angliss Institute. She loves mixing classic Australian flavors with fresh ideas to keep cooking fun and stress‑free.

Leave a Reply

Your email address will not be published. Required fields are marked *

Recipe rating 5 Stars 4 Stars 3 Stars 2 Stars 1 Star