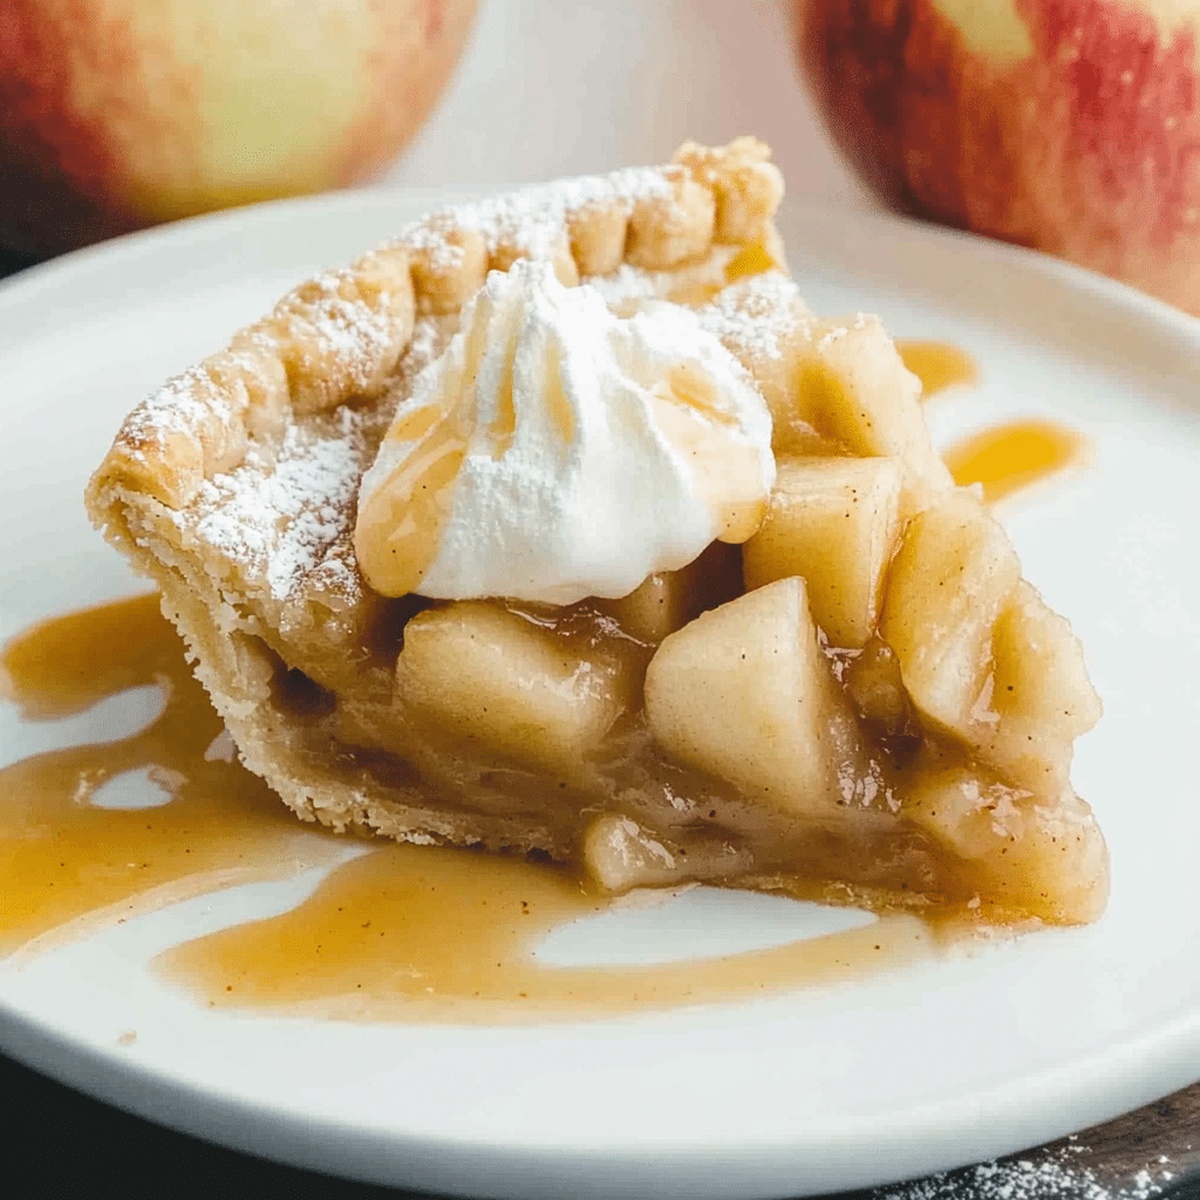
Brown Bag Apple Pie Recipe Rustic Charm in Every Slice
Baking a delightful brown bag apple pie sparks joy in every kitchen.
Crisp autumn afternoons call for sweet, warm desserts that remind you of home.
Grandma’s secret technique involves an unexpected paper bag trick that creates magical results.
The humble brown bag becomes your culinary ally, trapping steam and ensuring perfectly golden, flaky crust.
Apples picked fresh from local orchards bring robust flavor and delectable texture to this classic treat.
Simple ingredients combine to craft a dessert that warms hearts and delights taste buds.
Each slice promises a comforting journey through traditional baking magic that you’ll want to share.
Grab your ingredients and let the baking adventure begin!
Brown Bag Apple Pie That’s Worth the Hype
What’s Inside a Brown Bag Apple Pie
Pie Crust:Filling:Finishing:How to Bake Apple Pie in a Paper Bag
Step 1: Prepare Pie Dough
Grab flour, salt, sugar, cold butter, and ice water. In a spacious mixing bowl, blend flour, salt, and sugar using a whisk. Cut cold butter into small cubes and incorporate into the flour mixture. Use fingertips or a pastry cutter to break down butter until the mixture looks like rough, sandy crumbs. Slowly drizzle ice water into the mixture, gently stirring until the dough starts to form a cohesive ball. Divide dough into two equal portions, shape into flat discs, wrap in plastic, and refrigerate for a cool 30-minute rest.
Step 2: Create Apple Filling
Gather fresh apples, cinnamon, nutmeg, brown sugar, lemon juice, and cornstarch. Wash and peel apples, then slice them into thin, uniform wedges. In a large mixing bowl, toss apple slices with:Gently mix until apples are evenly coated with the sweet and spicy mixture.
Step 3: Roll Out Pie Crust
Remove chilled dough from refrigerator. Dust work surface with flour. Using a rolling pin, carefully roll out one dough disc into a circular shape slightly larger than your pie dish. Gently transfer the rolled crust into the pie dish, letting edges hang over the sides.
Step 4: Fill and Top Pie
Pour seasoned apple mixture into the pie crust, spreading evenly. Roll out the second dough disc and cover the filling. Trim excess dough and crimp edges to seal. Cut a few decorative slits on top to allow steam to escape.
Step 5: Brown Bag Baking Magic
Preheat oven to 425°F. Slide a large brown paper bag over the entire pie, ensuring it’s loose but sealed. Place pie in the oven and bake for approximately 60 minutes. The bag will trap steam, creating a uniquely moist and perfectly golden pie.
Step 6: Cool and Serve
Carefully remove pie from oven. Let it cool for 15-20 minutes. Gently tear away the brown bag. Slice and serve warm, optionally topped with vanilla ice cream or whipped cream.
Baking Tips for Brown Bag Apple Pie Success
Reheating and Saving Brown Bag Apple Pie
Serve Apple Pie with These Favorites
Apple Pie Flavors You Haven’t Tried Yet
Print
Easy Brown Bag Apple Pie Recipe
- Total Time: 1 hour 30 minutes
- Yield: 8 1x
Description
Homemade “brown bag apple pie” delivers classic comfort straight from grandmother’s kitchen, bringing warmth and nostalgia to sweet dessert lovers. Crisp autumn apples nestled in buttery crust become pure magic when baked to golden perfection, inviting you to savor each delectable slice.
Ingredients
Main Ingredients (Filling):
- 6 cups (about 6 medium) apples, peeled, cored, and thinly sliced (Granny Smith or Honeycrisp work well)
- ¾ cup (150 g) granulated sugar
- ¼ cup (55 g) brown sugar
- 1 tablespoon lemon juice
- 1 teaspoon ground cinnamon
- ¼ teaspoon nutmeg (optional)
Crust Ingredients:
- 2 ½ cups (310 g) all-purpose flour
- 1 teaspoon salt
- 1 teaspoon sugar
- 1 cup (225 g) unsalted butter (cold, cubed)
- 6 tablespoons ice water
Topping Ingredients:
- ½ cup (65 g) all-purpose flour
- ½ cup (100 g) granulated sugar
- ¼ cup (55 g) unsalted butter (cold, cubed)
Instructions
- Craft a silky pastry foundation by whisking flour, salt, and sugar together in a spacious mixing vessel, ensuring uniform incorporation of dry components.
- Introduce chilled butter cubes into the flour mixture, meticulously breaking down the fat using fingertips or a specialized pastry tool until the texture mimics delicate, uneven breadcrumbs.
- Carefully introduce glacial water, one tablespoon at a time, gently coaxing the fragmented mixture into a cohesive dough that barely holds together without becoming overly saturated.
- Partition the consolidated dough into two symmetrical segments, tenderly flattening each portion into disc-like shapes that will serve as the pie’s structural canvas.
- Envelop each dough disc in transparent film, creating a protective barrier that will preserve moisture and facilitate precise temperature control during the chilling phase.
- Refrigerate the wrapped dough for a minimum of half an hour, allowing gluten to relax and butter to solidify, which ensures a supremely flaky and tender pastry foundation.
Notes
- Keep butter extremely cold to ensure a flaky, tender pie crust that doesn’t become tough during mixing.
- Use a light touch when working the butter into flour, avoiding overworking the dough which can make the crust dense and chewy.
- Experiment with different apple varieties like Honeycrisp or Granny Smith for balanced sweetness and tartness in your pie filling.
- Consider brushing the crust with egg wash or sprinkling raw sugar before baking to create a beautiful golden, crispy exterior that adds extra texture and visual appeal.
- Prep Time: 30 minutes
- Cook Time: 1 hour
- Category: Desserts, Snacks
- Method: Baking
- Cuisine: American
Nutrition
- Serving Size: 8
- Calories: 350
- Sugar: 24 g
- Sodium: 200 mg
- Fat: 20 g
- Saturated Fat: 12 g
- Unsaturated Fat: 7 g
- Trans Fat: 1 g
- Carbohydrates: 40 g
- Fiber: 2 g
- Protein: 2 g
- Cholesterol: 30 mg
Daves Miller
Contributing Chef & Culinary Educator
Expertise
Education
Sullivan University, Louisville, Kentucky
White Mountains Community College, Berlin, New Hampshire
Daves is the friendly face guiding you through flavorful, fuss-free recipes at Picture Perfect Meals.
He studied culinary arts at Sullivan University and embraced Baking and Pastry Arts at White Mountains Community College. Daves specializes in comforting meals with vibrant flavors, highlighting fresh, seasonal ingredients.