Easy Brownie Truffles Recipe

Easy Brownie Truffles Recipe: Sweet Fudgy Bites to Delight

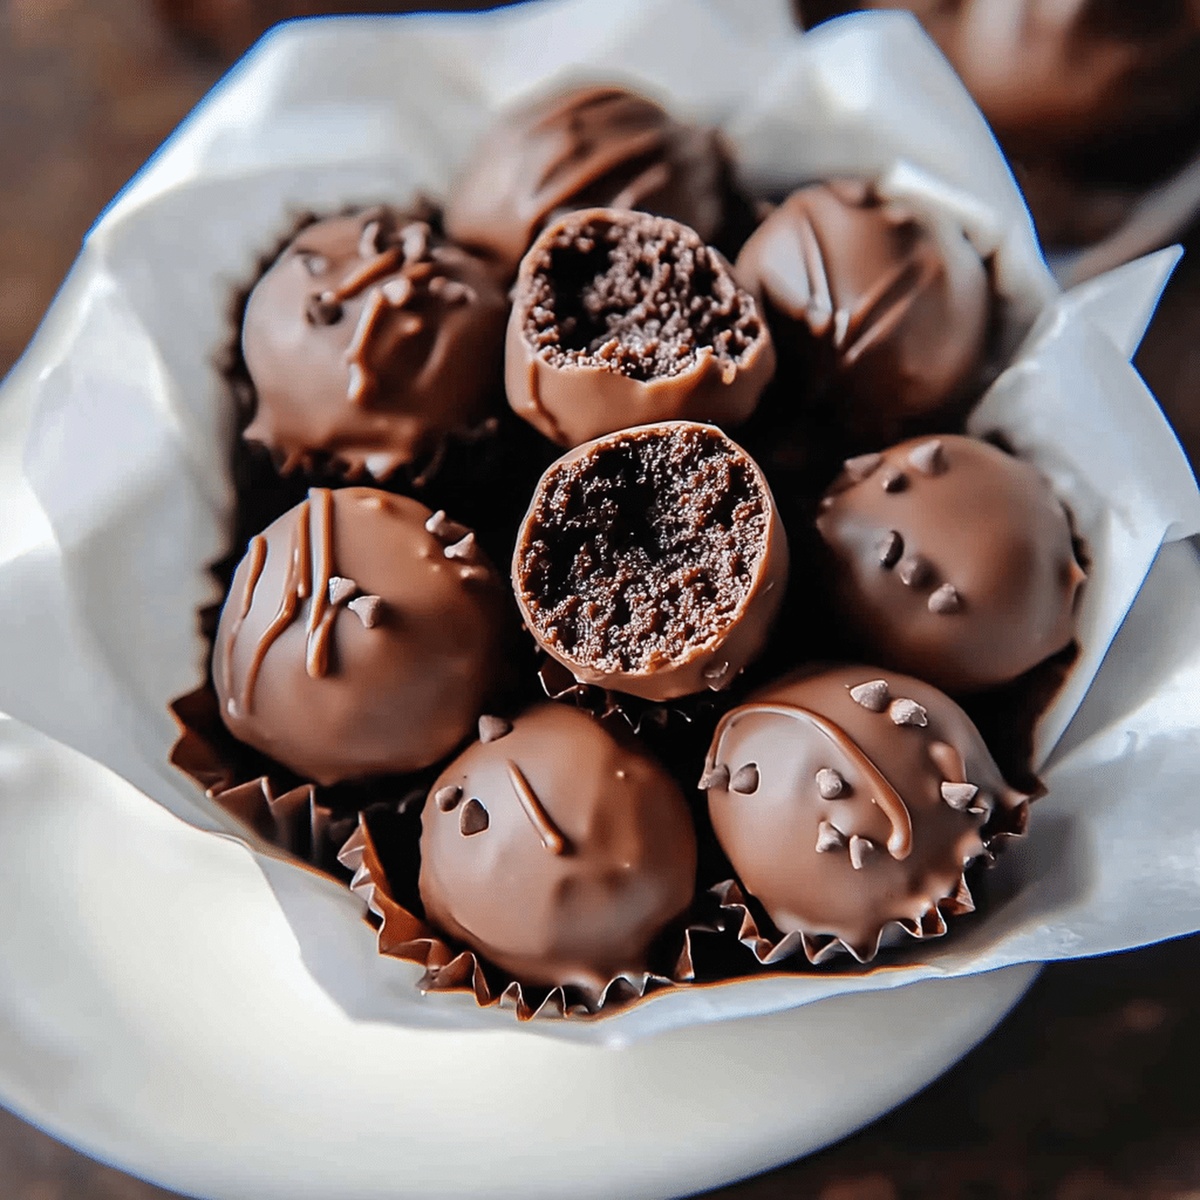
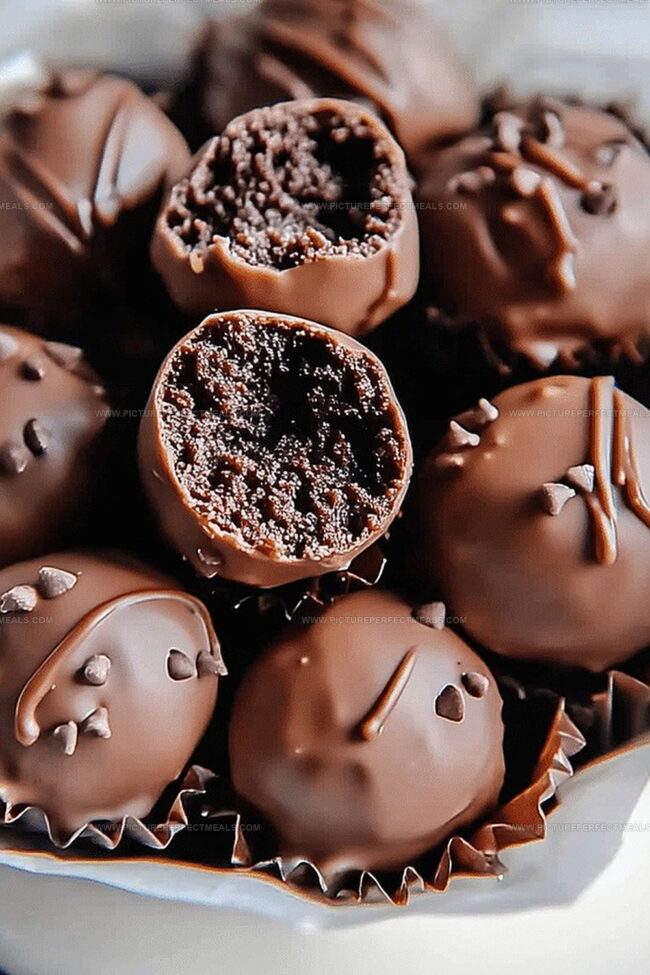
Chocolate lovers go crazy for these delightful brownie truffles that combine rich, fudgy textures with a surprising crunch.

Small bites of pure decadence can transform an ordinary dessert moment into something extraordinary.

Dense chocolate goodness melts seamlessly with creamy ingredients, creating a truffle that feels indulgent yet surprisingly simple.

Each tiny morsel packs an intense flavor profile that dances between sweet and deeply satisfying.

The recipe requires minimal kitchen skills, making these truffles accessible for bakers of all experience levels.

Unexpected guests or sudden dessert cravings will find their perfect match in these irresistible chocolate gems.

You’ll want to savor every single bite of these magnificent little treats.

What Makes Easy Brownie Truffles Crowd-Pleasers

  • Perfect for parties, potlucks, and family gatherings where everyone craves a rich, chocolatey bite-sized dessert.
  • Transform leftover brownies into elegant truffles, reducing food waste and creating a stunning new dessert with zero extra baking effort.
  • Engage children in rolling and decorating these easy truffles, making it a fun and interactive cooking activity that requires no complex techniques.

Ingredients You’ll Need for Brownie Truffles

Brownie Base:
  • Boxed Brownie Mix: The foundation of the truffles, providing rich chocolate flavor and dense texture.
  • Eggs: Helps bind the brownie mix and create a moist base.
  • Vegetable Oil: Adds moisture and helps create a soft brownie texture.
  • Water: Activates the brownie mix and helps combine ingredients.
Binding Ingredient:
  • Cream Cheese or Frosting: Helps hold the brownie crumbs together and adds creamy richness. Choose full-fat cream cheese for best results.
Coating and Decoration:
  • Chocolate Melting Wafers or Chocolate Chips: Provides a smooth coating for the truffles. Opt for high-quality chocolate for better flavor.
  • Sprinkles or Additional Toppings: Adds visual appeal and extra texture. Optional but recommended for a festive look.

How to Shape and Dip Brownie Truffles

Step 1: Bake Delectable Brownies

Grab a brownie mix from your pantry and follow the package instructions carefully. Pop the pan into the oven and bake until perfectly done. Once baked, remove from the oven and let the brownies cool completely at room temperature.

Step 2: Transform Brownies Into Crumbles

Break the cooled brownies into a large mixing bowl, using your hands to crumble them into fine, moist crumbs. Ensure no large chunks remain- you want a consistent, soft texture that will hold together easily.

Step 3: Create Truffle Mixture

If the brownie crumbs seem too dry and won’t stick together, you’ll need a binding agent. Choose one of these options:
  • Cream cheese
  • Chocolate frosting
  • Vanilla frosting

Gradually add your chosen binder, mixing thoroughly until the mixture can be rolled into smooth balls without falling apart.

Step 4: Shape Irresistible Truffles

Using clean hands, roll the brownie mixture into small, uniform balls. Place the truffles on a parchment-lined baking sheet.

Step 5: Decorate With Deliciousness

Optional decorating techniques:
  • Roll truffles in powdered sugar
  • Dip in melted chocolate
  • Sprinkle with cocoa powder
  • Coat with chopped nuts

Step 6: Chill And Enjoy

Refrigerate the truffles for about 30 minutes to help them firm up. Store in an airtight container in the refrigerator for up to one week.

Tips to Avoid Mistakes When Making Truffles

  • Perfect Binding Technique: Use softened cream cheese or frosting sparingly to help brownie crumbs stick together without making the mixture too wet.
  • Chill for Stability: Refrigerate the truffle balls for 15-30 minutes before coating to ensure they maintain their shape and prevent crumbling during dipping.
  • Smooth Rolling Method: Use slightly damp hands when forming truffle balls to create uniform, clean spheres without sticky residue on your palms.
  • Chocolate Coating Pro Tip: Melt chocolate slowly using a double boiler or microwave in short bursts, stirring frequently to prevent burning and achieve a silky smooth texture.
  • Decoration Variety: Experiment with different toppings like crushed nuts, sprinkles, cocoa powder, or drizzled white chocolate to add visual appeal and extra flavor to your truffles.

Reheating and Storage Advice for Truffles

  • Store truffles in an airtight container for up to 5 days. Place parchment paper between layers to prevent sticking.
  • Wrap individual truffles in plastic wrap, then place in a freezer-safe container. Freeze for up to 3 months for maximum freshness.
  • Remove truffles from freezer and let them sit at room temperature for 15-20 minutes before serving. Avoid microwaving to maintain texture.
  • For best taste and texture, consume refrigerated or thawed truffles within 2-3 days after removing from cold storage.

Best Pairings for Brownie Truffles

  • Elevate Chocolate Indulgence with Complementary Pairings
  • Pair these decadent brownie truffles with a bold Cabernet Sauvignon or Merlot, whose deep fruit notes and tannic structure beautifully enhance the chocolate's intense richness.
  • Serve alongside a freshly brewed espresso or dark roast coffee, allowing the bitter coffee undertones to balance the truffles' sweet, fudgy character and create a luxurious dessert experience.
  • Accompany the truffles with a scoop of vanilla bean ice cream, letting the cool, smooth cream provide a delightful temperature and flavor contrast to the dense chocolate treat.
  • Drizzle or serve with a hazelnut or almond liqueur like Frangelico, whose nutty warmth and subtle sweetness will complement the brownie truffles' deep chocolate profile.

Flavor Changes to Try with Brownie Truffles

  • Gluten-Free Delight: Swap regular brownie mix with a gluten-free brownie mix, ensuring those with gluten sensitivities can enjoy these truffles without worry.
  • Vegan Chocolate Bliss: Replace cream cheese with coconut cream or vegan cream cheese, and use a plant-based brownie mix to create a dairy-free and egg-free version.
  • Nutty Crunch Edition: Incorporate chopped almonds, pecans, or walnuts into the truffle mixture for added texture and a rich, roasted flavor profile.
  • Low-Sugar Alternative: Use a sugar-free brownie mix and replace cream cheese with Greek yogurt to reduce overall sugar content while maintaining moisture and binding.
Print
clock clock iconcutlery cutlery iconflag flag iconfolder folder iconinstagram instagram iconpinterest pinterest iconfacebook facebook iconprint print iconsquares squares iconheart heart iconheart solid heart solid icon
Easy Brownie Truffles Recipe

Easy Brownie Truffles Recipe


5 Stars 4 Stars 3 Stars 2 Stars 1 Star

4.7 from 40 reviews

  • Total Time: 45 minutes
  • Yield: 24 1x

Description

Chocolate lovers rejoice with these irresistible Brownie Truffles that blend rich fudgy goodness into bite-sized delights. Rich chocolate combines with creamy textures, creating an indulgent treat you’ll want to savor slowly and share with friends.


Ingredients

Scale

Main Ingredients:

  • 1 box (18-20 ounces/500 grams) brownie mix
  • 200 grams (7 ounces) semi-sweet or dark chocolate

Supporting Ingredients:

  • 3 tablespoons cream cheese or frosting

Garnish Ingredients:

  • Sprinkles
  • Chopped nuts
  • Cocoa powder
  • Crushed cookies

Instructions

  1. Transform freshly baked brownies into fine, delicate crumbs by gently breaking them apart in a spacious mixing vessel, ensuring a consistent, moist texture.
  2. Evaluate the structural integrity of the crumbled mixture, determining whether additional binding agent is necessary to achieve optimal cohesion.
  3. Introduce cream cheese or frosting incrementally, carefully folding and blending until the brownie fragments can be effortlessly molded into compact, uniform spheres.
  4. Manipulate the mixture with gentle hands, rolling small portions between palms to craft smooth, round truffle forms with consistent size and shape.
  5. Place the nascent truffles on a chilled parchment-lined surface, allowing them to firm up in the refrigerator for approximately 15-20 minutes.
  6. While truffles are firming, prepare your preferred coating method, whether melted chocolate, cocoa powder, chopped nuts, or sprinkles.
  7. Extract the chilled truffles and delicately enrobe each one in the selected coating, ensuring complete and even coverage.
  8. Return the decorated truffles to the refrigerator, permitting them to set and develop a firm exterior.
  9. Store the completed brownie truffles in an airtight container, maintaining their quality in the refrigerator for up to one week.

Notes

  • Ensure brownies are completely cooled to prevent sticky, messy truffles that won’t hold their shape.
  • Use room temperature cream cheese for smoother mixing and easier binding of crumbs.
  • Refrigerate truffles for 15-20 minutes before dipping in chocolate to help them maintain a perfect round shape and prevent crumbling.
  • Customize flavors by adding a splash of vanilla extract, instant espresso powder, or a pinch of sea salt to the brownie crumb mixture for extra depth.
  • Prep Time: 15 minutes
  • Cook Time: 30 minutes
  • Category: Desserts, Snacks
  • Method: Baking
  • Cuisine: American

Nutrition

  • Serving Size: 24
  • Calories: 120
  • Sugar: 10 g
  • Sodium: 150 mg
  • Fat: 7 g
  • Saturated Fat: 4 g
  • Unsaturated Fat: 3 g
  • Trans Fat: 0 g
  • Carbohydrates: 15 g
  • Fiber: 1 g
  • Protein: 2 g
  • Cholesterol: 15 mg
Daves Miller

Daves Miller

Contributing Chef & Culinary Educator

Expertise

  • American Southern cuisine with a modern twist.
  • Instruction in culinary fundamentals and advanced techniques.
  • Development of recipes that highlight seasonal and local produce.​
  • Mastery of artisanal bread and pastry techniques, from laminated doughs to decorative sugar artistry.

Education

Sullivan University, Louisville, Kentucky

  • Degree: Associate of Science Degree in Culinary Arts
  • Focus: Specialized in cooking techniques and culinary sciences, hands‑on externships, professional kitchen lab training, and career preparation for restaurants, entrepreneurship, and global culinary opportunities.

White Mountains Community College, Berlin, New Hampshire

  • Program: Baking and Pastry Arts degree
  • Focus: Specialized in comprehensive baking and pastry arts, including bread making, artisan breads, cake decorating and design, chocolates, confections, and decorative centerpieces; product development and baking theory; and career preparation for baker and pastry chef roles in many places.

Daves is the friendly face guiding you through flavorful, fuss-free recipes at Picture Perfect Meals. 

He studied culinary arts at Sullivan University and embraced Baking and Pastry Arts at White Mountains Community College. Daves specializes in comforting meals with vibrant flavors, highlighting fresh, seasonal ingredients.

Leave a Reply

Your email address will not be published. Required fields are marked *

Recipe rating 5 Stars 4 Stars 3 Stars 2 Stars 1 Star