Easy Cool Whip Candy Recipe

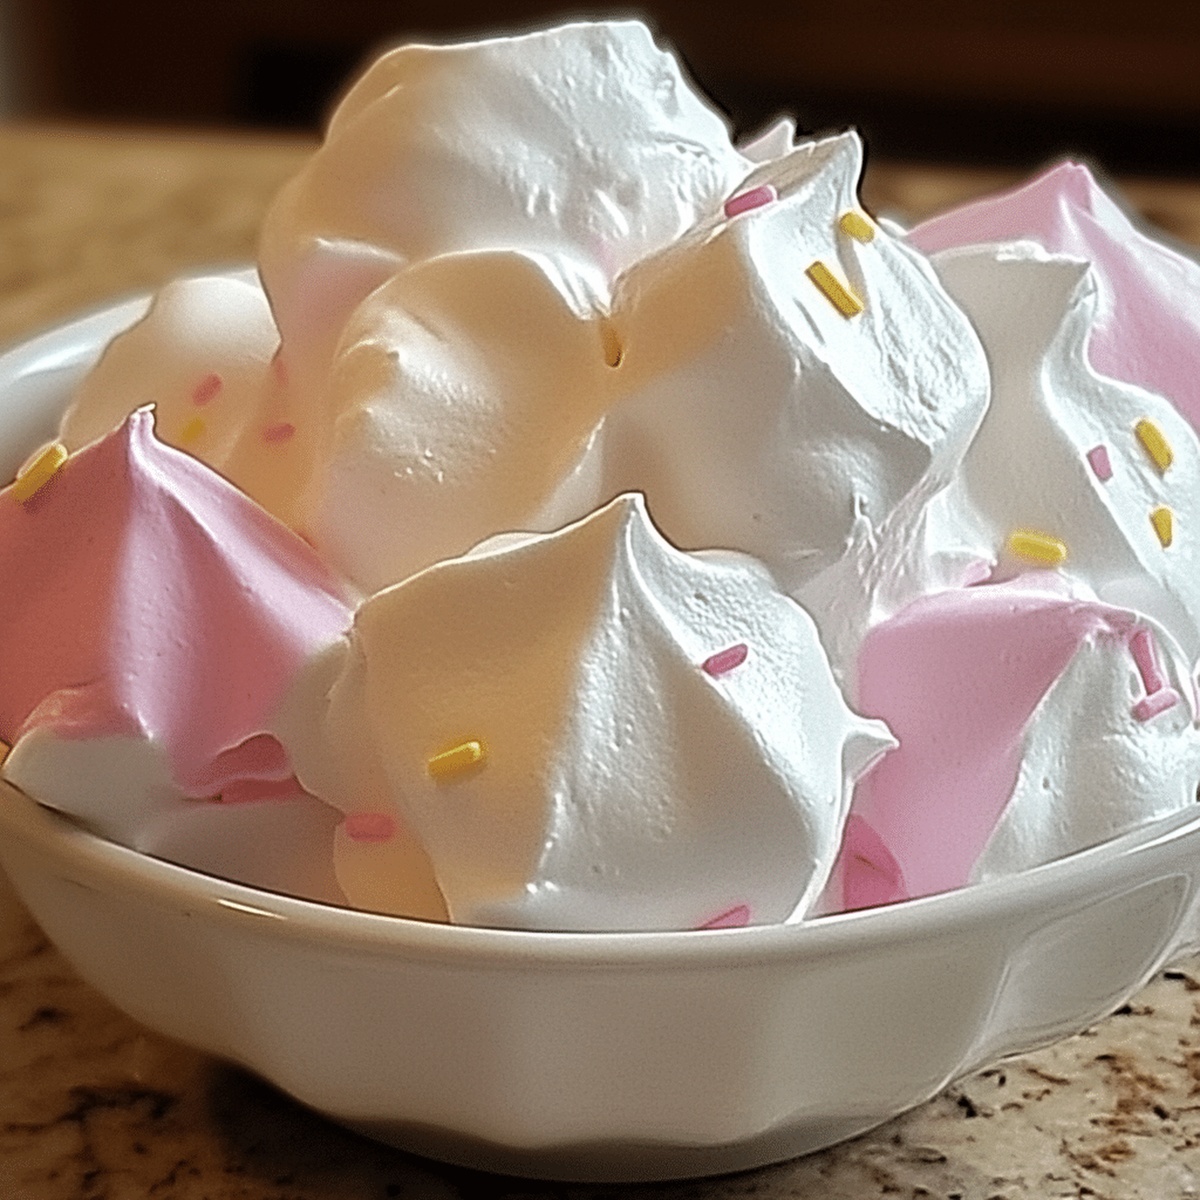
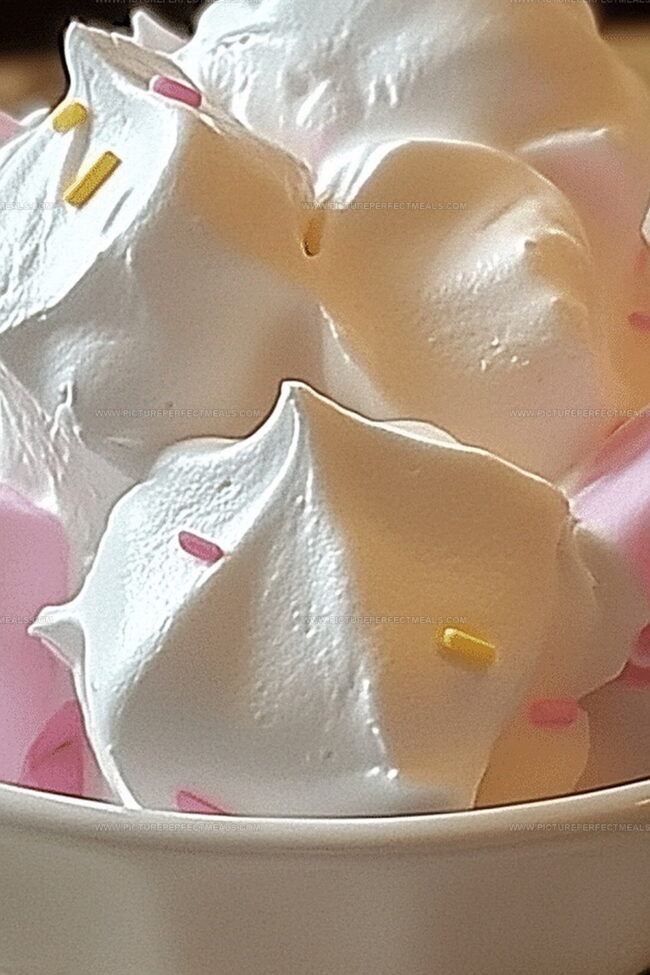
Easy Cool Whip Candy Recipe for Sweet Treats

Sweet tooths go crazy for this cool whip candy that blends creamy textures with unexpected delights.

Every bite promises a melt-in-your-mouth experience that surprises and satisfies.

Simple ingredients come together in minutes, creating a treat that looks complicated but feels effortless.

Minimal kitchen skills work perfectly for crafting these delectable morsels.

Chocolate lovers and dessert enthusiasts will appreciate the quick preparation and luxurious result.

Kids can help mix the ingredients, making this a fun family activity.

You’ll want to save this recipe for future celebrations or spontaneous sugar cravings.

Grab a spoon and prepare to indulge in pure confectionery magic.

Cool Whip Candy You Can Whip Up Fast

  • Cool Whip Candy's irresistible charm makes it a breeze to create delectable treats without complex baking skills.
  • Transform basic ingredients into personalized candies by adding different mix-ins like chocolate chips, nuts, or sprinkles for unique flavor combinations.
  • Minimal preparation time and simple refrigeration mean you can have delightful homemade candies ready in just 1-2 hours, perfect for last-minute dessert cravings.
  • Engage children in a playful kitchen activity where they can roll candies, choose mix-ins, and shape creative designs, making dessert preparation an enjoyable family experience.

What You Need for Cool Whip Candy

Base Ingredients:
  • Cool Whip: Creamy base that provides smooth texture and acts as primary binding ingredient.
  • Powdered Sugar: Adds sweetness and helps thicken the mixture.
Flavor Enhancers:
  • Vanilla Extract: Provides rich, classic flavor to the candy.
Optional Mix-Ins:
  • Mini Chocolate Chips, Chopped Nuts, Sprinkles: Add texture, crunch, and visual interest to the candy, can be customized based on personal preference.

Instructions to Make Fluffy Cool Whip Candy

Step 1: Soften The Cool Whip

Transfer the Cool Whip into a spacious mixing bowl. Let it sit at room temperature until soft and pliable, making mixing smoother.

Step 2: Create Sweet Mixture

Gradually sprinkle powdered sugar into the Cool Whip. Stir gently and consistently until the mixture becomes smooth and integrated.

Step 3: Enhance Flavor Profile

Pour vanilla extract into the mixture. Blend thoroughly to distribute the rich aromatic essence throughout the candy base.

Step 4: Add Exciting Texture

Carefully incorporate delicious mix-ins:
  • Mini chocolate chips
  • Chopped nuts
  • Colorful sprinkles

Fold ingredients gently to maintain the light texture of the Cool Whip.

Step 5: Shape Delectable Treats

Use a spoon or cookie scoop to portion the mixture. Roll into small round balls or create fun shapes like:
  • Hearts
  • Squares
  • Triangles

Step 6: Chill And Set

Place shaped candies on a parchment-lined baking sheet. Refrigerate for 1-2 hours until firm and holding their shape perfectly.

Step 7: Serve And Store

Remove candies from refrigerator. Serve immediately or store in an airtight container. Keeps fresh for up to one week in the refrigerator.

Tips to Keep Cool Whip Candy Light and Smooth

  • Soften Cool Whip Perfectly: Let the Cool Whip sit at room temperature for 10-15 minutes before mixing to ensure smooth, easy blending without lumps.
  • Customize Mix-Ins Creatively: Experiment with different add-ins like crushed cookies, dried fruit, or mini marshmallows to personalize your candy's flavor and texture.
  • Control Sugar Sweetness: Adjust the amount of powdered sugar based on your taste preference- start with less and gradually add more for desired sweetness.
  • Prevent Sticky Hands: Lightly coat your hands with powdered sugar or use a small cookie scoop when shaping the candy to prevent sticking and create uniform pieces.
  • Freeze for Longer Storage: For extended preservation, freeze the candies in an airtight container for up to 3 months, allowing you to enjoy them anytime a sweet craving hits.

Storage Advice for Cool Whip Candy

  • Store Cool Whip Candy in an airtight container in the refrigerator for up to 5-7 days. Keep layers separated with parchment paper to prevent sticking.
  • Wrap individual candies in plastic wrap, then place in a freezer-safe container. Freeze for up to 2 months for longer storage.
  • Remove frozen candies from the freezer and let them sit in the refrigerator for 30-45 minutes before serving. This helps maintain their creamy texture.
  • These candies are best enjoyed chilled. Avoid microwaving or warming, as they will lose their shape and become too soft.

Cool Whip Candy Pairing Ideas

  • Pair Creamy Cool Whip Delight with Complementary Flavors
  • Serve alongside a steaming cup of dark roast coffee to balance the sweet candy's creamy texture with robust, bitter notes.
  • Match with a chilled glass of sweet dessert wine like Moscato, which enhances the nutty undertones and provides a sophisticated drinking experience.
  • Combine with dark chocolate pieces or chocolate liqueur to amplify the mini chocolate chips' richness and elevate the overall candy flavor profile.
  • Include a side of fresh berries like raspberries or strawberries to introduce a tart, refreshing element that cuts through the candy's sweetness.

Variations to Try with Cool Whip Candy

  • Chocolate Lover's Dream: Replace vanilla extract with cocoa powder and mini chocolate chips, creating an intense chocolate version of the candy.
  • Tropical Escape: Swap vanilla extract with coconut extract, add shredded coconut and crushed macadamia nuts for a Hawaiian-inspired treat.
  • Gluten-Free Friendly: Use gluten-free powdered sugar and ensure all mix-ins are certified gluten-free for those with dietary restrictions.
  • Vegan Alternative: Substitute Cool Whip with coconut whipped cream or vegan whipped topping, using plant-based powdered sugar and dairy-free chocolate chips to create an animal-product-free version.
Print
clock clock iconcutlery cutlery iconflag flag iconfolder folder iconinstagram instagram iconpinterest pinterest iconfacebook facebook iconprint print iconsquares squares iconheart heart iconheart solid heart solid icon
Easy Cool Whip Candy Recipe

Easy Cool Whip Candy Recipe


5 Stars 4 Stars 3 Stars 2 Stars 1 Star

4.7 from 25 reviews

  • Total Time: 20 minutes
  • Yield: 12 1x

Description

Cool whip candy offers a delightful twist on classic desserts, blending creamy sweetness with playful texture. Smooth, airy, and irresistibly light, you can indulge in this simple treat that brings joy to any gathering.


Ingredients

Scale

Primary Ingredients:

  • 24 ounces (680g) chocolate almond bark or chocolate melting wafers
  • 3 cups (525g) milk chocolate chips

Creamy Base:

  • 8 ounces (225g) Cool Whip, thawed

Preparation Ingredients:

None listed


Instructions

  1. Liberate the Cool Whip from its container into a spacious mixing vessel, allowing it to soften and become pliable for seamless ingredient integration.
  2. Delicately sift powdered sugar over the creamy base, whisking with precision to ensure a velvety smooth texture emerges without any granular remnants.
  3. Introduce vanilla extract to the mixture, stirring thoroughly to distribute the aromatic essence evenly throughout the confection.
  4. Gently incorporate mini chocolate chips and chopped nuts, folding them into the mixture with a light touch to maintain the airy consistency of the dessert.
  5. Unleash your creativity by crafting bite-sized spheres using a spoon or cookie scoop, alternately experimenting with whimsical shapes like hearts or geometric forms to add visual intrigue.
  6. Arrange the delicate morsels on a parchment-lined tray, then carefully transfer to the refrigerator for a transformative chilling period of 1-2 hours until they achieve a pristine, solid structure.
  7. When sufficiently set, liberate the candies from their cool sanctuary and transfer to an airtight container, preserving their delectable essence for up to a week of indulgent enjoyment.

Notes

  • Soften Cool Whip at room temperature for 10-15 minutes to ensure smooth mixing without lumps.
  • Use powdered sugar gradually to control sweetness and prevent clumping, tasting as you go for perfect sweetness level.
  • Experiment with alternative mix-ins like crushed cookies, dried fruit, or coconut flakes for unique flavor variations.
  • Chill candies on parchment paper to prevent sticking and make removal easier, ensuring clean and neat candy shapes.
  • Prep Time: 15 minutes
  • Cook Time: 5 minutes
  • Category: Desserts, Snacks
  • Method: None
  • Cuisine: American

Nutrition

  • Serving Size: 12
  • Calories: 205
  • Sugar: 19g
  • Sodium: 50mg
  • Fat: 12g
  • Saturated Fat: 7g
  • Unsaturated Fat: 4g
  • Trans Fat: 0g
  • Carbohydrates: 23g
  • Fiber: 1g
  • Protein: 2g
  • Cholesterol: 5mg
Daves Miller

Daves Miller

Contributing Chef & Culinary Educator

Expertise

  • American Southern cuisine with a modern twist.
  • Instruction in culinary fundamentals and advanced techniques.
  • Development of recipes that highlight seasonal and local produce.​
  • Mastery of artisanal bread and pastry techniques, from laminated doughs to decorative sugar artistry.

Education

Sullivan University, Louisville, Kentucky

  • Degree: Associate of Science Degree in Culinary Arts
  • Focus: Specialized in cooking techniques and culinary sciences, hands‑on externships, professional kitchen lab training, and career preparation for restaurants, entrepreneurship, and global culinary opportunities.

White Mountains Community College, Berlin, New Hampshire

  • Program: Baking and Pastry Arts degree
  • Focus: Specialized in comprehensive baking and pastry arts, including bread making, artisan breads, cake decorating and design, chocolates, confections, and decorative centerpieces; product development and baking theory; and career preparation for baker and pastry chef roles in many places.

Daves is the friendly face guiding you through flavorful, fuss-free recipes at Picture Perfect Meals. 

He studied culinary arts at Sullivan University and embraced Baking and Pastry Arts at White Mountains Community College. Daves specializes in comforting meals with vibrant flavors, highlighting fresh, seasonal ingredients.

Leave a Reply

Your email address will not be published. Required fields are marked *

Recipe rating 5 Stars 4 Stars 3 Stars 2 Stars 1 Star