Elegant Red Velvet Cake In A Jar Recipe

Stylish Red Velvet Cake in a Jar Recipe for Sweet Moments

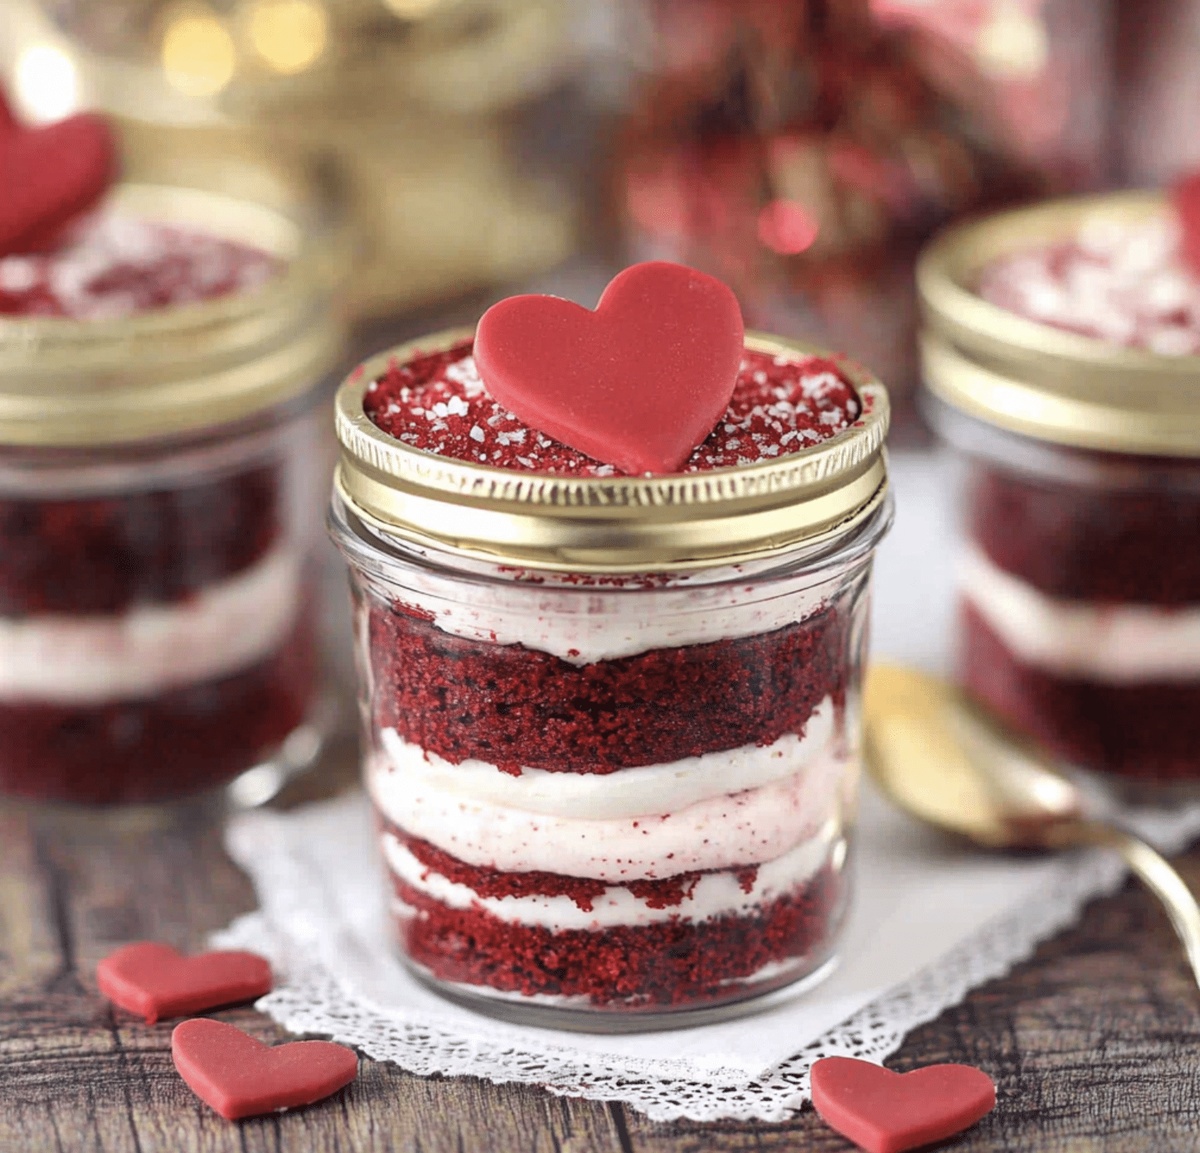
Layers of rich red velvet cake nestled in charming mason jars create a dessert that’s both visually stunning and deliciously decadent.

This red velvet cake in a jar recipe brings a modern twist to a classic Southern favorite.

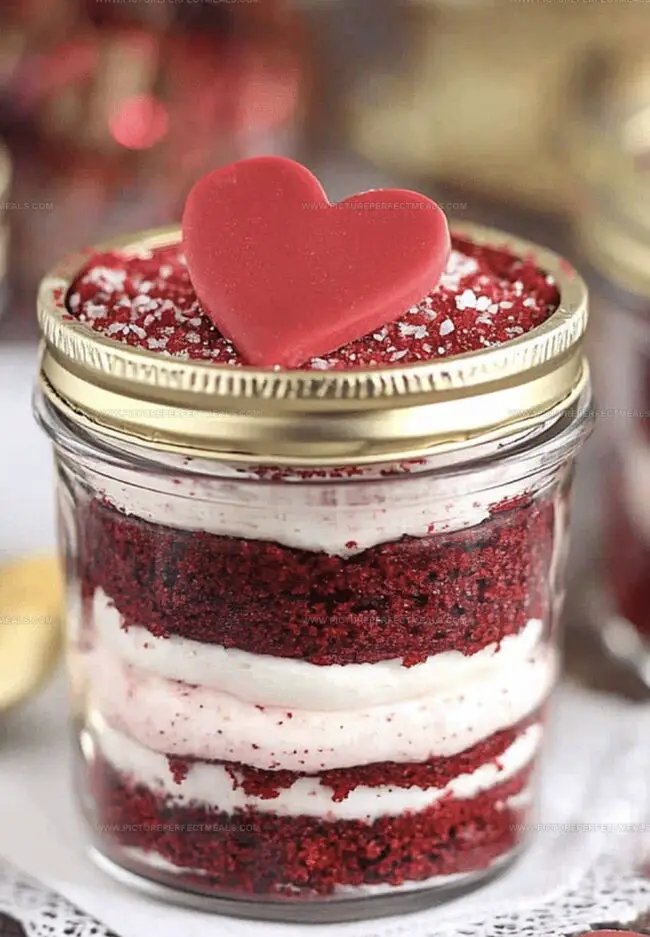
Creamy cream cheese frosting adds luxurious depth to each carefully crafted layer.

The vibrant red hue catches the eye, making these individual desserts perfect for special occasions or casual gatherings.

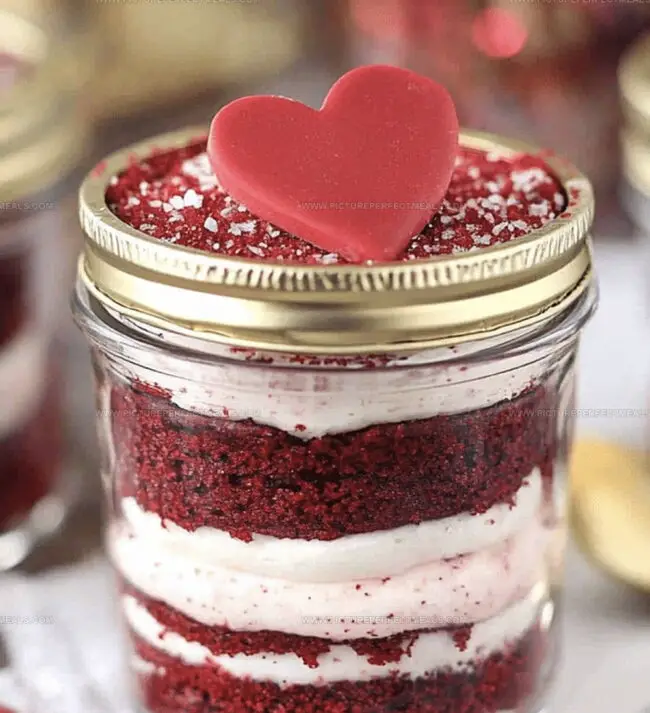
Compact and portable, these jar cakes eliminate the need for complicated slicing and serving.

Each spoonful promises a perfect balance of moist cake and silky frosting.

You’ll fall in love with this simple yet elegant dessert that’s sure to impress everyone at the table.

Quick Recipe Overview

Quick Recipe Overview

Prep Time: 30 minutes

Cook Time: 30 minutes

Total Time: 1 hour

Calories: 360 kcal

Servings: 6

Ingredients for Red Velvet Cake in a Jar

For Dry Ingredients:
  • All-Purpose Flour: Provides the cake's sturdy base and ensures a tender, smooth texture.
  • Cocoa Powder: Delivers rich chocolate undertones and deep color for classic red velvet flavor.
  • Baking Soda: Helps the cake rise and creates a light, airy structure.
  • Salt: Enhances overall flavor and balances the sweetness.
  • Granulated Sugar: Adds sweetness and contributes to the cake's soft, moist crumb.
For Wet Ingredients:
  • Buttermilk: Tenderizes the cake and adds tangy depth with its slight acidity.
  • Vegetable Oil: Ensures moisture and creates a soft, velvety texture.
  • Eggs: Bind ingredients together and provide structure and richness.
  • Vanilla Extract: Brings warm, aromatic complexity to the cake's flavor profile.
  • White Vinegar: Activates baking soda for better rise and contributes to tender crumb.
For Coloring and Finishing:
  • Red Food Coloring: Creates the signature vibrant red hue that defines red velvet cake.

Tools for Layering Cake in Cute Jars

  • Baking Pan (9×13-inch): Essential for baking the red velvet cake base.
  • Parchment Paper: Crucial for easy cake removal and preventing sticking.
  • Mixing Bowls (2): One for dry ingredients, another for wet ingredients.
  • Whisk: Perfect for smoothly combining ingredients without lumps.
  • Measuring Cups and Spoons: Ensures precise ingredient measurements.
  • Toothpick: Helps check cake doneness by testing for moist crumbs.

How to Assemble These Portable Velvet Beauties

How to Assemble These Portable Velvet Beauties
  • Warm Up the Oven

Crank your oven to a toasty 350°F and get a 9×13-inch pan ready with a quick spray and parchment paper lining.

  • Mix Dry Ingredients

Grab a big mixing bowl and toss in your flour, sugar, baking soda, cocoa powder, and salt. Give them a good whirl with a whisk until they’re best friends.

  • Blend Wet Ingredients

In another bowl, dance together buttermilk, oil, eggs, vanilla, vinegar, and that vibrant red food coloring until they’re smooth and gorgeous.

  • Create Magic Batter

Pour your wet ingredients into the dry ones and gently fold them together. Don’t go crazy – just mix until everything is happily combined.

  • Bake to Perfection

Slide your pan into the waiting oven and let it bake for 25-30 minutes. You’ll know it’s done when a toothpick comes out clean and the cake looks irresistibly golden.

  • Cool and Prepare

Let your cake chill completely before you start assembling your jar masterpiece. Patience is key to deliciousness!

Ideas for Customizing Jarred Red Velvet Treats

  • Make-Ahead Magic: Bake cake layers in advance and store in an airtight container for up to 3 days, perfect for planning ahead without stress.
  • Color Control: Adjust red food coloring quantity for deeper or lighter red shade, ensuring your cake looks exactly how you want without overwhelming color.
  • Dairy-Free Twist: Swap buttermilk with almond milk mixed with apple cider vinegar to create a vegan-friendly version that maintains moisture and tang.
  • Gluten-Free Option: Replace all-purpose flour with gluten-free flour blend, adding xanthan gum to help maintain cake's soft texture and prevent crumbling.
  • Jar Layering Pro Tip: Use a piping bag for clean, precise cake and frosting layers when assembling in jars, creating a professional and Instagram-worthy dessert presentation.

Tips for Gifting or Serving with a Smile

  • Dessert Jar Delights: Serving Suggestions
  • Picnic Perfect: Pack these charming red velvet jars for outdoor gatherings, adding a touch of elegance to your picnic spread. Top with fresh whipped cream and a sprinkle of cocoa powder for extra pizzazz.
  • Gifting Gorgeous: Wrap these individual jars with cute ribbons for a personalized dessert gift. Include a small wooden spoon or decorative fork to make the present even more special and inviting.
  • Party Presentation: Create a stunning dessert bar by arranging multiple jars on a tiered stand. Garnish with chocolate shavings, fresh berries, or mint leaves to elevate the visual appeal and wow your guests.
  • Brunch Brilliance: Serve these red velvet jars as a delightful sweet ending to a weekend brunch. Pair with a rich espresso or creamy latte for a decadent treat that everyone will adore.

Storage Advice for Cake You Can Take Anywhere

  • Smart Storage Solutions: Keep Your Cake Fresh
  • Refrigerator Magic: Seal red velvet jar cakes in airtight containers and store in the refrigerator for up to 5 days. Cold temperatures help maintain moisture and prevent quick spoilage.
  • Freezer Friendly: Wrap individual jars tightly with plastic wrap, then aluminum foil. Freeze for maximum 3 weeks. Thaw overnight in the refrigerator before serving for best texture and flavor.
  • Portion Control Planning: Prepare jars in advance during weekend meal prep. Stack them carefully with wax paper between layers to prevent sticking and maintain presentation.
  • Room Temperature Tips: If serving within 24 hours, keep sealed jars in a cool, dark pantry away from direct sunlight. Consume at room temperature for optimal taste and soft cake texture.
Print
clock clock iconcutlery cutlery iconflag flag iconfolder folder iconinstagram instagram iconpinterest pinterest iconfacebook facebook iconprint print iconsquares squares iconheart heart iconheart solid heart solid icon
Elegant Red Velvet Cake In A Jar Recipe

Elegant Red Velvet Cake In A Jar Recipe


5 Stars 4 Stars 3 Stars 2 Stars 1 Star

4.7 from 9 reviews

  • Total Time: 1 hour
  • Yield: 6 to 9 1x

Description

Red velvet cake in a jar delights dessert enthusiasts with its compact charm. Layers of crimson cake and cream cheese frosting create a portable sweet experience you’ll savor to the last delicious spoonful.


Ingredients

Scale
  • 2 large eggs, room temperature
  • 1 ½ cups (300 grams) granulated sugar
  • 1 cup (240 ml) buttermilk
  • 1 cup (240 ml) vegetable oil
  • 2 ½ cups (300 grams) all-purpose flour
  • 1 tbsp (15 ml) red food coloring
  • 1 tsp cocoa powder
  • 1 tsp baking soda
  • 1 tsp salt
  • 1 tsp white vinegar
  • 1 tsp vanilla extract
  • 8 oz (226 grams) cream cheese, softened
  • ½ cup (113 grams) unsalted butter, softened
  • 3 cups (360 grams) powdered sugar
  • 1 tsp vanilla extract
  • 68 small mason jars (8 oz each)
  • Crushed red velvet cake crumbs for garnish (optional)

Instructions

  1. Preheat and Prepare: Heat the oven to 350°F (175°C) and line a 9×13-inch baking pan with parchment paper, lightly greasing the surface to prevent sticking.
  2. Mix Dry Components: Whisk flour, sugar, baking soda, cocoa powder, and salt in a mixing bowl until completely smooth and lump-free, creating a uniform dry base.
  3. Combine Liquid Ingredients: In a separate large bowl, blend buttermilk, vegetable oil, eggs, vanilla extract, white vinegar, and red food coloring until the mixture reaches a vibrant, consistent texture.
  4. Create Batter: Gently fold dry ingredients into liquid mixture, stirring minimally to maintain a light, airy consistency without overmixing, which could result in a dense cake.
  5. Bake and Test: Pour batter evenly into prepared pan and bake for 25-30 minutes. Verify doneness by inserting a toothpick into the center – it should come out clean with no raw batter attached.
  6. Cool and Assemble: Remove cake from oven and let cool completely on a wire rack. Once at room temperature, slice into pieces and layer in jars with your chosen frosting or cream, creating a delightful layered dessert.

Notes

  • Prevent Overmixing: Gently fold dry and wet ingredients to maintain cake’s light, fluffy texture; overmixing leads to dense, tough cake.
  • Color Intensity Control: Adjust red food coloring quantity for desired vibrant red shade; less coloring works for natural, subtle color.
  • Moisture Retention Trick: Cool cake completely before layering to prevent frosting melting and maintain structural integrity of jar dessert.
  • Temperature Precision: Use room temperature ingredients like eggs and buttermilk to ensure even mixing and consistent cake texture.
  • Prep Time: 30 minutes
  • Cook Time: 30 minutes
  • Category: Desserts
  • Method: Baking
  • Cuisine: American

Nutrition

  • Serving Size: 6 to 9
  • Calories: 354
  • Sugar: 28 g
  • Sodium: 200 mg
  • Fat: 22 g
  • Saturated Fat: 10 g
  • Unsaturated Fat: 12 g
  • Trans Fat: 0 g
  • Carbohydrates: 40 g
  • Fiber: 0 g
  • Protein: 3 g
  • Cholesterol: 48 mg
Jenna Hartley

Jenna Hartley

Founder & Recipe Creator

Expertise

  • Recipe development with a focus on single-dish meals.
  • Fusion of traditional and modern Australian cuisines.
  • Food styling and photography for digital platforms.​

Education

Box Hill Institute, Melbourne

  • Degree: Advanced Diploma of Hospitality Management
  • Focus: Specialized in practical food and beverage service, responsible alcohol and hygiene compliance, legal risk management, and hands‑on experience in a simulated restaurant environment.

William Angliss Institute, Melbourne

  • Program: Certificate IV in Patisserie
  • Focus: Specialized in pastry and bakery techniques, cookery and specialty food preparation, recipe planning and costing, commercial kitchen operations, sustainable and inclusive work practices, food safety and hygiene compliance, and workplace health and safety.

Jenna is the heart of Picture Perfect Meals, turning simple ingredients into beautiful, easy‑to‑make dishes. 

Growing up around family meals in Melbourne, she trained at Box Hill Institute and then perfected her pastry skills at William Angliss Institute. She loves mixing classic Australian flavors with fresh ideas to keep cooking fun and stress‑free.

Leave a Reply

Your email address will not be published. Required fields are marked *

Recipe rating 5 Stars 4 Stars 3 Stars 2 Stars 1 Star