
Joyful Festive Grinch Cookies Recipe: Holiday Magic in Every Bite
Spreading holiday cheer takes a delightful turn with these whimsical grinch cookies that capture the spirit of mischief and sweetness.
These vibrant green treats blend playful color with irresistible flavor, making them a standout dessert for seasonal gatherings.
Soft, chewy, and delicately spiced, the cookies bring a touch of Dr.
Seuss magic to your kitchen.
Each bite bursts with festive charm and a hint of childhood nostalgia.
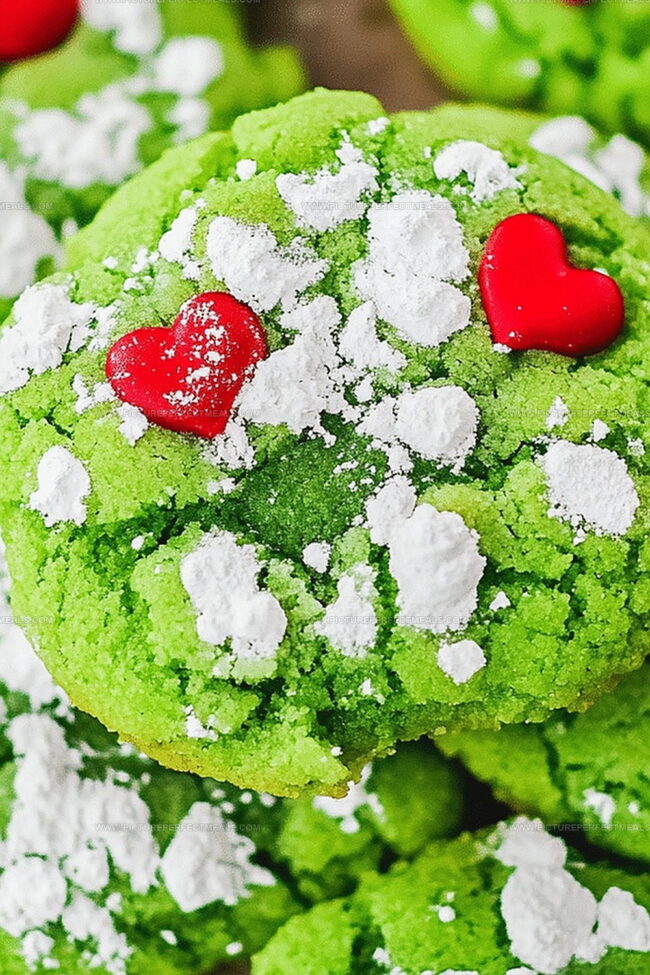
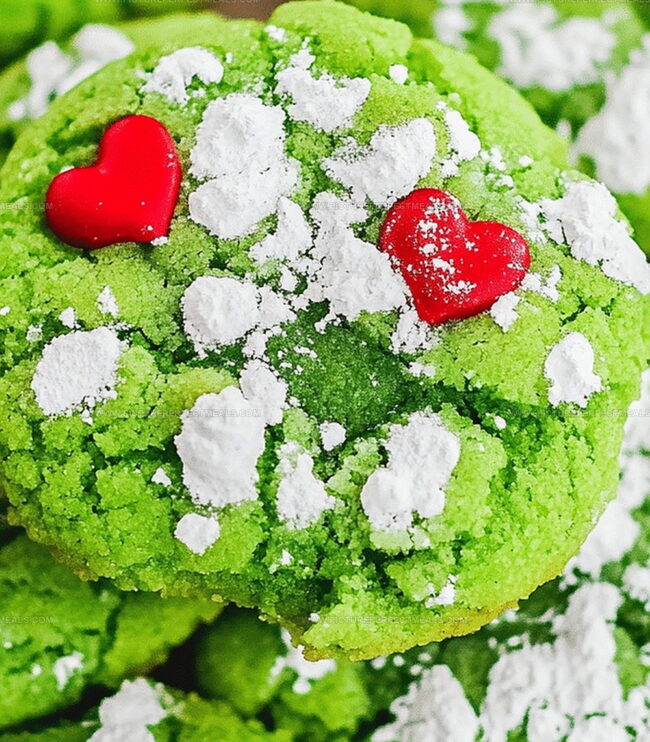
The bright green hue and red heart sprinkle create a charming nod to the beloved Grinch character.
Kids and adults alike will fall in love with these adorable, crisp-edged cookies that promise to steal hearts faster than the Grinch stole Christmas.
Prepare to delight your loved ones with this show-stopping holiday treat that’s sure to become a new festive tradition.
Quick Recipe Overview
What’s Inside Grinch Cookies
For Base Ingredients:For Coloring and Decoration:For Optional Enhancers:Tools to Make the Best Grinch Cookies
How to Bake Grinch Cookies with Ease
Grab a spacious mixing bowl and blend cake mix, vegetable oil, and eggs until a soft, dreamy mixture emerges. Splash in green food coloring and swirl until the dough transforms into a vibrant Grinch-worthy shade.
Roll spoonfuls of the green dough into delightful little spheres. Give each ball a luxurious powder sugar bath, ensuring a complete snowy coating. Arrange these green gems on baking sheets, leaving ample breathing room between them.
Tenderly nestle a bright red heart sprinkle right in the center of each cookie, symbolizing the Grinch’s growing compassion.
Slide the baking sheets into a preheated 350F oven. Bake for 810 minutes, watching carefully to maintain a soft, chewy texture. The cookies should look set but not hardened.
Let the cookies rest on the baking sheets for a brief moment, then transfer to a cooling rack. These whimsical treats are ready to spread holiday cheer at parties, family gatherings, or as a surprising gift for loved ones.
Fun Ways to Modify Grinch Cookies
Grinch Cookies Serving Tips for Any Crowd
Keeping Grinch Cookies Fresh and Tasty
Print
Festive Grinch Cookies Recipe
- Total Time: 20 minutes
- Yield: 25 1x
Description
Green grinch cookies deliver festive holiday cheer with their whimsical Seussian spirit. Christmas bakers can delight guests with these playful green-tinted sugar cookies topped with heart-shaped sprinkles.
Ingredients
- 1 box (15.25 oz/432g) vanilla cake mix
- 2 large eggs
- ⅓ cup (75ml) vegetable oil
- ½ cup (60g) powdered sugar
- ¼ tsp green gel food coloring (or a few drops liquid food coloring)
- 24 red heart sprinkles or candies
Instructions
- Prep Station: Ignite the oven to 350F (175C) and drape baking sheets with parchment paper or silicone mats for seamless cookie release.
- Dough Fusion: Whirl cake mix, vegetable oil, and eggs into a harmonious mixture, creating a smooth, malleable base ready for transformation.
- Grinch Metamorphosis: Infuse the dough with vibrant emerald hues by gradually blending food coloring, ensuring a consistent, eye-catching green saturation throughout.
- Cookie Crafting: Scoop uniform dough portions, lavishly enrobing each in powdered sugar to generate a crackled, winter-frost-like exterior that sparkles with festive charm.
- Decorative Touch: Nestle a crimson heart-shaped sprinkle into the center of each dough ball, adding a whimsical Grinch-inspired detail that transforms simple cookies into playful works of art.
- Baking Ritual: Slide the adorned cookie sheet into the preheated oven, allowing 8-10 minutes of precise baking to achieve a soft, yielding texture that melts in your mouth.
- Cooling Choreography: Let cookies rest briefly on the baking sheet, then gracefully transfer to a wire rack, allowing them to cool completely and develop their signature delicate structure.
Notes
- Manage Food Coloring Intensity: Start with a small amount of green food coloring and gradually add more to achieve the desired Grinch-green shade without over-saturating the dough.
- Prevent Sticky Dough: Chill the cookie dough for 15-20 minutes before forming balls to make handling easier and prevent excessive sticking to your hands.
- Ensure Soft Cookie Texture: Remove cookies from the oven when edges are just set but centers still look slightly underbaked to maintain a soft, chewy consistency.
- Customize for Dietary Needs: Substitute cake mix with gluten-free or vegan alternatives, and use plant-based oil and egg replacers to accommodate different dietary restrictions while preserving the cookie’s festive character.
- Prep Time: 10 minutes
- Cook Time: 10 minutes
- Category: Desserts, Snacks
- Method: Baking
- Cuisine: American
Nutrition
- Serving Size: 25
- Calories: 140
- Sugar: 5g
- Sodium: 120mg
- Fat: 6g
- Saturated Fat: 1g
- Unsaturated Fat: 5g
- Trans Fat: 0g
- Carbohydrates: 20g
- Fiber: 0g
- Protein: 2g
- Cholesterol: 20mg
Jenna Hartley
Founder & Recipe Creator
Expertise
Education
Box Hill Institute, Melbourne
William Angliss Institute, Melbourne
Jenna is the heart of Picture Perfect Meals, turning simple ingredients into beautiful, easy‑to‑make dishes.
Growing up around family meals in Melbourne, she trained at Box Hill Institute and then perfected her pastry skills at William Angliss Institute. She loves mixing classic Australian flavors with fresh ideas to keep cooking fun and stress‑free.