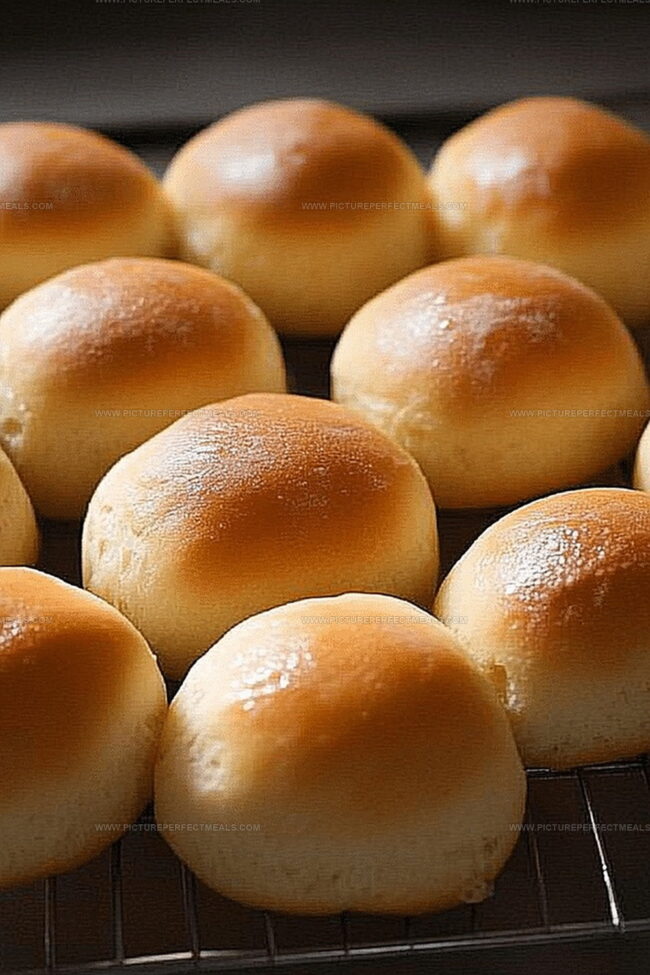
Warm, pillowy soft yeast rolls dance with comfort and nostalgia, sending gentle waves of homemade bread aromas through the kitchen.
Golden-brown edges promise a delightful texture that melts in your mouth.
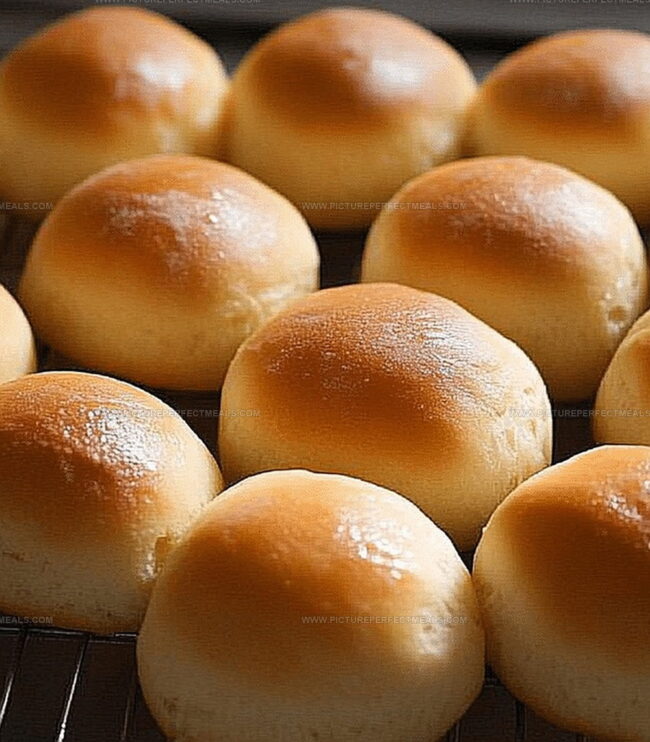
These classic dinner rolls emerge straight from generations of cherished family recipes.
Each tender morsel carries the warmth of traditional baking techniques passed down through years of love and care.
Kneading the dough becomes a rhythmic connection to culinary heritage.
Fresh from the oven, these rolls beckon you to break them apart and savor their irresistible goodness.
Prepare to experience bread magic that transforms an ordinary meal into an extraordinary dining moment.
Quick Recipe Overview
Prep Time: 15 minutes
Cook Time: 15 minutes
Total Time: 30 minutes
Calories: 180 kcal
Servings: 12
What Goes Into Homemade Yeast Rolls
For Activating Yeast:
Warm Milk: Provides ideal environment for yeast to bloom and become frothy.
Granulated Sugar: Feeds yeast and helps activate fermentation process.
Active Dry Yeast: Crucial microorganism that helps dough rise and creates soft, airy texture.
For Dough Base:
All-Purpose Flour: Provides structure and foundation for tender, pillowy rolls.
Unsalted Butter: Adds rich flavor and contributes to soft, delicate crumb.
Large Egg: Binds ingredients, adds moisture, and enhances golden color.
For Finishing and Flavor:
Salt: Balances sweetness and enhances overall bread flavor.
Melted Butter: Brushes on top for golden, glossy appearance and additional richness.
Kitchen Tools to Get Yeast Rolls Just Right
Large mixing bowl: Perfect for combining dry and wet ingredients.
Wooden spoon or spatula: Helps mix dough smoothly and easily.
Measuring cups and spoons: Ensures precise ingredient amounts.
Baking sheet: Provides surface for shaping and baking rolls.
Kitchen towel: Covers dough during rising to keep moisture locked in.
Pastry brush (optional): Helpful for brushing rolls with egg wash or butter.
Cooling rack: Allows rolls to cool evenly without getting soggy bottoms.
Yeast Rolls Made: The Process
Activate the Yeast Blend warm milk with sugar and sprinkle yeast on top. Let the mixture sit quietly and watch magic happen as tiny bubbles start dancing across the surface, signaling your yeast is coming alive and ready to make fluffy rolls.
Create Soft Dough Combine flour and salt in a large mixing bowl. Pour your activated yeast mixture into the center and start kneading with gentle, rhythmic movements. The dough will transform from a shaggy mess to a smooth, elastic wonder that springs back when touched.
Let Dough Rise Find a cozy, warm spot in your kitchen and allow the dough to rest. Cover it with a soft kitchen towel and let it expand and grow, doubling in size and developing deep, rich flavors that will make your rolls irresistible.
Shape the Rolls Gently punch down the puffy dough and divide it into equal portions. Roll each piece into a soft, round ball with tender fingertips, creating little clouds of potential deliciousness.
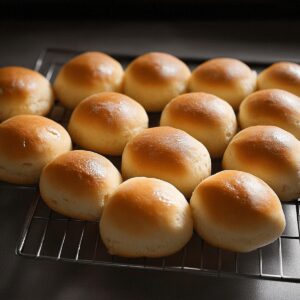
Final Rise and Bake Place your shaped rolls on a baking sheet, leaving space between them. Let them puff up one more time, then slide into a preheated oven. Watch as they turn golden brown, filling your kitchen with an aroma that will make everyone’s mouth water.
Serve and Enjoy Pull the rolls from the oven and brush with melted butter for an extra touch of deliciousness. Serve warm and watch them disappear in moments.
Flavor Add-Ins and Shaping Tips for Yeast Rolls
Proofing Perfection: Ensure your yeast activates properly by using milk at exactly 110°F – too hot kills yeast, too cold prevents activation.
Kneading Know-How: Knead dough until smooth and elastic, about 8-10 minutes by hand or 5 minutes in a stand mixer, which develops gluten for soft, fluffy rolls.
Rising Right: Let dough rise in a warm, draft-free spot like near a preheated oven or inside a turned-off oven with the light on for consistent temperature.
Gluten-Free Option: Swap regular flour with a high-quality gluten-free blend and add xanthan gum to maintain roll structure and texture.
Make-Ahead Magic: Prepare rolls up to the shaping stage, then refrigerate overnight for slow fermentation, which enhances flavor and can be baked fresh in the morning.
Present Yeast Rolls Warm and Golden
Comfort Companions: Pair these warm, fluffy yeast rolls with hearty soups like creamy tomato bisque or classic beef stew for a cozy meal experience.
Bread Basket Brilliance: Serve these rolls alongside roasted chicken, grilled meats, or holiday turkey for a delightful bread accompaniment that elevates any main course.
Breakfast Bliss: Transform leftover rolls into morning delights by splitting them, toasting lightly, and spreading with butter, jam, or creating a mini breakfast sandwich with scrambled eggs and cheese.
Dipping Delights: Use these soft rolls as perfect vehicles for savory dips, marinara sauce, or herb-infused olive oil, making every bite an irresistible treat.
Save Yeast Rolls Without Drying Them Out
Make-Ahead Magic: Prepare dough up to 24 hours in advance and refrigerate, allowing slow fermentation to develop richer flavor profiles.
Freezer-Friendly Trick: Shape unbaked rolls and freeze on a baking sheet, then transfer to freezer bags for up to 3 months. Thaw overnight in refrigerator before baking.
Freshness Extend Technique: Store cooled rolls in airtight container at room temperature for 2-3 days. Reheat gently in oven wrapped in foil to restore softness and warmth.
Portion Control Strategy: Wrap individual rolls in plastic wrap or aluminum foil to maintain moisture and prevent staleness when storing in refrigerator or freezer.
Homemade yeast rolls bring warmth and comfort from traditional Southern kitchens. Tender, golden bread rolls pair perfectly with butter and create memorable meals for family gatherings.
Ingredients
Scale
2 ¼ teaspoons (1 packet) active dry yeast
3 ½ cups (420 g) all-purpose flour
1 egg
¾ cup (180 ml) warm milk (110°F/45°C)
¼ cup (60 ml) unsalted butter, melted
¼ cup (50 g) granulated sugar
1 tsp salt
1 tbsp butter, melted (for brushing after baking)
Instructions
Yeast Activation: Whisk warm milk with sugar and yeast in a small vessel, allowing the mixture to foam and activate for 5-10 minutes, signaling live yeast culture.
Dough Formation: Merge flour, salt, and softened butter in a spacious mixing bowl, creating a foundational dough mixture with a crumbly texture.
Mixing and Kneading: Integrate the frothy yeast blend into the flour mixture, gradually transforming the ingredients into a cohesive, slightly tacky dough. Transfer to a floured surface and knead vigorously for 6-8 minutes until achieving a smooth, resilient consistency.
First Proofing: Nestle the kneaded dough into a greased bowl, drape with a damp cloth, and position in a warm, undisturbed zone. Allow the dough to rise and expand, approximately 1 hour, until volume doubles.
Shaping and Second Proofing: Deflate the risen dough by gently pressing out trapped air. Divide and mold into individual rolls on a prepared baking surface. Cover and let rest for 30-45 minutes, enabling further expansion and airiness.
Baking and Finishing: Heat oven to the recommended temperature. Bake rolls until they develop a rich, golden-brown exterior. Immediately after removing from the oven, lavish with melted butter for a luxurious sheen and enhanced flavor profile.
Notes
Check Yeast Freshness: Ensure yeast is active and not expired by confirming frothy reaction during activation stage.
Maintain Precise Temperature: Use warm (not hot) milk around 110°F to activate yeast without killing microorganisms.
Knead for Proper Texture: Develop gluten thoroughly by kneading consistently, creating smooth and elastic dough structure.
Create Optimal Rising Environment: Place dough in warm, draft-free area like near oven or covered with towel to encourage proper expansion.
Recipe development with a focus on single-dish meals.
Fusion of traditional and modern Australian cuisines.
Food styling and photography for digital platforms.
Education
Box Hill Institute, Melbourne
Degree: Advanced Diploma of Hospitality Management
Focus: Specialized in practical food and beverage service, responsible alcohol and hygiene compliance, legal risk management, and hands‑on experience in a simulated restaurant environment.
William Angliss Institute, Melbourne
Program: Certificate IV in Patisserie
Focus: Specialized in pastry and bakery techniques, cookery and specialty food preparation, recipe planning and costing, commercial kitchen operations, sustainable and inclusive work practices, food safety and hygiene compliance, and workplace health and safety.
Jenna is the heart of Picture Perfect Meals, turning simple ingredients into beautiful, easy‑to‑make dishes.
Growing up around family meals in Melbourne, she trained at Box Hill Institute and then perfected her pastry skills at William Angliss Institute. She loves mixing classic Australian flavors with fresh ideas to keep cooking fun and stress‑free.

Jenna Hartley
Founder & Recipe Creator
Expertise
Education
Box Hill Institute, Melbourne
William Angliss Institute, Melbourne
Jenna is the heart of Picture Perfect Meals, turning simple ingredients into beautiful, easy‑to‑make dishes.
Growing up around family meals in Melbourne, she trained at Box Hill Institute and then perfected her pastry skills at William Angliss Institute. She loves mixing classic Australian flavors with fresh ideas to keep cooking fun and stress‑free.