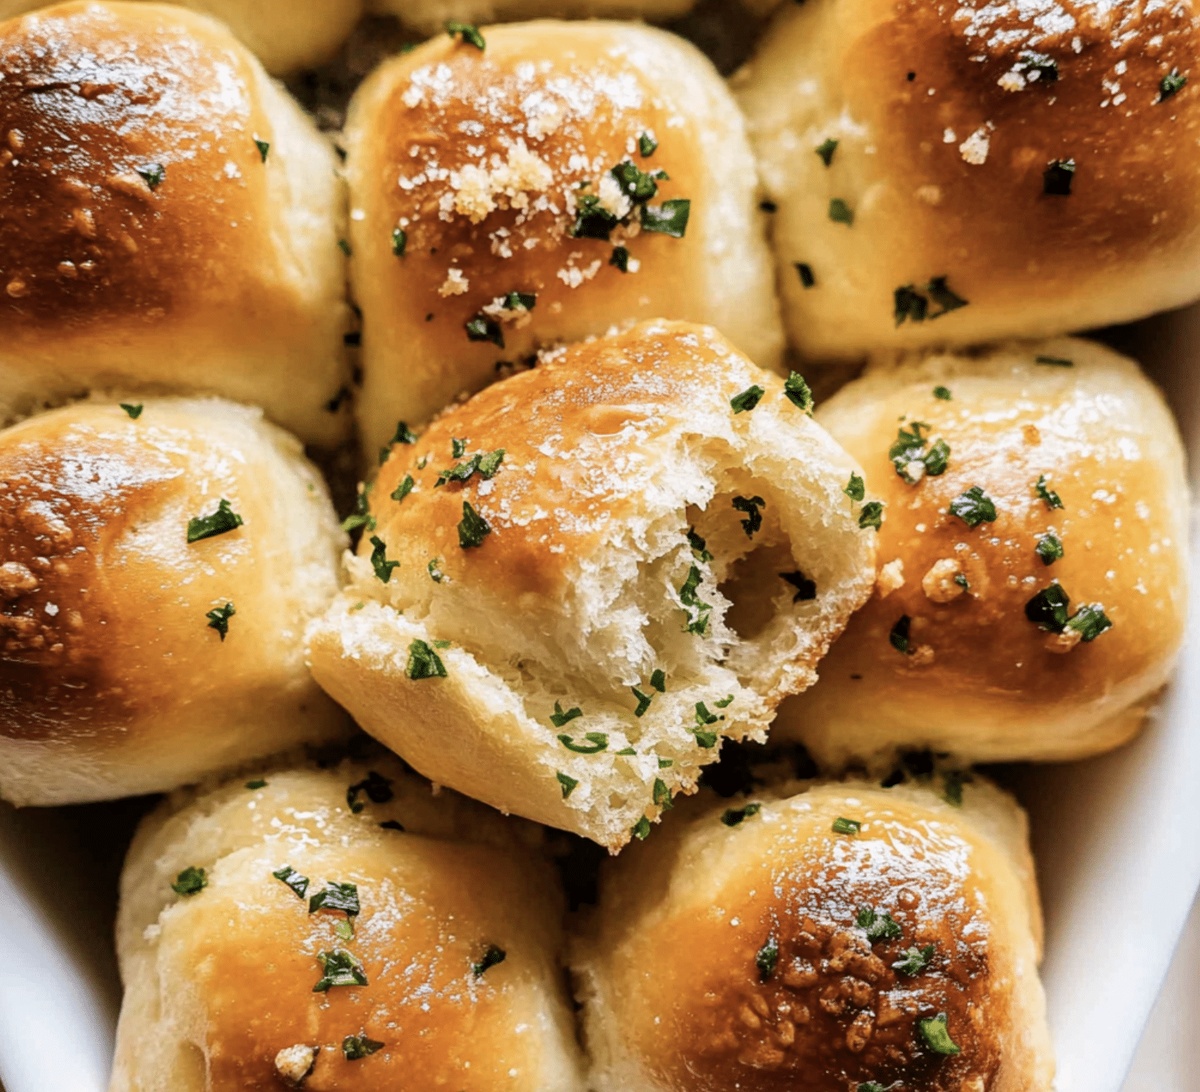
Irresistibly Fluffy Garlic Bread Rolls Recipe for Cozy Dinners
Crispy, golden garlic bread rolls have been my culinary obsession lately.
Baking these delectable treats fills my kitchen with an irresistible aroma that draws everyone closer.
Soft, pillowy dough meets fragrant garlic and herbs in this simple yet magical recipe.
Butter melts into every crevice, creating a rich and indulgent texture that melts in your mouth.
My grandmother’s secret technique transforms ordinary ingredients into something extraordinary.
Each roll promises a perfect balance of crunch and tenderness that makes people close their eyes in pure delight.
You won’t be able to resist tearing into these warm, garlicky gems straight from the oven.
Why Garlic Bread Rolls Make Every Meal Better
What You Need to Make Garlic Bread Rolls
Base Ingredients:Liquid Activators:Binding and Enriching Ingredients:How to Bake Garlic Rolls Fluffy and Golden
Step 1: Activate Yeast
Blend warm water, sugar, and yeast in a small bowl. Allow the mixture to rest and become frothy, developing a bubbly texture that signals the yeast is ready to work its magic.
Step 2: Create Dough Base
Combine flour and salt in a large mixing bowl. Pour in the activated yeast mixture, warm milk, softened butter, and beaten egg. Mix thoroughly until a cohesive dough emerges, bringing all ingredients together into a unified mass.
Step 3: Knead and Develop Texture
Transfer the dough to a lightly floured surface. Knead vigorously, using the heel of your hand to stretch and fold the dough. Continue working for 8-10 minutes until the dough becomes smooth, elastic, and develops a silky consistency. Alternatively, use a stand mixer with a dough hook, mixing for approximately 5 minutes.
Step 4: First Rise
Place the kneaded dough in a generously greased bowl. Cover with a clean kitchen towel, creating a cozy environment. Position the bowl in a warm, draft-free location and allow the dough to rise, expanding and doubling in size over 1-1.5 hours.
Tips for the Softest Garlic Bread Rolls
Best Storage for Garlic Rolls
What Goes Great with Garlic Bread Rolls
Garlic Roll Variations to Try at Home
Garlic Bread Roll Questions Answered
Active dry yeast or instant yeast are both suitable. Just ensure the yeast is fresh and not expired for the best rising results.
Absolutely! You can knead the dough by hand on a floured surface for 8-10 minutes. The key is to develop the gluten by kneading until the dough becomes smooth and elastic.
Mix the yeast with warm water and sugar. If it becomes frothy and bubbly within 5-10 minutes, the yeast is active and ready to use. If nothing happens, the yeast is likely dead and should be replaced.
Proofing allows the yeast to create air bubbles, which helps the dough rise and creates a soft, fluffy texture in the final bread rolls. Warm environments help activate the yeast and speed up the rising process.
Print
Garlic Bread Rolls Recipe
- Total Time: 40 minutes
- Yield: 12 1x
Description
Irresistible garlic bread rolls blend Italian comfort with homemade warmth, delivering golden crispy edges and fragrant herbed butter. Delightful alongside pasta or as a standalone snack, these rolls promise to elevate your dining experience with simple, satisfying flavors.
Ingredients
Bread Components:
- 500 g (4 cups) all-purpose flour
- 1 packet (7 g or 2 ¼ teaspoons) active dry yeast
- 1 egg, lightly beaten
- 1 tablespoon sugar
- 1 teaspoon salt
Liquid Ingredients:
- 250 milliliters (1 cup) warm milk
- 60 milliliters (¼ cup) warm water
Butter and Fat Components:
- 120 grams (8 tablespoons) unsalted butter, softened and melted
Garlic Butter Topping:
- 3 cloves garlic, minced
- 1 tablespoon fresh parsley, chopped
- ¼ cup Parmesan cheese (optional, for sprinkling)
Instructions
- Activate the yeast by whisking warm water, sugar, and yeast together in a compact vessel, allowing the mixture to bloom and become effervescent for approximately 5-10 minutes.
- Create a foundational dough by integrating flour and salt in a spacious mixing receptacle, then incorporate the activated yeast solution, tepid milk, malleable butter, and whisked egg until a cohesive mixture emerges.
- Transfer the nascent dough onto a lightly dusted work surface and manipulate thoroughly through rhythmic kneading motions, developing gluten and achieving a silky, resilient texture. Alternatively, utilize a stand mixer equipped with a dough hook, processing for roughly 5-8 minutes.
- Nestle the developed dough into a lightly greased container, drape with a breathable kitchen cloth, and position in a draft-free, warm environment to facilitate fermentation and volume expansion for approximately 1-1.5 hours, or until the dough visibly doubles in dimension.
Notes
- Activate instant yeast faster by using water slightly warmer than body temperature, around 110°F, to ensure quick and reliable proofing.
- Create softer rolls by incorporating a touch of olive oil or milk powder into the dough for enhanced moisture and tender texture.
- Customize flavor profiles by adding dried herbs like rosemary, thyme, or oregano directly into the dough for a Mediterranean-inspired twist.
- For gluten-sensitive individuals, substitute all-purpose flour with a high-quality gluten-free blend containing xanthan gum to maintain structural integrity.
- Prep Time: 20 minutes
- Cook Time: 20 minutes
- Category: Appetizer, Snacks
- Method: Baking
- Cuisine: Italian
Nutrition
- Serving Size: 12
- Calories: 180
- Sugar: 1 g
- Sodium: 220 mg
- Fat: 8 g
- Saturated Fat: 5 g
- Unsaturated Fat: 3 g
- Trans Fat: 0 g
- Carbohydrates: 24 g
- Fiber: 1 g
- Protein: 4 g
- Cholesterol: 20 mg
Daves Miller
Contributing Chef & Culinary Educator
Expertise
Education
Sullivan University, Louisville, Kentucky
White Mountains Community College, Berlin, New Hampshire
Daves is the friendly face guiding you through flavorful, fuss-free recipes at Picture Perfect Meals.
He studied culinary arts at Sullivan University and embraced Baking and Pastry Arts at White Mountains Community College. Daves specializes in comforting meals with vibrant flavors, highlighting fresh, seasonal ingredients.