Garlic Knots Recipe

Heavenly Twisted Garlic Knots Recipe for Bread Lovers

These mouthwatering garlic knots dance with irresistible flavor and charm, promising a delightful culinary adventure.

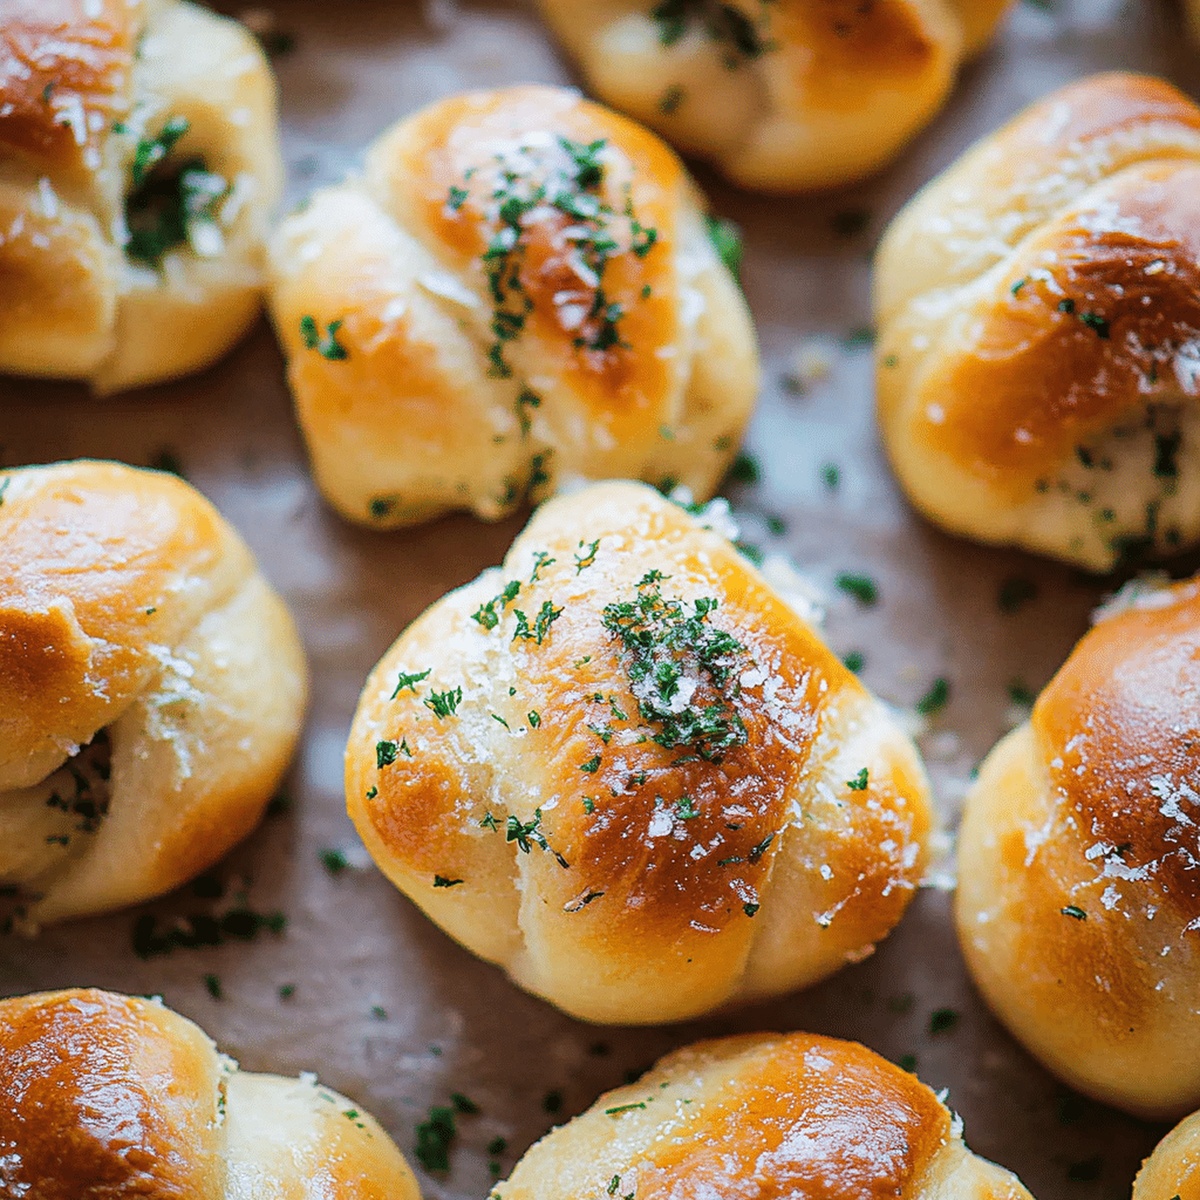
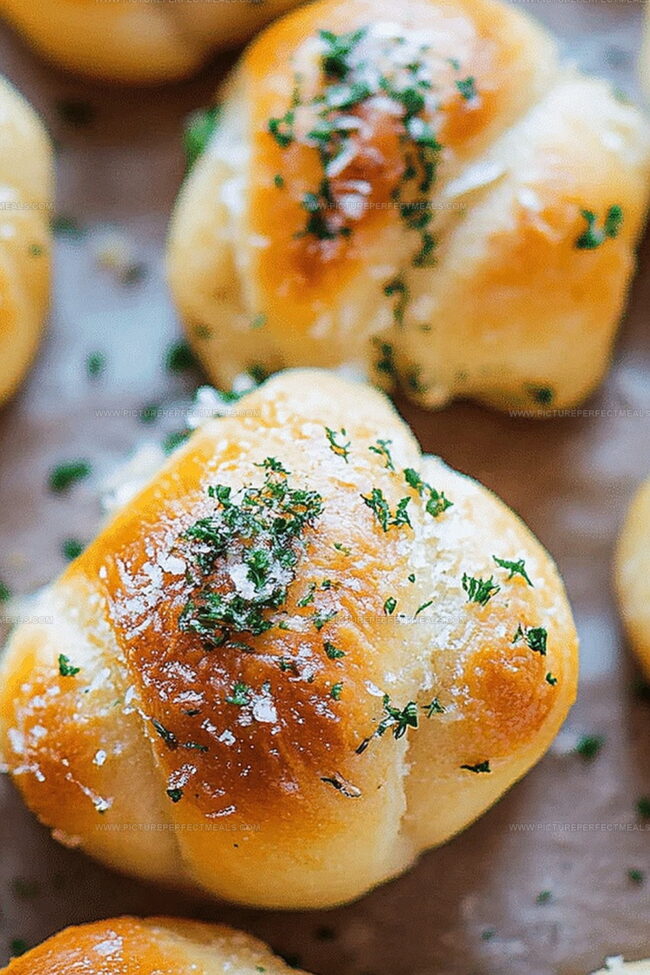
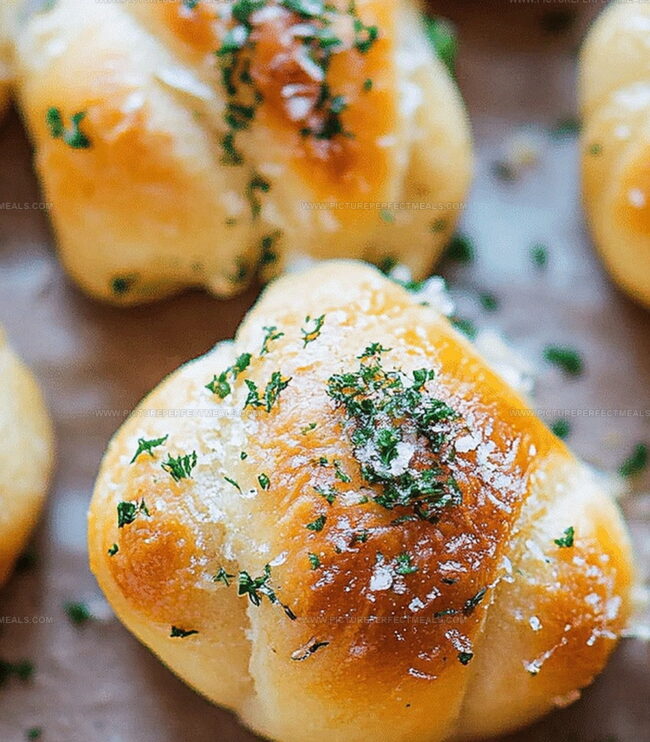
Soft, pillowy dough twists beckon from the kitchen counter, whispering temptation.

Crusty edges hint at the magical combination waiting to unfold.

Butter and herbs mingle together, creating an aroma that fills every corner of your space.

Seasoned bakers and kitchen novices can master this simple yet spectacular treat.

Crisp on the outside and tender within, you’ll want to savor each delectable bite.

Let’s transform ordinary ingredients into an extraordinary snack that sparks pure joy.

Ingredients Needed for Garlic Knot Dough

Bread Base:
  • Flour: High-protein wheat flour provides structure and chewiness for the garlic knots.
  • Water, Warm: Helps activate yeast and creates the right environment for dough development.
  • Yeast, Active Dry: Essential microorganism for making the dough rise and creating a light texture.
  • Salt: Enhances flavor and controls yeast activity in the bread dough.
Flavor Enhancers:
  • Olive Oil: Adds richness, moisture, and helps create a soft tender texture.
  • Sugar: Feeds the yeast and provides a subtle sweetness to balance the savory garlic.
Topping and Finishing:
  • Garlic, Fresh: Provides bold, aromatic flavor that defines the classic garlic knot.
  • Parsley, Fresh: Adds bright color and fresh herbal notes to the final dish.
  • Butter, Unsalted: Creates a rich, glossy coating that helps herbs and garlic stick to the knots.

How to Tie and Bake Homemade Garlic Knots

Step 1: Awaken the Yeast

Grab a small bowl and pour in warm water. Sprinkle sugar and yeast into the water. Watch the magic happen as the mixture becomes frothy and bubbly after 5 minutes.

Step 2: Create the Dough Base

Grab a large mixing bowl and toss in:
  • Flour
  • Salt

Pour in the yeast mixture and olive oil. Stir everything together until a shaggy dough forms.

Step 3: Knead with Love

Dust your work surface with flour. Transfer the dough and start kneading. Work the dough for 5-7 minutes until it becomes smooth and elastic. For an easier method, use a stand mixer with a dough hook and knead for 4-5 minutes.

Step 4: Let the Dough Rise

Lightly grease a clean bowl. Place the dough inside and cover with a kitchen towel. Find a cozy, warm spot in your kitchen and let the dough rest and rise. Wait 1-1.5 hours until the dough has doubled in size.

Step 5: Shape the Knots

Roll out the puffy dough on a floured surface. Cut into small strips. Tie each strip into a playful knot shape.

Step 6: Prepare Garlic Coating

While the knots are resting, whip up a zesty garlic mixture:
  • Minced garlic
  • Melted butter
  • Chopped parsley
  • Salt

Step 7: Bake to Golden Perfection

Preheat the oven. Arrange knots on a baking sheet. Brush with garlic mixture. Bake until golden brown and irresistible.

Step 8: Final Touch

Brush with extra garlic butter right after pulling from the oven. Serve warm and watch everyone’s eyes light up!

Pro Tips to Keep Garlic Knots Buttery and Soft

  • Proof Yeast Perfectly: Ensure water is between 110-115°F for optimal yeast activation, avoiding killing the microorganisms with excessive heat.
  • Knead with Confidence: Develop gluten by stretching and folding the dough, creating a smooth texture that results in soft, pillowy garlic knots.
  • Rise in Ideal Conditions: Place dough in a draft-free, warm spot like inside an unheated oven with the light on to promote consistent rising.
  • Prevent Sticking Tricks: Dust work surface generously with flour and use parchment paper to easily transfer and prevent garlic knots from adhering to baking sheet.
  • Enhance Flavor Boost: Brush freshly baked knots with a mixture of melted butter, minced garlic, and chopped parsley for maximum aromatic deliciousness.

Garlic Knots: How to Reheat or Store Easily

  • Store leftover garlic knots in an airtight container for up to 3 days. Wrap them individually in aluminum foil to maintain moisture and prevent drying.
  • Place cooled garlic knots in a freezer-safe bag, removing excess air. They'll stay fresh for 2-3 months. Label the bag with the date to track freshness.
  • Warm knots at 350°F for 5-7 minutes, wrapped in foil to prevent burning. Unwrap the last 2 minutes to restore crispy exterior.
  • Quickly reheat for 15-20 seconds. Add a damp paper towel to prevent knots from becoming tough and dry.

Sauces and Dishes That Pair with Garlic Knots

  • Create a classic Italian-style experience by serving warm garlic knots alongside a rich, herb-infused marinara sauce that complements the buttery, garlicky flavor of the knots.
  • The buttery notes of a chilled Chardonnay beautifully balance the garlic's intensity, providing a refreshing counterpoint to the knots' rich, warm texture.
  • Serve garlic knots alongside pepperoni slices, salami, or prosciutto to create a robust appetizer spread that highlights the knots' Italian-inspired character.
  • Create a vibrant side dish of fresh mozzarella, ripe tomatoes, and basil leaves to add a light, fresh element that cuts through the knots' richness.

Ways to Elevate Your Garlic Knot Game

  • Herb-Infused Knots: Replace olive oil with herb-infused olive oil and add dried oregano, basil, or rosemary to the dough for an aromatic herbal flavor profile.
  • Gluten-Free Option: Swap regular flour with a gluten-free flour blend and add xanthan gum to help bind the dough and maintain texture.
  • Whole Wheat Version: Substitute half the all-purpose flour with whole wheat flour for a nuttier, more nutritious garlic knot with added fiber and nutrients.
  • Vegan Adaptation: Use almond milk instead of water, replace olive oil with coconut oil, and sprinkle nutritional yeast on top for a cheesy flavor without dairy ingredients.

What Makes Garlic Knots Totally Addictive

  • Easy homemade garlic knots deliver restaurant-style deliciousness right from your kitchen with minimal effort and maximum flavor.
  • Preparing these knots takes just over an hour, including rising time, making them perfect for spontaneous gatherings or quick weekend treats that impress everyone.
  • Kids and adults alike will love twisting and shaping these soft, garlicky bread bites, turning meal preparation into a fun, interactive cooking experience that brings everyone together.
  • These garlic knots shine as appetizers, side dishes, or game day snacks, adapting effortlessly to different occasions and complementing various main courses with their irresistible aroma and taste.
Print
clock clock iconcutlery cutlery iconflag flag iconfolder folder iconinstagram instagram iconpinterest pinterest iconfacebook facebook iconprint print iconsquares squares iconheart heart iconheart solid heart solid icon
Garlic Knots Recipe

Garlic Knots Recipe


5 Stars 4 Stars 3 Stars 2 Stars 1 Star

4.6 from 33 reviews

  • Total Time: 35 minutes
  • Yield: 12 1x

Description

Homemade garlic knots blend Italian bakery charm with kitchen magic, creating irresistible bread twists that dance with herbal richness. Warm, buttery, and perfectly seasoned, these knots invite hungry guests to savor each delightful golden bite.


Ingredients

Scale

Main Ingredients:

  • 3 cups (375 g) all-purpose flour
  • 2 ¼ teaspoons (1 packet) instant yeast
  • 1 cup (240 ml) warm water (110°F/45°C)

Liquid and Fat Ingredients:

  • 2 tablespoons olive oil
  • ¼ cup (60 g) unsalted butter, melted

Seasoning and Flavor Ingredients:

  • 2 teaspoons granulated sugar
  • 1 teaspoon salt
  • 2 cloves garlic, minced
  • 1 tablespoon fresh parsley, finely chopped (or 1 teaspoon dried parsley)
  • ¼ teaspoon salt

Instructions

  1. Dissolve granulated sugar and yeast in tepid water, allowing the mixture to bloom and become frothy within 5 minutes.
  2. Sift flour and sprinkle salt into a spacious mixing vessel, creating a central well for the activated yeast and fragrant olive oil.
  3. Gently incorporate liquid ingredients into dry components, stirring until a shaggy, cohesive dough emerges.
  4. Transfer the dough onto a lightly dusted work surface, kneading rhythmically with the heels of your hands for approximately 6-7 minutes until the texture becomes smooth and springy.
  5. Transfer the dough into a lightly oiled ceramic bowl, ensuring the surface is completely coated to prevent sticking.
  6. Drape a clean, lightweight kitchen towel over the bowl, positioning it in a draft-free, warm environment to encourage rising.
  7. Allow the dough to expand and develop, roughly 1-1.25 hours, until its volume doubles and the surface becomes puffy and soft.

Notes

  • Boost yeast activation by using water between 100-110°F for optimal proofing and ensuring the yeast becomes perfectly bubbly.
  • Experiment with flour varieties like bread flour for chewier texture or whole wheat for added nutrition and slightly nutty flavor.
  • Customize garlic coating by mixing fresh minced garlic with melted butter and adding herbs like parsley or oregano for extra depth of flavor.
  • Prevent dough from drying out by covering it with a damp cloth during rising and storing in a draft-free, warm area like inside an unheated oven.
  • Prep Time: 20 minutes
  • Cook Time: 15 minutes
  • Category: Appetizer, Snacks
  • Method: Baking
  • Cuisine: Italian

Nutrition

  • Serving Size: 12
  • Calories: 150
  • Sugar: 1 g
  • Sodium: 200 mg
  • Fat: 7 g
  • Saturated Fat: 3 g
  • Unsaturated Fat: 4 g
  • Trans Fat: 0 g
  • Carbohydrates: 20 g
  • Fiber: 1 g
  • Protein: 3 g
  • Cholesterol: 10 mg
Daves Miller

Daves Miller

Contributing Chef & Culinary Educator

Expertise

  • American Southern cuisine with a modern twist.
  • Instruction in culinary fundamentals and advanced techniques.
  • Development of recipes that highlight seasonal and local produce.​
  • Mastery of artisanal bread and pastry techniques, from laminated doughs to decorative sugar artistry.

Education

Sullivan University, Louisville, Kentucky

  • Degree: Associate of Science Degree in Culinary Arts
  • Focus: Specialized in cooking techniques and culinary sciences, hands‑on externships, professional kitchen lab training, and career preparation for restaurants, entrepreneurship, and global culinary opportunities.

White Mountains Community College, Berlin, New Hampshire

  • Program: Baking and Pastry Arts degree
  • Focus: Specialized in comprehensive baking and pastry arts, including bread making, artisan breads, cake decorating and design, chocolates, confections, and decorative centerpieces; product development and baking theory; and career preparation for baker and pastry chef roles in many places.

Daves is the friendly face guiding you through flavorful, fuss-free recipes at Picture Perfect Meals. 

He studied culinary arts at Sullivan University and embraced Baking and Pastry Arts at White Mountains Community College. Daves specializes in comforting meals with vibrant flavors, highlighting fresh, seasonal ingredients.

Leave a Reply

Your email address will not be published. Required fields are marked *

Recipe rating 5 Stars 4 Stars 3 Stars 2 Stars 1 Star