Glamorous Gold Glitter Dipped Peanut Butter Oreos Recipe

Dazzling Gold Dusted Peanut Butter Oreos Recipe

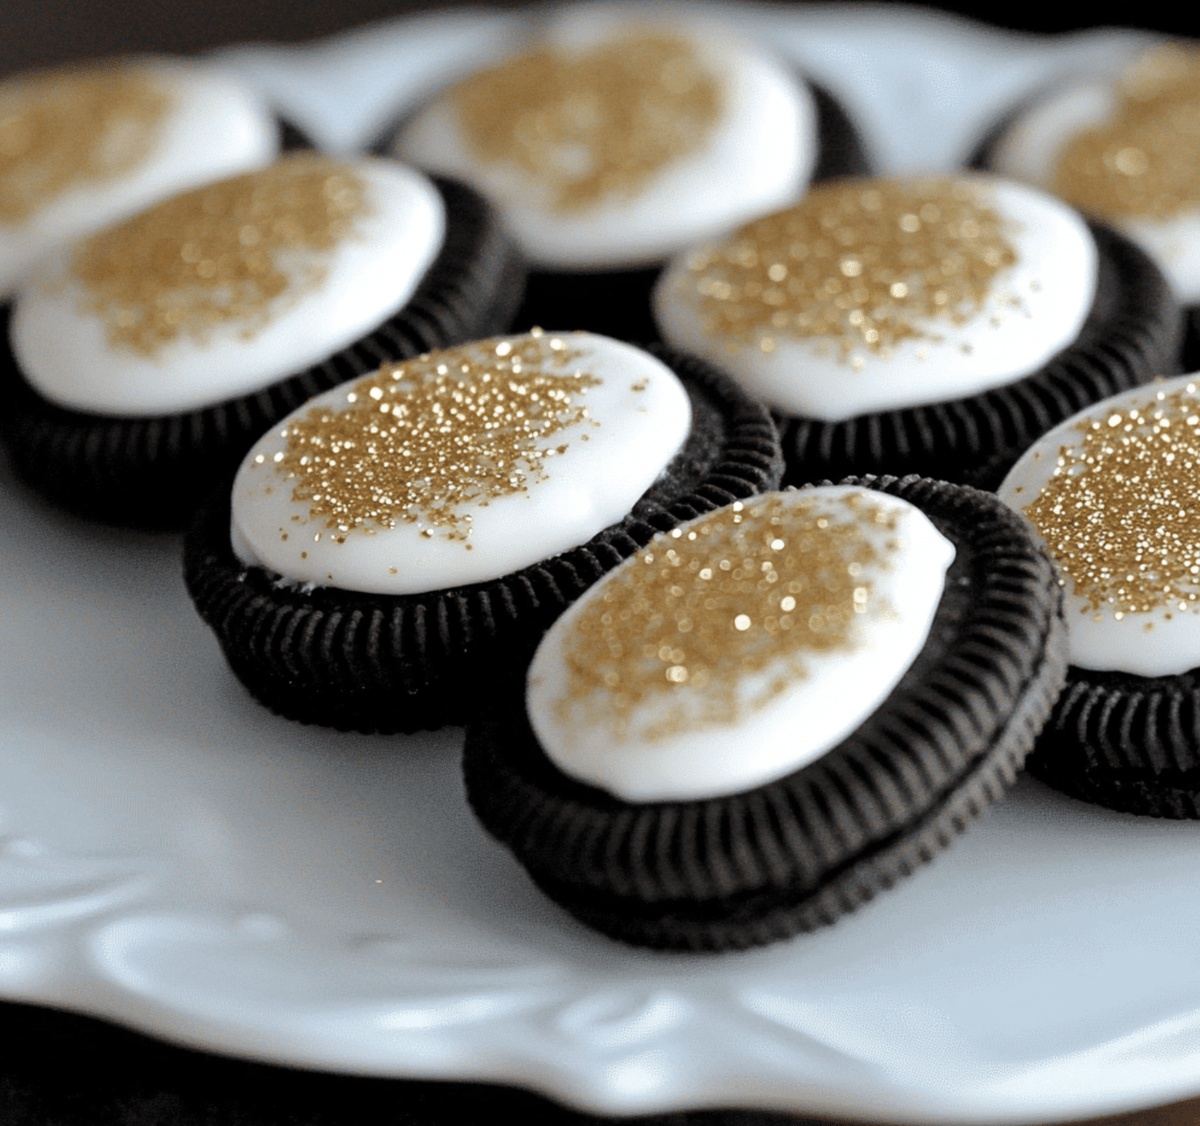
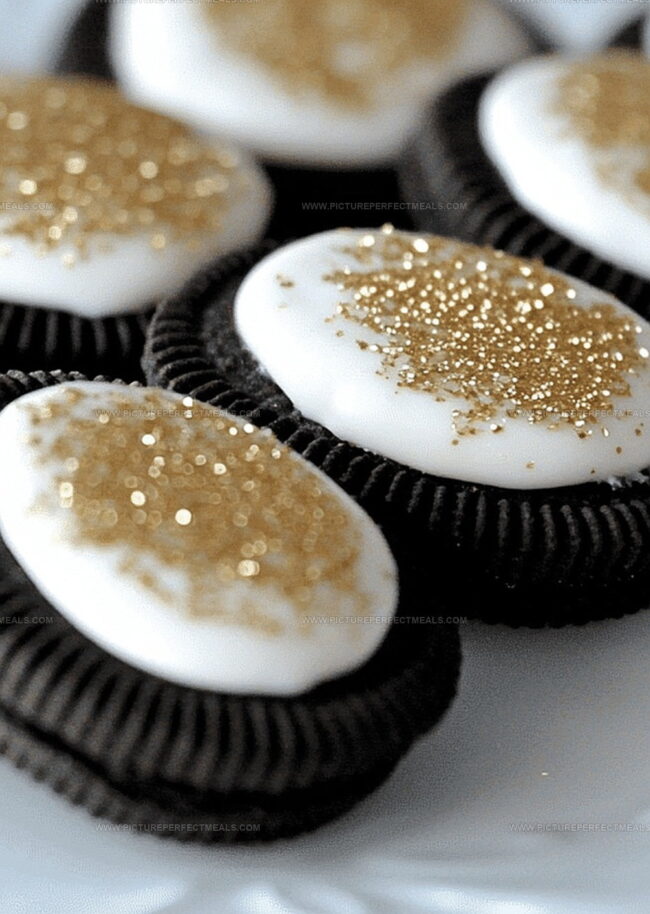
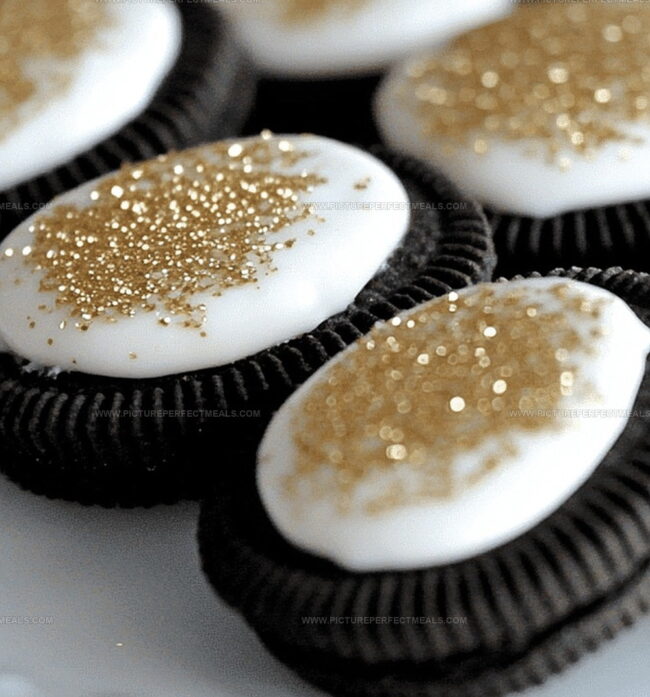
Decadent desserts spark joy in every sweet tooth, and these gold glitter dipped peanut butter Oreos deliver pure indulgence.

Rich chocolate cookies paired with creamy peanut butter create an irresistible combination.

The unexpected glimmering gold touch transforms these classic cookies into a showstopping treat that demands attention.

Each bite promises a delightful blend of smooth peanut butter, chocolate crunch, and sparkling elegance.

Guests will marvel at the luxurious appearance and decadent flavor profile.

These glamorous cookies work perfectly for parties, special occasions, or midnight cravings.

Prepare to dazzle and delight with this simple yet spectacular dessert.

Bringing Gold Glitter Dipped Peanut Butter Oreos to Life: Step-by-Step

  • Separate Cookie Halves

Gently twist each Oreo apart, creating two delicate cookie pieces.

  • Create Peanut Butter Filling

Spread a layer of creamy peanut butter on one cookie half, then reunite the halves to form a delectable sandwich.

  • Melt Chocolate Coating

Combine chocolate chips with a touch of coconut oil in a microwave-safe bowl. Heat in short bursts, stirring between intervals until silky smooth.

  • Dip and Decorate

Submerge each peanut butter Oreo into the molten chocolate, ensuring complete coverage. Allow excess chocolate to drip off, then place on a parchment-lined tray.

  • Add Glamorous Sparkle

While chocolate remains wet, dust the Oreos with shimmering gold glitter or luster dust for a luxe, festive look.

  • Chill and Set

Refrigerate the glittery treats for 15-20 minutes until the chocolate hardens completely.

  • Serve and Impress

Display these glamorous Oreos on an elegant platter or package them in charming gift boxes for a show-stopping dessert.

Make Gold Glitter Dipped Peanut Butter Oreos Yours with These Tips

  • Chocolate Coating Magic: Ensure chocolate is perfectly smooth by using high-quality chocolate chips and stirring thoroughly between microwave intervals to prevent burning.
  • Make-Ahead Brilliance: Prepare these fancy Oreos up to 3 days in advance and store in an airtight container in the refrigerator to maintain their crisp chocolate shell and fresh texture.
  • Allergy-Friendly Swaps: For nut-free versions, replace peanut butter with sunflower seed butter or chocolate hazelnut spread. Gluten-sensitive friends can use gluten-free sandwich cookies as a base.
  • Flavor Adventure: Experiment with different chocolate types like dark, milk, or white chocolate for unique taste profiles. Try adding a hint of peppermint extract or orange zest to the melted chocolate for an unexpected flavor twist.
  • Decorative Options: If edible gold glitter is unavailable, use gold sprinkles, edible gold paint, or gold sugar crystals to create a glamorous finish that transforms these Oreos into showstopping treats.

Serving Ideas to Showcase Gold Glitter Dipped Peanut Butter Oreos

  • Party Platter Perfection: Create a glamorous dessert display by arranging these gold-dipped Oreos on a sleek black serving tray with scattered gold confetti for extra sparkle.
  • Sweet Gift Packaging: Wrap individual Oreos in clear cellophane bags tied with luxurious gold ribbons, perfect for holiday hostess gifts or elegant party favors.
  • Dessert Pairing Delight: Serve alongside champagne, vanilla bean ice cream, or hot cocoa to complement the rich chocolate and peanut butter flavors for a decadent tasting experience.
  • Instagram-Worthy Presentation: Position Oreos at varying heights on a tiered cake stand, ensuring each cookie's golden shimmer catches the light for stunning social media photos.

Save & Store Gold Glitter Dipped Peanut Butter Oreos the Right Way

  • Quick Chill Strategy: Store dipped Oreos in refrigerator for 15-20 minutes to help chocolate set rapidly and maintain crisp edges.
  • Airtight Container Technique: Keep decorated cookies in sealed container between layers of parchment paper to prevent glitter transfer and maintain crispness for 3-4 days.
  • Temperature Control Method: Maintain cookies at cool room temperature or refrigerate to prevent chocolate from melting and preserve delicate gold glitter decoration.
  • Gift Packaging Approach: Carefully stack cookies in clear gift boxes with wax paper separators, allowing gold shimmer to remain visible while protecting delicate chocolate coating.

Quick Recipe Overview

Prep Time: 10 minutes

Cook Time: 25 minutes

Total Time: 35 minutes

Calories: 200 kcal

Servings: 12

What’s Inside: Gold Glitter Dipped Peanut Butter Oreos Essentials

For Base Cookie:
  • Oreo Cookies: Classic sandwich cookies that provide the crispy, sweet foundation for this decadent treat, choose fresh, crunchy cookies for the best texture.
For Filling:
  • Peanut Butter: Creamy spread that adds rich, nutty flavor and helps seal the cookie halves, select smooth, high-quality peanut butter for best results.
For Coating and Decoration:
  • Chocolate Chips: Melts into luxurious coating that envelops the cookies, opt for good-quality chocolate with high cocoa content for deeper flavor.
  • Coconut Oil: Helps chocolate achieve smooth, glossy finish and enhances melting properties, choose refined version for neutral taste.
  • Edible Gold Glitter: Provides stunning, glamorous sparkle that transforms ordinary cookies into extraordinary showstoppers, select food-grade glitter for safe consumption.
  • Luster Dust: Alternative decorative option that gives elegant, metallic sheen to chocolate surface, pick edible grade for food safety.

Tools to Master Gold Glitter Dipped Peanut Butter Oreos

  • Microwave-safe bowl: Essential for melting chocolate smoothly.
  • Fork or dipping tool: Perfect for evenly coating Oreos in chocolate.
  • Parchment-lined baking sheet: Prevents sticking and makes cleanup easy.
  • Edible gold glitter or luster dust: Adds a glamorous sparkle to your treats.
  • Measuring spoon: Helps spread exactly 1 teaspoon of peanut butter.
Print
clock clock iconcutlery cutlery iconflag flag iconfolder folder iconinstagram instagram iconpinterest pinterest iconfacebook facebook iconprint print iconsquares squares iconheart heart iconheart solid heart solid icon
Glamorous Gold Glitter Dipped Peanut Butter Oreos Recipe

Glamorous Gold Glitter Dipped Peanut Butter Oreos Recipe


5 Stars 4 Stars 3 Stars 2 Stars 1 Star

4.7 from 24 reviews

  • Total Time: 35 minutes
  • Yield: 13 1x

Description

Peanut butter oreos dazzle with luxurious gold glitter edges that elevate classic cookies into elegant party treats. Chocolate and peanut butter combine for an irresistible dessert you can quickly craft at home.


Ingredients

Scale
  • 24 Oreo cookies
  • 1 cup (250 g / 8.8 oz) creamy peanut butter
  • 2 cups (350 g / 12.3 oz) white or dark chocolate chips (or candy melts)
  • 1 tbsp (15 ml / 0.5 fl oz) coconut oil or vegetable shortening (optional, for smoother melting)
  • Edible gold glitter or luster dust

Instructions

  1. Cookie Preparation: Carefully separate Oreo cookies and spread peanut butter between the wafers, reuniting them into a unified sandwich treat.
  2. Chocolate Coating: Melt chocolate chips with coconut oil in a microwave-safe bowl, stirring until achieving a smooth, glossy consistency.
  3. Dipping Technique: Completely immerse each peanut butter Oreo into the molten chocolate, allowing excess to drain using a fork, ensuring an even and elegant chocolate coverage.
  4. Luxe Embellishment: While chocolate remains wet, delicately dust with edible gold glitter or apply luster dust to create a sophisticated, shimmering finish.
  5. Setting Process: Place chocolate-covered Oreos on a parchment-lined baking sheet and refrigerate for 15-20 minutes until chocolate sets firmly and glitter adheres perfectly.
  6. Presentation: Arrange the glamorous gold-accented Oreos on an elegant platter or package in decorative gift boxes for a stunning holiday confection that dazzles both visually and tastefully.

Notes

  • Select High-Quality Ingredients: Choose fresh, creamy peanut butter and premium Oreo cookies for the best flavor and texture.
  • Perfect Chocolate Melting: Melt chocolate slowly and carefully to prevent burning, using short 15-second microwave intervals and stirring consistently.
  • Dipping Technique Matters: Use a fork or dipping tool to ensure even chocolate coating and smooth removal of excess chocolate for a professional finish.
  • Glitter Application Tip: Sprinkle gold glitter immediately after dipping while chocolate is still wet to ensure maximum adhesion and stunning visual effect.
  • Prep Time: 10 minutes
  • Cook Time: 25 minutes
  • Category: Desserts, Snacks
  • Method: Blending
  • Cuisine: American

Nutrition

  • Serving Size: 13
  • Calories: 207
  • Sugar: 13 g
  • Sodium: 50 mg
  • Fat: 12 g
  • Saturated Fat: 5 g
  • Unsaturated Fat: 7 g
  • Trans Fat: 0 g
  • Carbohydrates: 22 g
  • Fiber: 1 g
  • Protein: 3 g
  • Cholesterol: 0 mg
Jenna Hartley

Jenna Hartley

Founder & Recipe Creator

Expertise

  • Recipe development with a focus on single-dish meals.
  • Fusion of traditional and modern Australian cuisines.
  • Food styling and photography for digital platforms.​

Education

Box Hill Institute, Melbourne

  • Degree: Advanced Diploma of Hospitality Management
  • Focus: Specialized in practical food and beverage service, responsible alcohol and hygiene compliance, legal risk management, and hands‑on experience in a simulated restaurant environment.

William Angliss Institute, Melbourne

  • Program: Certificate IV in Patisserie
  • Focus: Specialized in pastry and bakery techniques, cookery and specialty food preparation, recipe planning and costing, commercial kitchen operations, sustainable and inclusive work practices, food safety and hygiene compliance, and workplace health and safety.

Jenna is the heart of Picture Perfect Meals, turning simple ingredients into beautiful, easy‑to‑make dishes. 

Growing up around family meals in Melbourne, she trained at Box Hill Institute and then perfected her pastry skills at William Angliss Institute. She loves mixing classic Australian flavors with fresh ideas to keep cooking fun and stress‑free.

Leave a Reply

Your email address will not be published. Required fields are marked *

Recipe rating 5 Stars 4 Stars 3 Stars 2 Stars 1 Star