
Dreamy Gooey Brownie Ice Cream Sandwiches Recipe for Treats
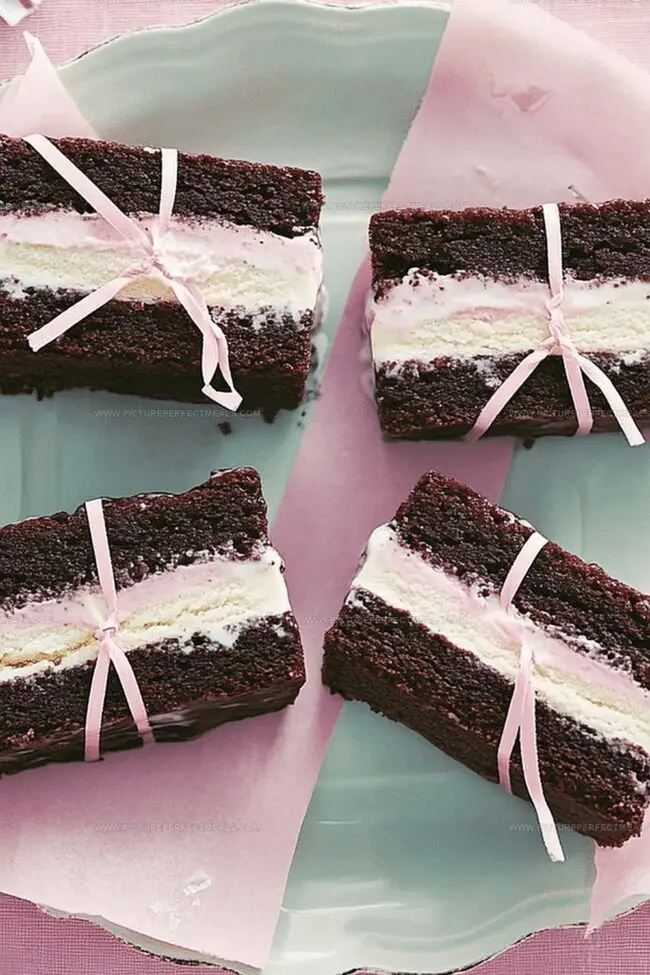
Decadent chocolate brownies with creamy homemade brownie ice cream sandwiches will make your taste buds dance with pure delight.
These fudgy treats combine rich, moist chocolate with smooth, cold ice cream for an irresistible dessert.
Summer afternoons call for something extraordinary and refreshing.
Crafting these sandwiches requires simple ingredients and minimal effort.
Chocolate lovers will absolutely adore the intense flavor and contrasting textures in every single bite.
Each sandwich promises a luxurious experience that blends warm, chewy brownie layers with cool, silky ice cream.
Prepare to indulge in a dessert that transforms an ordinary moment into something truly spectacular.
Quick Recipe Overview
What Goes In Brownie Ice Cream Sandwiches
For Dry Ingredients:For Wet Ingredients:For Sweet and Filling Components:Sandwich Equipment Essentials
Making Brownie Ice Cream Sandwiches

Crank your oven to a toasty 350F and line a square baking pan with parchment paper, letting extra hang over the edges for easy lifting.
Whisk melted butter, sugar, and cocoa powder into a silky smooth mixture. Blend in the egg and vanilla until everything looks perfectly combined. Gently fold in flour and salt, stirring just enough to bring the batter together.
Pour the batter into the prepared pan, spreading it into a thin, even layer. Slide the pan into the oven and bake for 10-12 minutes until the brownie looks set but still soft. Let it cool completely right in the pan.
Once cooled, lift the brownie out using the parchment edges. Slice it precisely down the middle to form two matching layers.
Let your favorite ice cream soften for a few minutes. Spread it evenly across one brownie layer, using a spatula to create a smooth surface. Gently press the second brownie layer on top.
Wrap the entire creation in plastic wrap or foil. Tuck it into the freezer for a minimum of 2 hours until completely firm.
Pull out your frozen treat, unwrap, and cut into individual portions. Serve immediately or keep stored in the freezer for a cool surprise later.
Notes & Tips for Brownie Sandwiches
How to Serve These Sandwiches
Storage Help for Brownie Ice Cream Sandwiches
Print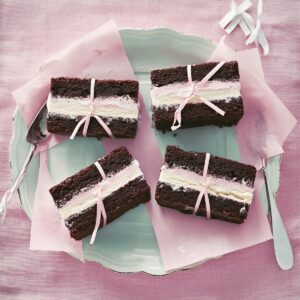
Gooey Brownie Ice Cream Sandwiches Recipe
- Total Time: 27 minutes
- Yield: 5 1x
Description
Irresistible chewy brownie ice cream sandwiches bring together rich chocolate and creamy vanilla in a delightful summer treat. Cool dessert lovers will crave these homemade delights that combine classic flavors for an indulgent experience.
Ingredients
- 1 large egg
- 1.5 cups (300g) granulated sugar
- 1 cup (230g) unsalted butter, melted
- ⅔ cup (70g) cocoa powder (unsweetened)
- 1 cup (130g) all-purpose flour
- 1 tbsp vanilla extract
- 0.5 tsp salt
- 1 pint (475 ml) ice cream (vanilla, chocolate, or any flavor of choice)
Instructions
- Preparation: Preheat oven to 350F (175C) and line a square pan with parchment paper, allowing excess to hang over edges for effortless removal.
- Chocolate Base: Whisk melted butter, sugar, and cocoa powder in a mixing bowl until achieving a lustrous, homogeneous texture.
- Liquid Integration: Vigorously blend egg and vanilla extract into the chocolate mixture, ensuring complete ingredient fusion.
- Dry Ingredient Incorporation: Delicately fold flour and salt into the batter, minimizing mixing to preserve a tender consistency.
- Pan Distribution: Spread batter evenly across the prepared pan, creating a thin, uniform layer that promises a delectable brownie foundation.
- Baking Process: Bake for 10-12 minutes, targeting a soft, barely set texture that guarantees a chewy final product.
- Cooling and Preparation: Allow brownie to cool completely in the pan, then extract using parchment paper and slice horizontally into two precise layers.
- Ice Cream Application: Briefly soften ice cream to a spreadable consistency, then generously apply across one brownie layer using a spatula.
- Sandwich Assembly: Carefully position the second brownie layer atop the ice cream, gently pressing to create a cohesive sandwich.
- Freezing and Serving: Wrap tightly and freeze for a minimum of two hours. When ready, unwrap and slice into individual portions with a sharp knife.
Notes
- Minimize Mixing: Stir brownie batter gently to prevent tough texture, ensuring light and chewy consistency by avoiding overmixing.
- Temperature Control: Soften ice cream just enough to spread smoothly without completely melting, maintaining structural integrity for perfect sandwich assembly.
- Freezing Technique: Wrap ice cream sandwich tightly in plastic wrap to prevent freezer burn and preserve fresh flavor and texture.
- Precision Cutting: Use a sharp, clean knife when slicing sandwiches to create neat, professional-looking edges that showcase the dessert’s elegance.
- Prep Time: 15 minutes
- Cook Time: 12 minutes
- Category: Desserts, Snacks
- Method: Baking
- Cuisine: American
Nutrition
- Serving Size: 5
- Calories: 350
- Sugar: 28g
- Sodium: 150mg
- Fat: 18g
- Saturated Fat: 10g
- Unsaturated Fat: 8g
- Trans Fat: 0g
- Carbohydrates: 42g
- Fiber: 1g
- Protein: 4g
- Cholesterol: 40mg
Jenna Hartley
Founder & Recipe Creator
Expertise
Education
Box Hill Institute, Melbourne
William Angliss Institute, Melbourne
Jenna is the heart of Picture Perfect Meals, turning simple ingredients into beautiful, easy‑to‑make dishes.
Growing up around family meals in Melbourne, she trained at Box Hill Institute and then perfected her pastry skills at William Angliss Institute. She loves mixing classic Australian flavors with fresh ideas to keep cooking fun and stress‑free.