
Ooey-Gooey Peanut Butter Cup Dump Cake Recipe for Sweet Fans
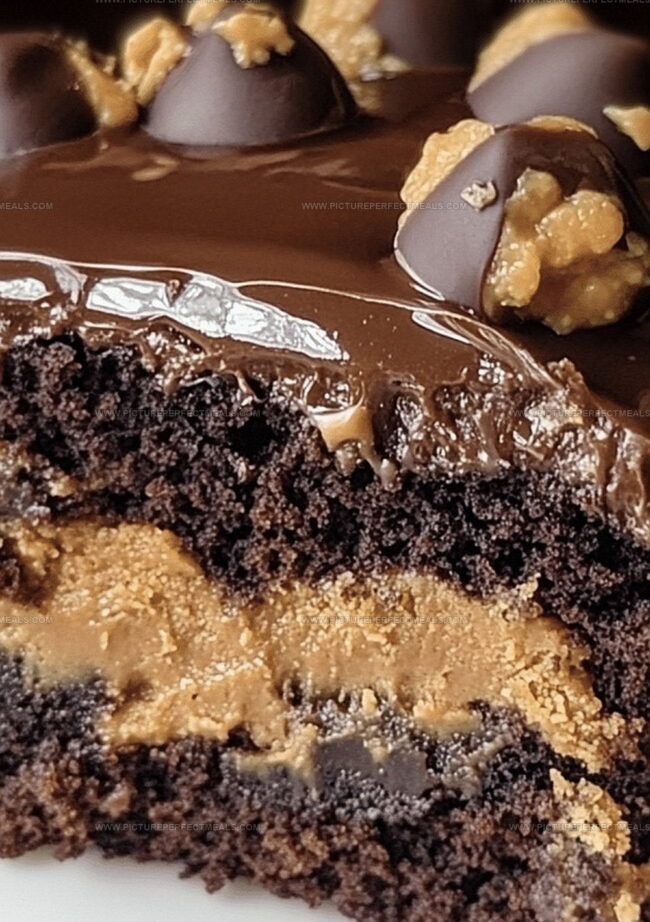
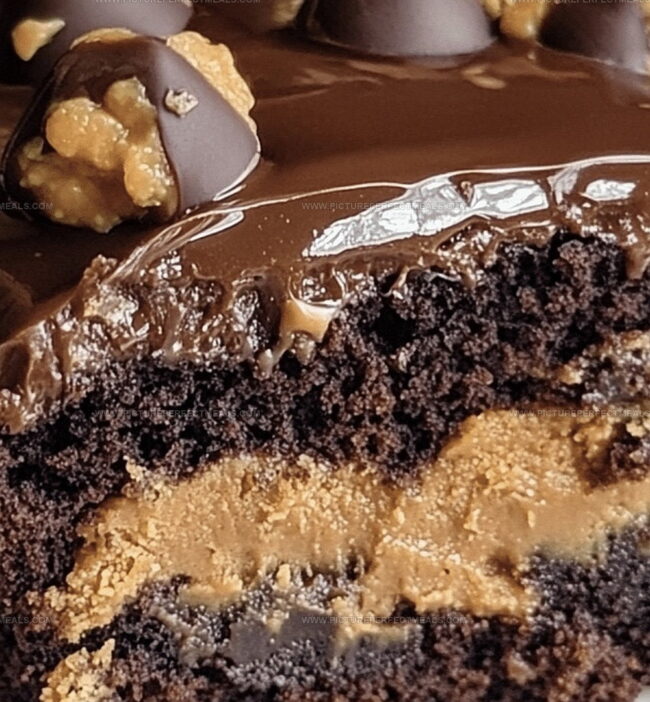
Decadent chocolate and creamy peanut butter cup dump cake will make dessert lovers swoon with excitement.
Sweet layers of pure indulgence melt together effortlessly.
The recipe requires minimal effort but delivers maximum flavor.
Simple ingredients combine to create a rich, heavenly treat.
Chocolate and peanut butter lovers understand the magic of this delightful dessert.
Each bite promises a perfect balance of smooth, velvety textures.
This crowd-pleasing cake transforms ordinary moments into delicious celebrations.
Prepare to savor every single mouthwatering spoonful.
Quick Recipe Overview
Ingredients in Peanut Butter Cup Dump Cake
For Base Layer:For Cake Mix:For Topping:Tools for Baking a Peanut Butter Dump Cake
How to Make Peanut Butter Cup Dump Cake
Fire up your oven to a toasty 350°F and give your baking dish a quick spray or butter rub to prevent any sticky situations.
Grab your favorite creamy peanut butter and spread it like smooth, delicious artwork across the bottom of the pan, making sure every inch gets a generous coating.
Sprinkle the cake mix over the peanut butter layer, creating a delightful foundation. Scatter chocolate pudding mix on top like delicate snow.
Drizzle melted butter all over the dry ingredients, ensuring everything gets a luxurious moisture bath. Then rain down chopped peanut butter cups across the surface.
Slide your creation into the preheated oven and let it transform for 35-40 minutes. Look for golden edges and a slightly jiggly center that promises gooey deliciousness.
Let the cake rest and cool for about 15 minutes. This allows the layers to set and the flavors to mingle. Slice, serve, and watch everyone’s eyes light up with pure dessert joy.
Tips to Perfect Peanut Butter Dump Cake
Ways to Serve Peanut Butter Cup Dump Cake
Store & Save Peanut Butter Cup Dump Cake
Print
Gooey Peanut Butter Cup Dump Cake Recipe
- Total Time: 50 minutes
- Yield: 13 1x
Description
Irresistible peanut butter cup dump cake combines classic dessert simplicity with chocolate-peanut butter indulgence. Rich layers of chocolate cake mix and creamy peanut butter create a quick, delightful treat you’ll crave repeatedly.
Ingredients
- 1 box chocolate cake mix
- 1 cup / 240 mL creamy peanut butter
- 1 ½ cups / 225 g chopped peanut butter cups
- 1 can / 14 oz / 414 mL sweetened condensed milk
- ½ cup / 113 g melted butter
- 1 cup / 170 g milk chocolate chips
- Optional: whipped cream or vanilla ice cream for serving
Instructions
- Peanut Butter Foundation: Spread a velvety layer of peanut butter across the entire greased baking dish, creating a uniform base that will anchor the dessert’s rich flavor profile.
- Cake Mix Cascade: Liberally disperse the chocolate cake mix over the peanut butter, ensuring a complete and even distribution without disrupting the underlying spread.
- Peanut Butter Cup Embellishment: Artfully scatter chopped peanut butter cups across the surface, strategically positioning them to guarantee a delightful surprise in every potential serving.
- Butter Drench: Stream melted butter evenly over the entire landscape, thoroughly saturating the dry ingredients and creating a luscious, moisture-rich foundation.
- Oven Transformation: Situate the prepared dish centrally in a preheated oven, allowing consistent heat circulation to work its transformative magic.
- Baking Precision: Monitor the cake for 35-40 minutes, seeking a golden-brown exterior and checking doneness with a toothpick that reveals minimal, moist crumbs.
- Cooling and Settling: Rest the cake for 10-15 minutes, permitting layers to harmonize and flavors to intensify, creating a more cohesive dessert experience.
- Serving Elegance: Slice and present the warm dump cake, optionally crowned with a vanilla ice cream scoop or a delicate powdered sugar dusting for enhanced indulgence.
Notes
- Precision in Peanut Butter Spreading: Create an even, thin layer to prevent thick clumps that might disrupt cake texture.
- Gentle Cake Mix Distribution: Sprinkle mix carefully to avoid creating dense pockets or uneven baking surfaces.
- Strategic Peanut Butter Cup Placement: Chop cups into consistent sizes for balanced flavor and prevent burnt chocolate edges.
- Temperature Control Matters: Use room temperature butter for smoother melting and more uniform cake consistency.
- Prep Time: 10 minutes
- Cook Time: 40 minutes
- Category: Desserts, Snacks
- Method: Baking
- Cuisine: American
Nutrition
- Serving Size: 13
- Calories: 380
- Sugar: 25 g
- Sodium: 300 mg
- Fat: 20 g
- Saturated Fat: 10 g
- Unsaturated Fat: 8 g
- Trans Fat: 0 g
- Carbohydrates: 42 g
- Fiber: 2 g
- Protein: 6 g
- Cholesterol: 30 mg
Jenna Hartley
Founder & Recipe Creator
Expertise
Education
Box Hill Institute, Melbourne
William Angliss Institute, Melbourne
Jenna is the heart of Picture Perfect Meals, turning simple ingredients into beautiful, easy‑to‑make dishes.
Growing up around family meals in Melbourne, she trained at Box Hill Institute and then perfected her pastry skills at William Angliss Institute. She loves mixing classic Australian flavors with fresh ideas to keep cooking fun and stress‑free.