
Grandma’s Biscuits Recipe Fluffy Homemade Magic
Memories of grandmas biscuits transport me back to cozy kitchen moments with warm, buttery aromas filling the air.
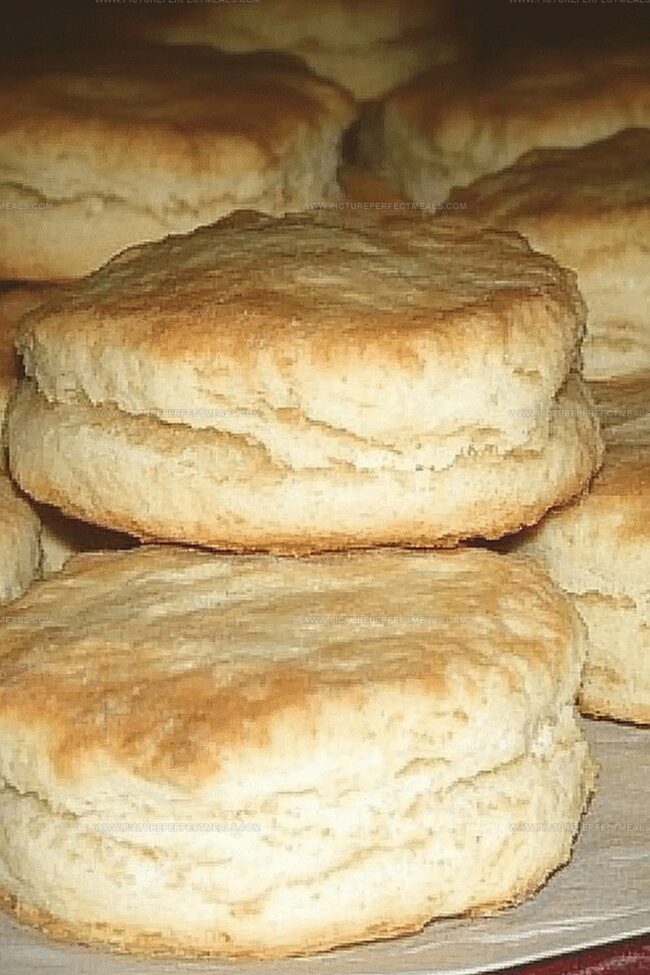
Soft and pillowy, these treasured treats whisper stories of generations past.
Each golden-brown morsel carries a legacy of love and tradition.
My grandmother’s hands would gracefully knead dough, creating perfect little clouds of comfort.
Crisp edges and tender centers make these biscuits irresistibly delightful.
Simple ingredients come together in a magical dance of culinary nostalgia.
Let these biscuits become your new cherished recipe, connecting you to heartwarming traditions.
Grandma’s Biscuits That Never Miss
Ingredients That Make Grandma’s Biscuits Shine
Dry Ingredients:Fat and Liquid Ingredients:Optional Finishing Ingredient:How to Bake Grandma’s Biscuits from Scratch

Step 1: Fire Up the Oven
Crank your oven to 425F and grab a baking sheet. Line it with parchment paper or give it a quick spray of cooking oil.
Step 2: Dance with Dry Ingredients
Grab a spacious mixing bowl and toss in:Whisk everything together until they’re best friends.
Step 3: Butter Blending Magic
Drop in cold, cubed butter. Use your fingertips or a pastry cutter to break down the butter into tiny crumbly bits. You want it to look like coarse cornmeal with some pea-sized butter chunks.
Step 4: Welcome the Buttermilk
Create a little crater in the center of your flour mixture. Pour in the chilled buttermilk. Gently fold with a fork until the dough just comes together. Don’t go crazy mixing- gentle is the secret!
Step 5: Dough Handling
Dust your countertop with flour. Transfer the dough and give it a few tender kneads. Pat or roll it out to about half an inch thick.
Step 6: Biscuit Shaping Technique
Grab a round cutter and press straight down. No twisting allowed! This helps your biscuits rise tall and proud. Gather and re-roll any leftover dough.
Step 7: Baking Brilliance
Arrange biscuits on your baking sheet. Want soft sides? Let them touch. Craving crispy edges? Space them out. Bake for 12-15 minutes until they turn a gorgeous golden brown.
Step 8: Buttery Finish
Fresh out of the oven? Brush those beauties with melted butter for extra lusciousness.
Step 9: Serve with Love
Slide these warm, fluffy clouds onto a plate. Pair with butter, jam, honey, or whatever makes your heart sing.
Biscuit Tips Passed Down Through Generations
How to Store and Reheat Grandma’s Biscuits
What to Pair with Grandma’s Fresh Biscuits
Flavor Variations for Grandma’s Biscuits
Print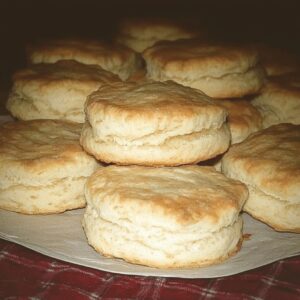
Grandmas Biscuits Recipe
- Total Time: 27 minutes
- Yield: 8 1x
Description
Grandma’s cherished biscuits blend Southern comfort and nostalgia, delivering flaky layers of pure homestyle magic. Golden, buttery perfection emerges from your oven, inviting warm memories and culinary connection to family traditions.
Ingredients
Main Dry Ingredients:
- 2 cups (250 g) all-purpose flour
- 1 tablespoon baking powder
- ½ teaspoon baking soda
- 1 teaspoon salt
Sweeteners and Flavor Enhancers:
- 2 tablespoons granulated sugar (optional, for a touch of sweetness)
Wet and Cold Ingredients:
- ½ cup (115 g) cold unsalted butter (cubed)
- ¾ cup (180 milliliters) cold buttermilk
Instructions
- Prepare the baking environment by heating the oven to 425F (220C). Cover a baking sheet with parchment paper or apply a light grease coating.
- Combine flour, baking powder, baking soda, salt, and optional sugar in a spacious mixing bowl. Whisk thoroughly to distribute ingredients evenly.
- Introduce cold, diced butter into the dry mixture. Utilize a pastry blender or fingertips to integrate until the texture resembles rough, uneven crumbs with tiny butter fragments.
- Create a central depression in the dry ingredient landscape. Cascade cold buttermilk into this cavity, then delicately merge using a fork without excessive manipulation.
- Transfer the cohesive dough onto a lightly dusted work surface. Perform minimal kneading, approximately 2-3 gentle compressions to unite the mass.
- Flatten the dough to a consistent 1/2 to 3/4 inch thickness using gentle pressure from your palms or a rolling implement.
- Employ a circular cutter measuring 2-3 inches to extract biscuit shapes. Apply direct downward pressure without rotating to ensure uniform rising potential.
- Arrange biscuit rounds on the prepared baking sheet, positioning them either adjacently for softer edges or with slight separation for crisp perimeters.
- Position the sheet in the preheated oven, allowing 12-15 minutes of transformation until surfaces achieve a rich golden hue.
- Optional enhancement involves brushing freshly extracted biscuits with melted butter for intensified richness.
- Present immediately while warm, accompanied by complementary spreads like butter, preserves, or honey, or as a delectable side to your preferred main course.
Notes
- Keep butter ice-cold for the flakiest, most tender biscuits possible, ensuring maximum layers and a delicate crumb structure.
- Avoid overmixing the dough to prevent tough, dense biscuits; handle the mixture gently and minimally for light, airy results.
- Use buttermilk at refrigerator temperature to activate baking powder and create a perfect rising mechanism that guarantees soft, fluffy texture.
- Try alternative flour options like whole wheat or gluten-free blends for dietary modifications, adjusting liquid ratios slightly to maintain moisture and texture.
- Prep Time: 15 minutes
- Cook Time: 12 minutes
- Category: Breakfast, Snacks
- Method: Baking
- Cuisine: American
Nutrition
- Serving Size: 8
- Calories: 210
- Sugar: 1 g
- Sodium: 300 mg
- Fat: 10 g
- Saturated Fat: 6 g
- Unsaturated Fat: 4 g
- Trans Fat: 0 g
- Carbohydrates: 27 g
- Fiber: 1 g
- Protein: 3 g
- Cholesterol: 30 mg
Daves Miller
Contributing Chef & Culinary Educator
Expertise
Education
Sullivan University, Louisville, Kentucky
White Mountains Community College, Berlin, New Hampshire
Daves is the friendly face guiding you through flavorful, fuss-free recipes at Picture Perfect Meals.
He studied culinary arts at Sullivan University and embraced Baking and Pastry Arts at White Mountains Community College. Daves specializes in comforting meals with vibrant flavors, highlighting fresh, seasonal ingredients.