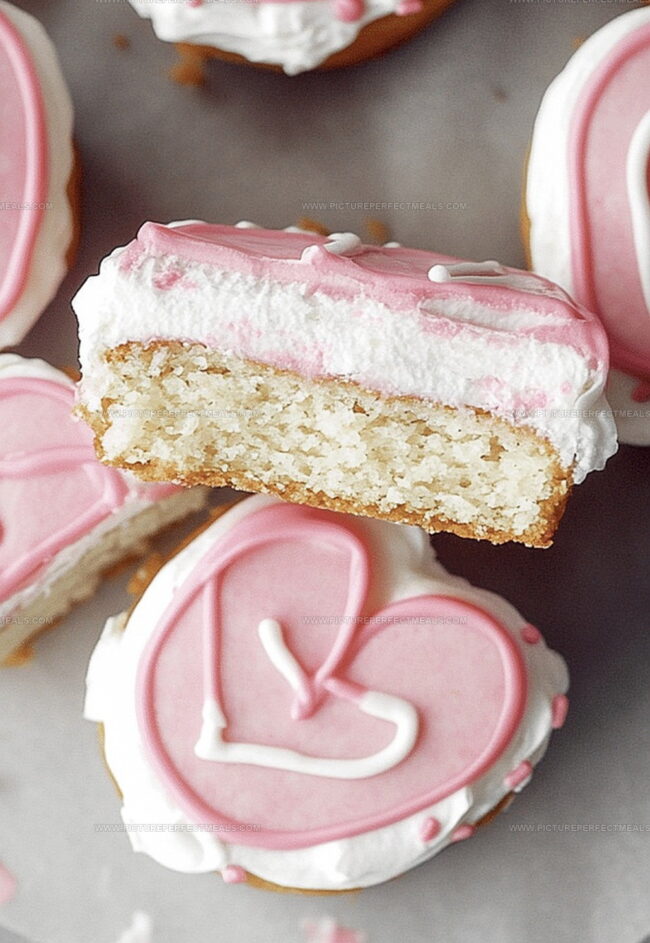
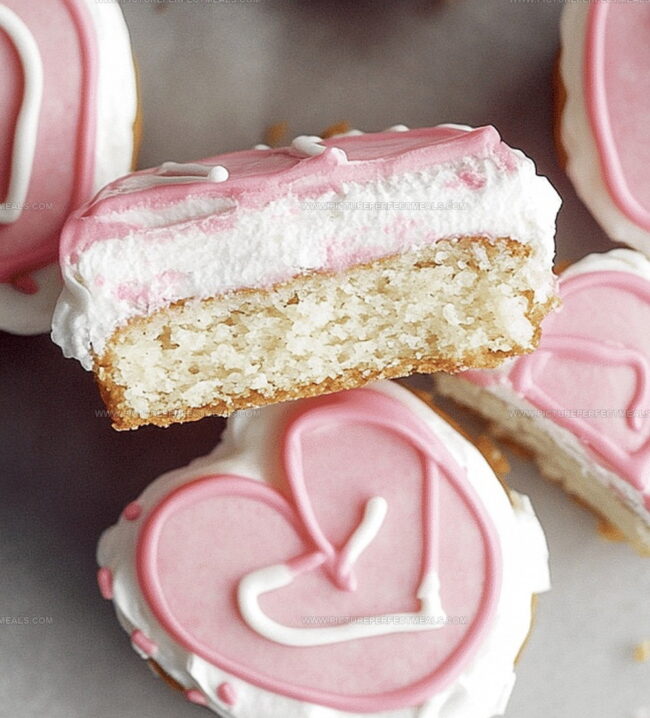
Nostalgia floods back with every bite of these delightful Little Debbie Valentine cakes that bring childhood memories to life.
Sweet layers of soft cake and creamy frosting dance together in a delectable celebration of love.
These charming treats capture the essence of homemade comfort with their simple yet irresistible design.
Valentine’s Day becomes extra special when you bake these adorable desserts that shimmer with pink and red hues.
Each cake tells a story of warmth and affection, perfect for sharing with someone dear.
The recipe transforms basic ingredients into a magical experience that connects hearts through delicious memories.
Dive into this sweet adventure and create moments of pure joy.
Quick Recipe Overview
Prep Time: 20 minutes
Cook Time: 30 minutes
Total Time: 50 minutes
Calories: 315 kcal
Servings: 12
Ingredients for Copycat Little Debbie Cakes
For Cake Base:
All-Purpose Flour: Provides structure and softness to the cake, choose unbleached flour for better texture.
Baking Powder: Helps the cake rise and creates a light, airy crumb.
Baking Soda: Neutralizes acidic ingredients and assists in browning.
Salt: Enhances overall flavor and balances sweetness.
For Wet Ingredients:
Butter: Adds rich flavor and creates a tender cake, use room temperature for smooth mixing.
Sugar: Sweetens and helps create a golden brown exterior.
Eggs: Bind ingredients together and provide structure, use fresh large eggs.
Vanilla Extract: Adds depth and warmth to the cake’s flavor, use pure vanilla for best results.
Buttermilk: Creates moisture and tenderness, adds subtle tanginess to the cake.
For Decorative Elements:
Red Gel Food Coloring: Creates vibrant pink color, use sparingly for even distribution.
Tools to Get That Perfect Heart Shape
Large mixing bowl: Essential for combining dry and wet ingredients smoothly.
Medium mixing bowl: Perfect for whisking flour and dry ingredients together.
Electric mixer or whisk: Helps cream butter and sugar to light, fluffy consistency.
9×13-inch baking pan: Provides the right size for even cake layer.
Parchment paper: Ensures easy cake removal and prevents sticking.
Measuring cups and spoons: Crucial for accurate ingredient measurements.
Toothpick: Helps check cake doneness by testing center.
Cooling rack: Allows cake to cool evenly and prevent soggy bottom.
Spatula: Useful for spreading batter and scraping bowl.
How to Make These Valentine Cake Lookalikes
Warm Up The Oven Preheat to a toasty 350 degrees and prepare a 9×13 pan with a light coating of grease and parchment paper.
Mix Dry Ingredients Combine flour, baking powder, baking soda, and salt in a mixing bowl, creating a fluffy base for your delightful treat.
Create Creamy Base Blend butter and sugar until wonderfully light, then gently fold in eggs one by one. Splash in vanilla for extra magic.
Build Your Batter Slowly combine dry ingredients and buttermilk, alternating between each. Add a few drops of red gel food coloring to give your cake a gorgeous pink glow.
Bake With Love Pour the batter into the prepared pan, spreading it evenly. Slide into the oven and bake for 18-20 minutes until a toothpick comes out clean. Let the cake cool completely before decorating.
Decorate And Enjoy Frost with a sweet vanilla cream and add adorable Valentine’s themed sprinkles or decorations to make these little cakes absolutely irresistible.
Tips for Flavor, Frosting, and Filling
Perfect Texture Tip: Let the cake cool entirely before cutting to prevent crumbling, ensuring clean, precise Valentine cake squares that look professionally made.
Freezing Magic: These copycat cakes freeze beautifully for up to 3 weeks, wrapped individually in plastic wrap, making them perfect for advance party preparation or surprise treats.
Dairy-Free Twist: Swap buttermilk with almond or oat milk and use vegan butter to create a delicious dairy-free version that maintains the same soft, tender texture.
Color Play: Experiment with different gel food coloring shades like soft pink, deep red, or even pastel lavender to match various holiday or celebration themes without compromising the cake’s delicate flavor.
Healthier Alternative: Replace some butter with unsweetened applesauce to reduce calories and add natural sweetness, creating a lighter version of the classic Little Debbie-style Valentine cake.
How to Serve Like the Real Deal
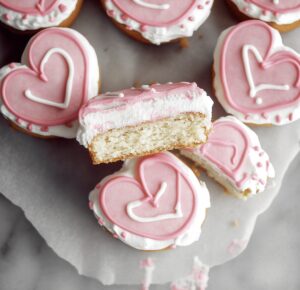
Sweet Heart Plating: Create romantic mini-cakes by cutting the sheet cake into heart shapes using cookie cutters, perfect for Valentine’s celebrations.
Festive Frosting Finale: Top each cake slice with cream cheese frosting dyed pink or red, then sprinkle with festive Valentine’s themed sugar pearls or edible glitter for extra charm.
Romantic Dessert Display: Arrange cake slices on a decorative plate with fresh strawberries, chocolate drizzle, and a light dusting of powdered sugar to elevate the presentation and add elegant touches.
Loving Gift Packaging: Wrap individual heart-shaped cakes in clear cellophane with a ribbon, creating adorable homemade treats ideal for gifting to loved ones or sharing at workplace parties.
Storing to Keep Them Cute and Fresh
Refrigeration Strategy: Store the finished Valentine cakes in an airtight container in the refrigerator for up to 5 days. Cover each layer with plastic wrap to maintain moisture and prevent drying out.
Make-Ahead Magic: Prepare cake layers in advance and freeze them wrapped tightly in plastic wrap for up to 3 weeks. Thaw at room temperature for 2-3 hours before decorating and serving.
Portioning Perfection: Cut cakes into individual squares or heart shapes before storing. Place wax paper between layers to prevent sticking and maintain the cake’s delicate texture.
Room Temperature Tips: If serving within 24 hours, keep decorated cakes in a cool, dry spot covered with a cake dome or loose plastic wrap. Avoid direct sunlight or warm areas that could melt frosting or compromise the cake’s structure.
Indulgent little debbie valentine cakes bring nostalgic charm to homemade desserts. Sweet layers of pink-tinted cake and creamy filling create a charming replica of the classic childhood treat you’ll instantly adore.
Ingredients
Scale
2 large eggs
1 ¼ cups (156 g) all-purpose flour
¾ cup (150 g) granulated sugar
1 cup (226 g) unsalted butter, softened
½ cup (120 mL) buttermilk
1 tsp baking powder
¼ tsp baking soda
¼ tsp salt
1 tsp vanilla extract
Red gel food coloring
1 ½ cups (180 g) powdered sugar
2 tbsps (30 mL) heavy cream
12 oz (340 g) white chocolate or white candy melts
2 oz (57 g) pink or red candy melts (for decoration)
Instructions
Oven Preparation: Heat oven to 350F (175C) and line a 9×13-inch pan with parchment paper, applying a delicate grease coating.
Ingredient Fusion: Whisk flour, baking powder, baking soda, and salt in a mixing bowl, creating a uniform dry ingredient base.
Batter Construction: Cream butter and sugar until light and fluffy. Gradually incorporate eggs, blending thoroughly after each addition. Infuse mixture with vanilla extract’s rich flavor. Fold in red gel food coloring to achieve a vibrant pink hue.
Liquid Integration: Gently alternate adding dry ingredient mixture and buttermilk to the batter, beginning and ending with dry ingredients. Mix until just combined, maintaining a smooth, consistent texture.
Baking Process: Pour batter into prepared pan, spreading evenly. Bake for 18-20 minutes, verifying doneness by inserting a toothpick that emerges clean.
Cooling and Preparation: Remove cake from oven and allow to cool completely on a wire rack, setting the stage for final decoration and transformation into delightful Valentine treats.
Notes
Temperature Precision: Monitor oven heat closely, as slight variations can affect cake texture and moistness. Use an accurate thermometer for consistent results.
Color Control: Add red gel food coloring gradually to achieve desired pink shade without altering batter consistency. Start with small amounts and increase incrementally.
Mixing Mastery: Cream butter and sugar thoroughly until light and fluffy, which creates a tender cake structure. Avoid overmixing after adding flour to prevent tough texture.
Cooling Technique: Allow cake to cool completely before frosting to prevent melting and ensure clean, crisp decorative edges. Place on wire rack for even air circulation.
Recipe development with a focus on single-dish meals.
Fusion of traditional and modern Australian cuisines.
Food styling and photography for digital platforms.
Education
Box Hill Institute, Melbourne
Degree: Advanced Diploma of Hospitality Management
Focus: Specialized in practical food and beverage service, responsible alcohol and hygiene compliance, legal risk management, and hands‑on experience in a simulated restaurant environment.
William Angliss Institute, Melbourne
Program: Certificate IV in Patisserie
Focus: Specialized in pastry and bakery techniques, cookery and specialty food preparation, recipe planning and costing, commercial kitchen operations, sustainable and inclusive work practices, food safety and hygiene compliance, and workplace health and safety.
Jenna is the heart of Picture Perfect Meals, turning simple ingredients into beautiful, easy‑to‑make dishes.
Growing up around family meals in Melbourne, she trained at Box Hill Institute and then perfected her pastry skills at William Angliss Institute. She loves mixing classic Australian flavors with fresh ideas to keep cooking fun and stress‑free.

Jenna Hartley
Founder & Recipe Creator
Expertise
Education
Box Hill Institute, Melbourne
William Angliss Institute, Melbourne
Jenna is the heart of Picture Perfect Meals, turning simple ingredients into beautiful, easy‑to‑make dishes.
Growing up around family meals in Melbourne, she trained at Box Hill Institute and then perfected her pastry skills at William Angliss Institute. She loves mixing classic Australian flavors with fresh ideas to keep cooking fun and stress‑free.