
Dreamy Sugar Cookie Cake Recipe: A Divine Sweet Treat
Baking brings pure joy, especially when whipping up this delectable sugar cookie cake that promises to tantalize taste buds.
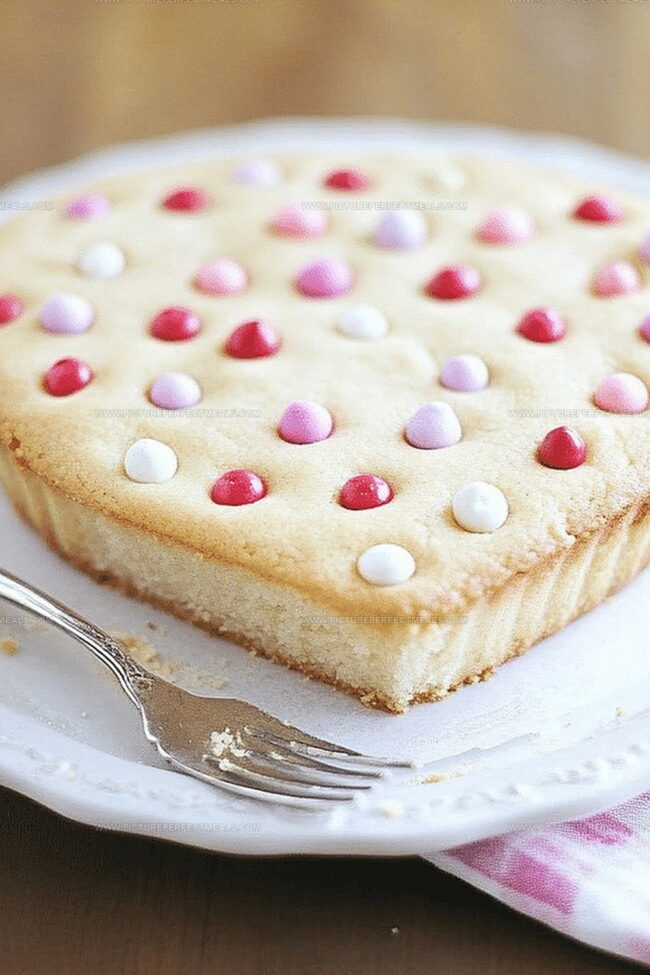
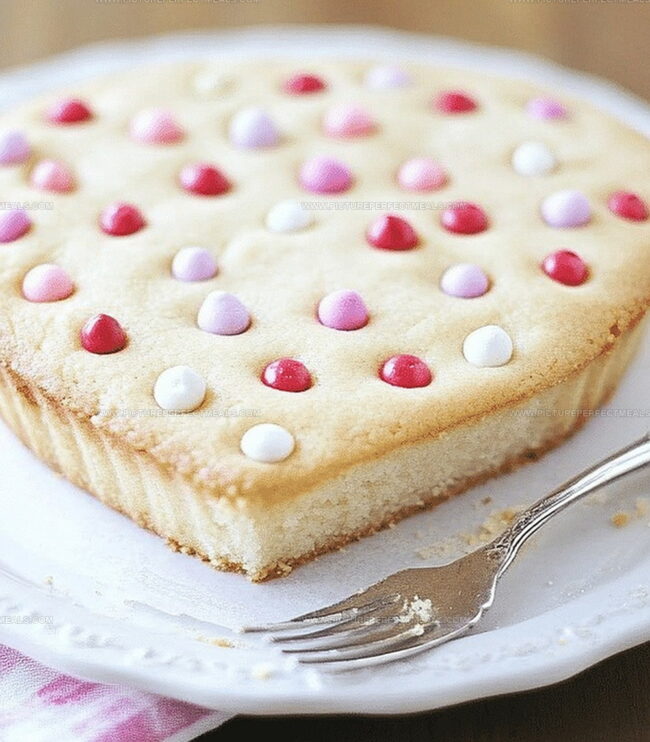
Soft, buttery layers meld together in a symphony of sweetness that melts in your mouth.
Comfort and nostalgia dance on your palate with every delightful bite of this crowd-pleasing dessert.
The recipe combines classic cookie flavors with the luxurious texture of a moist cake, creating an irresistible treat.
Each slice offers a perfect balance of crisp edges and tender center that will have everyone asking for seconds.
Weekend gatherings or special celebrations deserve something extraordinary like this sugar cookie cake.
You’ll want to savor every crumb of this delightful dessert that transforms ordinary moments into memorable experiences.
Quick Recipe Overview
Sugar Cookie Cake – Here’s What You’ll Need
For Base Structure:For Moisture and Binding:For Dry Base and Leavening:Baking Tools for Sugar Cookie Cake Perfection
Instructions for Making Sugar Cookie Cake at Home
Crank your oven to a toasty 350F and get a 9-inch pan ready by giving it a quick spray and lining with parchment paper.
Grab your mixer and whip butter and sugar into a cloud-like mixture that looks super fluffy and pale.
Mix in your egg, extra egg yolk, and flavor boosters like vanilla and almond extract until everything looks smooth and happy.
Gently fold flour, baking powder, baking soda, and salt into your creamy mixture, stirring just enough to combine without over-mixing.
Spread the dough evenly across your prepared pan, using a spatula to create a smooth, even surface that promises deliciousness.
Pop the pan into the oven and bake for 20-25 minutes until the edges turn a gorgeous golden color and the center looks set. Let it cool completely before adding any frosting magic.
Ways to Personalize Your Sugar Cookie Cake
Serve Sugar Cookie Cake at Birthdays or Holidays
Sugar Cookie Cake Storage
Print
Heavenly Sugar Cookie Cake Recipe
- Total Time: 40 minutes
- Yield: 13 1x
Description
Delightful sugar cookie cake brings classic bakery charm to homemade desserts. Sweet layers combine buttery richness with delicate vanilla notes, promising a memorable treat for family gatherings and special celebrations.
Ingredients
- 1 cup (200 grams) granulated sugar
- 2 cups (240 grams) all-purpose flour
- ¾ cup (170 grams) unsalted butter, softened
- 1 large egg
- 1 egg yolk
- ½ tsp baking powder
- ¼ tsp baking soda
- ¼ tsp salt
- 1 tsp vanilla extract
- ½ tsp almond extract (optional)
- ½ cup (113 grams) unsalted butter, softened
- 2 cups (240 grams) powdered sugar, sifted
- 2–3 tbsps heavy cream or milk
- 1 tsp vanilla extract
- Food coloring (optional)
- Sprinkles
- Edible glitter
Instructions
- Oven Preparation: Preheat oven to 350F (175C). Grease a 9-inch round or square pan and line with parchment paper for optimal release and even baking.
- Creaming Foundation: Whip softened butter and granulated sugar in a mixer until the mixture becomes light, fluffy, and pale, creating a smooth base for the cookie cake.
- Liquid Integration: Add whole egg, extra egg yolk, vanilla extract, and almond extract. Mix thoroughly until ingredients form a uniform, silky batter with no visible separation.
- Dry Ingredient Combination: Sift flour, baking powder, baking soda, and salt together. Fold dry ingredients into wet mixture with minimal stirring to maintain a tender, delicate texture.
- Pan Distribution: Gently spread cookie dough across prepared pan, using a spatula to create an even, smooth surface that fills the entire baking vessel.
- Baking Process: Bake in preheated oven for 20-25 minutes, watching for golden-brown edges and a set center as indicators of perfect doneness.
- Cooling and Finishing: Allow cookie cake to cool completely in the pan before decorating with frosting or additional embellishments.
Notes
- Soften Butter Strategically: Remove butter from refrigerator 30-60 minutes before baking to achieve the perfect creamy texture for smooth mixing.
- Minimize Dough Handling: Mix dry and wet ingredients gently to prevent tough, dense cookie cake; overmixing develops gluten and reduces tenderness.
- Check Oven Temperature Accuracy: Use an oven thermometer to verify actual temperature, as built-in oven displays can be inconsistent and affect baking results.
- Customize Texture Variations: Adjust baking time by 2-3 minutes for softer or crispier edges; slightly less time yields a more gooey center, while longer baking creates crisp borders.
- Prep Time: 15 minutes
- Cook Time: 25 minutes
- Category: Desserts, Snacks
- Method: Baking
- Cuisine: American
Nutrition
- Serving Size: 13
- Calories: 289
- Sugar: 24 g
- Sodium: 98 mg
- Fat: 16 g
- Saturated Fat: 10 g
- Unsaturated Fat: 4 g
- Trans Fat: 0 g
- Carbohydrates: 34 g
- Fiber: 0.5 g
- Protein: 2 g
- Cholesterol: 48 mg
Jenna Hartley
Founder & Recipe Creator
Expertise
Education
Box Hill Institute, Melbourne
William Angliss Institute, Melbourne
Jenna is the heart of Picture Perfect Meals, turning simple ingredients into beautiful, easy‑to‑make dishes.
Growing up around family meals in Melbourne, she trained at Box Hill Institute and then perfected her pastry skills at William Angliss Institute. She loves mixing classic Australian flavors with fresh ideas to keep cooking fun and stress‑free.