
Easy Homemade Moose Tracks Ice Cream Recipe for Sweet Delight
Crafting delectable homemade moose tracks ice cream brings pure summer magic right into your kitchen.
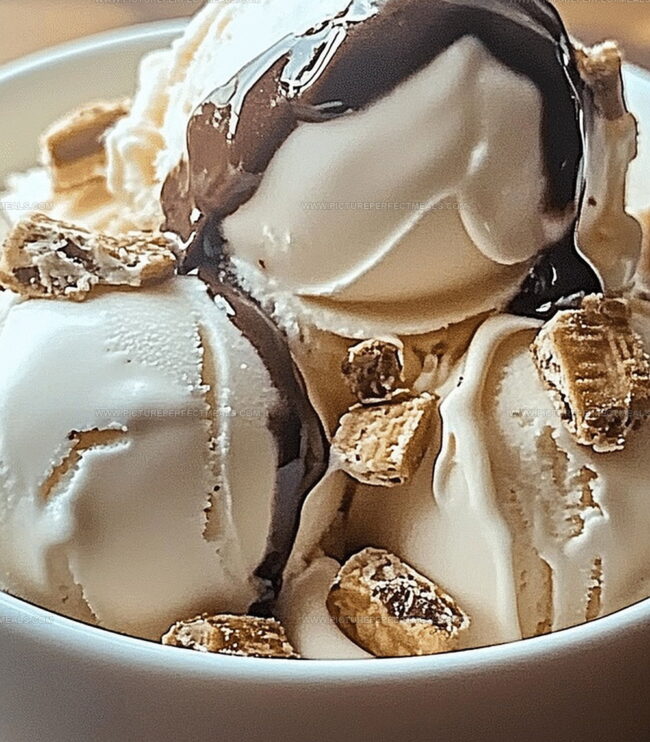
Sweet cream blends with rich chocolate ribbons and peanut butter cups, creating an irresistible treat.
Cold desserts like this remind me of childhood memories and lazy afternoons.
Each scoop promises a delightful dance of creamy textures and intense flavors.
Regional ingredients make this recipe special, turning simple ingredients into something extraordinary.
Freezing techniques matter when aiming for that perfect, smooth consistency everyone loves.
This dessert will become your new weekend celebration centerpiece – just wait and see!
Why Homemade Moose Tracks Ice Cream Brings Pure Joy

What You’ll Need for That Signature Moose Tracks Swirl
Dairy Base:Sweeteners and Flavors:Chocolate Components:Steps for Freezing and Layering This Ice Cream Dessert
Step 1: Blend Chocolate Base
In a small saucepan, combine:Place over medium heat and whisk continuously until the mixture transforms into a silky, glossy blend. Keep stirring until the mixture reaches a gentle boil, watching for smooth consistency and preventing any burning.
Step 2: Infuse Vanilla Essence
Remove the saucepan from heat source. Pour in vanilla extract and stir gently to incorporate the rich, aromatic flavor throughout the chocolate mixture. Allow the chocolate base to cool naturally to room temperature, which helps develop deeper flavor profiles and ensures perfect texture for your ice cream.
Step 3: Prepare Peanut Butter Swirl
In a separate bowl, soften peanut butter until it reaches a smooth, spreadable consistency. This will create delightful ribbons of nutty goodness throughout your ice cream.
Step 4: Craft Ice Cream Base
In a large mixing bowl, whisk together:Blend until ingredients are fully combined and create a luxurious, creamy foundation.
Step 5: Create Custard
Transfer mixture to a saucepan and cook over medium heat. Stir constantly until the custard thickens and coats the back of a spoon. Strain to ensure ultimate smoothness.
Step 6: Chill and Flavor
Refrigerate the custard base until completely cold. Once chilled, churn in an ice cream maker according to manufacturer’s instructions.
Step 7: Layer and Freeze
As ice cream churns, layer in:Transfer to a freezer-safe container and freeze until firm, allowing flavors to meld and develop.
Tips for Achieving Creamy Texture with Even Distribution
How to Store It Without Icy Crystals Forming
Treats That Pair Beautifully with Moose Tracks Flavor
Additions That Bring Even More Crunch or Sweetness
Print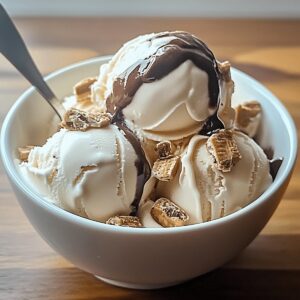
Homemade Moose Tracks Ice Cream Recipe
- Total Time: 45 minutes
- Yield: 8 1x
Description
Creamy homemade moose tracks ice cream mingles rich chocolate swirls with peanut butter cups in a delightful frozen dessert. Indulgent scoops promise cool comfort that delights taste buds with classic flavor combinations.
Ingredients
Primary Base Ingredients:
- 2 cups (480 milliliters/16 fluid ounces) heavy cream
- 1 cup (240 milliliters/8 fluid ounces) whole milk
- ¾ cup (150 grams) granulated sugar
- 1 teaspoon vanilla extract
Mix-Ins:
- 1 cup (150 grams) mini peanut butter cups, halved or chopped
- ½ cup (100 grams) chocolate chunks or chips
- ½ cup (120 milliliters/4 fluid ounces) fudge sauce
Optional Homemade Fudge Sauce Ingredients:
- ½ cup (100 grams) granulated sugar
- ¼ cup (60 milliliters/2 fluid ounces) heavy cream
- ¼ cup (60 grams) unsalted butter
- ¼ cup (30 grams) unsweetened cocoa powder
- ½ teaspoon vanilla extract
Instructions
- Prepare a smooth base by combining sugar, heavy cream, butter, and cocoa powder in a saucepan over medium heat, whisking continuously to create a uniform mixture.
- Monitor the mixture carefully, stirring until it reaches a gentle boiling point, ensuring all ingredients are fully incorporated and the texture becomes glossy.
- Immediately remove the saucepan from the heat source and gently fold in vanilla extract, allowing the aromatic essence to blend seamlessly with the warm chocolate base.
- Transfer the liquid mixture to a separate container and let it cool completely to room temperature, which helps stabilize the consistency and prevent ice crystallization.
- During the cooling process, periodically stir the mixture to prevent surface film formation and promote even temperature distribution.
- Once the chocolate base has reached room temperature, it will be ready for further ice cream preparation steps, providing a rich and decadent foundation for the moose tracks flavor profile.
Notes
- Ensure precise whisking prevents lumps and creates a silky smooth chocolate base for your ice cream.
- Cool the chocolate mixture completely before incorporating into the ice cream to maintain optimal texture and prevent unwanted crystallization.
- Experiment with different cocoa powder qualities – high-quality dark cocoa delivers richer, more intense chocolate flavor compared to standard varieties.
- For dietary modifications, swap heavy cream with coconut cream and use alternative sweeteners like monk fruit or stevia for low-carb and vegan versions.
- Prep Time: 20 minutes
- Cook Time: 20-25 minutes
- Category: Desserts, Snacks
- Method: Boiling
- Cuisine: American
Nutrition
- Serving Size: 8
- Calories: 500
- Sugar: 38 g
- Sodium: 80 mg
- Fat: 30 g
- Saturated Fat: 18 g
- Unsaturated Fat: 10 g
- Trans Fat: 0 g
- Carbohydrates: 55 g
- Fiber: 1 g
- Protein: 6 g
- Cholesterol: 100 mg
Daves Miller
Contributing Chef & Culinary Educator
Expertise
Education
Sullivan University, Louisville, Kentucky
White Mountains Community College, Berlin, New Hampshire
Daves is the friendly face guiding you through flavorful, fuss-free recipes at Picture Perfect Meals.
He studied culinary arts at Sullivan University and embraced Baking and Pastry Arts at White Mountains Community College. Daves specializes in comforting meals with vibrant flavors, highlighting fresh, seasonal ingredients.