
Heavenly Cherry Cheesecake Brownies Recipe: Sweet Decadence
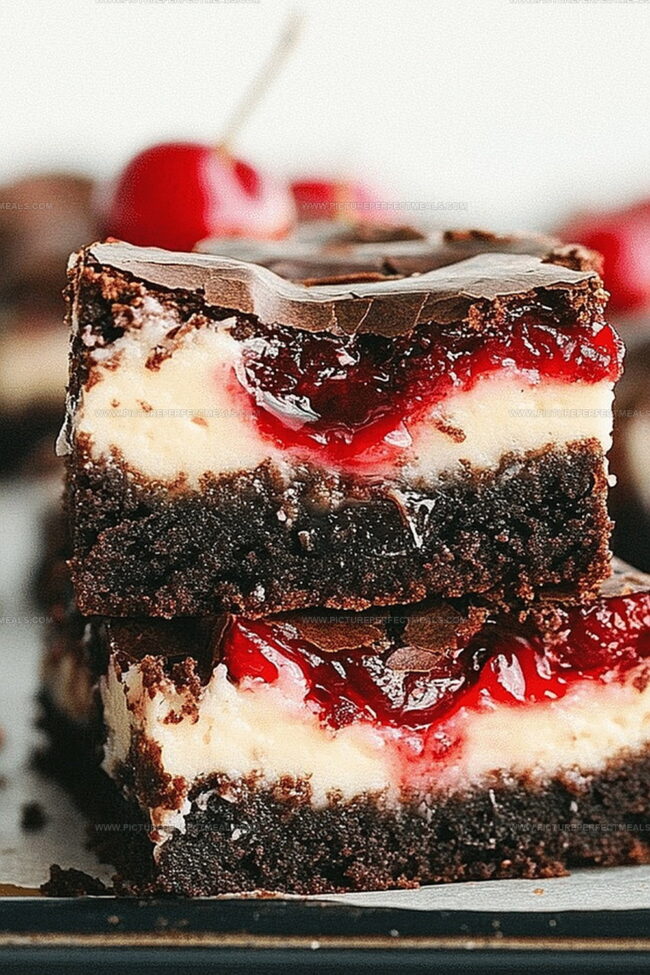
Chocolate swirls dance with creamy cheesecake and vibrant cherry in these irresistible cherry cheesecake brownies that promise pure dessert magic.
Rich brownie layers create a decadent foundation for the tangy cream cheese blend.
Each bite delivers a symphony of textures and flavors that melt together beautifully.
The tart cherry swirls add a bright, fruity contrast to the deep chocolate base.
Silky cream cheese ribbons weave through the dense brownie, creating stunning marbled patterns.
These brownies elevate a classic dessert into an elegant treat that will impress at any gathering.
Prepare to fall in love with this show-stopping dessert that balances sweet, rich, and slightly tart notes perfectly.
Quick Recipe Overview
Cherry Cheesecake Brownie Ingredients
For Brownie Base:For Cheesecake Layer:For Cherry Topping:Tools to Make Cherry Cheesecake Brownies
Cherry Cheesecake Brownie Recipe Steps

Combine melted butter and sugar in a large mixing bowl. Whisk in eggs and vanilla until silky smooth. Gently fold in dry ingredients, stirring just until blended. Spread the rich chocolate mixture evenly across your baking pan.
Whip cream cheese until luxuriously soft. Blend in sugar, egg, and vanilla until perfectly smooth. Carefully pour this delicate mixture over the chocolate foundation, creating a dreamy contrast.
Shower the cheesecake surface with vibrant cherry filling. Use a knife to dance through the layers, creating beautiful marble-like patterns that hint at the deliciousness within.
Slide the pan into a preheated oven. Bake until the center sets and a toothpick reveals just a hint of moistness. The edges should look beautifully golden and slightly crisp.
Let the dessert cool completely on a wire rack. Refrigerate for a few hours to allow flavors to meld and texture to firm up. Cut into elegant squares and serve chilled.
Tips for Juicier Cherry Cheesecake Brownies
Serving Cherry Cheesecake Brownies Sweetly
Keeping Cherry Cheesecake Brownies Fresh
Print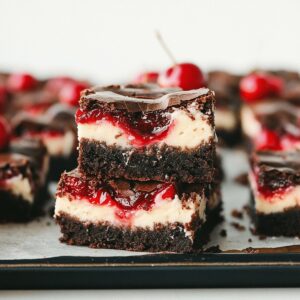
Indulgent Cherry Cheesecake Brownies
- Total Time: 1 hour 10 minutes
- Yield: 17 1x
Description
Luscious cherry cheesecake brownies blend rich chocolate with tangy cream cheese and sweet cherry swirls. Classic dessert layers create irresistible flavor combinations that will delight chocolate and cheesecake enthusiasts.
Ingredients
- 2 large eggs
- 1 large egg
- 1 cup (200g) granulated sugar
- ⅓ cup (65g) granulated sugar
- 8 oz (225g) cream cheese
- ½ cup (115g) unsalted butter, melted
- 1 can (21 oz) cherry pie filling
- ½ cup (65g) all-purpose flour
- ⅓ cup (35g) unsweetened cocoa powder
- 2 tsps vanilla extract
- 1 tsp vanilla extract
- ¼ tsp salt
- ¼ tsp baking powder
Instructions
- Preparation: Preheat oven to 350°F (175°C). Grease a 9×13-inch pan or line with parchment paper, ensuring complete coverage for easy removal.
- Brownie Base: Blend melted butter with granulated sugar until smooth. Mix in eggs and vanilla extract, creating a glossy, homogeneous batter. Gently fold in cocoa powder, flour, salt, and baking powder, stirring until just combined to maintain a rich, fudgy consistency. Spread evenly across the prepared pan.
- Cheesecake Layer: Whip cream cheese until creamy and light. Incorporate granulated sugar, egg, and vanilla extract, mixing until fully integrated and silky. Delicately pour the cream cheese mixture over the brownie foundation, creating a pristine white layer.
- Cherry Swirl: Distribute cherry pie filling across the cheesecake surface. Use a knife or toothpick to create elegant marbled swirls, intertwining the ruby-red cherries with the creamy backdrop.
- Baking: Place in the preheated oven and bake for 35-40 minutes. Check doneness by inserting a toothpick – it should emerge with minimal moist crumbs, indicating a perfectly baked dessert.
- Cooling and Serving: Remove from oven and allow to cool completely on a wire rack. Refrigerate for at least two hours to enhance flavor and texture. Slice into square portions and store any leftovers in the refrigerator.
Notes
- Prevent Overmixing: Gently fold dry ingredients into wet mixture to maintain a fudgy brownie texture, avoiding tough or dense results.
- Distribute Evenly: Use an offset spatula or back of a spoon to create smooth, level layers for consistent baking and professional-looking presentation.
- Check Doneness Carefully: Watch for firm center and minimal moist crumbs when testing with a toothpick to prevent overbaking and dry brownies.
- Chill for Best Flavor: Refrigerate for at least two hours before serving to allow flavors to meld and achieve perfect slicing consistency.
- Prep Time: 20 minutes
- Cook Time: 45-50 minutes
- Category: Desserts, Snacks
- Method: Baking
- Cuisine: American
Nutrition
- Serving Size: 17
- Calories: 250
- Sugar: 20g
- Sodium: 150mg
- Fat: 12g
- Saturated Fat: 7g
- Unsaturated Fat: 4g
- Trans Fat: 0g
- Carbohydrates: 34g
- Fiber: 1g
- Protein: 3g
- Cholesterol: 45mg
Jenna Hartley
Founder & Recipe Creator
Expertise
Education
Box Hill Institute, Melbourne
William Angliss Institute, Melbourne
Jenna is the heart of Picture Perfect Meals, turning simple ingredients into beautiful, easy‑to‑make dishes.
Growing up around family meals in Melbourne, she trained at Box Hill Institute and then perfected her pastry skills at William Angliss Institute. She loves mixing classic Australian flavors with fresh ideas to keep cooking fun and stress‑free.