Indulgent Cherry Garcia Fudge Recipe

Heavenly Cherry Garcia Fudge Recipe: Sweet Bliss in Every Bite

Chocolate and cherries dance together in this delectable homemade cherry garcia fudge that promises pure bliss.

Sweet memories of classic ice cream flavors inspired this rich, creamy treat.

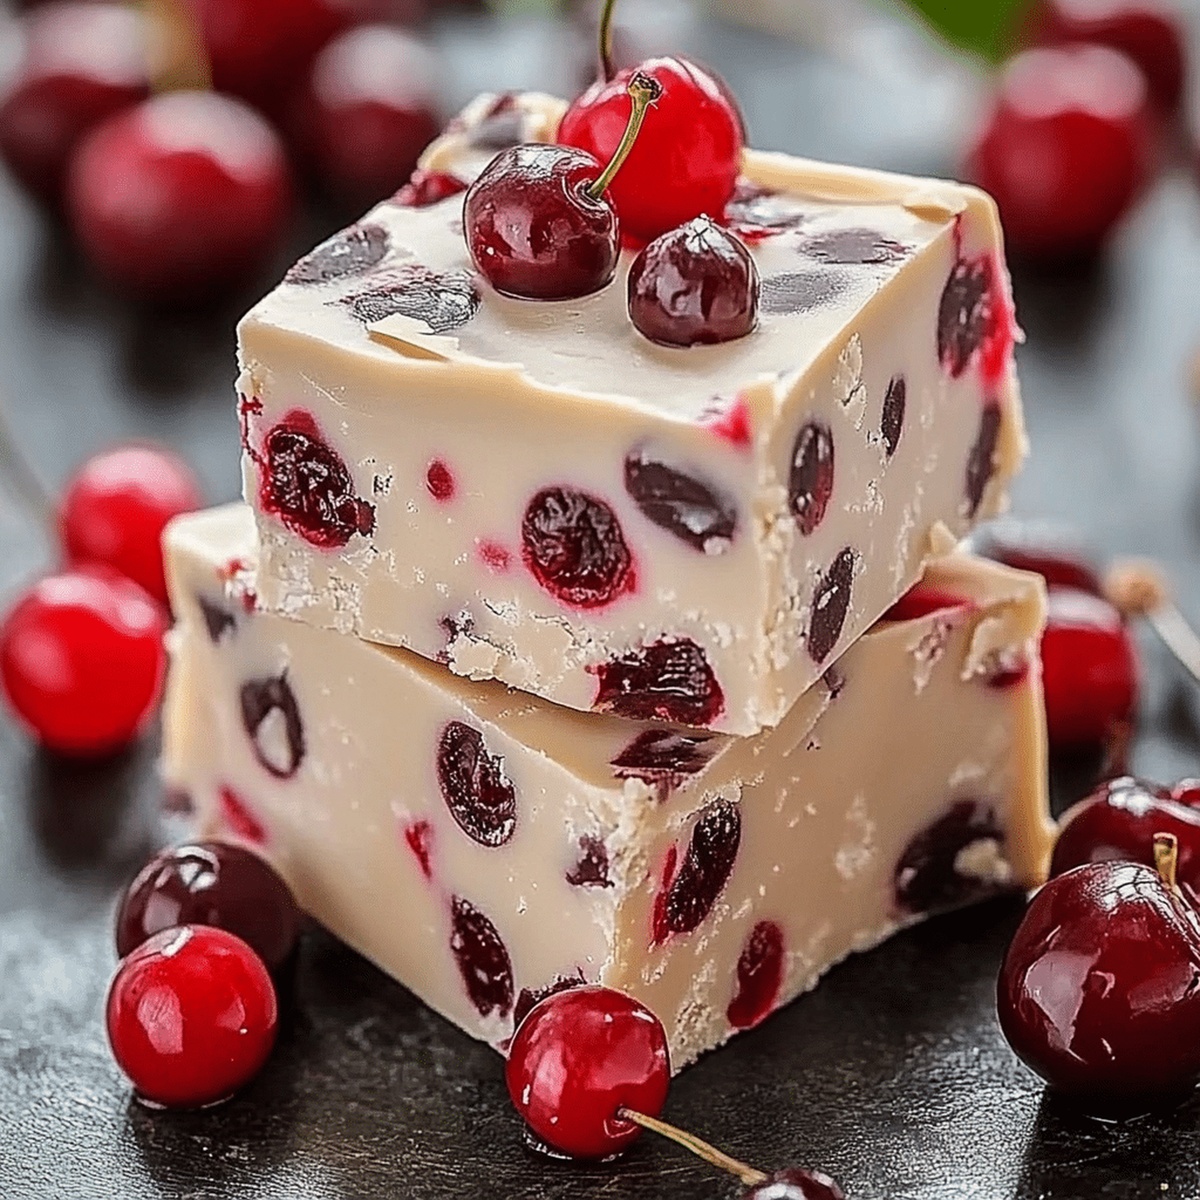
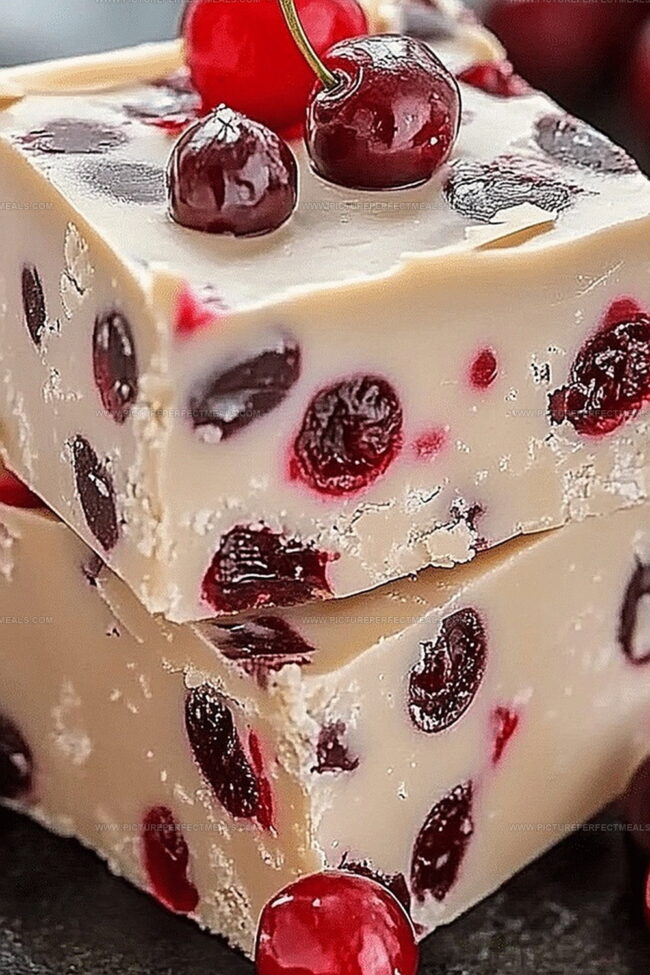
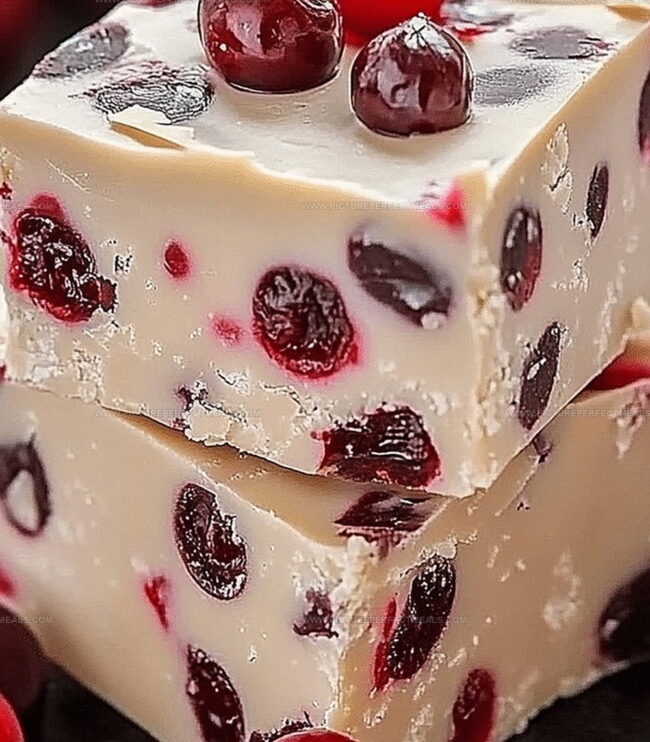
The combination of smooth chocolate and bursting cherry pieces creates an irresistible dessert experience.

Chunks of real cherries add delightful texture and unexpected brightness to each bite.

Dark chocolate provides a luxurious base that melts perfectly in your mouth.

This fudge delivers a decadent twist on a beloved flavor profile that will have everyone asking for seconds.

One taste and you’ll understand why this recipe is a total game-changer for dessert lovers.

Cherry Garcia Fudge Ingredient List

For Base Ingredients:
  • Chocolate Chips: Rich, smooth base that creates dreamy fudge texture; choose high-quality dark or semi-sweet chips for robust flavor.
  • Sweetened Condensed Milk: Creamy binding agent that adds silky sweetness and helps achieve perfect fudge consistency.
For Flavor Enhancers:
  • Vanilla Extract: Adds warm, classic undertone that complements chocolate beautifully; use pure extract for best results.
  • Almond Extract: Optional aromatic booster that introduces subtle nutty warmth; use sparingly to prevent overpowering.
  • Dried Cherries: Tangy-sweet bursts that echo classic Cherry Garcia flavor; select plump, soft cherries without excessive sugar coating.
  • Toasted Almonds: Provides delightful crunch and nutty depth; toast carefully to enhance natural flavors without burning.
For Preparation Support:
  • Parchment Paper: Ensures effortless fudge removal and clean cutting; choose non-stick, sturdy quality.
  • Spatula: Essential for smooth spreading and even distribution of fudge mixture; use silicone or offset type for best results.

Tools You’ll Need for Cherry Garcia Fudge

  • 8×8-inch square baking pan: essential for creating the perfect fudge shape and size.
  • Parchment paper: crucial for easy removal and preventing sticking.
  • Medium saucepan: ideal for melting chocolate and mixing ingredients smoothly.
  • Spatula: helps spread the fudge evenly and scrape mixture from the pan.
  • Sharp knife: necessary for cutting clean, precise fudge squares.
  • Measuring cups and spoons: ensure accurate ingredient measurements.
  • Wooden spoon or heat-resistant spatula: perfect for stirring chocolate mixture without scratching the pan.

How to Make Cherry Garcia Fudge

  • Prepare Your Workspace

Grab an 8-inch square pan and line it with parchment paper, creating little “handles” on the sides for easy lifting. Give the paper a quick spray of cooking oil to help your fudge release smoothly.

  • Create Chocolate Magic

Combine chocolate chips and sweetened condensed milk in a saucepan. Gently warm them together, stirring constantly until they transform into a silky, glossy mixture that looks like liquid velvet.

  • Build Flavor Layers

Pull the pan off the heat and stir in vanilla, a splash of almond extract, chopped dried cherries, and toasted almonds. Mix everything until the add-ins are perfectly distributed throughout the chocolate.

  • Shape and Chill

Pour the luscious mixture into your prepared pan, using a spatula to spread it evenly. Smooth the top like you’re creating a delicious canvas. Slide the pan into the refrigerator and let it rest for 2-3 hours until it’s firm and set.

  • Slice and Enjoy

Once the fudge is completely set, lift it out using the parchment paper “handles”. Slice into bite-sized squares with a sharp knife. Serve chilled or let sit at room temperature for a melt-in-your-mouth treat.

Tips to Tweak Cherry Garcia Fudge Recipes

  • Silky Smooth Secret: For ultra-creamy fudge, use a candy thermometer to ensure the chocolate melts precisely between 110-115°F without scorching.
  • Nutty Twist: Experiment with different nuts like pecans or walnuts for a unique crunch and flavor profile that complements the cherries.
  • Dietary Friendly Swap: Make this recipe gluten-free by using certified gluten-free chocolate chips and verifying all ingredients are gluten-free certified.
  • Vegan Version: Replace sweetened condensed milk with coconut cream and dairy-free chocolate chips to create a plant-based cherry fudge treat that's equally delicious.
  • Storage Savvy: Keep fudge fresh by storing in an airtight container in the refrigerator for up to two weeks, or freeze for longer preservation without losing texture or taste.

Sharing Cherry Garcia Fudge in Style

  • Cherry Lover's Dream Plate: Arrange fudge squares on a decorative cherry-red ceramic platter, garnished with fresh cherries and a light dusting of powdered sugar.
  • Sweet Dessert Companion: Pair with a scoop of vanilla bean ice cream or a small glass of cherry liqueur to enhance the rich chocolate and cherry flavors.
  • Gifting Delight: Package individual squares in clear cellophane bags tied with rustic twine, perfect for homemade edible gifts or party favors for friends and family gatherings.
  • Elegant Coffee Break: Serve alongside a steaming cappuccino or espresso, allowing the fudge's sweet complexity to complement the robust coffee notes for a luxurious afternoon treat.

Save and Store Cherry Garcia Fudge Properly

  • Smart Storage Solutions: Keep fudge wrapped tightly in plastic wrap or sealed container in refrigerator for up to 7 days. Cold temperatures maintain texture and prevent softening.
  • Make-Ahead Magic: Prepare fudge 3-4 days before serving for intensified flavors. Store in airtight container between sheets of wax paper to prevent sticking.
  • Freezing Friendly: Pack fudge squares in freezer-safe container with parchment between layers. Freeze up to 3 months. Thaw overnight in refrigerator for best quality and taste.
  • Portion Control Pro: Cut fudge into bite-sized pieces before storing. This allows easy grab-and-go treats and helps control serving sizes without compromising deliciousness.

Quick Recipe Overview

Prep Time: 10 minutes

Cook Time: 2 hours

Total Time: 2 hours 10 minutes

Calories: 228 kcal

Servings: 12

Print
clock clock iconcutlery cutlery iconflag flag iconfolder folder iconinstagram instagram iconpinterest pinterest iconfacebook facebook iconprint print iconsquares squares iconheart heart iconheart solid heart solid icon
Indulgent Cherry Garcia Fudge Recipe

Indulgent Cherry Garcia Fudge Recipe


5 Stars 4 Stars 3 Stars 2 Stars 1 Star

4.5 from 38 reviews

  • Total Time: 2 hours 10 minutes
  • Yield: 13 1x

Description

Rich cherry garcia fudge combines classic Ben & Jerry’s ice cream flavors in a delightful dessert. Chocolate-studded cherry treats offer creamy indulgence you’ll savor with every blissful bite.


Ingredients

Scale
  • 1 (14 oz/397 g) can sweetened condensed milk
  • 2 cups (480 ml) semi-sweet chocolate chips
  • ½ cup (75 g) dried cherries, chopped
  • ½ cup (60 g) slivered almonds, toasted (optional)
  • 1 tsp (5 ml) vanilla extract
  • ¼ tsp (1.25 ml) almond extract (optional, for extra flavor)

Instructions

  1. Preparation: Line an 8-inch square baking pan with parchment paper, greasing edges to ensure effortless fudge removal.
  2. Chocolate Base: Melt chocolate chips with sweetened condensed milk using a double boiler or low heat, stirring until achieving a glossy, smooth consistency.
  3. Flavor Infusion: Remove from heat and blend vanilla and almond extracts into the chocolate mixture, creating a rich aromatic foundation.
  4. Ingredient Integration: Gently fold chopped dried cherries and toasted almonds throughout the molten chocolate, ensuring even distribution for a complex flavor profile.
  5. Pan Setting: Carefully spread the fudge mixture into the prepared pan, using a flexible spatula to create a uniform layer and eliminate potential air pockets.
  6. Chilling Process: Refrigerate the fudge for 2-3 hours until completely set and firm, allowing the ingredients to meld and solidify.
  7. Cutting and Serving: Remove the fudge block from the pan by lifting the parchment paper, then slice into precise, bite-sized squares using a clean, sharp knife, wiping the blade between cuts for crisp edges.
  8. Presentation: Serve the cherry garcia fudge either chilled or at room temperature, showcasing a decadent dessert that balances intense chocolate with vibrant cherry undertones.

Notes

  • Chocolate Melting Mastery: Use low, gentle heat to prevent chocolate from burning or seizing, stirring constantly for a smooth, glossy texture.
  • Precise Ingredient Integration: Fold cherries and almonds gently to maintain their integrity and distribute evenly throughout the fudge mixture.
  • Chill for Perfect Consistency: Refrigerate exactly 2-3 hours for optimal firm yet creamy texture; avoid over-chilling to prevent hardness.
  • Clean Cut Technique: Wipe knife blade between cuts with a warm, damp cloth to achieve clean, sharp edges without crumbling the fudge.
  • Prep Time: 10 minutes
  • Cook Time: 2 hours
  • Category: Desserts, Snacks
  • Method: Baking
  • Cuisine: American

Nutrition

  • Serving Size: 13
  • Calories: 218
  • Sugar: 19 g
  • Sodium: 95 mg
  • Fat: 11 g
  • Saturated Fat: 6 g
  • Unsaturated Fat: 4 g
  • Trans Fat: 0 g
  • Carbohydrates: 26 g
  • Fiber: 1 g
  • Protein: 3 g
  • Cholesterol: 8 mg
Jenna Hartley

Jenna Hartley

Founder & Recipe Creator

Expertise

  • Recipe development with a focus on single-dish meals.
  • Fusion of traditional and modern Australian cuisines.
  • Food styling and photography for digital platforms.​

Education

Box Hill Institute, Melbourne

  • Degree: Advanced Diploma of Hospitality Management
  • Focus: Specialized in practical food and beverage service, responsible alcohol and hygiene compliance, legal risk management, and hands‑on experience in a simulated restaurant environment.

William Angliss Institute, Melbourne

  • Program: Certificate IV in Patisserie
  • Focus: Specialized in pastry and bakery techniques, cookery and specialty food preparation, recipe planning and costing, commercial kitchen operations, sustainable and inclusive work practices, food safety and hygiene compliance, and workplace health and safety.

Jenna is the heart of Picture Perfect Meals, turning simple ingredients into beautiful, easy‑to‑make dishes. 

Growing up around family meals in Melbourne, she trained at Box Hill Institute and then perfected her pastry skills at William Angliss Institute. She loves mixing classic Australian flavors with fresh ideas to keep cooking fun and stress‑free.

Leave a Reply

Your email address will not be published. Required fields are marked *

Recipe rating 5 Stars 4 Stars 3 Stars 2 Stars 1 Star