Irresistible Mini Rolo Cheesecakes Recipe: Sweet Bites of Bliss
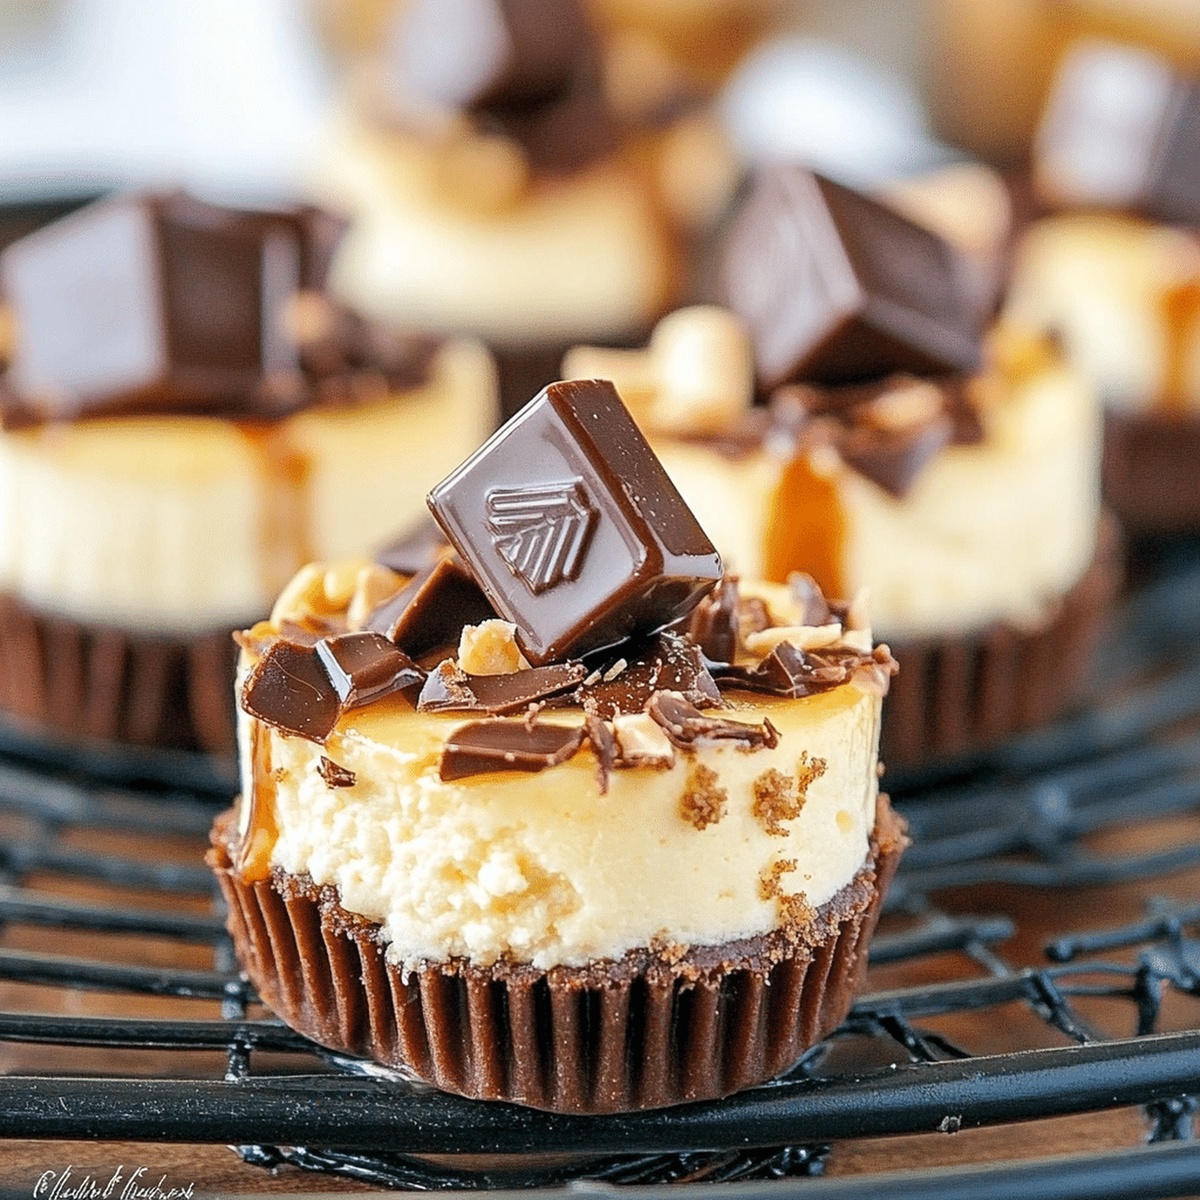
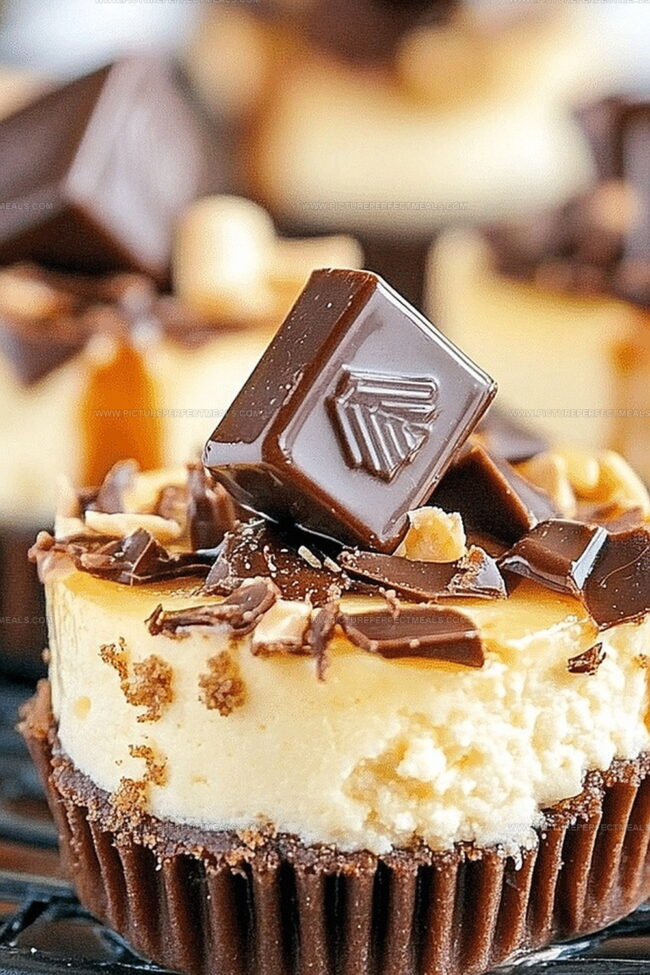
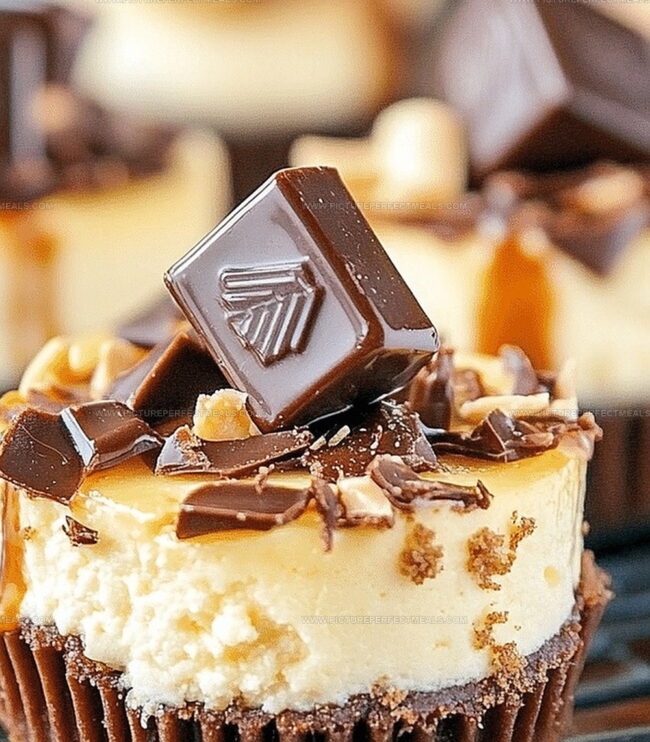
Creamy cheesecake meets decadent Rolo candy in this irresistible mini rolo cheesecakes recipe that promises pure dessert bliss.
Chocolate lovers will swoon over these delightful bite-sized treats packed with rich caramel and smooth chocolate notes.
Each miniature cheesecake delivers a perfect balance of tangy cream cheese and sweet chocolate goodness.
The graham cracker crust provides a delightful crunch that complements the silky smooth filling.
You won’t be able to resist these adorable and delicious miniature cheesecakes that are sure to impress at any gathering.
Quick Recipe Overview
What You’ll Need for Mini Rolo Cheesecakes
For Crust:For Cheesecake Filling:For Topping and Decoration:Tools to Bake, Chill, and Top With Gooey Centers
How to Make Mini Rolo Cheesecakes With That Candy Surprise
Crank your oven to a toasty 325°F and get ready for some delicious baking magic.
Grab your muffin tin and dress it up with cute paper liners. Crush those chocolatey Oreos and mix them with melted butter to form a delectable base.
Gently press about a spoonful of the Oreo mixture into each liner, creating a solid foundation for your mini treats.
Pop the muffin tin into the oven and let those crusts bake for a quick 5 minutes to set their crispy structure.
Blend cream cheese, sugar, and eggs until silky smooth, creating a luxurious cheesecake mixture that’ll make taste buds dance.
Fill each liner with the creamy mixture, then dot the tops with mini Rolos for a chocolatey surprise.
Slide the pan back into the oven and bake until the centers are just set but still slightly jiggly, about 15-18 minutes.
Let these mini delights cool completely, then refrigerate for a few hours to help them firm up and develop maximum flavor.
Before serving, garnish with extra chopped Rolos for a decadent chocolate drizzle that’ll have everyone asking for seconds.
Add Caramel, Sea Salt, or Chocolate Chips
Serve These Minis as a Sweet Party Popper
Store in a Cool Spot to Keep the Candy Center Soft
Print
Indulgent Mini Rolo Cheesecakes Recipe
- Total Time: 30 minutes
- Yield: 13 1x
Description
Rich mini Rolo cheesecakes combine chocolate and caramel in a delightful dessert. Creamy cheesecake layers topped with chocolate drizzle and Rolo pieces offer a perfect treat you’ll crave again and again.
Ingredients
- 8 oz (225 g) cream cheese, softened
- 1 large egg
- 12 Oreo cookies, crushed into fine crumbs
- 12 Rolo chocolates, 1 for each cheesecake
- ¼ cup (50 g) granulated sugar
- 1 tsp vanilla extract
- ¼ cup (60 ml) heavy cream
- ¼ cup caramel sauce
- ¼ cup (30 g) unsweetened cocoa powder
- 3 tbsps unsalted butter, melted
- 6 Rolos, cut in half, for garnish
Instructions
- Preparation: Preheat oven to 325°F with the rack centered, ensuring uniform heat distribution for the delicate cheesecakes.
- Crust Creation: Blend crushed Oreo cookies with melted butter, pressing the dark, crumbly mixture into cupcake liners to form a compact base. Briefly toast the crust for 5 minutes to enhance its flavor and structural integrity.
- Cheesecake Filling: Whip cream cheese and sugar until silky smooth, incorporating eggs individually to maintain a luxurious texture. Gently fold in sour cream and vanilla extract, creating a rich, velvety batter.
- Assembly: Carefully fill each lined cup with cheesecake mixture, leaving minimal space at the top. Scatter chopped Rolos across the surface, allowing them to nestle into the creamy landscape.
- Baking Process: Bake for 18-20 minutes, watching for a subtle central wobble that signals perfect doneness. Immediately afterward, turn off the oven and leave the door slightly ajar, facilitating a gradual cooling that prevents unsightly surface cracks.
- Finishing Touches: Chill the mini cheesecakes for a minimum of 2 hours to set completely. Before serving, embellish with additional Rolos or a decadent chocolate drizzle to elevate the visual and flavor profile.
Notes
- Prevent Crust Crumbling: Press Oreo mixture firmly and evenly to ensure a stable, compact base that won’t fall apart when serving.
- Control Cheesecake Texture: Mix cream cheese and sugar thoroughly without overmixing to avoid incorporating excess air that could cause cracking.
- Manage Baking Temperature: Watch cheesecakes closely during final minutes of baking, looking for slight center jiggle to guarantee a creamy, smooth consistency.
- Optimize Cooling Process: Allow cheesecakes to cool gradually in oven with door cracked to minimize surface cracks and maintain a silky texture.
- Prep Time: 10 minutes
- Cook Time: 20 minutes
- Category: Desserts, Snacks
- Method: Baking
- Cuisine: American
Nutrition
- Serving Size: 13
- Calories: 190
- Sugar: 15 g
- Sodium: 150 mg
- Fat: 10 g
- Saturated Fat: 5 g
- Unsaturated Fat: 3 g
- Trans Fat: 0 g
- Carbohydrates: 22 g
- Fiber: 1 g
- Protein: 2 g
- Cholesterol: 40 mg
Jenna Hartley
Founder & Recipe Creator
Expertise
Education
Box Hill Institute, Melbourne
William Angliss Institute, Melbourne
Jenna is the heart of Picture Perfect Meals, turning simple ingredients into beautiful, easy‑to‑make dishes.
Growing up around family meals in Melbourne, she trained at Box Hill Institute and then perfected her pastry skills at William Angliss Institute. She loves mixing classic Australian flavors with fresh ideas to keep cooking fun and stress‑free.