Irresistible Mini Chocolate Peanut Butter Pies Recipe

Dreamy Mini Chocolate Peanut Butter Pies Recipe: Sweet Bites

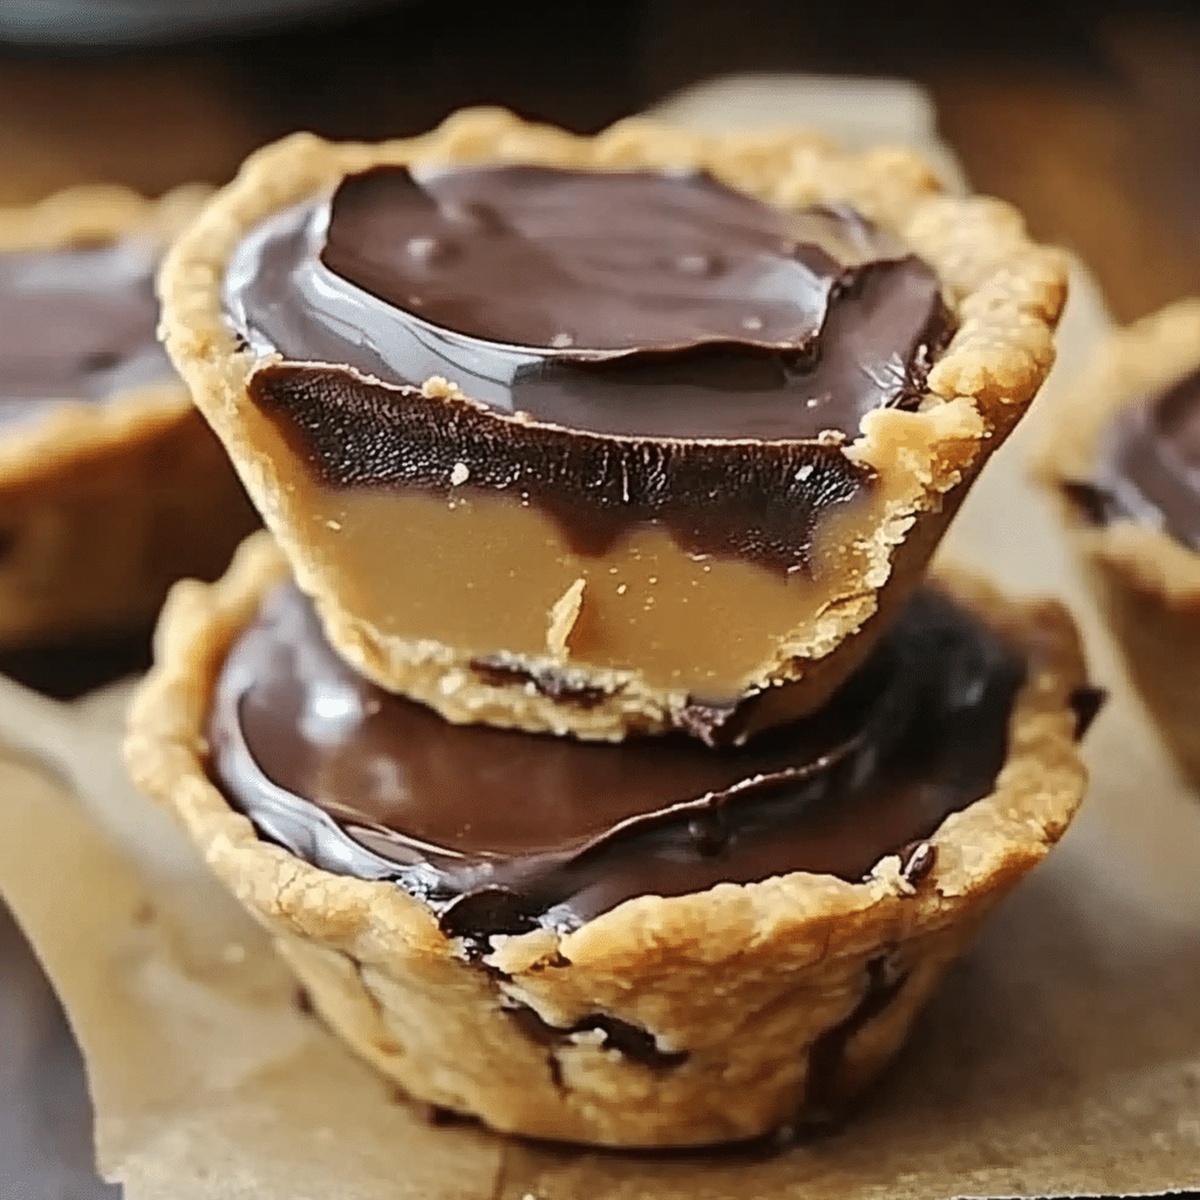
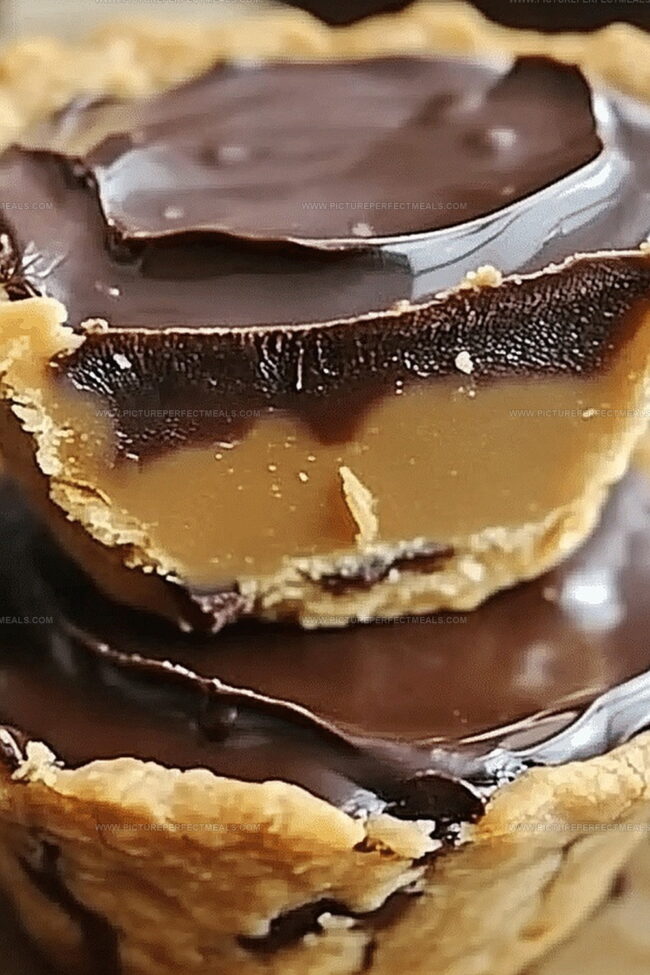
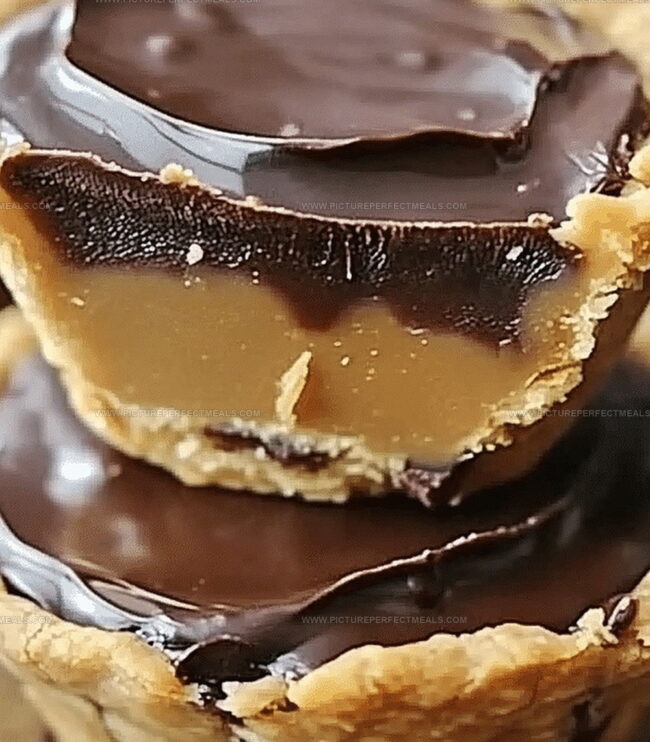
Decadent chocolate and creamy peanut butter create pure magic in these mini chocolate peanut butter pies that dance between rich dessert and heavenly indulgence.

Sweet tooths rejoice at the perfect blend of flavors melting together in each bite-sized treat.

These miniature pies pack an intense punch of deliciousness that transforms an ordinary moment into something extraordinary.

No complicated techniques stand between you and dessert bliss with this straightforward recipe.

Each small pie delivers a delightful combination of smooth chocolate and nutty peanut butter that will make taste buds sing.

The compact size makes them ideal for parties, potlucks, or a personal sweet escape.

One taste, and you’ll be completely captivated by these irresistible little delights.

What’s in Those Mini PB Chocolate Pies?

For Pie Crust:
  • Chocolate Cookie Crumbs: Creates a rich, crumbly base that complements the creamy filling's texture, choose dark chocolate cookies for deeper flavor.
  • Melted Butter: Binds the crust ingredients, ensuring a perfect compact foundation, use unsalted butter for consistent taste.
For Filling Base:
  • Peanut Butter: Delivers intense nutty flavor and creamy consistency, select natural or smooth variety for best results.
  • Cream Cheese: Provides tangy richness and stabilizes the filling, opt for full-fat version for superior texture.
  • Powdered Sugar: Sweetens and smooths the filling, sift to prevent lumps for silky consistency.
  • Vanilla Extract: Enhances overall flavor profile, choose pure extract for authentic taste.
  • Whipped Topping: Lightens the filling, creates airy texture, select fresh or high-quality frozen version.
For Chocolate Topping:
  • Chocolate Chips: Creates glossy ganache layer, dark or semi-sweet chips recommended for balanced sweetness.
  • Heavy Cream: Helps create smooth ganache, ensure fresh and high-fat content for best results.
  • Mini Chocolate Chips: Optional garnish for extra chocolate crunch, add just before serving.
  • Crushed Peanuts: Optional topping for added texture and nutty flavor, toast lightly for enhanced taste.
  • Whipped Cream: Optional final garnish for extra indulgence, freshly whipped preferred.

Gear for No-Fuss Chocolate Peanut Butter Pies

  • Medium bowl: For mixing chocolate cookie crumbs and butter.
  • Muffin tin or silicone cupcake molds: To shape and hold pie crusts.
  • Large mixing bowl: For preparing peanut butter filling.
  • Electric mixer or whisk: To beat cream cheese and mix ingredients smoothly.
  • Spatula: For smoothing filling and spreading ganache.
  • Microwave-safe bowl: To melt chocolate chips and cream.
  • Spoon or piping bag: For filling crusts with peanut butter mixture.
  • Measuring cups and spoons: To accurately measure ingredients.

Making Mini PB Chocolate Pies from Scratch

  • Create Chocolate Cookie Base

Crush chocolate cookies into fine crumbs and blend thoroughly with melted butter. Press the mixture firmly into mini muffin cups, creating a solid foundation. Pop the tray into the refrigerator to help the base set perfectly.

  • Whip Creamy Peanut Butter Filling

Blend peanut butter and cream cheese until silky smooth. Incorporate powdered sugar and vanilla, stirring until completely integrated. Gently fold in whipped topping to create a light, airy texture that will melt in your mouth.

  • Layer and Top Pies

Carefully spoon the fluffy peanut butter mixture over the chilled cookie bases. Ensure each mini pie is filled evenly and smoothly.

  • Drizzle Chocolate Glaze

Melt chocolate chips with heavy cream, stirring until glossy and completely combined. Allow the ganache to cool slightly before drizzling generously over the peanut butter layer.

  • Chill and Garnish

Refrigerate the mini pies for at least an hour to help them set firmly. Before serving, sprinkle with crushed peanuts or mini chocolate chips for extra crunch and visual appeal.

  • Serve and Enjoy

Gently remove the pies from the muffin tin and plate. These decadent treats are best enjoyed chilled and shared with friends.

Sweet Swaps & Twists for Peanut Butter Pie Fans

  • Perfect Crust Technique: Use a flat-bottomed glass or measuring cup to press cookie crumbs evenly into muffin tin for uniform, compact crusts that won't crumble.
  • Make-Ahead Magic: Prepare these mini pies up to 3 days in advance and store in an airtight container in the refrigerator for stress-free entertaining.
  • Diet-Friendly Swaps: Replace regular cream cheese with dairy-free alternative and use gluten-free chocolate cookie crumbs to create a vegan and gluten-free version of these mini pies.
  • Flavor Adventure: Experiment with different nut butters like almond or cashew butter for unique taste profiles that still complement the chocolate ganache perfectly.
  • Decorative Delights: Top with sea salt flakes, drizzle with caramel sauce, or sprinkle with toasted coconut flakes to elevate the visual appeal and add extra texture to these mini desserts.

How to Serve These Mini Pies Just Right

  • Chocolate Drizzle Delight: Top each mini pie with a zigzag of melted chocolate for an elegant, professional bakery-style finish that adds visual appeal and extra chocolate flavor.
  • Party Presentation Platter: Arrange the mini pies on a beautiful white serving platter with scattered crushed peanuts and chocolate shavings, creating a stunning dessert display that will wow guests at any gathering.
  • Gourmet Garnish Extras: Sprinkle sea salt flakes on top to enhance the chocolate and peanut butter flavors, or add a small mint leaf for a fresh contrast that elevates the dessert's sophistication.
  • Ice Cream Companion: Serve these mini pies alongside a scoop of vanilla bean or chocolate ice cream for a decadent dessert combination that provides multiple textures and temperatures.

Store, Chill, Repeat: Mini Pie Storage Guide

  • Refrigerator Rhythm: Store these delightful mini pies in an airtight container within the refrigerator for up to 5 days, maintaining their creamy texture and preventing flavor absorption from other foods.
  • Freezer Friend: Stack these treats between parchment paper layers in a freezer-safe container, where they'll happily rest for 2-3 months. Thaw overnight in the refrigerator before enjoying their decadent goodness.
  • Prep-Ahead Magic: Create these mini pies a day before your gathering, allowing flavors to meld and giving you stress-free dessert preparation. The ganache and filling will continue to set beautifully in the cold environment.
  • Single-Serve Strategy: Consider individually wrapping each mini pie in plastic wrap after chilling, which makes grab-and-go snacking simple and prevents potential freezer burn during storage.

Quick Recipe Overview

Prep Time: 20 minutes

Cook Time: 1 hour

Total Time: 1 hour 20 minutes

Calories: 300 kcal

Servings: 12

Print
clock clock iconcutlery cutlery iconflag flag iconfolder folder iconinstagram instagram iconpinterest pinterest iconfacebook facebook iconprint print iconsquares squares iconheart heart iconheart solid heart solid icon
Irresistible Mini Chocolate Peanut Butter Pies Recipe

Irresistible Mini Chocolate Peanut Butter Pies


5 Stars 4 Stars 3 Stars 2 Stars 1 Star

4.9 from 31 reviews

  • Total Time: 20 minutes
  • Yield: 13 1x

Description

Delectable mini chocolate peanut butter pies deliver a perfect balance of rich chocolate and creamy peanut butter in bite-sized treats. Guests will savor these indulgent desserts that combine smooth textures with intense flavors.


Ingredients

Scale
  • 1 cup (240 ml) creamy peanut butter
  • 8 oz (225 g) cream cheese
  • 1 ½ cups (375 ml) chocolate cookie crumbs
  • ½ cup (120 ml) semi-sweet chocolate chips
  • 1 cup (240 ml) powdered sugar
  • 4 tbsps (60 ml) unsalted butter
  • ¼ cup (60 ml) heavy cream
  • 1 tsp (5 ml) vanilla extract
  • 1 cup (240 ml) whipped topping
  • Mini chocolate chips
  • Crushed peanuts
  • Whipped cream

Instructions

  1. Crust Preparation: Crush chocolate cookies into fine crumbs and mix with melted butter, creating a uniform base mixture that will hold its shape when pressed.
  2. Crust Molding: Press the crumb mixture firmly into mini muffin tin cavities, ensuring even distribution and smooth, compact edges.
  3. Crust Chilling: Refrigerate the prepared crusts for 20 minutes to solidify their structure and enhance stability.
  4. Filling Blending: Combine cream cheese and peanut butter, whipping until achieving a smooth, lump-free consistency with a silky texture.
  5. Flavor Integration: Blend powdered sugar and vanilla extract into the peanut butter mixture, stirring until completely smooth and well-incorporated.
  6. Filling Lightening: Gently fold whipped topping into the peanut butter mixture, creating a light, airy filling with consistent texture and volume.
  7. Filling Application: Pipe or spoon the peanut butter filling evenly across the chilled crusts, ensuring uniform coverage and clean edges.
  8. Chocolate Topping: Melt chocolate chips with heavy cream in short microwave intervals, stirring carefully to create a glossy, smooth ganache.
  9. Final Decoration: Once ganache has slightly cooled, drizzle or spread over the peanut butter filling, optionally garnishing with crushed peanuts or mini chocolate chips.
  10. Setting and Serving: Refrigerate the assembled mini pies for at least one hour to allow complete setting, then carefully remove from the muffin tin and serve chilled for optimal flavor and presentation.

Notes

  • Crumb Consistency Control: Ensure cookie crumbs are finely ground and evenly mixed with butter to prevent crumbly or loose crusts that might fall apart.
  • Prevent Filling Separation: Bring cream cheese to room temperature before mixing to achieve a smoother, lump-free peanut butter filling and ensure proper incorporation.
  • Ganache Temperature Technique: Let chocolate ganache cool slightly before drizzling to maintain the right viscosity and prevent running off the pie surface.
  • Chilling Strategy: Refrigerate pies for at least an hour to allow flavors to meld and achieve a firm, sliceable texture that holds its shape when served.
  • Prep Time: 20 minutes
  • Cook Time: 0 minutes
  • Category: Desserts, Snacks
  • Method: None
  • Cuisine: American

Nutrition

  • Serving Size: 13
  • Calories: 335
  • Sugar: 21 g
  • Sodium: 205 mg
  • Fat: 22 g
  • Saturated Fat: 8 g
  • Unsaturated Fat: 13 g
  • Trans Fat: 0 g
  • Carbohydrates: 28 g
  • Fiber: 1 g
  • Protein: 5 g
  • Cholesterol: 20 mg
Jenna Hartley

Jenna Hartley

Founder & Recipe Creator

Expertise

  • Recipe development with a focus on single-dish meals.
  • Fusion of traditional and modern Australian cuisines.
  • Food styling and photography for digital platforms.​

Education

Box Hill Institute, Melbourne

  • Degree: Advanced Diploma of Hospitality Management
  • Focus: Specialized in practical food and beverage service, responsible alcohol and hygiene compliance, legal risk management, and hands‑on experience in a simulated restaurant environment.

William Angliss Institute, Melbourne

  • Program: Certificate IV in Patisserie
  • Focus: Specialized in pastry and bakery techniques, cookery and specialty food preparation, recipe planning and costing, commercial kitchen operations, sustainable and inclusive work practices, food safety and hygiene compliance, and workplace health and safety.

Jenna is the heart of Picture Perfect Meals, turning simple ingredients into beautiful, easy‑to‑make dishes. 

Growing up around family meals in Melbourne, she trained at Box Hill Institute and then perfected her pastry skills at William Angliss Institute. She loves mixing classic Australian flavors with fresh ideas to keep cooking fun and stress‑free.

Leave a Reply

Your email address will not be published. Required fields are marked *

Recipe rating 5 Stars 4 Stars 3 Stars 2 Stars 1 Star