Irresistible Strawberry Chocolate Thumbprint Cookies Recipe

Sweet Symphony: Irresistible Strawberry Chocolate Thumbprint Recipe

Sweet aromas of baked goodness fill the kitchen when making strawberry chocolate thumbprint cookies that blend rich chocolate with vibrant fruit flavors.

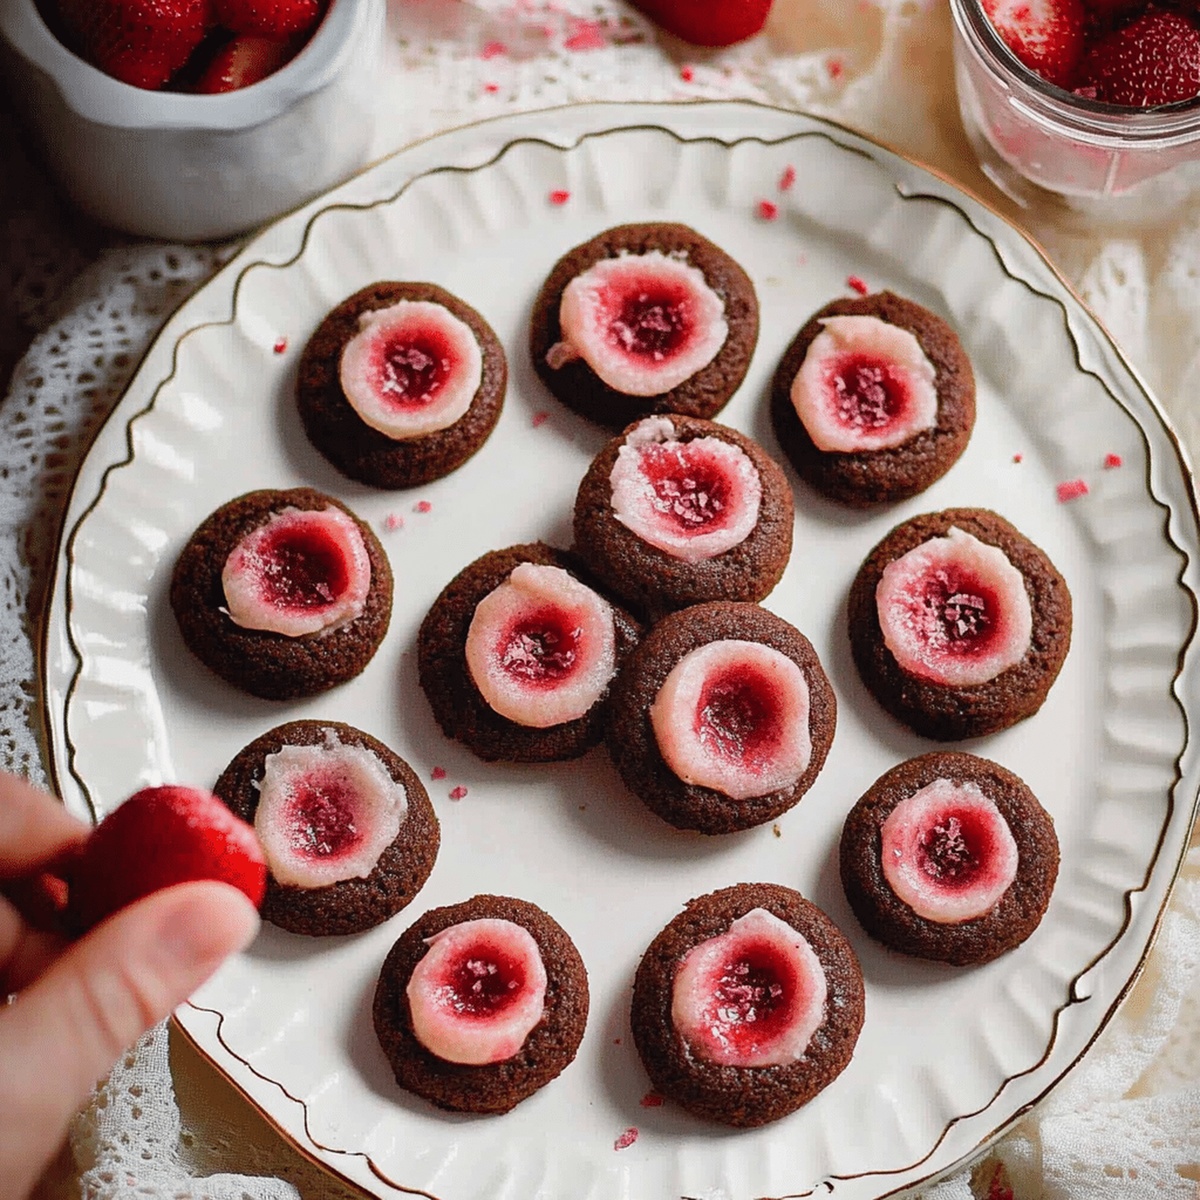
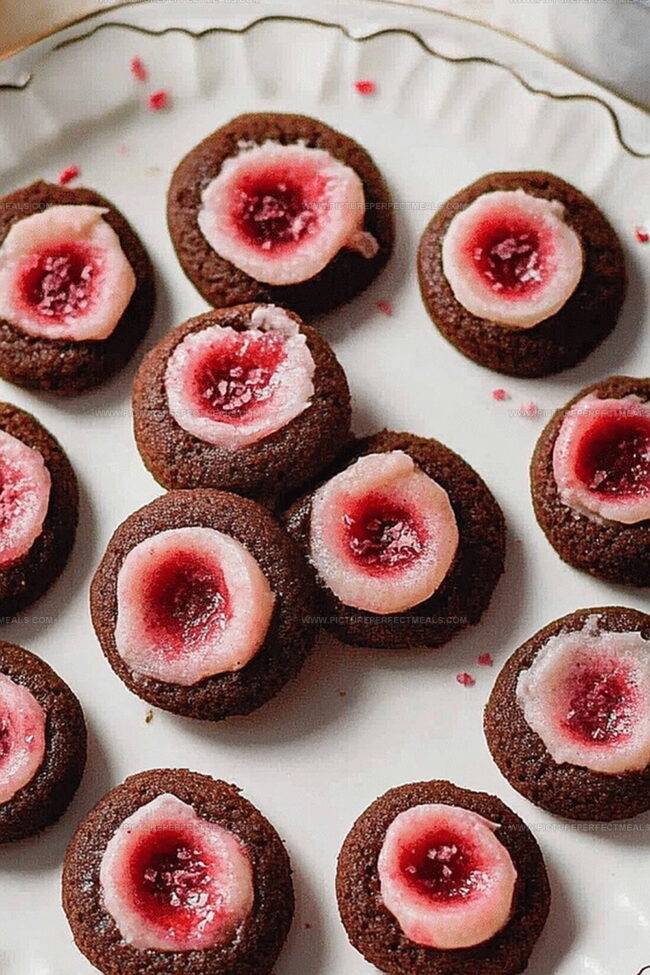
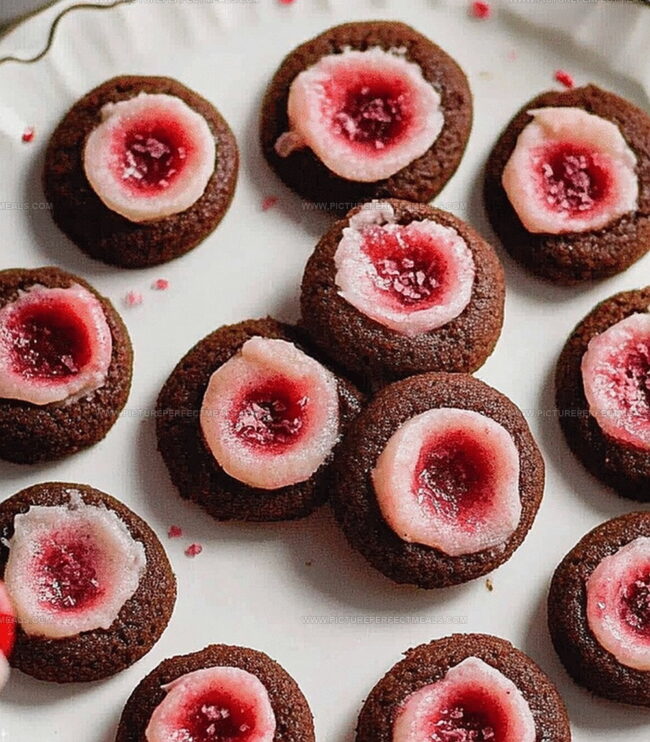
These delightful treats combine soft, buttery cookie bases with a decadent chocolate center and bright strawberry jam.

Each cookie promises a perfect balance of textures and tastes that dance across your palate.

Crumbly edges give way to a smooth, silky chocolate core that melts effortlessly.

Home bakers love how simple yet sophisticated these cookies appear when served on elegant platters.

With just a few ingredients and minimal prep time, you can create a dessert that looks and tastes professionally crafted.

These charming cookies will surely become a favorite at any gathering or quiet afternoon indulgence.

Quick Recipe Overview

Prep Time: 20 minutes (+30 minutes chilling)

Cook Time: 14 minutes

Total Time: 34 minutes

Calories: 130 kcal

Servings: 24

Strawberry Chocolate Thumbprint Cookies – Ingredient List

For Cookie Base:
  • All-Purpose Flour: Creates tender texture and provides structure for delicate cookies.
  • Unsalted Butter: Delivers rich, creamy flavor and helps achieve perfectly tender crumb.
  • Granulated Sugar: Sweetens cookies and contributes to golden, crisp edges.
  • Egg Yolk: Adds richness, moisture, and helps bind ingredients together smoothly.
  • Salt: Enhances overall flavor and balances sweetness in the cookie dough.
  • Vanilla Extract: Adds warm, aromatic depth and complements other ingredients.
For Filling and Topping:
  • Strawberry Jam: Provides vibrant fruity center with natural sweetness and beautiful color.
  • Chocolate Chips: Creates decadent drizzle with rich, smooth chocolate flavor.
  • Coconut Oil: Helps chocolate melt smoothly and adds subtle tropical undertone.
For Baking Preparation:
  • Parchment Paper: Prevents cookies from sticking and ensures even baking surface.
  • Large mixing bowl: Essential for creaming butter and sugar, and mixing dough ingredients.
  • Electric mixer or whisk: Perfect for creating light, fluffy butter and sugar mixture.
  • Measuring cups and spoons: Crucial for accurate ingredient measurements.
  • Baking sheets: Needed for baking cookies evenly.
  • Parchment paper: Prevents cookies from sticking and ensures easy cleanup.
  • Thumb or small spoon: Used for creating indentations in cookie dough.
  • Microwave-safe bowl: Helpful for melting chocolate and coconut oil.
  • Wire cooling rack: Allows cookies to cool completely without getting soggy.
  • Spoon or piping bag: Great for drizzling melted chocolate over cookies.
  • Plastic wrap: Used for chilling the cookie dough.

How to Make Strawberry Chocolate Thumbprint Cookies

  • Create Buttery Base

Mix softened butter and sugar until creamy and fluffy. Blend in egg yolk and vanilla extract thoroughly.

  • Form Dough Mixture

Gradually fold flour and salt into the wet ingredients. Combine until soft dough develops. Wrap in plastic and chill in refrigerator for about 45 minutes.

  • Prepare Cookie Shapes

Heat oven to 350F. Line baking sheets with parchment paper. Roll dough into small round balls, spacing them evenly. Press gentle thumb indentations into center of each cookie.

  • Bake and Fill

Spoon strawberry jam into cookie centers. Slide trays into preheated oven. Bake until cookie edges turn light golden, approximately 12-14 minutes.

  • Finish with Chocolate Drizzle

Allow cookies to cool completely on wire rack. Melt chocolate chips with coconut oil in short microwave bursts. Use spoon to artfully drizzle melted chocolate across cookie tops. Let chocolate set before serving.

  • Perfect Baking Tricks for Strawberry Chocolate Thumbprint Cookies
  • Butter Temperature Magic: Ensure butter is softened but not melted for the perfect cookie texture. Room temperature butter helps create a light, fluffy dough that blends seamlessly.
  • Chill Dough Technique: Refrigerating dough prevents spreading and helps cookies maintain their beautiful shape. Cold dough creates a more concentrated, richer flavor profile.
  • Thumb Indentation Pro Tip: Use the back of a rounded measuring spoon for perfectly uniform cookie centers. Wet your thumb or spoon slightly to prevent sticking when creating cookie wells.
  • Chocolate Drizzle Hack: Let cookies cool completely before adding chocolate to prevent melting and ensure clean, crisp drizzle lines. Use a squeeze bottle or small spoon for precise chocolate decoration.
  • Dietary Swap Options: Replace wheat flour with gluten-free blend for celiac-friendly version. Substitute dairy butter with vegan butter for plant-based cookies. Use sugar-free jam for low-sugar alternative.

Present Strawberry Chocolate Thumbprint Cookies Neatly

  • Sweet Date Night Dessert: Pair these thumbprint cookies with a glass of champagne or dessert wine for a romantic evening treat perfect for sharing.
  • Festive Holiday Platter: Arrange cookies on a decorative holiday plate, sprinkle with powdered sugar, and create a beautiful seasonal dessert centerpiece that will impress guests.
  • Gifting Delights: Package cookies in clear cellophane bags tied with ribbons, making them an adorable homemade gift for friends, teachers, or family members during special occasions.
  • Kids' Baking Adventure: Invite children to help fill cookie indentations with jam and drizzle chocolate, turning this recipe into a fun family baking activity that creates sweet memories.

Store Thumbprint Cookies So They Don’t Crumble

  • Fridge Fresh Survival: Store cookies in an airtight container between parchment paper layers, keeping them crisp and delicious for up to 5 days at cool temperatures.
  • Make-Ahead Magic: Prepare cookie dough ahead and refrigerate for 3 days or freeze unbaked dough balls up to 3 months, allowing spontaneous baking adventures.
  • Freezing Finesse: Fully baked cookies freeze beautifully for 2-3 weeks; wrap individually in plastic wrap, then place in freezer-safe containers to maintain texture and flavor.
  • Room Temperature Radiance: Allow chocolate-drizzled cookies to sit at room temperature for optimal taste, ensuring chocolate sets smoothly and maintains a glossy appearance.
Print
clock clock iconcutlery cutlery iconflag flag iconfolder folder iconinstagram instagram iconpinterest pinterest iconfacebook facebook iconprint print iconsquares squares iconheart heart iconheart solid heart solid icon
Irresistible Strawberry Chocolate Thumbprint Cookies Recipe

Irresistible Strawberry Chocolate Thumbprint Cookies


5 Stars 4 Stars 3 Stars 2 Stars 1 Star

4.7 from 10 reviews

  • Total Time: 34 minutes
  • Yield: 25 1x

Description

Irresistible strawberry chocolate thumbprint cookies blend sweet fruit with rich chocolate in a delightful dessert. Warm kitchen aromas and delicate crumble make you crave these homemade treats.


Ingredients

Scale
  • 1 cup unsalted butter, softened (226 g)
  • ⅔ cup granulated sugar (133 g)
  • 2 cups all-purpose flour
  • 1 large egg yolk
  • 1 tsp vanilla extract
  • ½ tsp salt
  • ⅓ cup strawberry jam or preserves
  • ½ cup semi-sweet chocolate chips (85 g)
  • 1 tsp coconut oil or vegetable oil

Instructions

  1. Creaming: Whip softened butter and sugar into a light, fluffy texture using an electric mixer for 2-3 minutes until pale and airy.
  2. Binding: Blend egg yolk and vanilla extract thoroughly into the butter mixture until completely incorporated.
  3. Dough Formation: Gently fold flour and salt into the wet ingredients, creating a smooth, cohesive dough. Wrap in plastic and chill for 30-60 minutes to enhance texture and firmness.
  4. Preparation: Preheat oven to 350F (175C) and line baking sheets with parchment paper. Roll dough into uniform 1-inch spheres, spacing them evenly across the sheet.
  5. Shaping: Press a gentle indentation into each cookie’s center using your thumb or a small spoon, creating a well for filling.
  6. Filling: Carefully spoon strawberry jam into the center of each cookie’s depression, ensuring precise placement.
  7. Baking: Slide cookies into the preheated oven and bake for 12-14 minutes until edges turn golden and crisp. Rest on the baking sheet for 5 minutes, then transfer to a wire rack for complete cooling.
  8. Chocolate Finale: Melt chocolate chips and coconut oil in short microwave bursts, stirring between intervals to achieve a smooth consistency. Artfully drizzle the chocolate over cooled cookies using a spoon or piping tool.
  9. Setting: Allow chocolate decoration to set completely before serving or storing the cookies.

Notes

  • Chill Dough Strategically: Refrigerate the dough for at least 30 minutes to prevent spreading and create a more compact, tender cookie texture during baking.
  • Mind the Thumb Indent: Press gently when creating cookie wells to avoid cracking; a small measuring spoon works perfectly for consistent, clean indentations.
  • Control Jam Application: Use a small spoon or piping bag to add strawberry jam sparingly, preventing overflow and maintaining a clean, professional cookie appearance.
  • Chocolate Drizzle Technique: Melt chocolate slowly and stir frequently to prevent burning; use a squeeze bottle or spoon for precise, elegant chocolate decoration.
  • Prep Time: 20 minutes (+30 minutes chilling)
  • Cook Time: 14 minutes
  • Category: Desserts, Snacks
  • Method: Baking
  • Cuisine: American

Nutrition

  • Serving Size: 25
  • Calories: 120
  • Sugar: 6 g
  • Sodium: 60 mg
  • Fat: 8 g
  • Saturated Fat: 5 g
  • Unsaturated Fat: 3 g
  • Trans Fat: 0 g
  • Carbohydrates: 13 g
  • Fiber: 0.5 g
  • Protein: 1.5 g
  • Cholesterol: 20 mg
Jenna Hartley

Jenna Hartley

Founder & Recipe Creator

Expertise

  • Recipe development with a focus on single-dish meals.
  • Fusion of traditional and modern Australian cuisines.
  • Food styling and photography for digital platforms.​

Education

Box Hill Institute, Melbourne

  • Degree: Advanced Diploma of Hospitality Management
  • Focus: Specialized in practical food and beverage service, responsible alcohol and hygiene compliance, legal risk management, and hands‑on experience in a simulated restaurant environment.

William Angliss Institute, Melbourne

  • Program: Certificate IV in Patisserie
  • Focus: Specialized in pastry and bakery techniques, cookery and specialty food preparation, recipe planning and costing, commercial kitchen operations, sustainable and inclusive work practices, food safety and hygiene compliance, and workplace health and safety.

Jenna is the heart of Picture Perfect Meals, turning simple ingredients into beautiful, easy‑to‑make dishes. 

Growing up around family meals in Melbourne, she trained at Box Hill Institute and then perfected her pastry skills at William Angliss Institute. She loves mixing classic Australian flavors with fresh ideas to keep cooking fun and stress‑free.

Leave a Reply

Your email address will not be published. Required fields are marked *

Recipe rating 5 Stars 4 Stars 3 Stars 2 Stars 1 Star