Juicy Roast Beef & Cheddar Sliders Recipe

Scrumptious Juicy Roast Beef & Cheddar Sliders Recipe

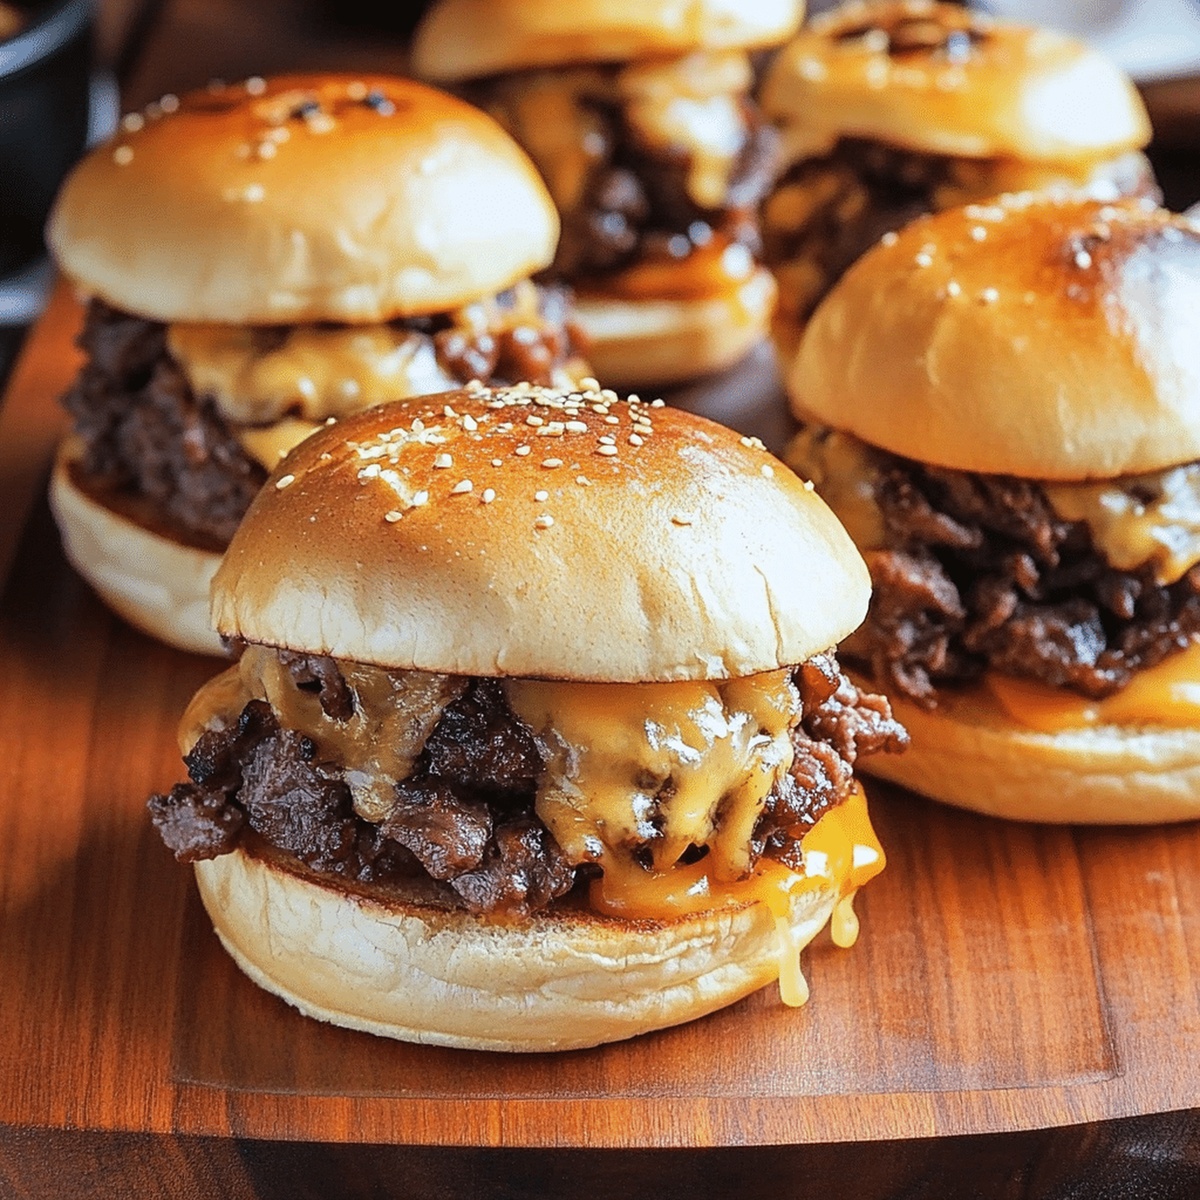
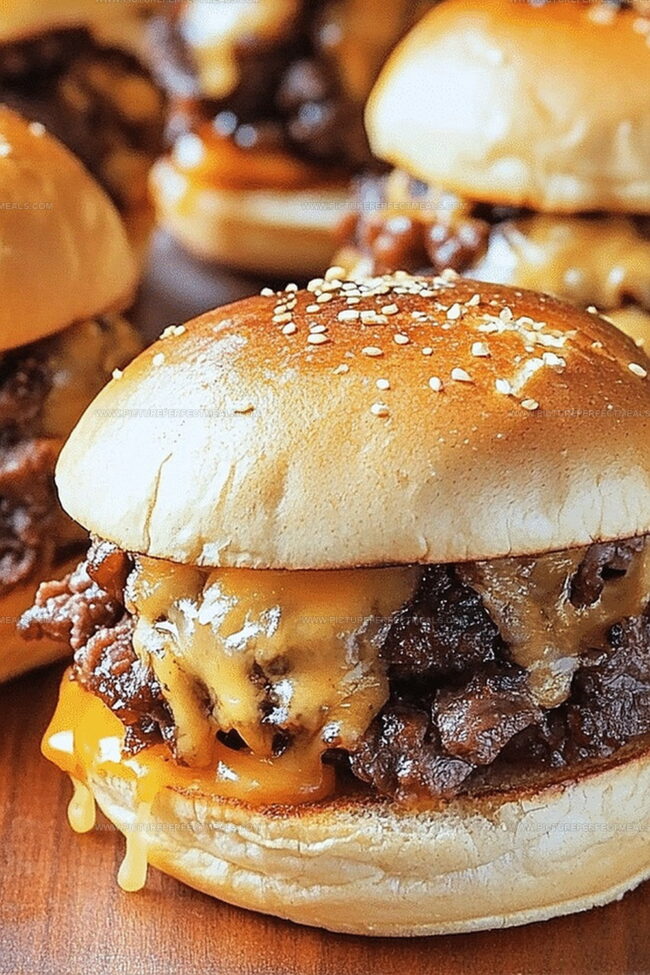
Succulent sliders packed with roast beef and cheddar cheese promise to be the ultimate party crowd-pleaser.

These bite-sized sandwiches deliver bold flavors in every single morsel.

Perfectly seasoned beef nestles between soft rolls with melted sharp cheddar that creates an irresistible combination.

Each slider offers a delectable blend of tender meat and rich cheese that melts in your mouth.

The recipe combines simple ingredients with easy preparation techniques anyone can master.

Small enough to serve as appetizers yet satisfying enough to fill hungry bellies, these sliders work for game day, family gatherings, or casual weekend meals.

Prepare to elevate your appetizer game with this mouthwatering recipe that guarantees smiles around the table.

Quick Recipe Overview

Prep Time: 10 minutes

Cook Time: 20 minutes

Total Time: 30 minutes

Calories: 300 kcal

Servings: 12

What’s in Roast Beef & Cheddar Sliders

For Base:
  • Hawaiian Rolls: Soft, sweet foundation that cradles the entire slider, providing a pillowy texture and mild sweetness.
  • Parchment Paper: Essential for easy removal and preventing sticking, ensuring clean slider presentation.
For Protein and Cheese:
  • Roast Beef: Premium deli-style meat offering rich, savory flavor and tender protein base.
  • Cheddar Cheese: Sharp, melty cheese that adds creamy richness and tangy bite to the sliders.
For Flavor Enhancers:
  • Mayonnaise: Creamy spread that adds moisture and subtle tanginess to the base.
  • Horseradish Sauce: Zesty condiment bringing a spicy kick and complex heat to the sliders.
  • Worcestershire Sauce: Deeply umami liquid that amplifies meaty flavors and adds depth.
  • Dijon Mustard: Tangy, slightly spicy condiment that brightens overall taste profile.
  • Garlic Powder: Aromatic seasoning providing instant savory undertones.
  • Onion Powder: Subtle, sweet background flavor that complements the meat.
  • Parsley: Fresh herb adding mild herbal notes and visual appeal.
For Finishing Touches:
  • Butter: Rich, golden glaze that creates crispy, glossy slider tops.
  • Sesame Seeds: Optional crunchy garnish that adds nutty texture and visual interest.

Tools to Make Roast Beef & Cheddar Sliders

  • Baking Dish (9×13-inch): Essential for preparing and baking the sliders.
  • Parchment Paper: Helps prevent sticking and makes cleanup easier.
  • Sharp Knife: For slicing rolls and cutting sliders after baking.
  • Small Bowl: Needed for mixing the buttery glaze ingredients.
  • Whisk: Perfect for blending glaze ingredients smoothly.
  • Pastry Brush: Helps evenly coat sliders with buttery glaze.
  • Foil: Used to cover sliders during initial baking.

How to Build Roast Beef & Cheddar Sliders

  • Prepare Slider Foundation

Grab your Hawaiian rolls and carefully slice them horizontally, keeping the connected base intact. Nestle the bottom layer into a greased baking dish.

  • Build Flavor Layers

Spread a whisper-thin coating of mayonnaise across the roll base. Drape roast beef evenly over the surface, then crown with sharp cheddar cheese slices.

  • Create Zesty Topping

Mix melted butter with Worcestershire sauce, Dijon mustard, garlic powder, onion powder, and parsley in a small bowl. This magical glaze will transform your sliders.

  • Craft Slider Finish

Slather horseradish sauce on the top roll half and place it gently over the cheese layer. Brush the buttery mixture generously across the slider tops. Sprinkle sesame seeds for extra crunch if desired.

  • Bake To Perfection

Slide the dish into a preheated 350F oven. Cover with foil and bake for 15 minutes. Remove foil and continue baking 5 more minutes until golden and cheese bubbles seductively.

  • Serve With Flair

Allow sliders to rest for 5 minutes. Slice and serve these mouthwatering mini sandwiches while they’re warm and irresistible.

Save & Reheat Roast Beef & Cheddar Sliders

  • Slider Storage Solutions: Keep sliders wrapped tightly in aluminum foil inside an airtight container. Refrigerate for up to 3 days, maintaining optimal flavor and texture.
  • Quick Reheating Trick: Warm sliders in the oven at 325F for 10-12 minutes. Cover with foil to prevent drying out and preserve moisture, ensuring they taste just as delicious as when first baked.
  • Advance Preparation Magic: Assemble sliders up to 24 hours before baking. Store covered in the refrigerator, then brush with glaze and bake when ready to serve. Perfect for busy weeknight dinners or game day gatherings.
  • Freezer-Friendly Strategy: Wrap individual sliders in plastic wrap, then place in a freezer bag. Freeze for up to 1 month. Thaw overnight in the refrigerator and reheat in the oven until warmed through and cheese melts beautifully.

Flavor Twists for Roast Beef & Cheddar Sliders

  • Perfect Make-Ahead Magic: Assemble sliders up to 24 hours in advance, cover tightly with foil, and refrigerate. Pull out 30 minutes before baking to reach room temperature for even heating.
  • Meat Swap Options: Replace roast beef with pulled chicken, turkey, or pulled pork for delicious protein variations that match the slider's flavor profile.
  • Dairy-Free Adaptation: Substitute cheddar cheese with dairy-free cheese alternatives or nutritional yeast for a vegan-friendly version that maintains rich, savory taste.
  • Spice Level Control: Adjust horseradish sauce quantity to manage heat intensity. Start with small amounts for mild flavor, or add extra for bold, zesty kick that suits individual preferences.
  • Gluten-Free Transformation: Use gluten-free Hawaiian rolls or create slider base with gluten-free dinner rolls to accommodate wheat-sensitive dietary needs without compromising taste and texture.

Presentation Tips for Roast Beef & Cheddar Sliders

  • Game Day Crowd Pleaser: Slice these mini sandwiches into smaller sections perfect for sharing during sports events or football watch parties.
  • Picnic Perfect Portable: Wrap individual sliders in parchment paper for easy transport to outdoor gatherings, beach trips, or family potlucks.
  • Weeknight Dinner Companion: Pair these sliders with a crisp green salad or quick coleslaw for a complete meal that comes together in under 30 minutes.
  • Appetizer Delight: Cut sliders into quarters for bite-sized party appetizers that will disappear quickly at any social gathering or holiday celebration.
Print
clock clock iconcutlery cutlery iconflag flag iconfolder folder iconinstagram instagram iconpinterest pinterest iconfacebook facebook iconprint print iconsquares squares iconheart heart iconheart solid heart solid icon
Juicy Roast Beef & Cheddar Sliders Recipe

Juicy Roast Beef & Cheddar Sliders Recipe


5 Stars 4 Stars 3 Stars 2 Stars 1 Star

4.7 from 11 reviews

  • Total Time: 30 minutes
  • Yield: 13 1x

Description

Crowd-pleasing roast beef & cheddar sliders bring classic sandwich flavors to mini proportions. Savory meat, melted cheese, and zesty sauce create an irresistible bite-sized party favorite you can easily prepare and enjoy.


Ingredients

Scale
  • 12 Hawaiian rolls (or slider buns)
  • 1 pound (lb) deli-style roast beef, thinly sliced
  • 8 slices cheddar cheese
  • ½ cup mayonnaise
  • ¼ cup horseradish sauce
  • 1 tbsp Worcestershire sauce
  • 1 tbsp Dijon mustard
  • 4 tbsps unsalted butter, melted
  • ½ tsp garlic powder
  • ½ tsp onion powder
  • ½ tsp dried parsley
  • 1 tsp sesame seeds

Instructions

  1. Prep Station: Preheat oven to 350F (175C), prepare 9×13-inch baking dish with parchment paper or thorough greasing.
  2. Roll Transformation: Carefully slice Hawaiian rolls horizontally, maintaining their connected structure, creating a unified base for layering.
  3. Base Layer Construction: Spread mayonnaise evenly across bottom roll section, creating a smooth, creamy foundation for subsequent ingredients.
  4. Protein and Cheese Integration: Arrange roast beef in uniform layer, then top with cheddar cheese slices, ensuring complete surface coverage.
  5. Flavor Enhancement: Spread horseradish sauce across top roll half, positioning it gently over cheese layer to complete the sandwich structure.
  6. Glaze Preparation: Whisk melted butter with Worcestershire sauce, Dijon mustard, garlic powder, onion powder, and parsley until achieving a harmonious, glossy mixture.
  7. Topping Application: Brush glaze generously over slider tops, creating a rich, aromatic coating; optionally sprinkle sesame seeds for textural complexity.
  8. Baking Process: Cover with aluminum foil, bake for 15 minutes to preserve moisture, then uncover and bake additional 5 minutes until tops turn golden and cheese melts completely.
  9. Serving Finale: Rest sliders for 5 minutes, allowing flavors to meld, then separate into individual portions and serve while warmth and aroma are at their peak.

Notes

  • Select Quality Meat: Choose high-grade deli roast beef for maximum tenderness and rich flavor, avoiding tough or overly processed varieties.
  • Cheese Melting Trick: Allow cheese to reach room temperature before placing on meat to ensure smooth, even melting without clumping.
  • Glaze Application Technique: Brush glaze gently and evenly, covering entire surface to prevent dry spots and enhance overall flavor profile.
  • Dietary Modification: Swap Hawaiian rolls for gluten-free alternatives and use dairy-free cheese for accommodating specific dietary restrictions without compromising taste.
  • Prep Time: 10 minutes
  • Cook Time: 20 minutes
  • Category: Lunch, Snacks
  • Method: Baking
  • Cuisine: American

Nutrition

  • Serving Size: 13
  • Calories: 302
  • Sugar: 2 g
  • Sodium: 707 mg
  • Fat: 18 g
  • Saturated Fat: 7 g
  • Unsaturated Fat: 9 g
  • Trans Fat: 0 g
  • Carbohydrates: 24 g
  • Fiber: 1 g
  • Protein: 14 g
  • Cholesterol: 45 mg
Jenna Hartley

Jenna Hartley

Founder & Recipe Creator

Expertise

  • Recipe development with a focus on single-dish meals.
  • Fusion of traditional and modern Australian cuisines.
  • Food styling and photography for digital platforms.​

Education

Box Hill Institute, Melbourne

  • Degree: Advanced Diploma of Hospitality Management
  • Focus: Specialized in practical food and beverage service, responsible alcohol and hygiene compliance, legal risk management, and hands‑on experience in a simulated restaurant environment.

William Angliss Institute, Melbourne

  • Program: Certificate IV in Patisserie
  • Focus: Specialized in pastry and bakery techniques, cookery and specialty food preparation, recipe planning and costing, commercial kitchen operations, sustainable and inclusive work practices, food safety and hygiene compliance, and workplace health and safety.

Jenna is the heart of Picture Perfect Meals, turning simple ingredients into beautiful, easy‑to‑make dishes. 

Growing up around family meals in Melbourne, she trained at Box Hill Institute and then perfected her pastry skills at William Angliss Institute. She loves mixing classic Australian flavors with fresh ideas to keep cooking fun and stress‑free.

Leave a Reply

Your email address will not be published. Required fields are marked *

Recipe rating 5 Stars 4 Stars 3 Stars 2 Stars 1 Star