Lazy Baker’s Dream: Cozy Chocolate Chip Cookie Bars Recipe
Chocolate chip cookie bars have been my ultimate comfort snack since childhood.
Memories of warm, gooey treats flood back with each bite.
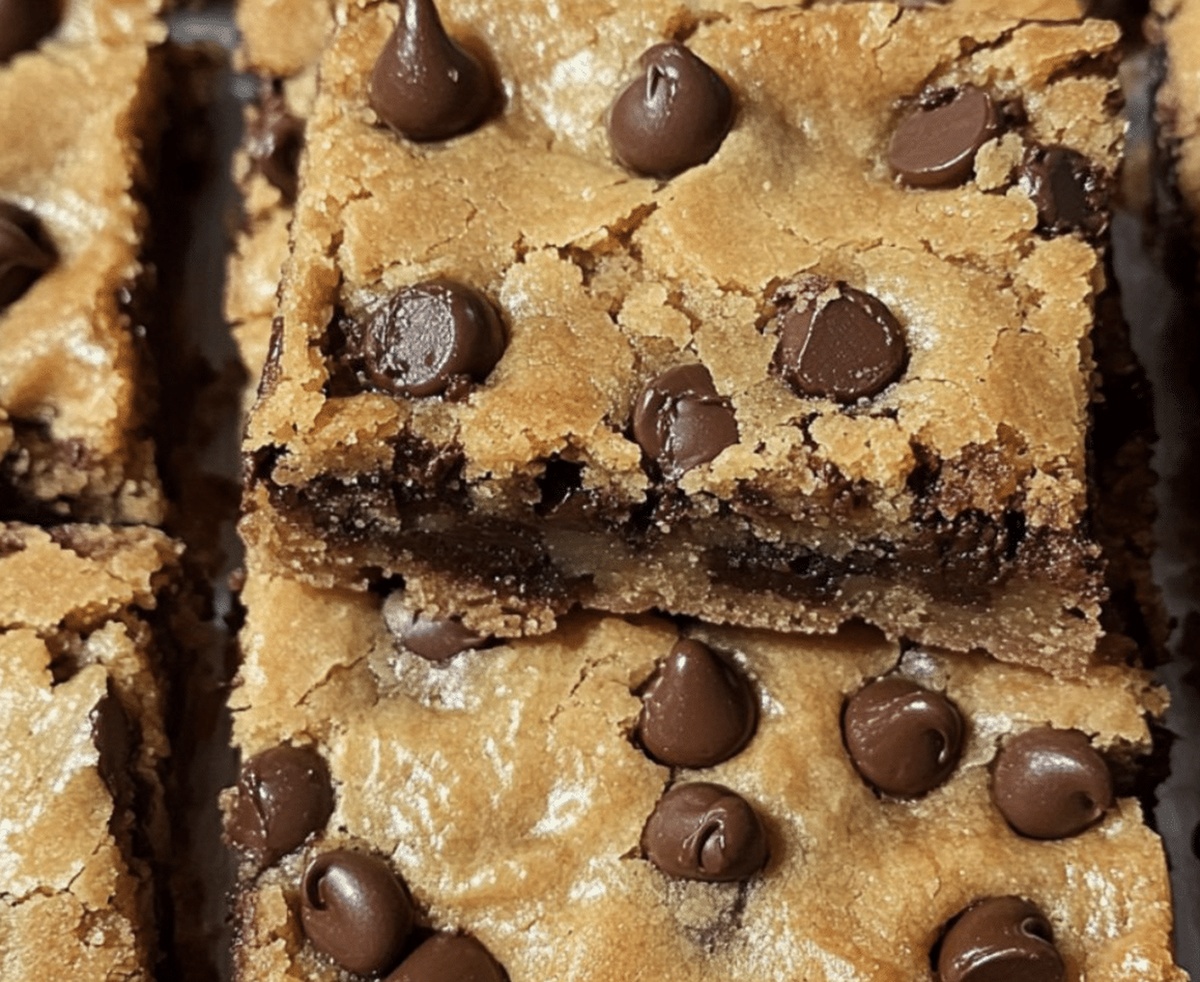
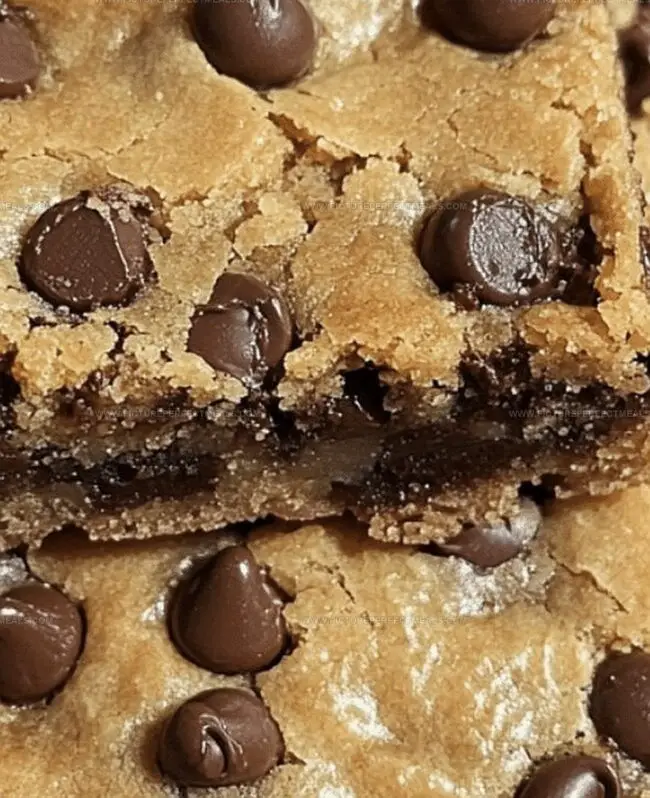
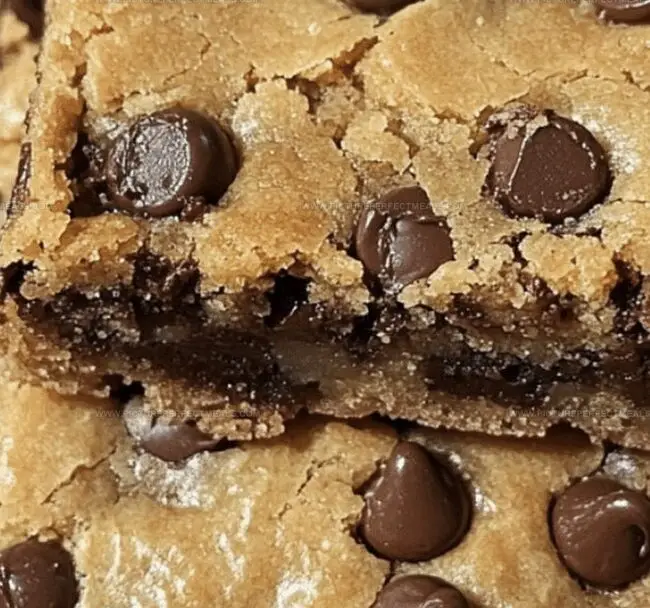
Crisp edges and soft centers create a perfect texture balance.
Nobody can resist the classic combination of sweet chocolate and buttery dough.
These bars simplify the traditional cookie-baking process, making dessert prep a breeze.
Minimal effort yields maximum deliciousness for you to enjoy.
Let’s dive into this irresistible recipe that promises to become your new go-to dessert.
Why Lazy Chocolate Chip Cookie Bars Save the Day
All the Ingredients for Lazy Cookie Bars
Base Ingredients:Leavening Agents:Wet Ingredients:Finishing Ingredients:Optional Toppings:How to Bake Lazy Chocolate Chip Cookie Bars
Step 1: Prep the Baking Scene
Crank up your oven to 175C (350F). Grab an 8×8-inch baking pan and give it a quick spray with cooking oil. Line the pan with parchment paper, letting the edges hang over the sides for easy bar removal.
Step 2: Mix the Magic Base
In a large bowl, combine:Whisk until the mixture looks smooth and glossy. Crack in the egg and splash of vanilla extract. Stir until everything looks perfectly blended.
In a separate bowl, mix together:Gently fold the dry ingredients into the wet mixture. Be careful not to overmix- you want the batter to look just combined. Toss in those chocolate chips and give a gentle stir.
Step 3: Create the Cookie Canvas
Spread the dough evenly across the prepared pan. For extra chocolate lovers, sprinkle some additional chocolate chips on top for that picture-perfect look.
Step 4: Bake to Perfection
Slide the pan into the preheated oven. Bake for 20-25 minutes. You’re looking for golden brown edges and a center that’s just barely set. Watch carefully to avoid overbaking- gooey is the goal!
Step 5: Cool and Slice
Let the bars hang out in the pan for about 15 minutes. Use the parchment paper handles to lift the entire batch out. Slice into squares and serve. Enjoy warm for maximum deliciousness or at room temperature for a classic treat.
Time-Saving Tips for Lazy Cookie Bars
Store and Reheat Lazy Cookie Bars Easily
What Pairs Well with Chocolate Chip Cookie Bars
Mix It Up: Lazy Cookie Bar Variations
Questions You Might Have About Lazy Cookie Bars
Yes, you can swap chocolate chips with milk, dark, or white chocolate chips. You can even mix different types for a unique flavor profile.
You can substitute brown sugar with white sugar, though the texture and flavor might slightly change. For best results, use a mix of white and brown sugar.
The edges should turn golden brown, and the center should look just set but not completely firm. A toothpick inserted near the center should come out with a few moist crumbs.
You can grease the pan directly, but parchment paper makes removing and cutting the bars much easier and prevents sticking.
Print
Lazy Chocolate Chip Cookie Bars Recipe
- Total Time: 35 minutes
- Yield: 12 1x
Description
Chocolate chip cookie bars bring comfort and nostalgia to sweet cravings with minimal effort. Quick mixing and simple baking make these bars a perfect dessert for busy home bakers seeking delicious shortcuts.
Ingredients
Main Ingredients:
- 1 cup (200 g) brown sugar, packed
- 1 cup (175 g) chocolate chips or chunks
- 1 ¼ cups (155 g) all-purpose flour
Wet Ingredients:
- ½ cup (115 g) unsalted butter, melted
- 1 large egg
- 1 teaspoon vanilla extract
Leavening and Seasoning:
- ½ teaspoon baking powder
- ¼ teaspoon baking soda
- ¼ teaspoon salt
Instructions
- Prepare the baking environment by heating the oven to 175C (350F). Create a non-stick surface in an 8×8-inch pan using parchment paper with extended edges for effortless removal.
- Combine melted butter and brown sugar in a mixing bowl, whisking until smooth and uniform. Incorporate egg and vanilla extract, stirring until completely blended.
- In a separate container, thoroughly mix flour, baking powder, baking soda, and salt. Gently integrate dry ingredients into the wet mixture, being careful not to overmix the batter.
- Delicately fold chocolate chips into the cookie dough, ensuring even distribution throughout the mixture.
- Transfer the dough into the prepared pan, using gentle pressure to create an even layer. Optionally, scatter additional chocolate chips across the surface for extra decadence.
- Position the pan in the preheated oven and bake for 20-25 minutes. Look for golden-brown edges and a slightly soft center as indicators of perfect doneness.
- Remove from oven and allow bars to cool within the pan for approximately 15 minutes. This resting period helps the bars set and makes cutting easier.
- Lift the bars from the pan using parchment paper overhang. Slice into square portions and serve either warm or at room temperature for optimal enjoyment.
Notes
- Customize chocolate chips by mixing different varieties like milk, dark, and white for a complex flavor profile.
- Experiment with add-ins like chopped nuts, dried fruit, or sea salt to elevate the basic recipe and create unique textures.
- Ensure butter is completely melted but not hot when mixing to prevent scrambling the egg and maintain smooth dough consistency.
- Store bars in an airtight container at room temperature for 3-4 days, or freeze for up to one month for extended enjoyment.
- Prep Time: 10 minutes
- Cook Time: 25 minutes
- Category: Desserts, Snacks
- Method: Baking
- Cuisine: American
Nutrition
- Serving Size: 12
- Calories: 201
- Sugar: 14 g
- Sodium: 90 mg
- Fat: 10 g
- Saturated Fat: 6 g
- Unsaturated Fat: 4 g
- Trans Fat: 0 g
- Carbohydrates: 26 g
- Fiber: 1 g
- Protein: 2 g
- Cholesterol: 18 mg
Daves Miller
Contributing Chef & Culinary Educator
Expertise
Education
Sullivan University, Louisville, Kentucky
White Mountains Community College, Berlin, New Hampshire
Daves is the friendly face guiding you through flavorful, fuss-free recipes at Picture Perfect Meals.
He studied culinary arts at Sullivan University and embraced Baking and Pastry Arts at White Mountains Community College. Daves specializes in comforting meals with vibrant flavors, highlighting fresh, seasonal ingredients.