Moist Country Apple Fritter Bread Recipe

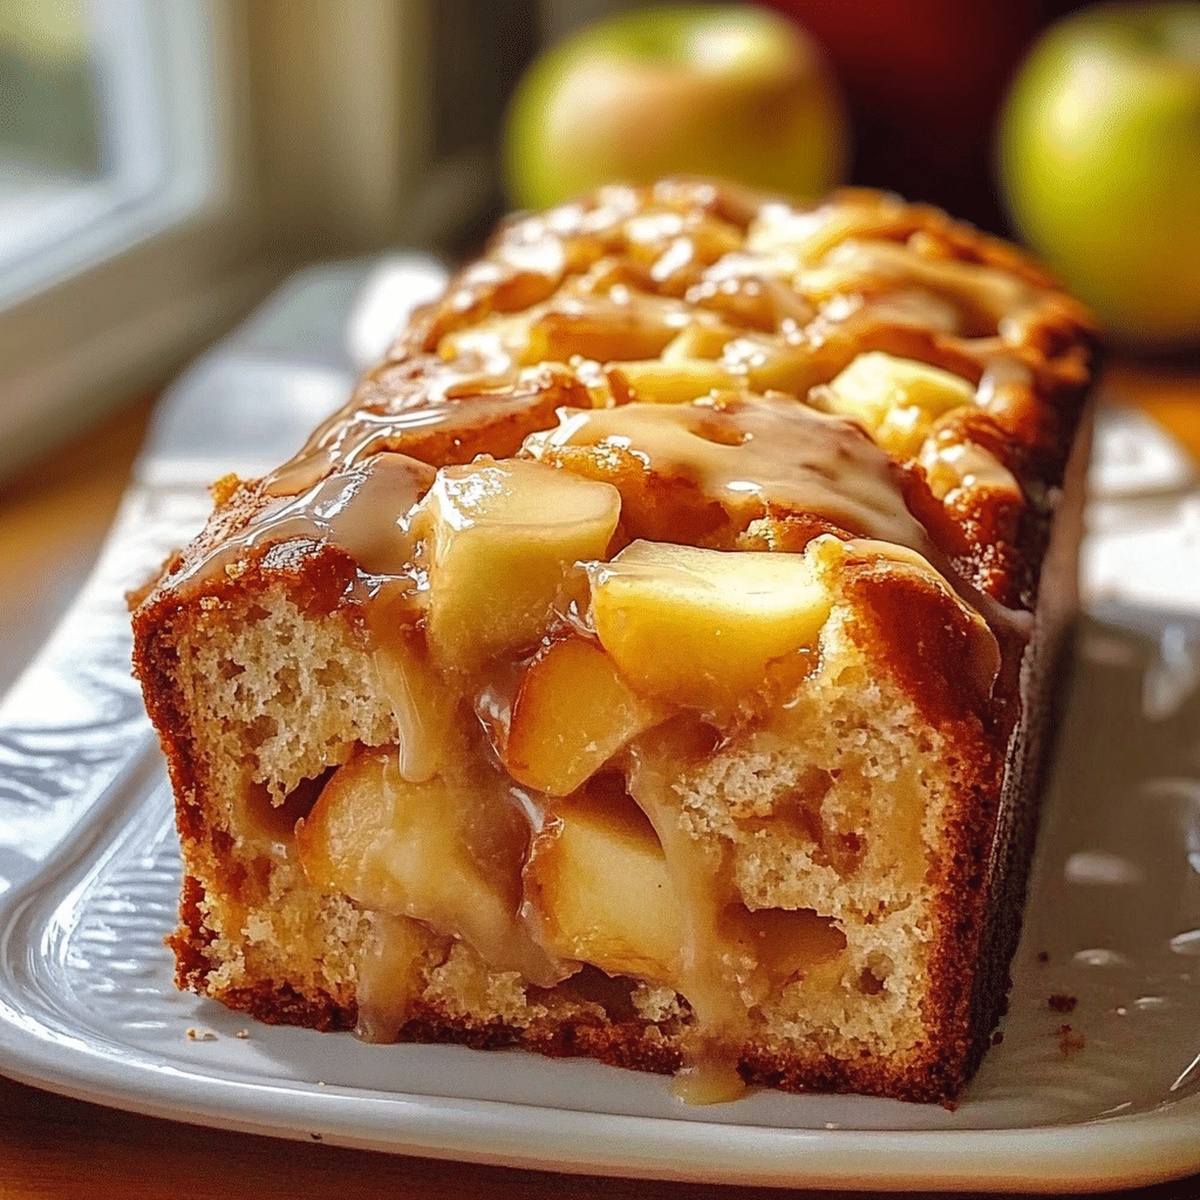
Irresistibly Juicy Country Apple Fritter Bread Recipe

Warm, golden apples dance through this delectable country apple fritter bread that promises comfort in every slice.

Crisp autumn afternoons call for baking something truly special with seasonal fruit.

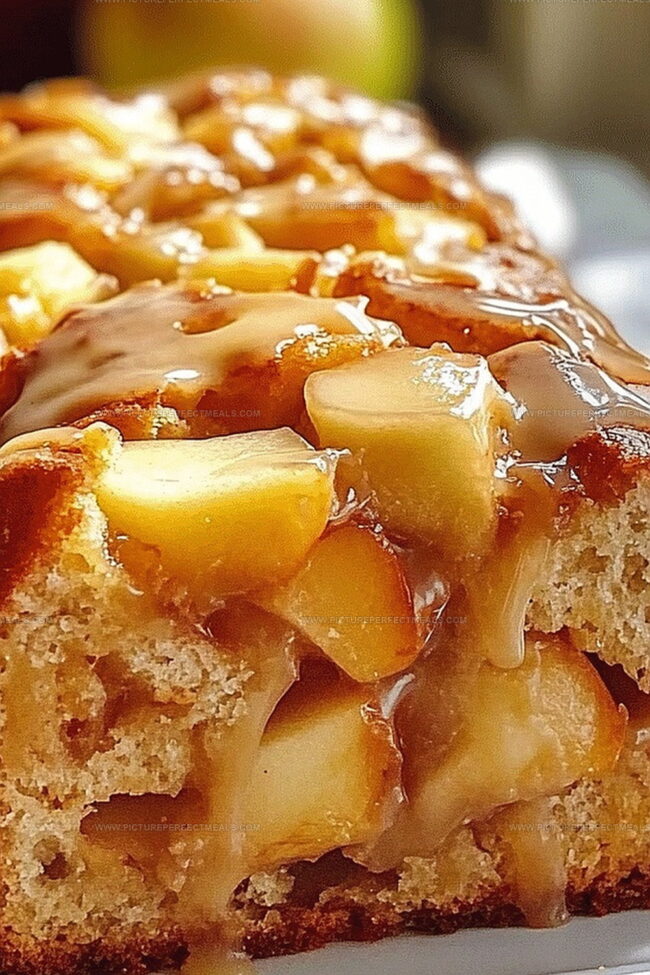
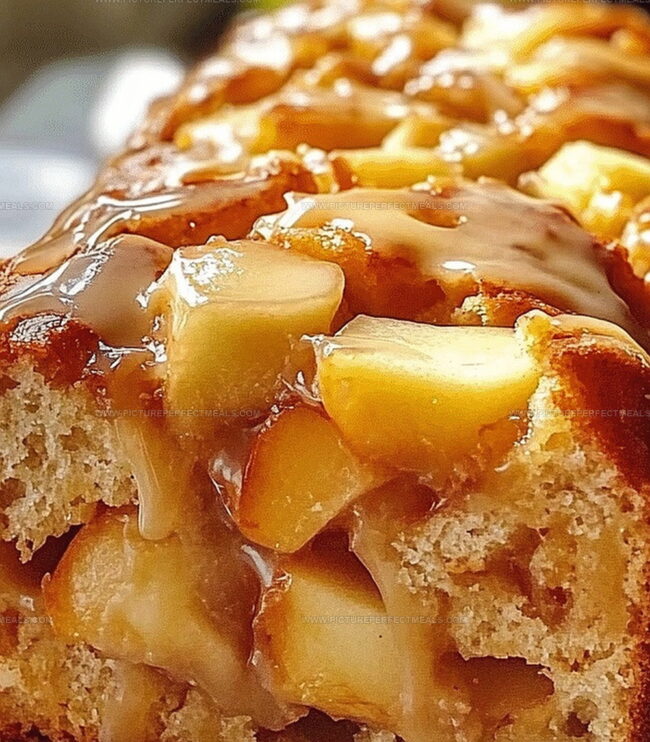
Sweet and tangy apple chunks meld perfectly with a tender, buttery batter that melts in your mouth.

Layers of cinnamon-spiced goodness create an irresistible aroma that fills the kitchen with nostalgic warmth.

Each bite combines the best of homestyle baking and classic dessert traditions.

The secret lies in selecting ripe, juicy apples and mixing them gently into the soft bread base.

This recipe transforms simple ingredients into a mouthwatering treat that will have everyone asking for seconds.

Quick Recipe Overview

Prep Time: 15 minutes

Cook Time: 60 minutes

Total Time: 1 hour 15 minutes

Calories: 400 kcal

Servings: 8

Country Apple Fritter Bread Ingredients

For Base Ingredients:
  • Butter: Provides rich, creamy foundation for tender bread texture.
  • Granulated Sugar: Sweetens and helps create golden-brown crust.
  • Eggs: Bind ingredients and add moisture to bread structure.
  • Vanilla Extract: Enhances overall flavor with warm, aromatic notes.
  • Flour: Creates bread's structural base with soft, consistent crumb.
  • Baking Powder: Helps bread rise and develop light, airy texture.
  • Milk: Adds moisture and helps blend dry and wet ingredients smoothly.
For Apple Layer:
  • Apples: Bring fresh, juicy sweetness and soft texture to bread.
  • Cinnamon: Adds warm, spicy depth and classic apple dessert flavor.
  • Sugar (for apple mixture): Caramelizes apples and intensifies their natural sweetness.
For Finishing Touch:
  • Powdered Sugar: Creates smooth, sweet glaze with delicate consistency.
  • Milk (for glaze): Thins powdered sugar to perfect drizzling consistency.
  • Vanilla Extract (for glaze): Adds subtle aromatic complexity to sweet topping.

Tools for Baking Rustic Apple Fritter Bread

  • Large mixing bowl: Essential for creaming butter and mixing batter.
  • Electric mixer or whisk: Needed to cream butter and mix ingredients smoothly.
  • Measuring cups and spoons: Critical for accurate ingredient measurements.
  • 9×5-inch loaf pan: Perfect for baking the bread evenly.
  • Parchment paper or cooking spray: Helps prevent bread from sticking.
  • Small bowls: Used for mixing apple coating and cinnamon-sugar swirl.
  • Whisk: Helpful for mixing dry ingredients and glaze.
  • Toothpick: Checks bread doneness.
  • Wire cooling rack: Allows bread to cool without getting soggy.

Steps for Sweet, Swirled Apple Bread

  • Warm Up Your Kitchen

Crank the oven to a cozy 350F and get a loaf pan ready with a quick spray or parchment paper.

  • Whip Up the Creamy Base

Blend butter and sugar until they’re fluffy and dreamy. Crack in eggs one by one, then splash vanilla for extra magic.

  • Dance with Dry Ingredients

Gently fold flour and baking powder into your creamy mixture, splashing milk to create a silky batter.

  • Sprinkle Apple Goodness

Toss fresh apples with a sweet cinnamon shower, creating little bursts of flavor waiting to explode.

  • Layer Your Masterpiece

Pour half the batter into the pan, scatter apple chunks and cinnamon magic across the surface. Top with remaining batter, pressing apples gently into the mix.

  • Bake to Perfection

Slide the pan into the oven and let it transform for 50-60 minutes. Check with a toothpick – when it comes out clean, you’re golden.

  • Drizzle and Serve

Once cooled, shower your creation with a silky glaze made from powdered sugar, milk, and vanilla. Slice and enjoy with your favorite hot drink.

Apple Mix-Ins & Tips for Cinnamon Lovers

  • Apple Preservation Trick: Toss diced apples in a bit of lemon juice to prevent browning and keep their fresh, crisp texture during preparation.
  • Make-Ahead Magic: Prepare the bread batter and apple mixture a day ahead, storing them separately in the refrigerator to save time on baking day.
  • Gluten-Free Swap: Replace regular flour with a gluten-free all-purpose blend to make this recipe friendly for those with wheat sensitivities.
  • Dairy-Free Adaptation: Substitute butter with coconut oil and use almond milk instead of regular milk for a delicious dairy-free version of the bread.
  • Spice It Up: Experiment with additional warm spices like nutmeg or cardamom to enhance the apple fritter bread's flavor profile and create a more complex taste experience.

How to Serve It for Breakfast or Dessert

  • Cozy Breakfast Companion: Pair this warm, fragrant bread with a steaming cup of coffee or chai tea for a delightful morning treat that feels like a warm hug.
  • Dessert Transformation: Cut thick slices and serve as a decadent dessert, topped with a scoop of vanilla ice cream or a dollop of whipped cream for extra indulgence.
  • Gifting Delight: Wrap individual slices in parchment paper and tie with a rustic ribbon for a homemade gift that shows friends and family how much you care about them.
  • Brunch Showstopper: Arrange slices on a beautiful wooden board with fresh apple slices and a small jar of honey for a stunning centerpiece that will impress weekend guests.

Keep Apple Bread Tasty After Day One

  • Smart Storage Strategy: Wrap the cooled bread tightly in plastic wrap or aluminum foil to maintain freshness for 3-4 days at room temperature, keeping its delightful texture and flavor intact.
  • Refrigeration Recommendation: Extend the bread's lifespan by storing it in an airtight container in the refrigerator for up to one week. Gently warm individual slices in the microwave for 10-15 seconds to restore that fresh-baked warmth.
  • Freezing Friendly Option: Slice the bread before freezing, placing wax paper between each slice. Pack in a freezer-safe container or ziplock bag, where it will stay delicious for up to 2-3 months. Thaw overnight in the refrigerator for best results.
  • Make-Ahead Magic: Prepare the entire bread recipe up to 24 hours in advance. Keep the unbaked batter in a sealed container in the refrigerator, then bake fresh when ready to serve. This technique helps develop deeper, richer flavors and saves precious morning preparation time.
Print
clock clock iconcutlery cutlery iconflag flag iconfolder folder iconinstagram instagram iconpinterest pinterest iconfacebook facebook iconprint print iconsquares squares iconheart heart iconheart solid heart solid icon
Moist Country Apple Fritter Bread Recipe

Moist Country Apple Fritter Bread Recipe


5 Stars 4 Stars 3 Stars 2 Stars 1 Star

4.8 from 21 reviews

  • Total Time: 1 hour 15 minutes
  • Yield: 8 to 11 1x

Description

Delectable country apple fritter bread blends classic American bakery flavors with homestyle charm. Sweet cinnamon-spiced apples nestle between buttery layers, promising comfort in each tender slice.


Ingredients

Scale
  • 2 medium apples (Granny Smith or Honeycrisp), peeled and diced
  • 1.5 cups (190 g) all-purpose flour
  • 0.5 cup (115 g) unsalted butter, softened
  • ⅔ cup (135 g) granulated sugar
  • 2 large eggs
  • 1 ¾ tsps baking powder
  • 1 tsp ground cinnamon
  • 0.33 cup (65 g) granulated sugar
  • 2 tbsps granulated sugar
  • 1.5 tsps vanilla extract
  • 0.33 cup (80 ml) milk
  • 0.5 cup (60 g) powdered sugar
  • 23 tbsps milk or heavy cream
  • 0.5 tsp vanilla extract

Instructions

  1. Preparation: Preheat oven to 350F (175C) and thoroughly prepare a 9×5-inch loaf pan with butter and flour or parchment paper for seamless removal.
  2. Batter Foundation: Cream butter and sugar until fluffy, then integrate eggs individually, incorporating vanilla extract for aromatic complexity.
  3. Dry Ingredient Integration: Sift flour and baking powder, gently folding into wet ingredients alternating with milk to maintain a smooth, consistent texture.
  4. Apple Seasoning: Toss diced apples with cinnamon and sugar, ensuring each piece receives an even, fragrant coating.
  5. Cinnamon Swirl Composition: Blend sugar and cinnamon thoroughly to create a flavor-enhancing mixture.
  6. Strategic Layering: Distribute half the batter in the pan, sprinkle half the cinnamon-sugar and apple pieces, then repeat with remaining batter, pressing final apple pieces into the surface and dusting with remaining cinnamon-sugar.
  7. Baking Process: Bake in oven center for 50-60 minutes, watching for a golden-brown top and clean toothpick test.
  8. Cooling and Finishing: Rest bread in pan for 10 minutes, transfer to wire rack, and allow complete cooling. Whisk powdered sugar, milk, and vanilla into a smooth glaze, then drizzle generously over cooled bread.

Notes

  • Prevent Apple Browning: Toss diced apples with a splash of lemon juice to maintain their fresh color and prevent oxidation during preparation.
  • Avoid Overmixing Batter: Gently fold dry ingredients into wet ingredients just until combined to ensure a tender, light bread texture without developing tough gluten.
  • Check Moisture Balance: Use firm, crisp apples like Granny Smith or Honeycrisp to prevent excess liquid that could make the bread soggy during baking.
  • Control Baking Temperature: Place bread on the center oven rack to ensure even heat distribution and prevent burning or uneven cooking around the edges.
  • Prep Time: 15 minutes
  • Cook Time: 60 minutes
  • Category: Breakfast, Snacks, Desserts
  • Method: Baking
  • Cuisine: American

Nutrition

  • Serving Size: 8 to 11
  • Calories: 138
  • Sugar: 11 g
  • Sodium: 44 mg
  • Fat: 6 g
  • Saturated Fat: 4 g
  • Unsaturated Fat: 2 g
  • Trans Fat: 0 g
  • Carbohydrates: 18 g
  • Fiber: 0.5 g
  • Protein: 2 g
  • Cholesterol: 33 mg
Jenna Hartley

Jenna Hartley

Founder & Recipe Creator

Expertise

  • Recipe development with a focus on single-dish meals.
  • Fusion of traditional and modern Australian cuisines.
  • Food styling and photography for digital platforms.​

Education

Box Hill Institute, Melbourne

  • Degree: Advanced Diploma of Hospitality Management
  • Focus: Specialized in practical food and beverage service, responsible alcohol and hygiene compliance, legal risk management, and hands‑on experience in a simulated restaurant environment.

William Angliss Institute, Melbourne

  • Program: Certificate IV in Patisserie
  • Focus: Specialized in pastry and bakery techniques, cookery and specialty food preparation, recipe planning and costing, commercial kitchen operations, sustainable and inclusive work practices, food safety and hygiene compliance, and workplace health and safety.

Jenna is the heart of Picture Perfect Meals, turning simple ingredients into beautiful, easy‑to‑make dishes. 

Growing up around family meals in Melbourne, she trained at Box Hill Institute and then perfected her pastry skills at William Angliss Institute. She loves mixing classic Australian flavors with fresh ideas to keep cooking fun and stress‑free.

Leave a Reply

Your email address will not be published. Required fields are marked *

Recipe rating 5 Stars 4 Stars 3 Stars 2 Stars 1 Star