Molten Chocolate Lava Cakes Recipe

Dreamy Molten Chocolate Lava Cakes Recipe That Flows Magically

Decadent chocolate lava cakes with a gooey molten chocolate center have been delighting dessert enthusiasts for years.

This sinfully rich recipe brings restaurant-quality elegance right to your kitchen.

Professional pastry chefs often consider these individual cakes a hallmark of culinary skill.

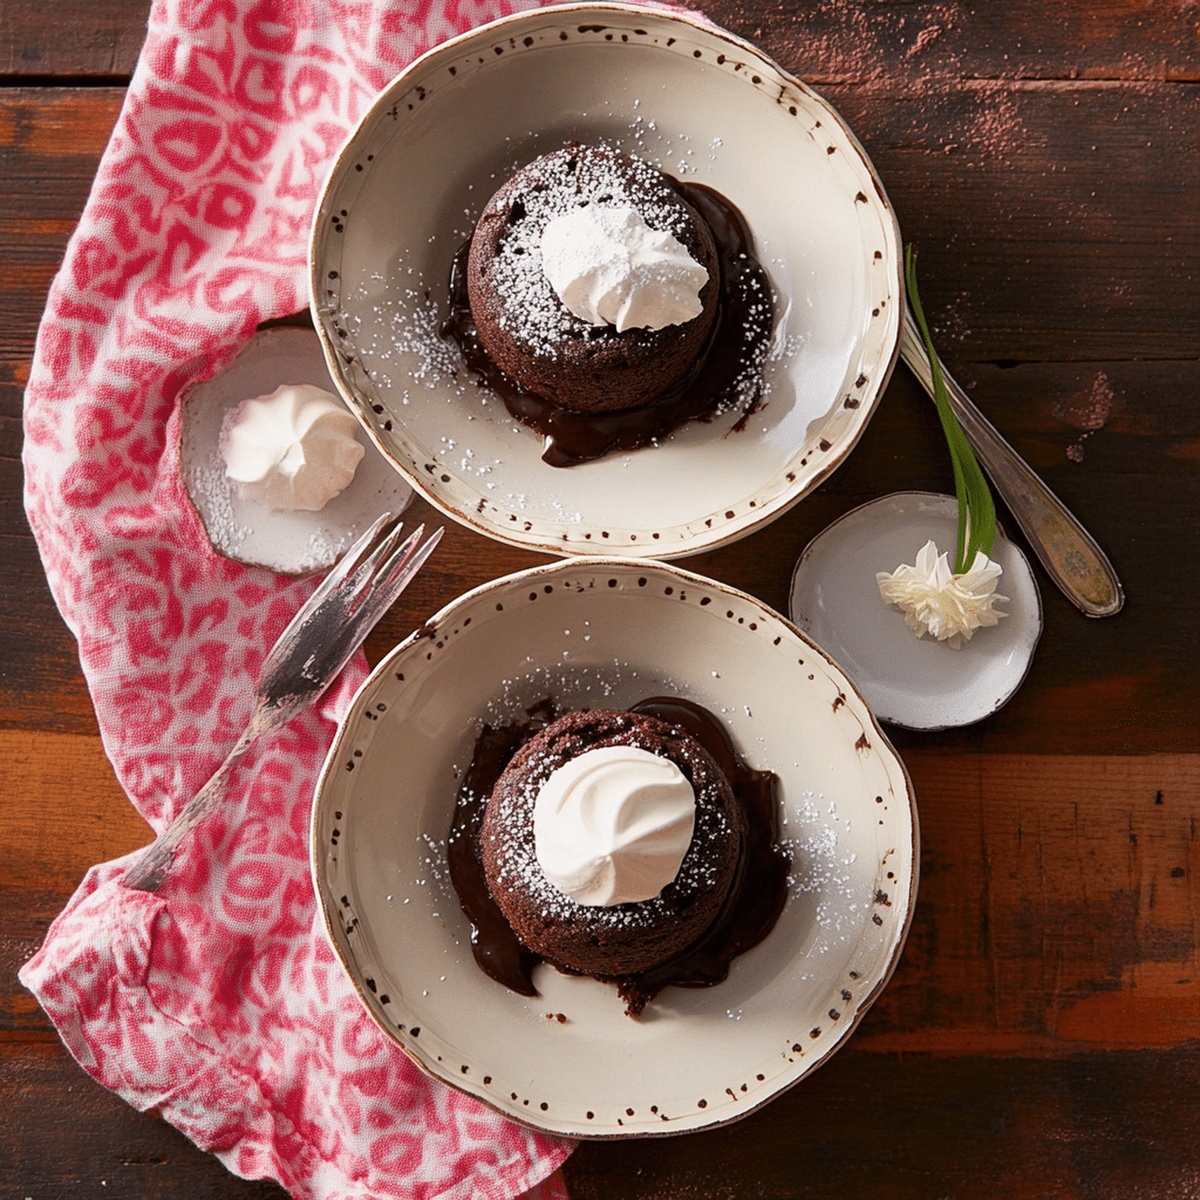
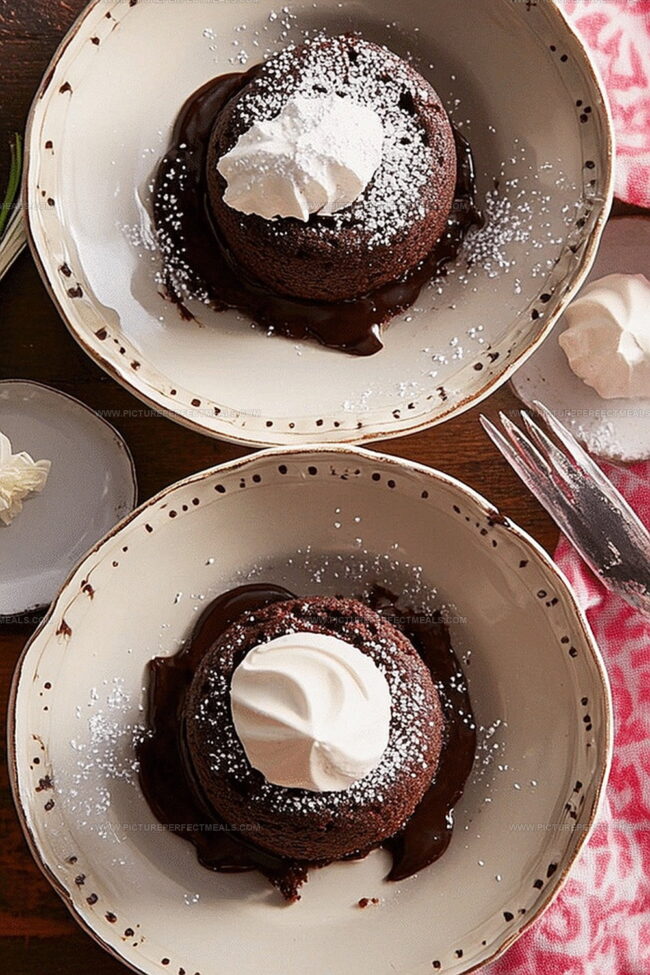
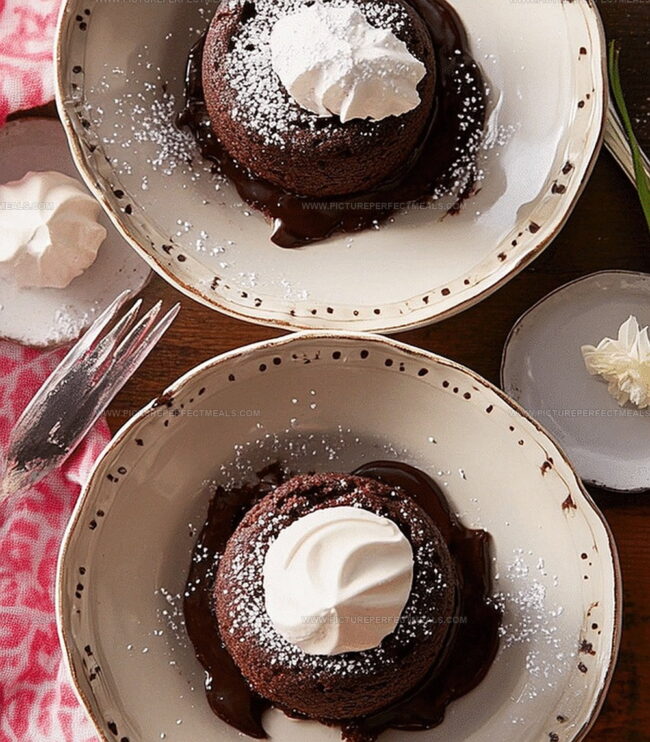
Each bite reveals a warm, velvety chocolate interior that melts luxuriously on the tongue.

The contrast between the tender cake exterior and liquid chocolate core creates an irresistible sensory experience.

These elegant desserts look impressive but come together surprisingly quickly with basic ingredients.

You’ll fall in love with how simple yet sophisticated these lava cakes can be.

Prepare to indulge in a chocolate lover’s ultimate dream.

Quick Recipe Overview

Quick Recipe Overview
  • Prep Time: 10 minutes
  • Cook Time: 12 minutes
  • Total Time: 22 minutes
  • Calories: 490 kcal
  • Servings: 2

Inside the Pantry for Chocolate Lava Cakes

For Chocolate Base:
  • Dark Chocolate: Provides rich, intense flavor and creates the signature molten center.
  • Unsalted Butter: Adds smoothness and helps create a silky chocolate mixture.
For Binding and Structure:
  • Eggs, Egg Yolks: Help bind ingredients and create a luxurious, creamy texture.
  • Granulated Sugar: Sweetens and helps stabilize the egg mixture.
  • All-Purpose Flour: Provides structure and helps hold the cake together.
For Serving and Finishing:
  • Cocoa Powder: Used for dusting ramekins and adds extra chocolate depth.
  • Powdered Sugar: Creates an elegant finishing touch and adds subtle sweetness.
  • Vanilla Ice Cream: Optional garnish that complements the warm chocolate cake.
  • Fresh Berries: Adds a burst of freshness and color contrast to the rich dessert.

Lava Cake Tools Guide

  • Electric Mixer: Perfect for whisking eggs and sugar to a pale, creamy consistency.
  • Double Boiler or Microwave: Essential for melting chocolate and butter smoothly without burning.
  • Ramekins (4): Crucial for creating individual lava cakes with perfect shape and size.
  • Baking Sheet: Helps transfer ramekins to and from the oven with ease.
  • Whisk: Great for combining eggs, sugar, and folding ingredients gently.
  • Sifter: Ensures flour is evenly distributed without lumps.
  • Small Knife: Helps loosen cakes from ramekins for a clean release.
  • Mixing Bowls (2): One for melting chocolate, another for egg mixture.
  • Measuring Cups and Spoons: Accurate for precise ingredient quantities.

How to Cook Chocolate Lava Cakes

How to Cook Chocolate Lava Cakes
  • Fire Up the Oven

Crank the oven to a toasty 425F. Grab your ramekins and give them a butter massage, then dust with cocoa powder like you’re sprinkling magic powder.

  • Chocolate Meltdown

Toss chocolate and butter into a bowl. Create a steamy bath or zap in microwave, stirring every 20 seconds until silky smooth. Let it chill for a moment.

  • Whip Up the Magic

Beat eggs, yolks, and sugar until they transform into a fluffy cloud. Gently swirl in the chocolate mixture like you’re painting a delicious masterpiece. Sift flour and fold softly until just combined.

  • Fill and Prepare

Pour the velvety batter into ramekins, filling them about three-quarters full. Line them up on a baking sheet, ready for their moment of glory.

  • Bake to Perfection

Slide the tray into the oven and bake for 12-14 minutes. You want edges that look set but centers that wiggle like a belly laugh.

  • Unveil and Enjoy

Wait one minute, then run a knife around the edges. Flip onto plates with a dramatic flourish. Sprinkle with powdered sugar, maybe add some berries or a scoop of ice cream. Dive in while it’s hot and molten!

Smart Notes for Chocolate Lava Cakes

  • Chocolate Lava Cake Cooking Tips & Variations
  • Chocolate Quality Matters: Use high-quality dark chocolate with at least 60% cocoa content for rich, intense flavor that elevates the entire dessert.
  • Perfect Timing Technique: Watch the baking time carefully – even 30 seconds can transform a molten center into a fully cooked cake, so set a timer and check frequently.
  • Make-Ahead Magic: Prepare the batter up to 24 hours in advance and refrigerate in ramekins, then bake directly from the cold state for convenient entertaining.
  • Gluten-Free Adaptation: Replace wheat flour with almond flour or gluten-free flour blend to make this decadent dessert suitable for those with wheat sensitivities.
  • Flavor Twist Options: Experiment with adding a dash of espresso powder, orange zest, or a splash of liqueur like Grand Marnier to create unique flavor profiles that complement the chocolate.

Best Way to Serve Chocolate Lava Cakes

  • Berry Bliss Topping: Sprinkle fresh raspberries, strawberries, or blueberries around the lava cake to add a burst of tangy freshness that complements the rich chocolate.
  • Ice Cream Dream: Top the warm chocolate lava cake with a scoop of creamy vanilla ice cream, letting the cold scoop melt slightly into the hot chocolate center for a decadent contrast.
  • Nutty Crunch Delight: Scatter toasted almond slivers or chopped hazelnuts over the cake to introduce a satisfying crunch and nutty depth to the dessert’s silky texture.
  • Caramel Drizzle Magic: Swirl a light drizzle of salted caramel sauce over the lava cake, creating a luxurious layer that enhances the chocolate’s deep, complex flavor profile.

Store Your Lava Cakes Wisely

  • Fridge Fresh Tactics: Store leftover chocolate lava cakes in an airtight container inside the refrigerator for up to 2 days. Wrap each cake individually in plastic wrap to maintain moisture and prevent flavor absorption.
  • Quick Reheat Magic: Warm individual cakes in the microwave for 10-15 seconds to restore their gooey center. Avoid overheating, which can dry out the delicate texture and melt the luscious chocolate core.
  • Make-Ahead Brilliance: Prepare batter up to 24 hours in advance and refrigerate in sealed ramekins. Remove from refrigerator 30 minutes before baking to allow mixture to reach room temperature for perfect consistency.
  • Freezer Stash Strategy: Unbaked lava cake batter can be frozen for up to 1 month. Thaw overnight in the refrigerator before baking. Transfer directly from refrigerator to preheated oven for best results, maintaining the cake’s signature molten center.
Print
clock clock iconcutlery cutlery iconflag flag iconfolder folder iconinstagram instagram iconpinterest pinterest iconfacebook facebook iconprint print iconsquares squares iconheart heart iconheart solid heart solid icon
Molten Chocolate Lava Cakes Recipe

Molten Chocolate Lava Cakes Recipe


5 Stars 4 Stars 3 Stars 2 Stars 1 Star

4.9 from 28 reviews

  • Total Time: 22 minutes
  • Yield: 3 1x

Description

Indulgent chocolate lava cakes reveal molten chocolate centers that melt with rich, velvety perfection. French pastry chefs craft these elegant desserts with carefully balanced ingredients for a luxurious experience you’ll savor completely.


Ingredients

Scale
  • 6 oz (170g) semi-sweet or dark chocolate, chopped
  • ½ cup (115g) unsalted butter
  • 2 large eggs
  • 2 large egg yolks
  • ¼ cup (50g) granulated sugar
  • 2 tbsps (15g) all-purpose flour
  • Unsalted butter, extra for greasing ramekins
  • Cocoa powder, for dusting ramekins

Instructions

  1. Preparation: Meticulously butter four ramekins and dust with cocoa powder, ensuring complete coverage. Tap out excess powder to create a non-stick surface.
  2. Chocolate Base: Melt dark chocolate and butter using a double boiler, stirring until achieving a glossy, uniform consistency. Allow mixture to cool slightly, preventing potential overheating.
  3. Egg Mixture: Whisk eggs, egg yolks, and sugar until the mixture becomes pale and significantly thickened, creating a light, airy texture that forms the cake’s foundational structure.
  4. Batter Composition: Gently fold the warm chocolate mixture into the egg mixture, carefully sifting flour over the liquid ingredients. Incorporate minimally to maintain a luxurious, tender texture without deflating the delicate egg foam.
  5. Baking Process: Transfer ramekins to a baking sheet, filling each about three-quarters full. Place in a preheated oven at 425F (220C) for 12-14 minutes, monitoring for set edges with slightly trembling centers.
  6. Serving: Remove from oven and let rest momentarily. Loosen edges with a thin knife, then invert onto serving plates with a confident motion. Garnish with a light dusting of powdered sugar.
  7. Presentation: Serve immediately, optionally accompanying with fresh berries, whipped cream, or a scoop of vanilla ice cream to enhance the rich chocolate experience.

Notes

  • Prevent Chocolate Seizing: Melt chocolate and butter at low heat to avoid burning, ensuring a smooth, glossy texture without graininess.
  • Master Egg Whipping Technique: Whisk eggs and sugar vigorously until pale and thick, creating a light, airy base that helps achieve the perfect lava cake consistency.
  • Precise Baking Time Matters: Watch carefully during the 12-14 minute baking window; slight underbaking creates the signature molten center while preventing a dry, cakey texture.
  • Customize for Dietary Needs: Substitute gluten-free flour for a celiac-friendly version, or use dark chocolate with 70% cocoa for a lower-sugar alternative that doesn’t compromise on rich chocolate flavor.
  • Prep Time: 10 minutes
  • Cook Time: 12 minutes
  • Category: Desserts
  • Method: Baking
  • Cuisine: French

Nutrition

  • Serving Size: 3
  • Calories: 408
  • Sugar: 17g
  • Sodium: 35mg
  • Fat: 30g
  • Saturated Fat: 18g
  • Unsaturated Fat: 12g
  • Trans Fat: 0g
  • Carbohydrates: 33g
  • Fiber: 1g
  • Protein: 6g
  • Cholesterol: 186mg

Jenna Hartley

Jenna Hartley

Founder & Recipe Creator

Expertise

  • Recipe development with a focus on single-dish meals.
  • Fusion of traditional and modern Australian cuisines.
  • Food styling and photography for digital platforms.​

Education

Box Hill Institute, Melbourne

  • Degree: Advanced Diploma of Hospitality Management
  • Focus: Specialized in practical food and beverage service, responsible alcohol and hygiene compliance, legal risk management, and hands‑on experience in a simulated restaurant environment.

William Angliss Institute, Melbourne

  • Program: Certificate IV in Patisserie
  • Focus: Specialized in pastry and bakery techniques, cookery and specialty food preparation, recipe planning and costing, commercial kitchen operations, sustainable and inclusive work practices, food safety and hygiene compliance, and workplace health and safety.

Jenna is the heart of Picture Perfect Meals, turning simple ingredients into beautiful, easy‑to‑make dishes. 

Growing up around family meals in Melbourne, she trained at Box Hill Institute and then perfected her pastry skills at William Angliss Institute. She loves mixing classic Australian flavors with fresh ideas to keep cooking fun and stress‑free.

Leave a Reply

Your email address will not be published. Required fields are marked *

Recipe rating 5 Stars 4 Stars 3 Stars 2 Stars 1 Star