No-Bake Candy Cane Pie Recipe

Jolly No-Bake Candy Cane Pie Recipe: Festive & Sweet Delight

Sweet secrets merge delightfully in this no-bake candy cane pie that promises winter magic without heating the kitchen.

Peppermint whispers through creamy layers, creating a dessert that dazzles with minimal effort.

Cold preparation means you can whip up this festive treat in minutes.

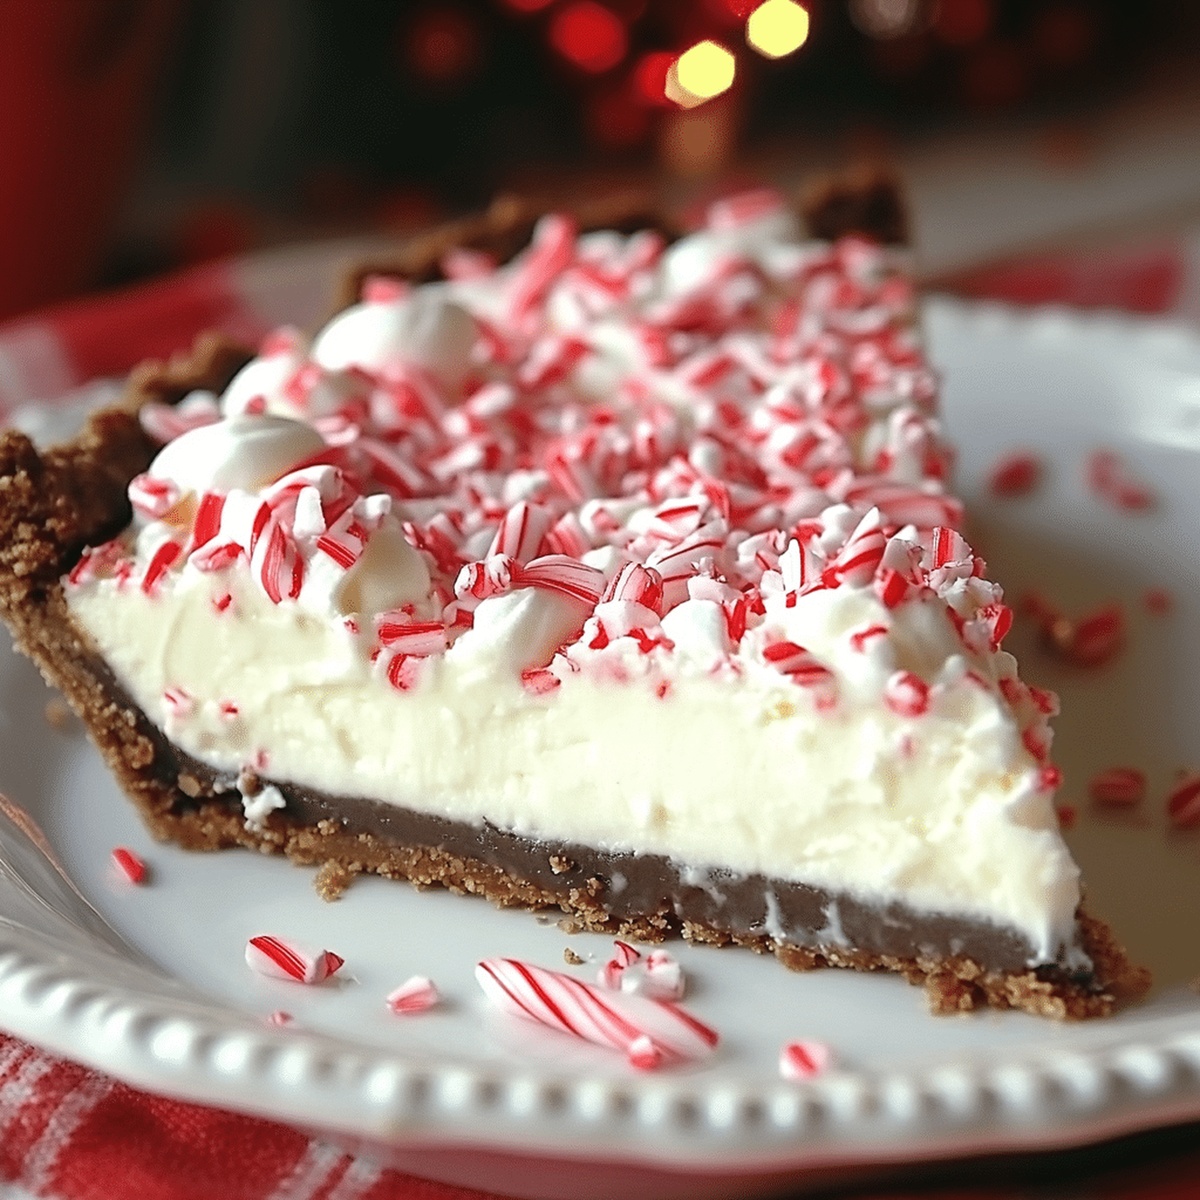
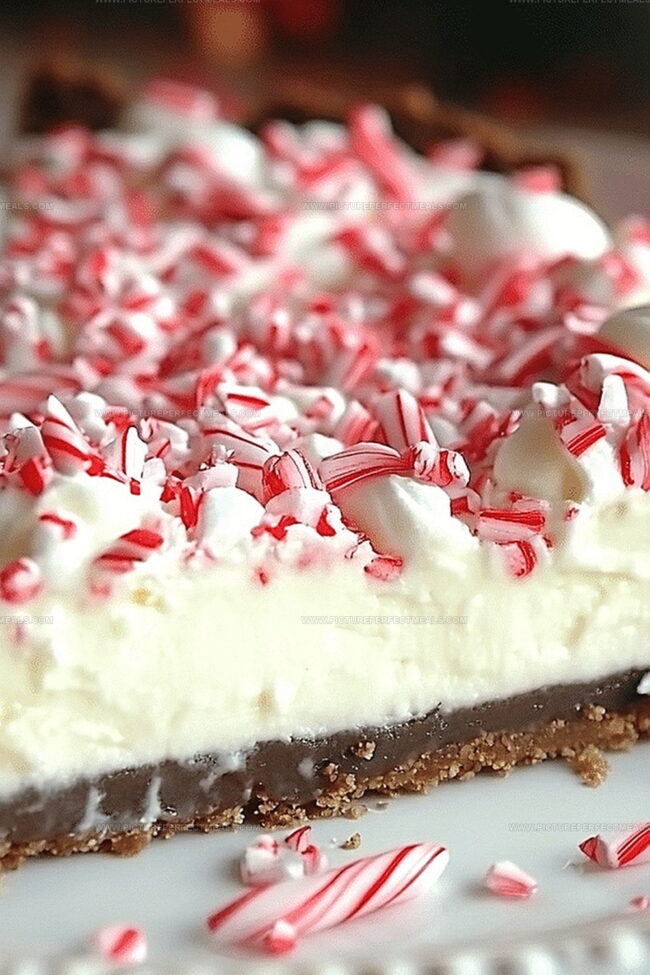
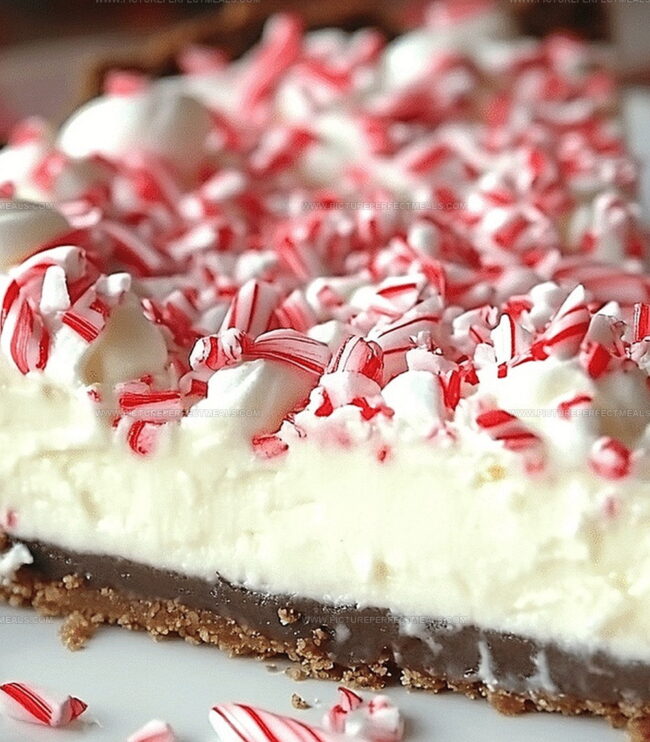
Chocolate crumb crusts provide a rich foundation for the cool, minty filling.

Imagine surprising guests with a dessert that looks complicated but comes together effortlessly.

Delicate candy cane pieces scattered across the top add a playful crunch and festive charm.

You’ll absolutely love how simple yet impressive this pie becomes when served.

Store Candy Cane Pie for Later Enjoyment

  • Store the No-Bake Candy Cane Pie in an airtight container or cover tightly with plastic wrap for up to 5 days in the refrigerator.
  • Wrap the entire pie or individual slices in plastic wrap and aluminum foil, then freeze for up to 2 months. Thaw overnight in the refrigerator before serving.
  • This pie is best enjoyed chilled and does not require reheating. Let it sit at room temperature for 5-10 minutes before serving to soften slightly.
  • Keep the pie away from strong-smelling foods in the refrigerator to prevent flavor absorption and maintain its fresh peppermint taste.

Drinks and Sweets to Serve with This Pie

  • A warm, rich peppermint hot chocolate complements the cool, creamy pie with matching mint notes and chocolate undertones.
  • A light champagne or sparkling white wine with orange zest cuts through the pie's sweetness and provides a crisp, elegant contrast.
  • A smooth espresso or cappuccino balances the pie's rich texture and enhances the peppermint flavor with its roasted, creamy profile.
  • Bailey's Irish Cream or a peppermint cream liqueur offers a decadent pairing that echoes the pie's festive holiday spirit and creamy consistency.

Candy Cane Pie Styles You’ll Want to Make

Gluten-Free Candy Cane Pie: Replace chocolate cookie crumbs with gluten-free graham crackers or almond flour cookies for a celiac-friendly version.

Vegan Peppermint Dream Pie: Substitute cream cheese with cashew-based cream cheese, use coconut whipped cream instead of dairy whipped topping, and select vegan candy canes.

Low-Sugar Chocolate Mint Pie: Use sugar-free cream cheese, replace powdered sugar with monk fruit sweetener, and incorporate dark chocolate cookie crumbs for reduced sugar content.

Dairy-Free Holiday Pie: Swap cream cheese with coconut cream cheese, use coconut whipped topping, and select plant-based butter for the crust to accommodate dairy-free diets.

Why No-Bake Candy Cane Pie Brings Cheer

  • Zero oven time means you'll create a showstopping dessert in under 30 minutes, perfect for busy holiday schedules.
  • Peppermint and chocolate combine in a creamy, dreamy treat that delivers classic Christmas taste without complicated techniques.
  • Kids can help crush candy canes and spread toppings, making this recipe an interactive and memorable holiday cooking experience.
  • Make ahead and chill, which means less last-minute kitchen chaos and more time enjoying celebrations with loved ones.

What to Gather for Candy Cane Pie

Crust Base:
  • Chocolate Cookie Crumbs: The foundation of the pie crust, providing a rich chocolate flavor and crunchy texture. Dark or regular chocolate cookies work best.
  • Melted Butter: Binds the cookie crumbs together, creating a solid and compact crust. Unsalted butter recommended for better control of saltiness.
Filling Base:
  • Cream Cheese: Creates a smooth and creamy texture for the pie filling. Full-fat cream cheese ensures the best consistency.
  • Powdered Sugar: Adds sweetness and helps stabilize the filling. Sifted sugar prevents lumps in the mixture.
  • Peppermint Extract: Provides a cool, minty flavor characteristic of candy cane desserts. Use pure extract for the most intense flavor.
Topping and Decoration:
  • Whipped Topping, Candy Canes: Adds a festive look and classic peppermint flavor to the pie. Crush candy canes finely for better distribution. Use fresh, crisp candy canes for the best texture and flavor.

How to Assemble a No-Bake Holiday Pie

Step 1: Build the Chocolate Cookie Base

  • Grab chocolate cookie crumbs
  • Melt butter
  • Mix crumbs and butter thoroughly
  • Press mixture into pie pan, covering bottom and sides
  • Chill in refrigerator for 10-15 minutes

Step 2: Whip Up Creamy Peppermint Filling

  • Take cream cheese
  • Add powdered sugar
  • Beat mixture until silky smooth
  • Sprinkle in peppermint extract
  • Crush candy canes
  • Fold in candy cane pieces
  • Gently incorporate whipped topping

Step 3: Craft the Pie Design

  • Transfer filling into chilled chocolate crust
  • Smooth surface with spatula
  • Spread additional whipped topping across pie
  • Garnish with extra crushed candy canes

Step 4: Chill and Enjoy

  • Place pie in refrigerator
  • Let sit for minimum 2 hours
  • Slice into delightful portions
  • Serve cold and savor the minty chocolate sensation

Candy Cane Pie Tips for a Chill Treat

  • Crush Cookies Perfectly: Use a food processor or place cookies in a sealed bag and crush with a rolling pin for uniform, fine crumbs that create a smooth, compact crust.
  • Control Peppermint Intensity: Adjust peppermint extract amount based on personal preference; start with less and taste, gradually adding more for desired mint flavor.
  • Achieve Creamy Consistency: Ensure cream cheese is at room temperature before mixing to prevent lumps and create a silky, smooth filling texture.
  • Decorate with Precision: Chill candy canes before crushing to prevent sticky clumping and create clean, crisp pieces for elegant pie topping.
  • Make Ahead Strategically: Prepare pie up to 2 days in advance and store covered in refrigerator to enhance flavor and save time during holiday entertaining.
Print
clock clock iconcutlery cutlery iconflag flag iconfolder folder iconinstagram instagram iconpinterest pinterest iconfacebook facebook iconprint print iconsquares squares iconheart heart iconheart solid heart solid icon
No-Bake Candy Cane Pie Recipe

No-Bake Candy Cane Pie Recipe


5 Stars 4 Stars 3 Stars 2 Stars 1 Star

4.7 from 16 reviews

  • Total Time: 2 hours 15 minutes
  • Yield: 8 1x

Description

Sweet holiday magic sparkles in this no-bake candy cane pie, blending peppermint’s cool crunch with creamy richness. Festive dessert lovers will savor each silky slice, celebrating winter’s most delightful flavor combination.


Ingredients

Scale

Main Ingredients:

  • 1 (8 ounces / 226 grams) package cream cheese, softened
  • 2 cups whipped topping (like Cool Whip)
  • 1 ½ cups chocolate cookie crumbs (such as Oreo, finely crushed)

Sweetening and Flavoring Ingredients:

  • 1 cup powdered sugar
  • ¼ cup crushed candy canes (plus extra for garnish)
  • 1 teaspoon peppermint extract

Binding and Crust Ingredients:

  • ¼ cup unsalted butter, melted
  • ½ cup whipped topping (additional, for garnish)
  • Crushed candy canes or peppermint pieces

Instructions

  1. Craft a rich chocolate cookie foundation by blending cookie crumbs with melted butter, ensuring a thorough and even mixture.
  2. Gently press the crumb mixture into a 9-inch pie pan, meticulously covering the bottom and sides with uniform pressure.
  3. Refrigerate the crust for 10-15 minutes to solidify its structure and enhance its stability.
  4. In a spacious mixing bowl, whip cream cheese and powdered sugar until achieving a silky, lump-free consistency.
  5. Infuse the cream cheese mixture with vibrant peppermint extract, creating an aromatic and refreshing flavor profile.
  6. Incorporate crushed candy canes into the cream cheese blend, distributing them evenly throughout the filling.
  7. Delicately fold whipped topping into the mixture, maintaining a light and airy texture.
  8. Transfer the peppermint-infused filling into the chilled chocolate cookie crust, using a spatula to create a smooth, elegant surface.
  9. Embellish the pie’s top with additional whipped topping, either spreading or piping for an artistic presentation.
  10. Garnish with a generous sprinkle of crushed candy canes, adding a festive and decorative touch.
  11. Refrigerate the pie for a minimum of 2 hours, allowing the filling to set and flavors to meld together.
  12. Serve the chilled pie, revealing a luxurious no-bake dessert perfect for holiday celebrations.

Notes

  • Crush cookies finely for a smooth, compact crust that holds together perfectly without crumbling.
  • Soften cream cheese at room temperature to ensure a silky, lump-free filling that blends seamlessly.
  • Adjust peppermint extract carefully to balance intense flavor without overwhelming the dessert’s delicate taste.
  • Make this pie gluten-free by substituting chocolate cookie crumbs with gluten-free chocolate wafer cookies or almond flour-based crumbs.
  • Prep Time: 15 minutes
  • Cook Time: 2 hours
  • Category: Desserts, Snacks
  • Method: None
  • Cuisine: American

Nutrition

  • Serving Size: 8
  • Calories: 360
  • Sugar: 30 g
  • Sodium: 210 mg
  • Fat: 24 g
  • Saturated Fat: 14 g
  • Unsaturated Fat: 8 g
  • Trans Fat: 0 g
  • Carbohydrates: 35 g
  • Fiber: 1 g
  • Protein: 3 g
  • Cholesterol: 40 mg
Daves Miller

Daves Miller

Contributing Chef & Culinary Educator

Expertise

  • American Southern cuisine with a modern twist.
  • Instruction in culinary fundamentals and advanced techniques.
  • Development of recipes that highlight seasonal and local produce.​
  • Mastery of artisanal bread and pastry techniques, from laminated doughs to decorative sugar artistry.

Education

Sullivan University, Louisville, Kentucky

  • Degree: Associate of Science Degree in Culinary Arts
  • Focus: Specialized in cooking techniques and culinary sciences, hands‑on externships, professional kitchen lab training, and career preparation for restaurants, entrepreneurship, and global culinary opportunities.

White Mountains Community College, Berlin, New Hampshire

  • Program: Baking and Pastry Arts degree
  • Focus: Specialized in comprehensive baking and pastry arts, including bread making, artisan breads, cake decorating and design, chocolates, confections, and decorative centerpieces; product development and baking theory; and career preparation for baker and pastry chef roles in many places.

Daves is the friendly face guiding you through flavorful, fuss-free recipes at Picture Perfect Meals. 

He studied culinary arts at Sullivan University and embraced Baking and Pastry Arts at White Mountains Community College. Daves specializes in comforting meals with vibrant flavors, highlighting fresh, seasonal ingredients.

Leave a Reply

Your email address will not be published. Required fields are marked *

Recipe rating 5 Stars 4 Stars 3 Stars 2 Stars 1 Star