
Irresistible No-Bake Thin Mint Cookie Truffles Recipe
Sweet childhood memories of thin mint cookie truffles dance across my kitchen counter, promising a delightful no-bake dessert that whispers pure nostalgia.
My favorite Girl Scout cookie transforms into something magical and decadent.
Chocolate lovers will adore these bite-sized treats that come together in minutes without turning on the oven.
Creamy chocolate and crisp mint create an irresistible combination that melts smoothly on your tongue.
Rich ganache enrobes crumbled cookies, creating elegant little confections perfect for sharing.
Quick and simple ingredients blend seamlessly into a dessert that feels unexpectedly sophisticated.
You’ll want to make a double batch because these truffles disappear faster than you can imagine.
Grab a mixing bowl and let’s create something deliciously unforgettable.
Thin Mint Cookie Truffles That Cool and Satisfy
What You’ll Need for No-Bake Mint Truffles
Cookies and Crumbs:Binding Ingredients:Coating and Decoration:How to Make Smooth, Minty Cookie Centers
Step 1: Crush The Cookies
Toss Thin Mint cookies into a food processor. Pulse the cookies until they transform into fine, velvety crumbs. Set aside a small portion of these crumbs for a delightful garnish later.
Step 2: Blend Creamy Mixture
In a mixing bowl, combine:Mix the ingredients thoroughly until a smooth, uniform dough forms. The mixture should feel slightly sticky and hold together when pressed.
Step 3: Shape Delightful Truffles
Use clean hands to roll the mixture into small, bite-sized balls. Place each truffle on a parchment-lined baking sheet. Aim for consistent sizes to ensure even coating and presentation.
Step 4: Chill And Set
Transfer the baking sheet to the refrigerator. Let the truffles cool and firm up for about 15-20 minutes. This step helps them maintain their shape during the next stage.
Step 5: Melt Chocolate Coating
In a microwave-safe bowl, melt chocolate chips. Heat in short 15-second intervals, stirring between each burst to prevent burning. Continue until the chocolate is completely smooth and glossy.
Step 6: Dip And Decorate
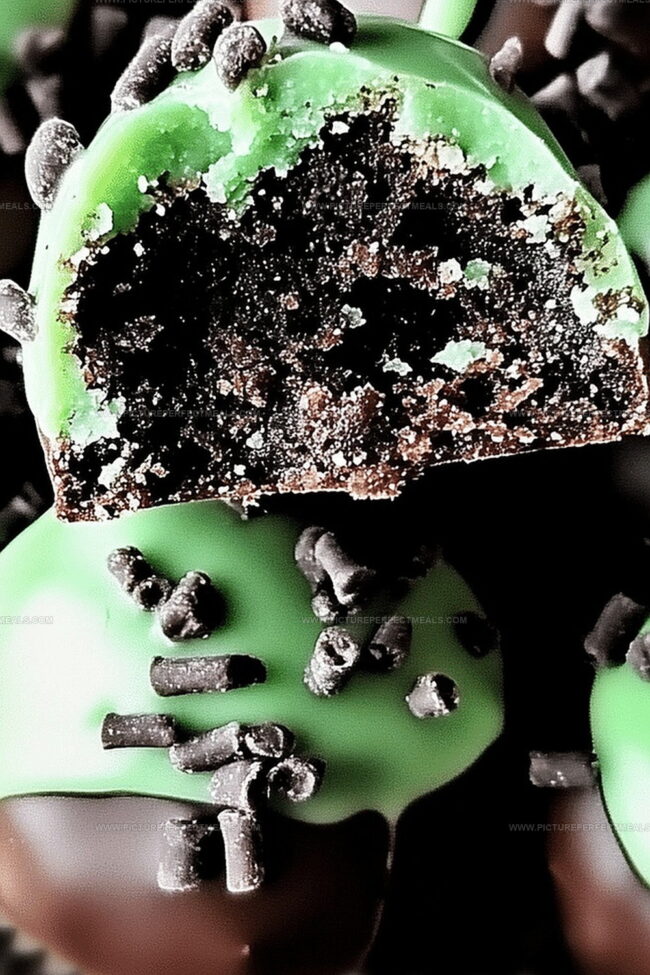
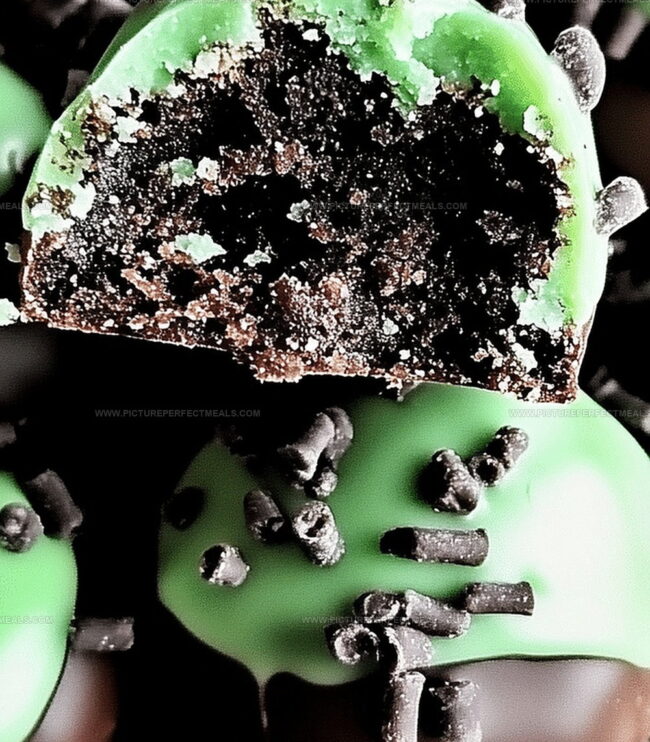
Carefully dip each chilled truffle into the melted chocolate, using a fork to help coat evenly. Gently tap off excess chocolate. Sprinkle reserved cookie crumbs on top for a beautiful finishing touch.
Step 7: Final Chill
Return the chocolate-covered truffles to the refrigerator. Allow them to set completely for about 10 minutes until the chocolate hardens. Serve chilled and enjoy your irresistible Thin Mint truffles!
Tips for Dipping and Chilling Just Right
Keep Truffles Tasting Fresh and Minty
Pair These with Drinks for Dessert Platters
Mint Truffle Mix-Ins You Can Try
Print
No-Bake Thin Mint Cookie Truffles Recipe
- Total Time: 1 hour 5 minutes
- Yield: 16 1x
Description
Indulgent no-bake thin mint cookie truffles bring a delightful twist to classic Girl Scout cookie flavors. Chocolate-coated mint morsels melt effortlessly on your palate, offering a cool, crisp escape into sweet bliss.
Ingredients
Main Ingredients:
- 1 box (9 ounces or 255 grams) Thin Mint cookies
- 4 ounces (115 grams) cream cheese
- 8 ounces (225 grams) semi-sweet or dark chocolate
Garnish and Decorative Ingredients:
- ¼ cup (40 grams) crushed Thin Mint cookies or white chocolate drizzle or sprinkles (optional)
Instructions
- Crush Thin Mint cookies in a food processor until they transform into a uniform, fine powder-like texture.
- Transfer the cookie crumbs to a mixing bowl, ensuring smooth, consistent ground texture.
- Incorporate cream cheese into the cookie crumbs, blending thoroughly until a cohesive, moldable mixture develops.
- Roll the combined mixture into compact, uniform spherical shapes, using gentle pressure to create smooth truffles.
- Place the formed truffles on a parchment-lined tray, then transfer to the refrigerator for initial chilling.
- Melt chocolate in a double boiler or microwave, stirring until achieving a silky, glossy consistency.
- Carefully immerse each chilled truffle into the melted chocolate, ensuring complete and even coating.
- Gently lift truffles from chocolate using a fork, allowing excess to drip back into the chocolate vessel.
- Delicately sprinkle reserved cookie crumbs atop each chocolate-covered truffle for decorative garnish.
- Return the decorated truffles to the refrigerator, allowing them to set and solidify for approximately 15 minutes.
- Once chocolate has hardened, transfer truffles to a serving platter and enjoy the decadent, cool treat.
Notes
- Pulse cookies carefully to avoid over-processing, which can make the mixture too dense and compact for perfect truffle texture.
- For gluten-free option, substitute Thin Mint cookies with gluten-free chocolate mint cookies or make a homemade version using gluten-free chocolate wafers.
- Chill truffles for at least 30 minutes before serving to help them set firmly and develop a more intense flavor profile.
- If food processor isn’t available, place cookies in a sealed plastic bag and crush with a rolling pin for a similar fine crumb consistency.
- Prep Time: 15 minutes
- Cook Time: 50 minutes
- Category: Desserts, Snacks
- Method: Blending
- Cuisine: American
Nutrition
- Serving Size: 16
- Calories: 170
- Sugar: 10 g
- Sodium: 120 mg
- Fat: 10 g
- Saturated Fat: 5 g
- Unsaturated Fat: 4.5 g
- Trans Fat: 0 g
- Carbohydrates: 19 g
- Fiber: 1 g
- Protein: 2 g
- Cholesterol: 20 mg
Daves Miller
Contributing Chef & Culinary Educator
Expertise
Education
Sullivan University, Louisville, Kentucky
White Mountains Community College, Berlin, New Hampshire
Daves is the friendly face guiding you through flavorful, fuss-free recipes at Picture Perfect Meals.
He studied culinary arts at Sullivan University and embraced Baking and Pastry Arts at White Mountains Community College. Daves specializes in comforting meals with vibrant flavors, highlighting fresh, seasonal ingredients.