No-Bake Three Chocolate Cake Recipe

No-Bake Three Chocolate Cake Recipe Dreamy Dessert Delight

Chocolate dreams come alive in this decadent no-bake three chocolate cake that promises pure indulgence without switching on your oven.

Sweet layers of creamy textures will make your dessert cravings dance with excitement.

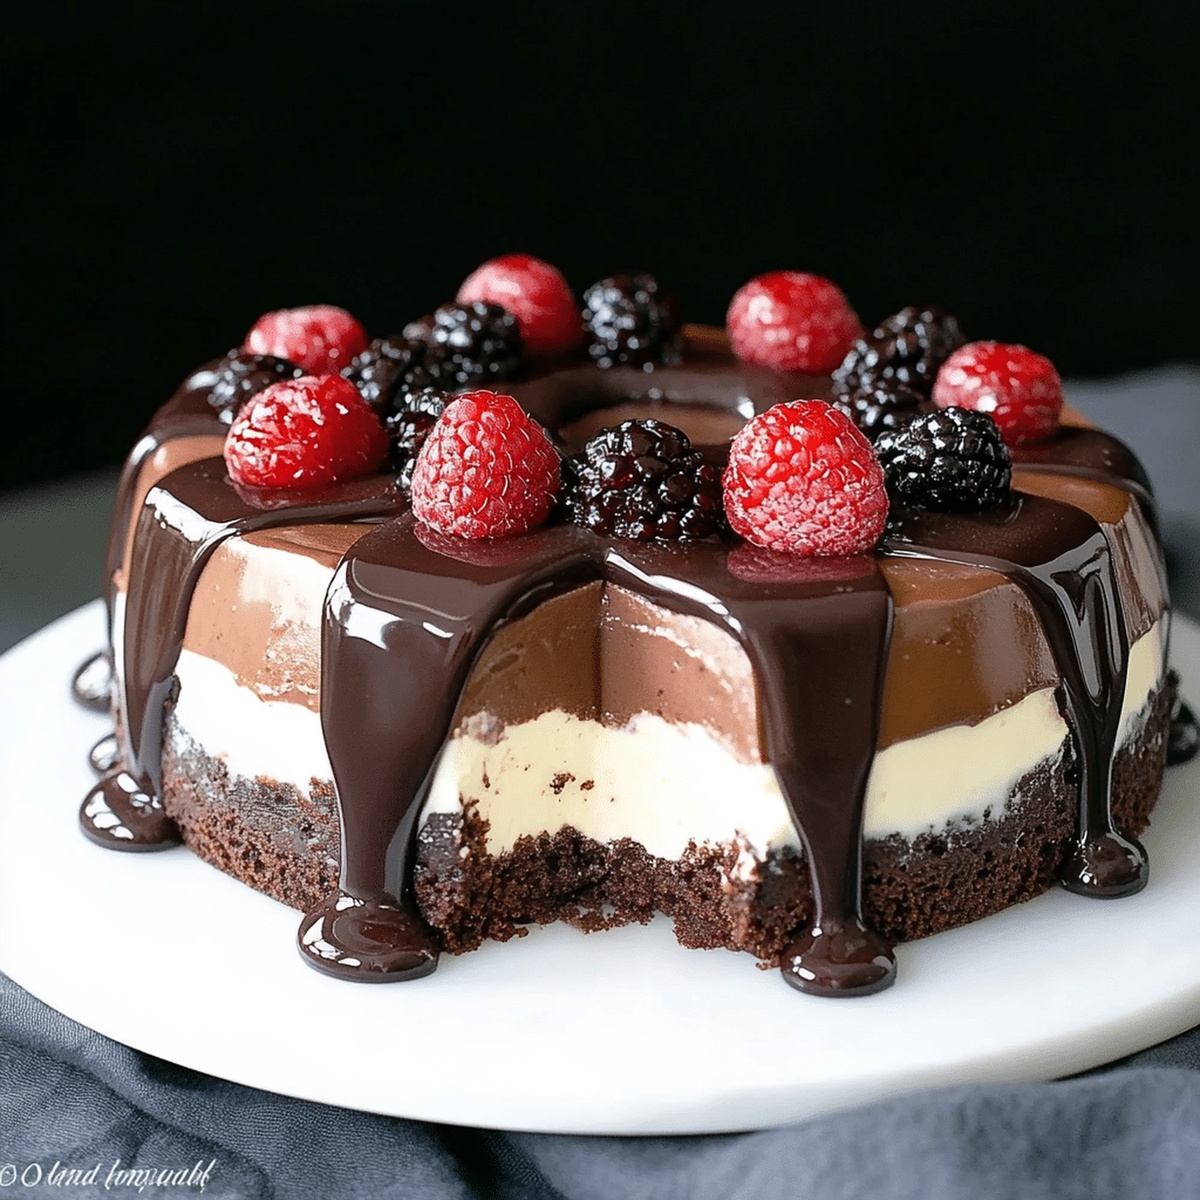
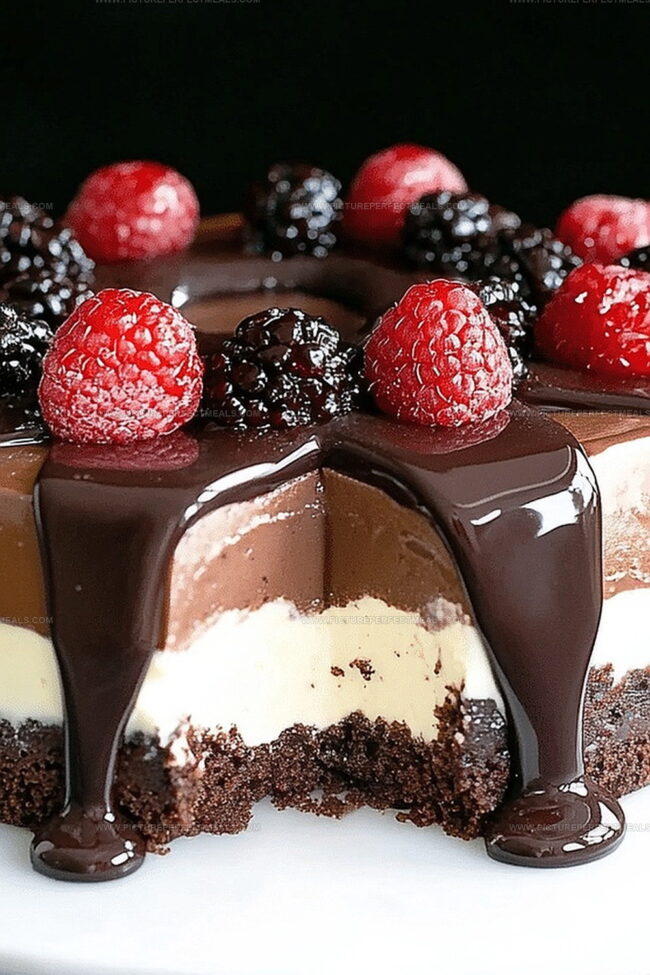
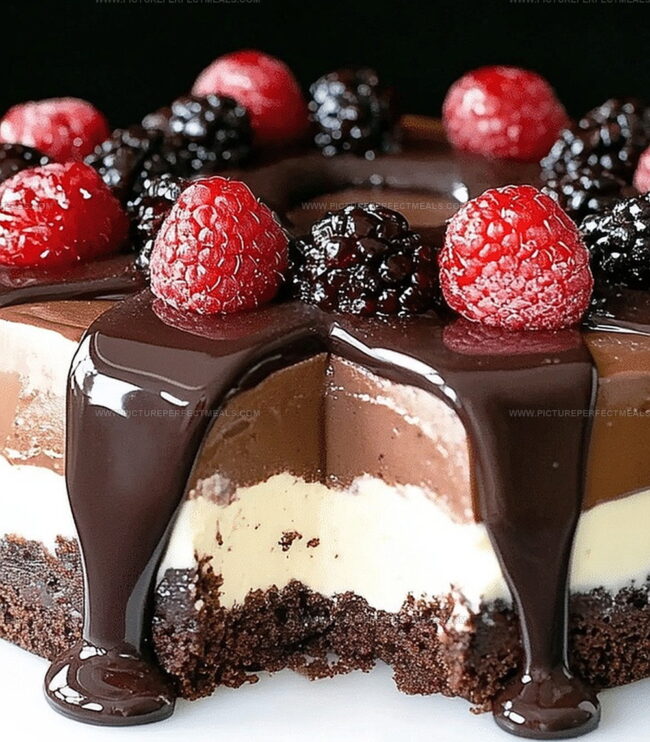
Each silky slice brings together dark, milk, and white chocolate in a mesmerizing symphony of flavors.

Minimal effort creates maximum impact with this simple yet stunning treat.

Chocolate lovers will swoon over the rich, velvety combination that melts effortlessly on your tongue.

Cool and luxurious, this dessert feels like a celebration of chocolate in its most elegant form.

Prepare to impress everyone with a recipe that looks complicated but requires surprisingly little skill.

No-Bake Three Chocolate Cake That’s Pure Indulgence

  • Perfect for beginners and novice bakers with simple step-by-step instructions that require zero oven time.
  • Assembles in under 3 hours, including chilling periods, making it an ideal dessert for spontaneous sweet cravings or last-minute gatherings.
  • Combines three rich chocolate varieties (milk, dark, white) creating a decadent layered experience that satisfies every chocolate enthusiast's palate.
  • Elegant enough for special occasions like birthdays or dinner parties, yet easy enough for casual weekend treats that everyone will adore.

Ingredients for a Rich and Creamy Three Chocolate Cake

Base Ingredients:
  • Cookies, Graham Crackers: Crunchy foundation that provides texture and sweetness to the cake.
  • Unsalted Butter: Binds the cookie crumbs together and adds richness to the base.
Chocolate Layer Ingredients:
  • Milk Chocolate, Dark Chocolate, White Chocolate: Smooth chocolates that create distinct flavor layers with creamy texture. Choose high-quality chocolate for best results.
  • Heavy Cream: Creates light and airy texture, helps chocolate layers blend smoothly. Use fresh, cold cream for better whipping.
  • Vanilla Extract: Enhances chocolate flavors and adds subtle depth to the layers.
Preparation Ingredients:
  • Parchment Paper: Helps remove cake easily from springform pan and prevents sticking.
  • Springform Pan: Allows easy removal and elegant presentation of layered cake.

Layer Your No-Bake Three Chocolate Cake Without Fuss

Step 1: Create Crumbly Foundation

  • Graham crackers
  • Butter
  • Crush crackers into fine powder using food processor or rolling pin.
  • Combine cracker crumbs with melted butter thoroughly.
  • Press mixture evenly into springform pan lined with parchment paper.
  • Refrigerate for half an hour until firm.

Step 2: Craft Milk Chocolate Dreamy Layer

  • Milk chocolate
  • Heavy cream
  • Vanilla extract
  • Melt chocolate gently using double boiler method.
  • Whip cream until soft peaks appear.
  • Fold melted chocolate and vanilla into whipped cream smoothly.
  • Pour mixture over chilled base.
  • Spread evenly with spatula.
  • Chill for one hour until set.

Step 3: Develop Dark Chocolate Intense Layer

  • Dark chocolate
  • Heavy cream
  • Vanilla extract
  • Repeat chocolate melting process.
  • Whip cream to soft peak consistency.
  • Incorporate melted chocolate and vanilla.
  • Pour layer over milk chocolate section.
  • Smooth surface carefully.
  • Refrigerate for another hour.

Step 4: Finish with White Chocolate Elegant Topping

  • White chocolate
  • Heavy cream
  • Vanilla extract
  • Melt white chocolate carefully.
  • Whip cream until soft peaks form.
  • Gently blend melted chocolate and vanilla.
  • Spread final layer over dark chocolate section.
  • Create smooth, beautiful surface.
  • Chill entire dessert for minimum two hours.

Step 5: Serve and Enjoy

  • Remove cake from springform pan.
  • Slice with sharp knife.
  • Serve chilled and savor each decadent layer.

Tips That Keep Chocolate Layers Perfectly Set

  • Crush Cookies Thoroughly: Use a food processor for uniform, fine crumbs that create a smooth, compact base without lumps.
  • Chill Between Layers: Allow each chocolate layer to set completely in the refrigerator to prevent mixing and maintain distinct color and flavor separation.
  • Melt Chocolate Gently: Use low heat or double boiler method to prevent chocolate from burning or seizing, ensuring a silky, glossy texture.
  • Fold Cream Carefully: Incorporate whipped cream into melted chocolate using gentle folding techniques to maintain the light, airy texture and prevent deflation.
  • Temperature Matters: Ensure all ingredients are at similar temperatures to prevent splitting or grainy texture when mixing chocolate and cream.

Store Your No-Bake Cake and Keep It Ready to Slice

  • Store the no-bake chocolate cake in an airtight container in the refrigerator for up to 5 days. Keep it covered to prevent absorbing other food odors.
  • Wrap the cake tightly in plastic wrap and aluminum foil. Freeze for up to 1 month. Thaw overnight in the refrigerator before serving.
  • Cut portions before storing to make reheating and serving easier. Use a clean, sharp knife wiped with hot water for smooth slices.
  • Remove the cake from the refrigerator 10-15 minutes before serving to soften slightly and enhance the chocolate flavors.

Pair This Three Chocolate Cake with These Treats

  • Perfect Pairings
  • Dark, intense espresso cuts through the cake's sweetness, complementing each chocolate layer with a robust coffee undertone that enhances the chocolate's depth.
  • Fresh raspberries or strawberries provide a tart, bright counterpoint to the rich chocolate, creating a palate-cleansing sensation and adding vibrant color to the dessert experience.
  • A sweet port or muscatel wine matches the cake's luxurious texture, with its complex fruity notes dancing alongside the varying chocolate intensities and creating a sophisticated tasting journey.
  • Sprinkle toasted almonds or hazelnut shavings on top to introduce a delightful textural contrast and earthy undertone that elevates the chocolate's multidimensional flavors.

Add-Ons for No-Bake Chocolate Cake That Pop

  • Gluten-Free Chocolate Dream: Replace graham crackers with gluten-free cookie crumbs or almond flour base. Use certified gluten-free chocolate to ensure safe consumption for those with gluten sensitivities.
  • Vegan Chocolate Bliss: Swap dairy ingredients with coconut cream, coconut milk, and dairy-free chocolate alternatives. Use vegan butter substitutes for the base and plant-based whipping cream for layering.
  • Low-Sugar Chocolate Sensation: Utilize sugar-free chocolate varieties and replace regular chocolate with stevia-sweetened or monk fruit-sweetened chocolate. Incorporate sugar-free whipped cream alternatives for a healthier dessert option.
  • Nut-Infused Chocolate Layer Cake: Add roasted almond or hazelnut pieces between chocolate layers. Sprinkle crushed nuts on top for extra crunch and nutty flavor enhancement.
Print
clock clock iconcutlery cutlery iconflag flag iconfolder folder iconinstagram instagram iconpinterest pinterest iconfacebook facebook iconprint print iconsquares squares iconheart heart iconheart solid heart solid icon
No-Bake Three Chocolate Cake Recipe

No-Bake Three Chocolate Cake Recipe


5 Stars 4 Stars 3 Stars 2 Stars 1 Star

4.6 from 11 reviews

  • Total Time: 5 hours 30 minutes
  • Yield: 8 1x

Description

Rich chocolate layers of no-bake three chocolate cake promise pure indulgence for dessert enthusiasts. Silky smooth textures and intense cocoa flavors blend seamlessly, offering you a luxurious treat without turning on the oven.


Ingredients

Scale

Chocolate Layers:

  • 150 g (5 ounces) dark chocolate, chopped
  • 150 g (5 ounces) milk chocolate, chopped
  • 150 g (5 ounces) white chocolate, chopped
  • 600 milliliters (2 ½ cups) heavy cream, divided (200 milliliters per layer)

Base Ingredients:

  • 200 g (7 ounces) digestive biscuits or graham crackers, crushed
  • 80 g (⅓ cup) unsalted butter, melted

Gelatin and Decoration:

  • 3 teaspoons gelatin powder (1 teaspoon per layer)
  • 3 tablespoons water (1 tablespoon per layer)
  • Chocolate shavings or curls
  • Cocoa powder
  • Berries (raspberries or strawberries)

Instructions

  1. Transform graham crackers or cookies into fine, powdery crumbs using a food processor or by placing them in a sealed bag and crushing with a rolling pin.
  2. Combine the cracker crumbs with melted butter, ensuring an even, moistened texture that will hold together when pressed.
  3. Transfer the crumb mixture into a parchment-lined springform pan, carefully pressing and compacting to create a uniform base layer.
  4. Refrigerate the base for approximately half an hour, allowing it to firm and stabilize.
  5. Create the milk chocolate layer by gently melting chocolate using a double boiler, maintaining a smooth, glossy consistency.
  6. Whip heavy cream until it develops soft, billowy peaks that hold their shape when the whisk is lifted.
  7. Delicately fold the melted milk chocolate and a hint of vanilla extract into the whipped cream, preserving the light, airy texture.
  8. Spread the milk chocolate mixture evenly over the chilled base, using a spatula to achieve a level surface.
  9. Return the cake to the refrigerator for one hour to allow the layer to set completely.
  10. Repeat the melting and folding process with dark chocolate, creating a rich, intense layer.
  11. Carefully pour the dark chocolate cream over the milk chocolate layer, ensuring a smooth transition between layers.
  12. Chill the cake for another hour to solidify the dark chocolate component.
  13. Melt white chocolate using gentle heat, avoiding scorching or separation.
  14. Fold the melted white chocolate into freshly whipped cream, creating a creamy, luxurious mixture.
  15. Spread the white chocolate layer across the top, smoothing it to a pristine, even finish.
  16. Refrigerate the complete cake for a final hour to ensure all layers are perfectly set and chilled.

Notes

  • Choose cookies with complementary flavors like chocolate or graham crackers for the base to enhance overall taste complexity.
  • When crushing cookies, aim for uniform, fine crumbs to create a stable and consistent cake foundation.
  • Ensure chocolate is melted slowly and gently to prevent seizing or burning, maintaining smooth texture and rich flavor profile.
  • Use room temperature heavy cream for better whipping volume and smoother chocolate integration during layering process.
  • Test chocolate temperature before folding into whipped cream to avoid deflating the delicate cream structure.
  • Chill each layer thoroughly to create distinct, clean chocolate separation and professional-looking cake presentation.
  • For dietary modifications, substitute regular butter with vegan butter and use dairy-free chocolate alternatives for gluten-free and vegan versions.
  • Consider decorating with chocolate shavings, cocoa powder dusting, or fresh berries to elevate visual appeal and add textural contrast.
  • Prep Time: 30 minutes
  • Cook Time: 5 hours
  • Category: Desserts
  • Method: Blending
  • Cuisine: American

Nutrition

  • Serving Size: 8
  • Calories: 480
  • Sugar: 28 g
  • Sodium: 150 mg
  • Fat: 34 g
  • Saturated Fat: 21 g
  • Unsaturated Fat: 10 g
  • Trans Fat: 0 g
  • Carbohydrates: 41 g
  • Fiber: 1 g
  • Protein: 5 g
  • Cholesterol: 90 mg
Daves Miller

Daves Miller

Contributing Chef & Culinary Educator

Expertise

  • American Southern cuisine with a modern twist.
  • Instruction in culinary fundamentals and advanced techniques.
  • Development of recipes that highlight seasonal and local produce.​
  • Mastery of artisanal bread and pastry techniques, from laminated doughs to decorative sugar artistry.

Education

Sullivan University, Louisville, Kentucky

  • Degree: Associate of Science Degree in Culinary Arts
  • Focus: Specialized in cooking techniques and culinary sciences, hands‑on externships, professional kitchen lab training, and career preparation for restaurants, entrepreneurship, and global culinary opportunities.

White Mountains Community College, Berlin, New Hampshire

  • Program: Baking and Pastry Arts degree
  • Focus: Specialized in comprehensive baking and pastry arts, including bread making, artisan breads, cake decorating and design, chocolates, confections, and decorative centerpieces; product development and baking theory; and career preparation for baker and pastry chef roles in many places.

Daves is the friendly face guiding you through flavorful, fuss-free recipes at Picture Perfect Meals. 

He studied culinary arts at Sullivan University and embraced Baking and Pastry Arts at White Mountains Community College. Daves specializes in comforting meals with vibrant flavors, highlighting fresh, seasonal ingredients.

Leave a Reply

Your email address will not be published. Required fields are marked *

Recipe rating 5 Stars 4 Stars 3 Stars 2 Stars 1 Star