Fluffy Dream: The Irresistible Oreo Pancakes Recipe
Crispy mornings welcome a delightful twist with oreo pancakes that spark instant joy.
Chocolate lovers will swoon over this playful breakfast creation.
Sweet crumbles of iconic cookies merge perfectly with fluffy batter.
Each bite promises a nostalgic dance of creamy darkness and light texture.
Morning hunger transforms into pure bliss with these decadent pancakes.
Rich cocoa notes weave through soft, airy layers of deliciousness.
You’ll want to savor every single crumbly, delectable moment of this dreamy breakfast treat.
Oreo Pancakes for Breakfast with a Cookie Twist
Ingredients You’ll Need for Oreo Pancakes
Dry Ingredients:Wet Ingredients:Oreo and Topping Ingredients:How to Flip and Stack Oreo Pancakes
Step 1: Mix Dry Ingredients
Grab a large mixing bowl and combine:Whisk these ingredients together until they’re perfectly blended.
Step 2: Prepare Wet Ingredients
In a separate bowl, blend:Gently pour the wet mixture into the dry ingredients, stirring until just combined. Carefully fold in crushed Oreo cookies. Let the batter sit and rest for 5 minutes to develop deeper flavors.
Step 3: Create Pancake Magic
Heat a nonstick skillet or griddle over medium heat. Lightly grease the surface with butter or cooking spray. Pour approximately 1/4 cup of batter for each pancake. Watch for bubbles to form on the surface and edges to set, which takes about 2-3 minutes. Flip the pancake and cook the other side for 1-2 minutes until golden brown.
Step 4: Craft Oreo Glaze
In a small bowl, whisk together:Adjust the consistency by adding more milk or powdered sugar until you reach a smooth, drizzle-friendly texture.
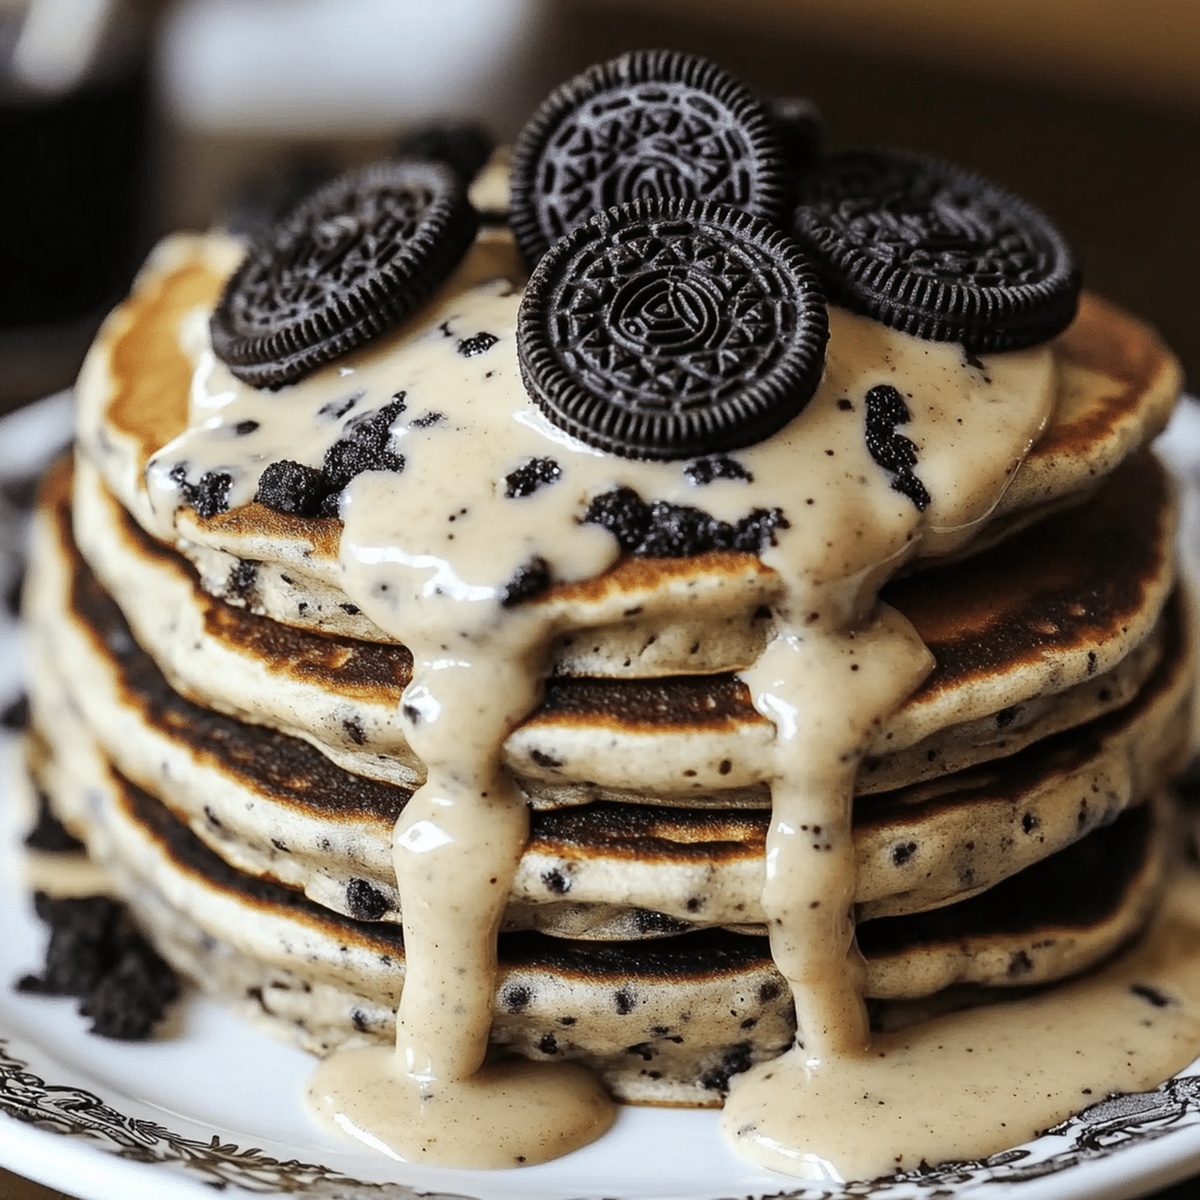
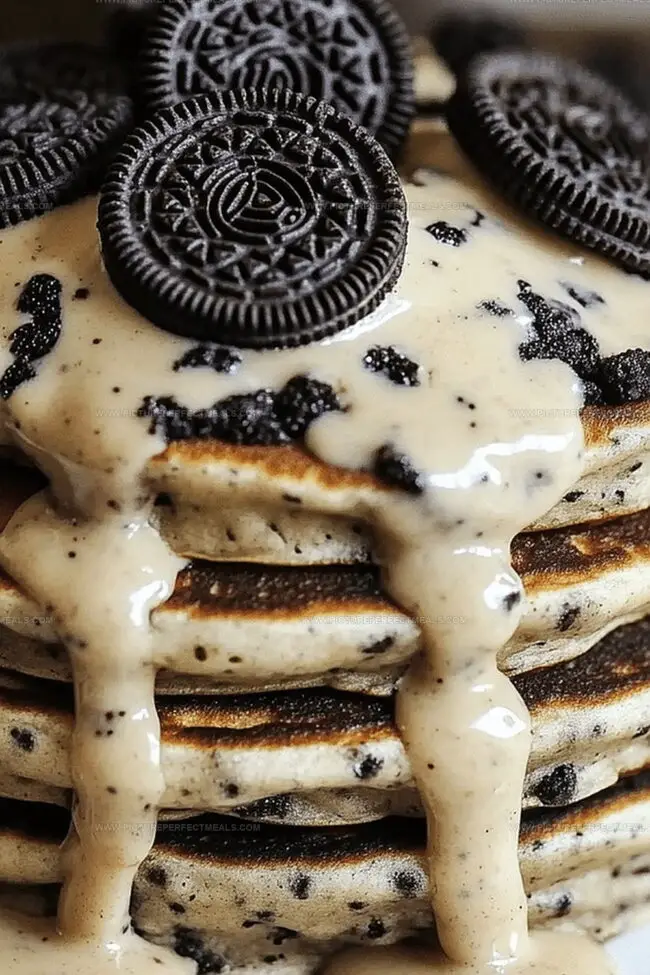
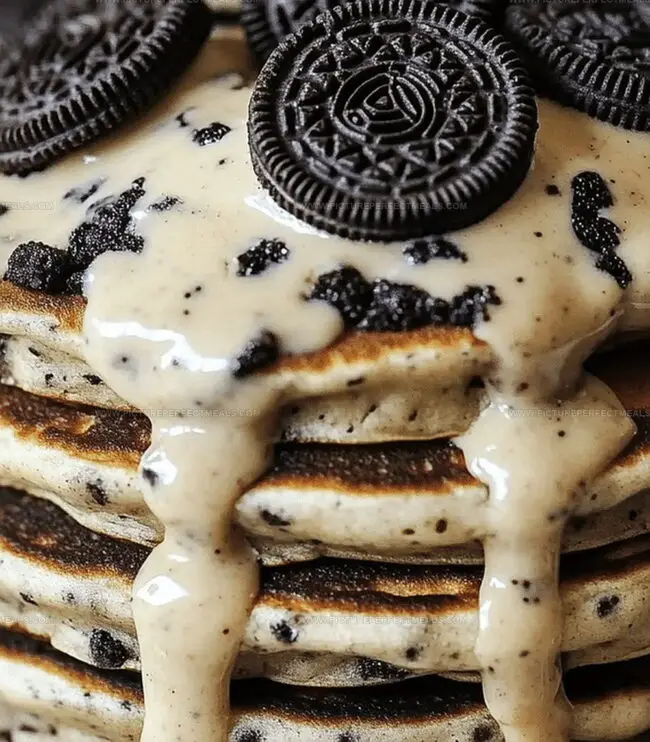
Step 5: Serve With Flair
Stack the warm pancakes on a plate. Generously drizzle the Oreo glaze over the top. For extra indulgence, add a dollop of whipped cream, sprinkle additional crushed Oreos, and finish with a zigzag of chocolate syrup. Serve immediately and enjoy your decadent creation!
Pro Tips for Fluffy Oreo Pancake Texture
Best Way to Store Leftover Oreo Pancakes
Syrups and Sides That Match Oreo Pancakes
Ideas for Changing Up Oreo Pancake Flavors
Print
Oreo Pancakes Recipe
- Total Time: 25 minutes
- Yield: 4 1x
Description
Indulgent oreo pancakes bring nostalgic cookie magic to your breakfast table, creating a playful twist on classic morning fare. Sweet chocolate layers and creamy filling blend seamlessly, promising pure comfort for morning cravings you won’t want to miss.
Ingredients
Dry Ingredients:
- 1 ¼ cups (155 g) all-purpose flour
- ¼ cup (25 g) cocoa powder
- 3 tablespoons granulated sugar
- 2 teaspoons baking powder
- ¼ teaspoon salt
- 8 Oreos, crushed
Wet Ingredients:
- 1 cup (240 ml) milk
- 1 large egg
- 2 tablespoons unsalted butter, melted
- 1 teaspoon vanilla extract
Glaze Ingredients:
- 1 cup (120 g) powdered sugar
- 2 tablespoons milk (plus more as needed)
- 4 Oreos, finely crushed
Optional Toppings:
- Whipped cream
- Extra crushed Oreos
- Chocolate syrup
Instructions
- Craft the chocolate cookie pancake foundation by combining dry ingredients in a spacious mixing vessel, ensuring even distribution of cocoa-based flour, granulated sweetener, rising agent, and mineral enhancer.
- Create a separate liquid mixture using dairy, protein-rich binding component, liquefied dairy fat, and aromatic extract. Integrate wet elements into dry components with minimal stirring to maintain delicate texture.
- Gently incorporate crushed chocolate sandwich cookies into the batter, allowing mixture to rest and harmonize flavors for several moments.
- Prepare a non-stick cooking surface over moderate thermal intensity, lightly conditioning with lubricating agent to prevent adherence.
- Dispense batter in precise circular portions, monitoring for telltale surface bubbling and firm peripheral edges as cooking indicators.
- Execute a precise pancake rotation, completing secondary cooking surface until achieving optimal golden-brown coloration and consistent internal temperature.
- Simultaneously continue producing additional pancake discs, maintaining warmth for completed portions.
- Construct a decadent glaze by whisking pulverized confectioner’s sweetener with dairy liquid and additional crushed chocolate sandwich cookies, adjusting viscosity as required.
- Assemble culinary creation by layering pancake discs and generously drizzling specialty glaze.
- Embellish with optional cloud-like cream topping, additional cookie fragments, and rich chocolate cascade for enhanced visual and gustatory appeal.
- Present immediately to preserve optimal temperature and textural integrity.
Notes
- Crush Oreos finely for even distribution throughout the batter, ensuring a consistent cookie crunch in every bite.
- Avoid overmixing the batter to prevent tough, dense pancakes; stir just until ingredients are combined for light, fluffy texture.
- Let the batter rest for 5 minutes to allow flour to absorb liquid, resulting in more tender pancakes with better rise.
- Adjust heat to medium-low if pancakes brown too quickly, ensuring even cooking without burning the delicate cookie pieces.
- For gluten-free option, swap regular flour with a 1:1 gluten-free baking blend to accommodate dietary restrictions.
- Create dairy-free version by using plant-based milk and coconut oil instead of butter and regular milk.
- Reduce sugar content by using half the recommended amount or substituting with a sugar alternative for a healthier twist.
- Prep Time: 10 minutes
- Cook Time: 15 minutes
- Category: Breakfast, Snacks, Desserts
- Method: Frying
- Cuisine: American
Nutrition
- Serving Size: 4
- Calories: 360
- Sugar: 25 g
- Sodium: 180 mg
- Fat: 14 g
- Saturated Fat: 8 g
- Unsaturated Fat: 4 g
- Trans Fat: 0 g
- Carbohydrates: 55 g
- Fiber: 2 g
- Protein: 6 g
- Cholesterol: 50 mg
Daves Miller
Contributing Chef & Culinary Educator
Expertise
Education
Sullivan University, Louisville, Kentucky
White Mountains Community College, Berlin, New Hampshire
Daves is the friendly face guiding you through flavorful, fuss-free recipes at Picture Perfect Meals.
He studied culinary arts at Sullivan University and embraced Baking and Pastry Arts at White Mountains Community College. Daves specializes in comforting meals with vibrant flavors, highlighting fresh, seasonal ingredients.